MPlayblast
 MNC Development


MPlayblast — Documentation
Requires Blender 5.0 or later.
1. In Blender, open Edit > Preferences > Get Extensions.
2. Click the dropdown arrow at the top right of the window and choose Install from Disk…
3. Select MPlayblast-1.0.0.zip. Blender asks you to confirm one permission — Files, because the add-on writes your playblasts to disk.
4. The extension installs and enables itself. MPlayblast now appears in the 3D Viewport's View menu.
To update later, install the newer zip the same way — it replaces the previous version. To remove it, find MPlayblast in the Add-ons list and uninstall it; nothing is left behind in your .blend files.
1. Press Numpad 0 to look through the active camera, or set the viewport to the angle you want to capture.
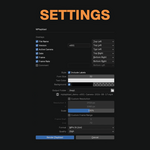
2. Open View > MPlayblast… The dialog holds every setting in one place.
3. Type your version label, pick an output folder, and check the file name preview shown underneath it.
4. Click Render Playblast. The status bar counts the frames; Esc stops at any time.
5. When it finishes, the full path of the file is reported in the status bar and the Info log.
Seven overlays, each can be switched on or off on its own. All are on by default except Comment.
| File Name | The name of your .blend file, without its extension. Shows Untitled if the file has never been saved. |
| Version | Whatever you type in the field beside it, such as v001. Leave the field empty and the overlay is skipped. |
| Active Camera | The active camera's name when you render through a camera. Outside camera view it reads Perspective View or Orthographic View instead. |
| Date | The date and time the playblast started, as 2026/07/22 14:30. The same value on every frame. |
| Frame | The frame being rendered, padded to four digits, counting up with the animation. |
| Frame Rate | The scene's frame rate, such as 24 fps. |
| Comment | Free text you type in the field beside it. Off by default; an empty field is skipped. |
Every overlay has its own position menu with six anchors: top or bottom, combined with left, center or right. These are the defaults.
| File Name, Version, Active Camera | Top left |
| Date | Top right |
| Frame, Frame Rate | Bottom right |
| Comment | Bottom left |
Overlays sharing an anchor stack on separate lines, always in this order: file name, version, camera, date, frame, frame rate, comment. Line spacing is calculated from the font size, so stacked overlays never overlap at any resolution.
Two pairs are special. When File Name and Version share an anchor they merge onto one line, and so do Frame and Frame Rate — giving File : MyProject | v001 and Frame : 0042 | 24 fps. Put them on different anchors and each takes its own line again.
| Include Labels | Puts a name in front of each value — File :, Camera :, Date :, Frame :. Turn it off to show bare values only. |
| Font Size | Set against a 1080 px tall frame and scaled with the output, so text keeps the same relative size at any resolution. Ranges from 8 to 128; the default is 32. |
| Text Color | Colour of the text, transparency included. |
| Background | The checkbox draws a panel behind the text so it stays readable over bright frames; the colour field sets its colour and opacity. Default is black at 35%. |
Output Folder is the destination directory — /tmp by default. A path starting with // is relative to your .blend file and needs the file to have been saved at least once.
You do not name the file. It is built from four parts, joined with dashes:
MyProject-v001-ShotCam-2026-07-22.mp4
That is the .blend file name, your version label, the camera (or Perspective / Orthographic), and the date. The exact result is previewed in the dialog, right under the folder field, so you see it before you commit.
Characters that are illegal in file names are stripped automatically, and parts you left empty are simply dropped. Image sequences get the frame number appended — MyProject-v001-ShotCam-2026-07-22-0001.png.
| Custom Resolution | Off, the playblast uses your scene resolution. On, it uses the Resolution X and Y values underneath. |
| Scale | A percentage applied on top, from 10% to 200%. Drop it to 50% for a fast draft. Final dimensions are rounded to even numbers, which video encoders require. |
| Custom Frame Range | Off, the playblast follows the scene's frame range — or its preview range when one is active. On, it uses the Frame Start and End values underneath. |
| MP4 (H.264) | QuickTime (H.264) |
| PNG image sequence | JPEG image sequence |
Quality offers four levels: Perceptually Lossless, High, Medium and Low. PNG is lossless, so the field is greyed out when PNG is selected.
Encoding uses the FFmpeg that ships inside Blender — there is nothing extra to install, and no audio track is written.
Exactly what the viewport shows.
In camera view, MPlayblast uses the exact framing of the active camera, following animated cameras and camera markers frame by frame — a sequence that switches cameras switches with it.
Outside camera view it captures your current viewport angle. The camera overlay then reads Perspective View or Orthographic View.
Shading follows the viewport too. Solid and Material Preview are the usual choices for review; Rendered works as well and draws through your scene's render engine, at the cost of a much slower playblast.
Because it mirrors the viewport, anything the viewport draws is captured — the grid, selection outlines, empties, armatures. Switch Show Overlays off in the viewport header for a clean frame.
Every option in the dialog is stored per scene inside the .blend file, so reopening the dialog brings back exactly what you last used, and different scenes can hold different setups.
These settings are entirely separate from your render settings, so your output path, file format, resolution and metadata are never modified.
| MESSAGE | WHAT TO DO |
| Cannot use a relative output path with an unsaved file | Your output folder starts with // but the .blend has never been saved. Save it, or choose an absolute path. |
| No 3D Viewport found to render the playblast from | Run MPlayblast from a workspace that contains a 3D viewport — it captures the viewport, so it needs one to exist. |
| Output path is empty | Pick a destination folder in the Output Folder field. |
| The frames show the grid and selection outlines | That is the viewport being captured faithfully. Turn Show Overlays off in the viewport header before rendering. |
MPlayblast · Requires Blender 5.0 or later
Have questions about this product?
Login to message
| Blender Extension Compatible | Yes |
| Published | about 2 months ago |
| Blender Version | 5.0 - 5.2 |
| Extension Type | Add-on |
| Render Engine Used | Cycles, Eevee |
| License | GPL |
Discover more products like this
animation review productivity tools playblast Workflow viewport