 MNC Development


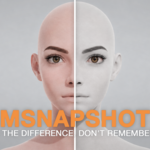
See the difference, don't remember it.
A single panel in the 3D viewport and the Image Editor: three capture buttons,
a fullscreen A/B viewer, and snapshots written beside your .blend.

MSnapshot sits in the sidebar of the 3D viewport and of the Image Editor. Three buttons decide what is captured.
| Viewport | The 3D view exactly as it is shaded, at your scene's render resolution |
| Current Slot | The render held in the active render slot |
| All Slots | Every filled render slot, empty ones are skipped |
Each capture becomes a PNG in a snapshots folder next to your .blend, and joins a thumbnailed list saved inside the file. Rename an entry with a double-click, delete one or all of them, or open the folder — the images are yours, in a format everything can read.
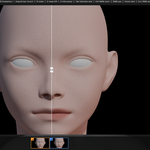
Choose two snapshots as A and B and the viewer holds both, split by a single bar. Drag it across the image to uncover one side or the other.
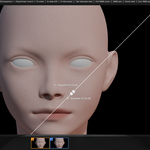
Press R and the bar rotates around its handle — vertical for a left/right shot, horizontal for a sky, diagonal for a corner, or any angle in between. Hold Shift while turning to snap to 45°, Ctrl for 15°.
| Drag | Move the split across the image |
| R | Rotate the bar, Shift snaps to 45°, Ctrl to 15° |
| S | Swap the two sides |
| H | Hide the names for a clean look |
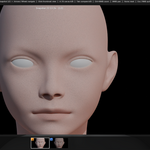
A strip of thumbnails runs along the bottom of the viewer, so a comparison never becomes a guessing game about which image is which.
The snapshot on screen carries a white frame. The two picked for the comparison carry an orange A and a blue B badge, visible at a glance while everything else is dimmed.
Click a thumbnail to bring it up, or step through the series with the arrow keys or the wheel. Press A or B to hand the snapshot on screen to a side, then Tab to compare — and Tab again to come back. The whole review runs from the keyboard, without ever reopening the sidebar.
Ctrl with the middle mouse button zooms from a tenth of the fitted size up to forty times, anchored under the cursor, so the detail you aim at stays where you put it. The middle button alone pans, Home restores the fitted view.
In a comparison the zoom drives both images at once — the bar keeps cutting through the same pixels, whether you are judging a whole frame or a single specular highlight.
| RENDER SLOTS ALONE | WITH MSNAPSHOT |
| Flip from one slot to the next and hold the difference in your head | Both images on screen at once, split by a bar you drag and turn to any angle |
| Slots live in the session and are gone once Blender closes | Snapshots are PNG files beside your .blend, listed with thumbnails inside the scene |
| Renders only, and nothing from the viewport | Viewport captures and renders in the same list, comparable against each other |
The same panel is in the sidebar of the 3D viewport and of the Image Editor, so a render can be captured and compared from the render window itself, without travelling back to the 3D view.
The viewer opens over whichever editor you are in and turns its button red while it runs — one more click, or Esc, and you are back to your scene exactly as you left it.
A difference you can see beats a difference you remember.