Native Snapping
 Nilson Borges


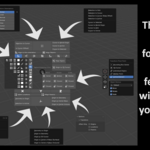
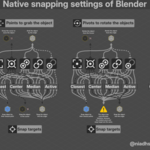
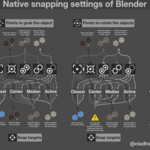
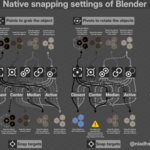
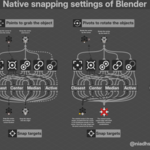
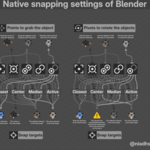
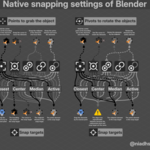
Snapping settings for 1 selected object
Move Tool
When moving the 3D cursor, the Gizmo can be moved. So, just choose where you want to move the object; click on the cursor/gizmo, and move the object with snap to the point where the cursor/gizmo was before starting the movement. These movements can be done with just the left mouse button, without any extra hotkeys.

Rotate & Scale Tools (Closest)
For Rotate and Scale, choose the rotation pivot with snap target "Closest". I believe that in most cases, the “Closest” snap target is sufficient here.

Rotate & Scale Tools (Target)
If the need for the snap in a more complex point, move the cursor/gizmo to that point and send the origin there, using “Set Target", which is actually “Origin to 3D Cursor”. I renamed this function to match the purpose of this add-on.

Snapping settings for 2 selected objects
Move Tool
In addition to the two other previous options, when 2 objects are selected, two new snapping options appear, and they are:
Pivot Point “Median” + Snap with “Closest”; and
Pivot Point “Median” + Snap with “Median”
For this context, no other options are necessary.

Snapping settings for 3 selected objects (or more)
A new snap option for this context is: Pivot Point “Bounding Box Center". This pivot point only works from 3 selections or more.

Other functions
Cursor orientation mode
The “Cursor” orientation mode is very useful for aligning and mirroring objects (that are outside the X, Y, and Z global and local axes) to any direction, based on the Cursor orientation. By default, orienting the Cursor to the object's geometry is not very practical, as the accessibility of the tools necessary for this makes this task very laborious. In this case, position the Cursor/Gizmo to the geometry of any object using “Align Gizmo”, which is the “Align Rotation to Target” function. This allows objects to be aligned with just a few movements, aligning the Rotate tool Gizmo to the surface of the objects to be aligned.

Mirror to Z axis
Flip the object on the “Z” axis in any direction using the “Move” tool Gizmo with “Align Gizmo”.

Align objects to the Cursor orientation
In the “Cursor” orientation mode, there are two tools called “Align to”, which aligns the selected object to the Cursor orientation, and “Align/Send to”, which does the same thing; however, it sends the object to the Cursor position. Align the Cursor/Gizmo and give zoom in wherever you want and press the “G” key; then the object will be taken to that specific location. If “Align Gizmo” is active, the object will be aligned according to the Cursor/Gizmo position; so be sure to align it before each movement.

Snap on instances
Move the instances without needing to move the origin. In the case of Rotate and Scale, use “Rotate+Closest”. Using “Set Target” will move the origin and throw off the object’s coordinates.

Snapping settings for 1, 2, and 3 selected elements (or more)
Works as in object mode, bearing in mind that the active element is equivalent to the origin of the active object, and the number of selected elements is equivalent to the number of selected objects, so that the right snapping combinations match the selection context.
Move, Rotate & Scale Tools
Moving with Gizmo alignment
In “Cursor” orientation mode, use “Align Gizmo” to move the vertex with the Cursor/Gizmo following the geometry orientation.

Rotate
In the case of Rotate, the available option is useful for transforming just one vertex. The same for the Scale tool; however, it didn't seem to make much sense in this context, but it is an available option.

Supported modes
Some modes have tools in common, so the add-on operates in the following modes:
Object Mode; Edit Mode; Edit Curve; Surface Mode; Metaball Mode; Armature Mode; Pose Mode, and Lattice Mode.
However, the focus of this add-on is Object Mode and Edit Mode. The other modes are optional.

Inactivity alert
If there is no object or element selected, a warning will appear in place of the tools that require a selection. The other tools (whose activation does not depend on a selection) will continue to be visible.

Installation
Install the “native_snapping_pie_3_0_0.zip” file like any other add-on.
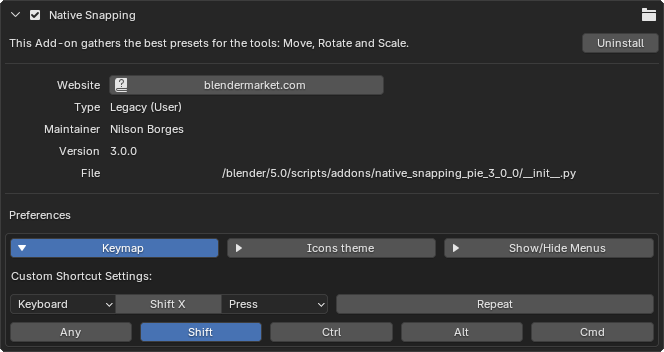
In the add-on preferences, choose your preferred shortcut. Make sure the shortcut is not already being used by Blender.
By default, the shortcut is Shift + X.
Discover more products like this
pie menu blender snapping hard surface transform tools rotate scale move ArchViz precision modeling snap tools accurate architecture