Node Differ
 3DSinghVFX
Node Differ v3.0 – User Guide
Installation
Follow these steps to install the add-on in Blender:
- Download the add‑on ZIP file or clone the repository.
- In Blender, navigate to Edit → Preferences → Add‑ons.
- Click Install… and select the
node_differ.zipfile. - Enable the add‑on by checking the Node Differ checkbox.
- Locate the panel in the Node Editor → Sidebar (N) → Node Differ tab.
Note: If you are using the multi‑file version directly, copy the entire node_differ folder into Blender’s scripts/addons/ directory, then enable it.
Comparison Modes
Node Differ lets you compare the currently active node group against an external reference. Choose your preferred workflow from the top of the panel:
1. Manual Mode
- Click Manual.
- Use the file browser to select any
.blendfile. - Choose the Reference node group from the dropdown (this populates automatically).
- Click Compare Nodes to view the differences.
2. Version Mode
- Click Version.
- The add‑on automatically scans the current file’s folder for older versions (files containing
_v01,.v02, etc.). - When a previous version is found, its path is displayed. The reference group is auto‑matched if its name matches the active group.
- Click Compare Nodes to run the diff.
3. Snapshot Mode (Recommended)
Snapshot mode allows you to create named checkpoints of your node group directly inside a hidden project repository (.nd_history) without manually saving separate files.
Setting up the Repository
- Switch to Snapshot mode.
- If no repository is found, a warning will appear. Click Initialize in Current Folder to create a
.nd_historyfolder in your current.blendfile's directory. - If a parent repository is detected, choose to Link to Parent or isolate the current folder.
- (Optional) Set a custom repository path using the Pencil icon.
Committing a Snapshot
- Ensure the Active group is the one you wish to snapshot.
- Click Commit and type a commit message in the dialog box.
- The current state is saved as a
.blendfile inside the repository and added to the history log.
Reverting to a Snapshot
- Expand the Advanced Actions section (located below the Commit button).
- Select a Target Commit from the dropdown menu.
- Click Revert.
- Confirm the warning dialog to overwrite the current node group with the chosen snapshot.
Deleting a Snapshot
- Open the Advanced Actions section.
- Select a commit from the list.
- Click the Trash icon next to the Revert button to permanently remove both the history file and its log entry.
Button Glossary
Use this quick reference guide to understand the interface buttons and their corresponding icons:
| Button / Action | Icon Appearance | Description |
|---|---|---|
| Commit Snapshot | 📄+ | Saves the current node group as a new snapshot. |
| Revert Snapshot | 🕒 | Restores a previously saved snapshot. |
| Delete Snapshot | 🗑️ | Deletes the selected snapshot file and log record (located next to Revert). |
| Select Repository | ✏️ | Opens a file browser to pick a custom repository location. |
| Initialize Repository | 📁 | Creates a .nd_history folder in the current .blend folder. |
| Link to Parent | 🔗 | Confirms using a parent repository for the current folder. |
| Reset to Auto | ❌ | Clears the custom repository path and returns to automatic detection. |
| Refresh | ↻ | Rescans the folder for newer/older version files (Version mode). |
| Compare Nodes | ⤨ | Runs the diff between the active group and the chosen reference. |
| Clear Diff | 🗑️ | Removes all highlighting, ghost nodes, and labels (located next to Compare Nodes). |
Diff Filters
After running a comparison, use the Diff Filters section to control which node types and changes are highlighted in your node tree.
Master Switches
Toggle these checkboxes to instantly show or hide entire categories of changes:
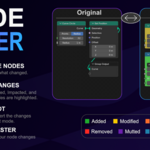
- Added Nodes: Highlights newly created nodes (Green).
- Removed Nodes: Shows nodes that existed in the reference but are now missing (Ghost nodes).
- Modified Nodes: Highlights nodes with changed internal settings, sockets, or connections (Yellow).
- Muted Nodes: Highlights nodes whose mute state differs (Purple).
- Renamed Nodes: Highlights nodes whose internal name has changed (Cyan).
- Impacted Nodes: Highlights nodes connected downstream of added or removed nodes (Orange).
-
Show Internal Names: Temporarily replaces custom labels with Blender’s internal names (e.g.,
Math.001) on all affected nodes.
Modification Filters
When Modified Nodes is enabled, refine exactly what counts as a modification using these categorized sub‑toggles:
Nodes / Core Structure
- Connections: Detects swapped or changed input/output cables.
-
Specific Props: Includes unique node settings (e.g.,
blur_size,iterations).
Math & Data
- Operation: Mathematical operations (e.g., Add, Multiply).
- Domain: Attribute domains (e.g., Point, Face).
- Data Type: Types of data being processed (e.g., Float, Vector).
- Mode: Specific node execution modes.
Shading & Limits
- Use Clamp: Toggles for value clamping.
- Mapping Type: Texture mapping coordinates/types.
- Clamp Type: Specific methods of clamping applied.
- Interpolation: Data blending methods (e.g., Linear, Spline).
Toggles & Options
- Invert: Boolean invert toggles.
- Use Self: Self-referencing toggles (common in Geometry Nodes).
- Normalize: Vector normalization toggles.
- Enum / Mode: Monitors dropdown UI changes.
- Location: Detects changes in the physical coordinates of the node in the editor.
Stats & Analysis
Results Summary
After a comparison, a Results box appears summarizing the scope of the differences:
- Added: Number of new nodes.
- Modified: Count of nodes with detectable changes.
- Impacted: Nodes connected to added/removed nodes.
- Removed: Missing nodes (visible in the tree if ghost display is active).
- Muted: Nodes with a mute state change.
- Renamed: Nodes with internal name differences.
Modified Nodes
Expand the list by clicking the arrow next to Modified Nodes. Each modified node displays a total change count, categorized into:
- Inputs: Added/removed input sockets, or changed default values.
- Outputs: Added/removed output sockets.
-
Properties: Specific Blender properties that changed (shows
old → newvalues). This includes complex data like Color Ramp stops and Curve control points. - Connections: Details on which inputs/outputs were disconnected or re‑connected, and to which nodes.
Removed Nodes
When the Removed Nodes master switch is enabled, the add‑on inserts "ghost" nodes directly into the active node tree.
-
Appearance: These nodes are red, muted, and labeled
[REF] NodeName (Missing). - Placement: They sit exactly where the original node existed in the reference file, giving you a clear visual trace of the old layout.
- Reconstruction: Expand the Removed Nodes details section to view a list of all missing nodes and their previous connections, helping you easily reconstruct the old graph if necessary.
-
$7
For individual artists and freelancers. Use on one seat for personal or commercial projects.
-
$15
For small teams and studios. Share across multiple seats within one team or organization.
Have questions about this product?
Login to message
| Sales | 10 |
| Dev Fund Contributor | |
| Published | 5 months ago |
| Blender Version | 4.5 - 5.2 |
| Extension Type | N/A |
| Render Engine Used | Blender-Internal, Cycles, Eevee, Luxrender, Octane, Vray |
| License | GPL |

Discover more products like this
materials technical-art tracker compare compositing nodes compositor debugging blender shader nodes geometry_nodes Node Editor addon utility shading version-control procedural Node Differ pipeline-tool Workflow diff tool diff