Stylized Sky
 Tachyon Studio
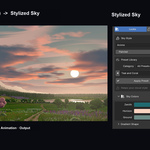
TACHYON STUDIO / DOCUMENTATION
Stylized Sky user manual
Version 1.0.0 · Blender 3.0–5.2 · GPL-3.0-or-later
Build an illustrated sky in Blender, light a scene through a day cycle and export the World as a panorama. The walkthroughs below use the Anime Day preset.
Contents
Getting started
Sky controls
Output and animation
File management and support
GETTING STARTED
1. Requirements and compatibility
- Blender 3.0 to 5.2. Tested on Windows in 16 Blender releases: 3.0.1, 3.1.2, 3.2.2, 3.3.21, 3.4.1, 3.5.1, 3.6.23, 4.0.2, 4.1.1, 4.2.23, 4.3.2, 4.4.3, 4.5.13, 5.0.1, 5.1.2 and 5.2.0. macOS and Linux have not been tested.
- No internet connection, account or extra Python packages are needed.
- Works with Cycles and EEVEE. Horizon Fog uses the compositor.
- The GPU cloud renderer (Anime and Sculpted) needs Blender 3.2 or newer and a GPU that runs Blender's viewport; on 3.0 and 3.1 the Nodes renderer draws the same clouds as shader nodes.
What it does not do: Stylized Sky clouds are shapes painted in the World shaderfor distant skies and environment lighting. They are not volume objects, cast nolocal shadows on your scene and show no parallax when the camera moves.
GETTING STARTED
2. Which ZIP should I install?
The two installers contain the same add-on in two installation formats. Installonly one.
Extension
Blender 4.2–5.2
Recommended for Blender 4.2 and newer
stylized-sky-1.0.0-extension-blender-4.2-5.2.zip
Legacy add-on
Blender 3.0–5.2
Blender 3.0–4.1, or if you manage add-ons the legacy way
stylized-sky-1.0.0-legacy-blender-3.0-5.2.zip
Documentation
Offline manual, quick start, FAQ and release notes; not an installer
stylized-sky-1.0.0-documentation.zip
GETTING STARTED
3. Install, update and remove
Blender 4.2 to 5.2 (Extension)
- Open Edit → Preferences → Get Extensions.
- Open the ⌄ menu at the top right and choose Install from Disk….
- Select
stylized-sky-1.0.0-extension-blender-4.2-5.2.zip. Stylized Sky is installed and enabled.
Blender 3.0 to 4.1 (legacy add-on)
- Open Edit → Preferences → Add-ons and click Install….
- Select
stylized-sky-1.0.0-legacy-blender-3.0-5.2.zip. - Tick Stylized Sky in the list to enable it.
Check the version in the add-on's entry in Preferences: it reads 1.0.0.
Updating
Install the new ZIP in the same format over the old one, then restart Blender.If you change format (legacy to Extension), first remove the legacy add-on inPreferences → Add-ons, restart Blender and then install the Extension, soBlender does not load two copies.
Skies made with an older version keep their look. When a newer version canimprove them, the panel shows Sky update available with an Update Skybutton; nothing changes until you click it.
Removing
Disable or remove Stylized Sky in Preferences. Your saved skies stay in your.blend files and still render without the add-on; you need the add-on again toedit them.
GETTING STARTED
4. Where to find Stylized Sky
- 3D Viewport sidebar: press N in the 3D Viewport and open the Stylized Sky tab.
- Properties editor: the World tab has the same Stylized Sky panel.
- Quality (a button at the top of the panel once a sky exists) opens preview and renderer settings.
If you see only Create Stylized Sky, the scene's World is not a Stylized Skyyet. If the tab is missing, check that the add-on is enabled (section 3).
Preferences
Expand Stylized Sky in Edit → Preferences → Add-ons. The preferencesare kept with Blender's own settings, not in your .blend files, and have fourtabs:
- Interface: the sidebar tab that holds Stylized Sky (type another add-on's tab name to share its tab), the page the panel opens on (Start Page), and the Sun & Moon Gizmo.
- New Skies: what Create Stylized Sky starts with: the style, Link Scene Lights and, for GPU clouds, the renderer, preview sizes and Refine After Editing. Existing skies keep their own settings (Quality).
- Status: whether GPU clouds are available and on which graphics card, Free GPU Cloud Memory, whether the prepared node library is in use, Reset Preferences and Copy System Information.
- About: the version, the Discord community and the Superhive store page.
GETTING STARTED
5. Quick start
- In a new scene, open the Stylized Sky tab (N in the 3D Viewport).
- Click Create Stylized Sky. A new World named Stylized Sky replaces the scene's World (the old one is remembered), and linked Sun and Moon lights are added.
- Switch the 3D Viewport to Rendered shading (Z → Rendered) to see the sky.
- On the Looks page, pick a Category, browse with the arrows and click Apply Look (or Apply Preset).
- On the Lighting page, turn on Day Cycle and drag Time of Day: the palette, Sun, Moon and stars move together.
- Press F12 to render.
To go back, use Ctrl+Z, or Output → World Management → Restore PreviousWorld to return the scene to its earlier World. When the scene already has aStylized Sky World, Use Existing Sky shows it again.
SKY CONTROLS
6. Looks: style, presets and colours
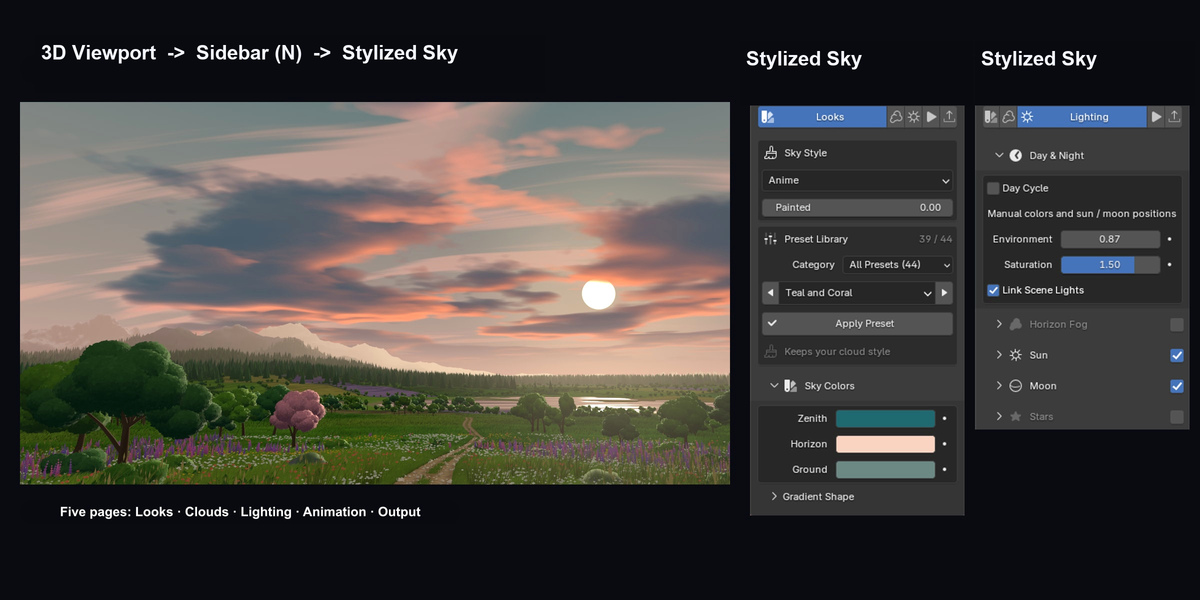
The panel has five pages: Looks, Clouds, Lighting, Animationand Output. In a narrow sidebar only the open page shows its name; theothers show their icons (widen the sidebar to see every name).
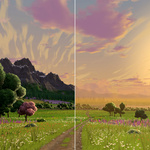
Choose the colours of the sky
Watch the zenith turn violet as the horizon picks up a warmer tone. The camera and cloud shapes stay fixed, so you can see what the two colour controls change.
Sky Style
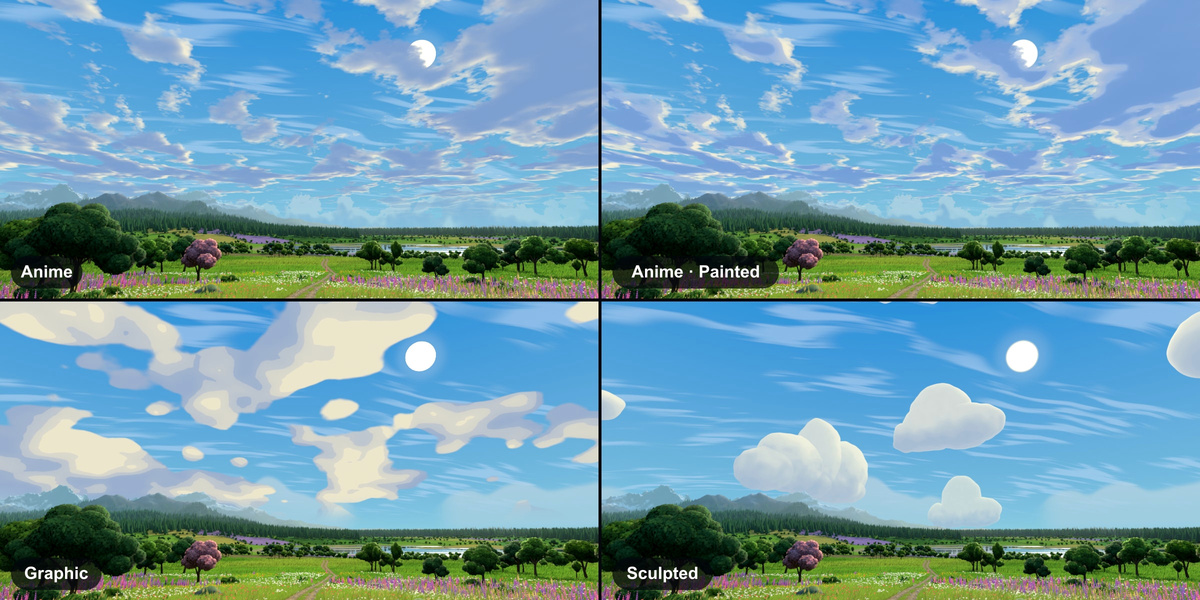
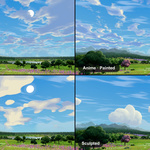
- Anime (default): dimensional, turbulent clouds with painted light and shadow. The Painted slider blends towards broad illustrated light, cool middle tones and grouped painted shadows.
- Graphic: flat, graphic cloud shapes.
- Sculpted: rounded cloud masses with dimensional painted shading.
Changing the style keeps your palette, controls and keyframes.
Preset Library
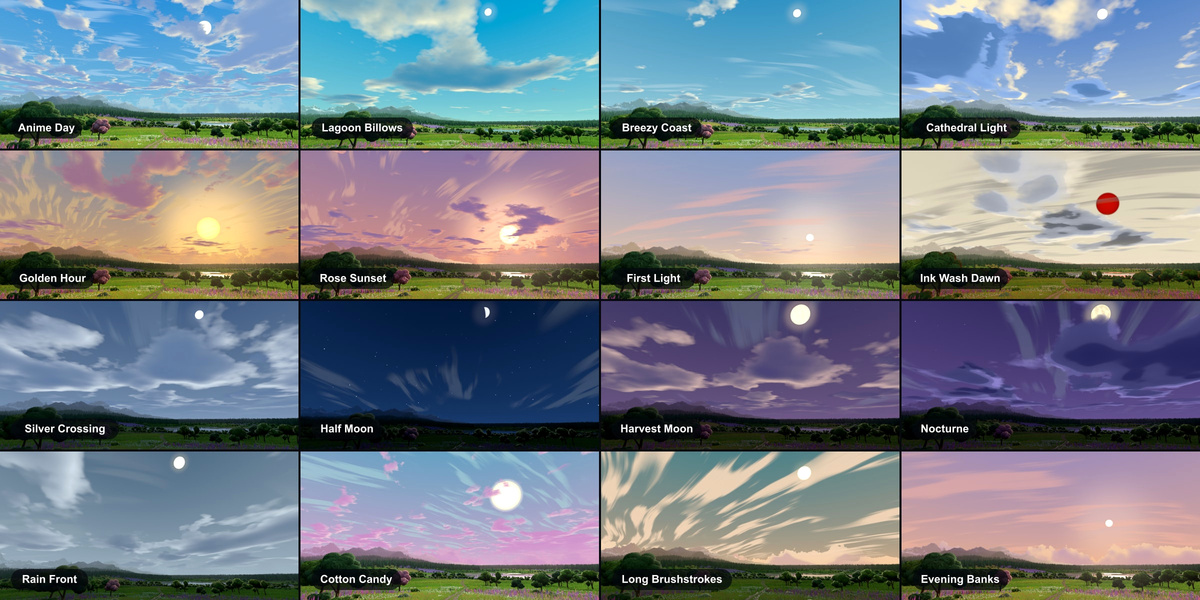
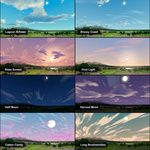
44 presets in seven categories: Daylight, Sunrise & Sunset, Night &Moonlight, Storm & Overcast, Pastel & Fantasy, Wisps & Cloudlets and HorizonSkies. Every preset shows its Sun or, at night, its Moon.
- Apply Look appears for the seven looks; it switches to Anime Painted and applies the palette and controls.
- Apply Preset applies the palette and controls and keeps your current style. Graphic and Sculpted have no presets of their own: apply any preset, then change the style.
A preset changes the look, not your scene setup: it keeps Link Scene Lightsand your lights, the wind and twinkle timing, the star layout and the Paintedamount.
Crescent Twilight, Half Moon, Starry Hush, Moon Through Clouds and VioletCrescent show a crescent on its side; applying one turns Face the Sun offso it keeps that angle.
Both can be undone with Ctrl+Z.
Sky Colors
Zenith, Horizon and Ground colours of the sky gradient, with Gradient Shape(horizon height and falloff) under the detail toggle. With Day Cycle on, thecolours follow the time of day.
SKY CONTROLS
7. Clouds
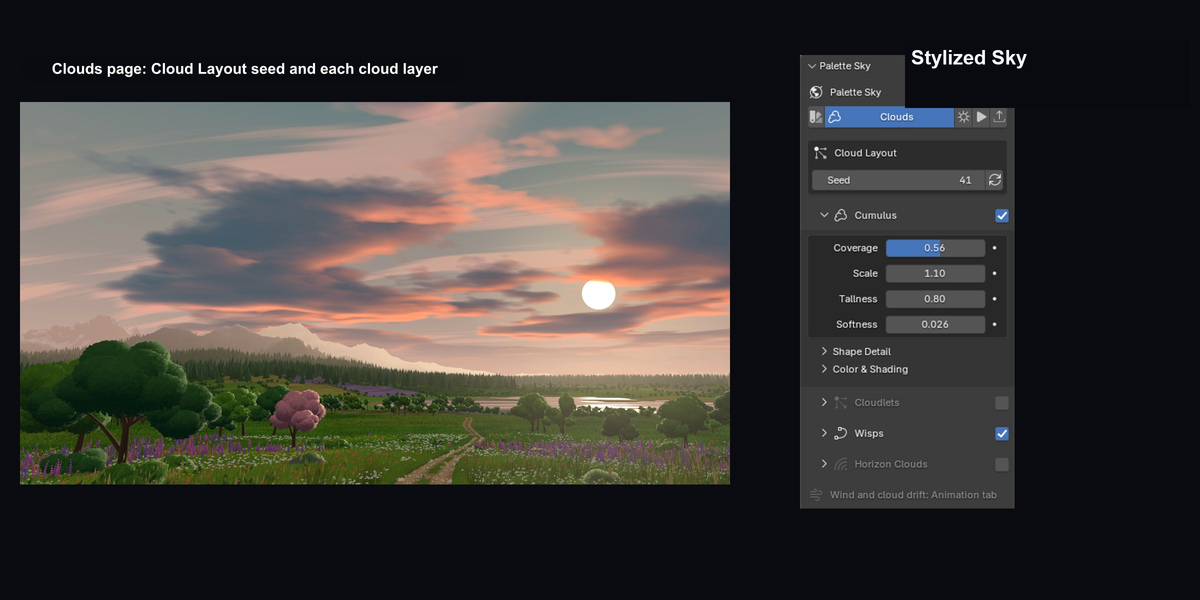
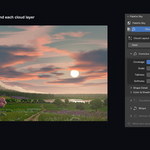
Cloud Layout → Seed (with the refresh button) picks a new arrangement of theclouds without changing colours or shaping. Each layer has an on/off checkbox inits header.
Build up the cloud cover
Follow one cloud bank as Cumulus Coverage rises from 0.15 to 0.80 and returns. Keeping the seed fixed makes the changing silhouettes easy to follow.
- Cumulus: Coverage, Scale, Tallness (Anime and Sculpted) and Softness; Shape Detail and Color & Shading below.
- Cloudlets: small high cloud patches: Coverage, Scale, Opacity and colour. In Anime, Edge Detail breaks their edges into fluffy tufts and Sun Shading gives them a bright rim towards the sun or moon.
- Wisps: feathery high streaks with Direction, Length, Curl and Feathering.
- Horizon Clouds: low banks along the horizon with Tallness, Height, Coverage, Scale, Opacity and colour.
Wind and cloud drift are on the Animation page (section 12).
SKY CONTROLS
8. Lighting: Day Cycle, Sun, Moon and stars
Day & Night
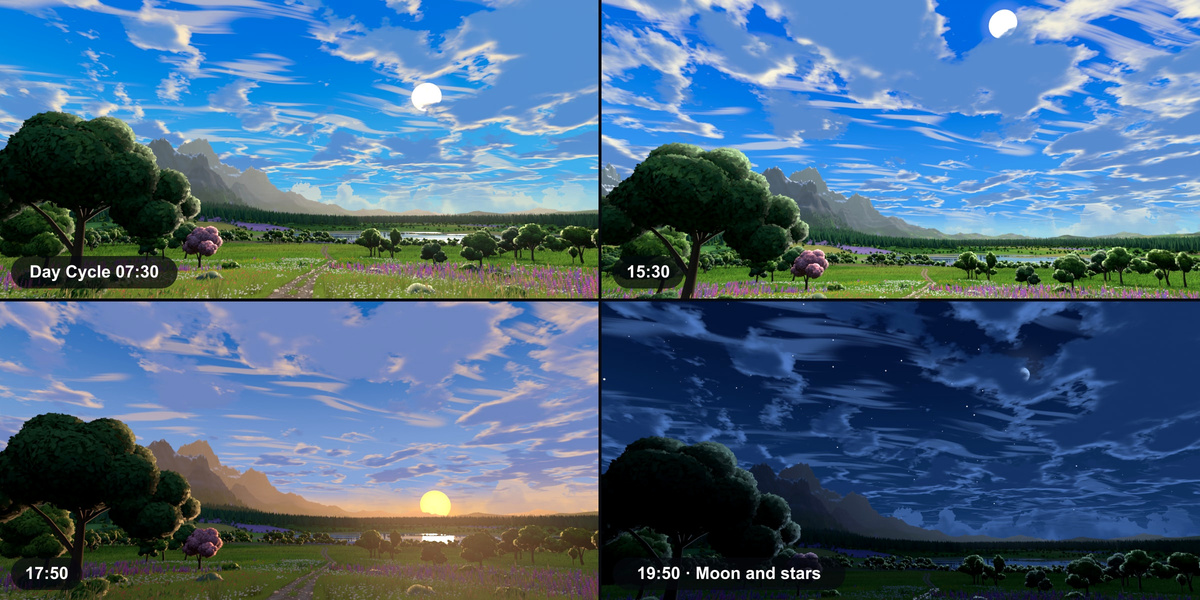
- Day Cycle drives the palette and the Sun and Moon from Time of Day; the clock time shows below the slider (sunrise 06:00, sunset 18:00). To move it with the timeline, use Sun & Day on the Animation page (section 12). Night Light brightens or darkens the night.
- Environment sets how strongly the sky lights the scene.
- Saturation sets colour intensity for the whole sky and its light: 1 is the palette as designed; new skies start at 1.5.
- Link Scene Lights keeps a Sun and a Moon light in the scene that match the sky, for shadows.
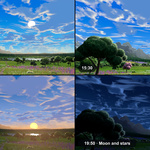
Follow the light across the meadow
Watch the grass and tree shadows as Time of Day moves through 24 hours. The linked Sun lights the field by day, the Moon takes over at night, and dawn brings the colour back.
Sun & Moon gizmo
Sun & Moon Gizmo (on by default; toggle it in Day & Night, the viewport'sGizmos menu or the add-on's preferences, Interface) shows a dome around the 3Dcursor in Object Mode: the horizon with N/E/S/W (+Y is north), the Sun's path,the Sun and Moon where the sky draws them and, with Follow Sun, a line fromthe Moon to the Sun. The dome keeps its size on screen and hides with theviewport's Show Gizmo toggle.
- Drag the Sun or Moon to move it. With Day Cycle on, dragging the Sun along its path changes Time of Day and dragging sideways its direction. While Sun & Day animates, it moves Start Time and End Time together instead.
- Hold Ctrl to snap to 5 degrees or 15 minutes.
- Right-click or Esc cancels a drag; Ctrl+Z undoes it.
Sun
Direction, Elevation (or the Day Cycle elevation), disc Radius, Brightness,Color, Halo, and the linked light's Strength and Softness.
- The magnifier button turns the viewport towards the Sun.
- The gizmo button selects the linked light and shows Blender's rotate gizmo: rotating it moves the Sun in the sky.
Moon
Direction, Elevation, Radius, Brightness, Color, Phase (with New, Crescent,Half and Full buttons), Halo, Surface & Edge Detail and Moonlight.
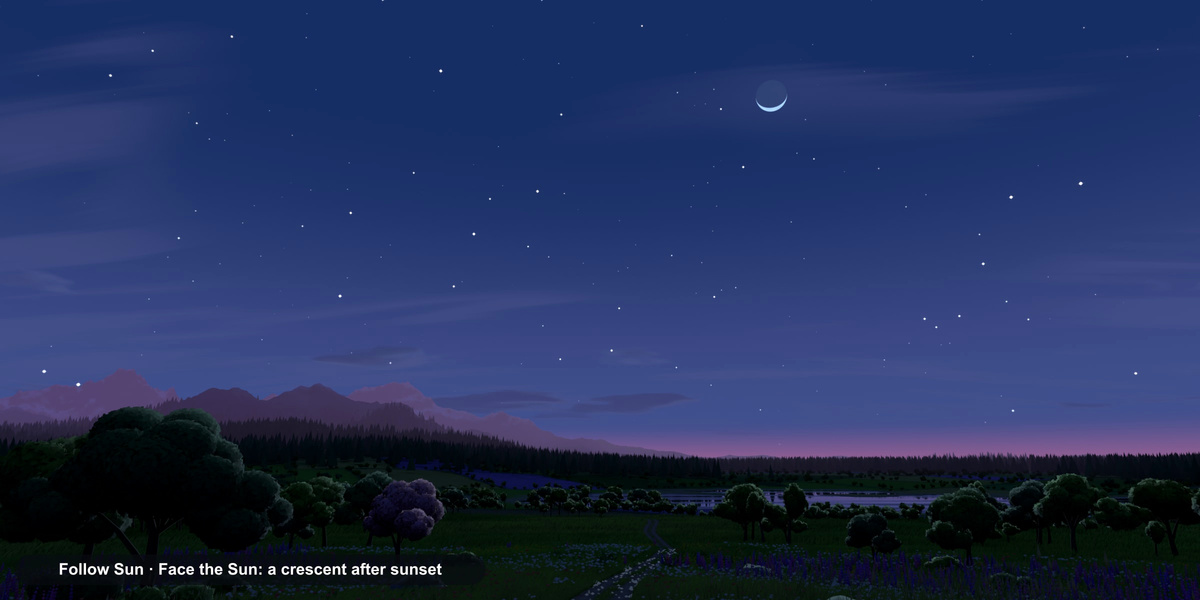
- Follow Sun keeps the Moon on the Sun's path, behind it by the angle its phase implies: a thin crescent stays near the Sun, a full moon is opposite. Moving either one moves the other. With Day Cycle on and Follow Sun off, Behind Sun sets how far the Moon trails the Sun (180° is twelve hours).
- Face the Sun turns the crescent's lit side towards the Sun. Turn it off to set Phase Tilt yourself.
- Show Disc & Halo off hides the visible moon but keeps its light.
New skies start with Follow Sun and Face the Sun on. Both are also on theAnimation page, beside the day they follow.
Stars
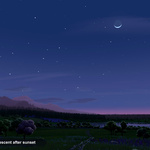
Turn on the Stars header. Quick looks: Subtle, Dreamy, Denseand Milky Way. Rich Stars adds faint background stars, clusters, a MilkyWay and Twinkle (set on the Animation page); it adds shader work, so leaveit off when you do not need it. With Day Cycle, stars fade in after sunset.
SKY CONTROLS
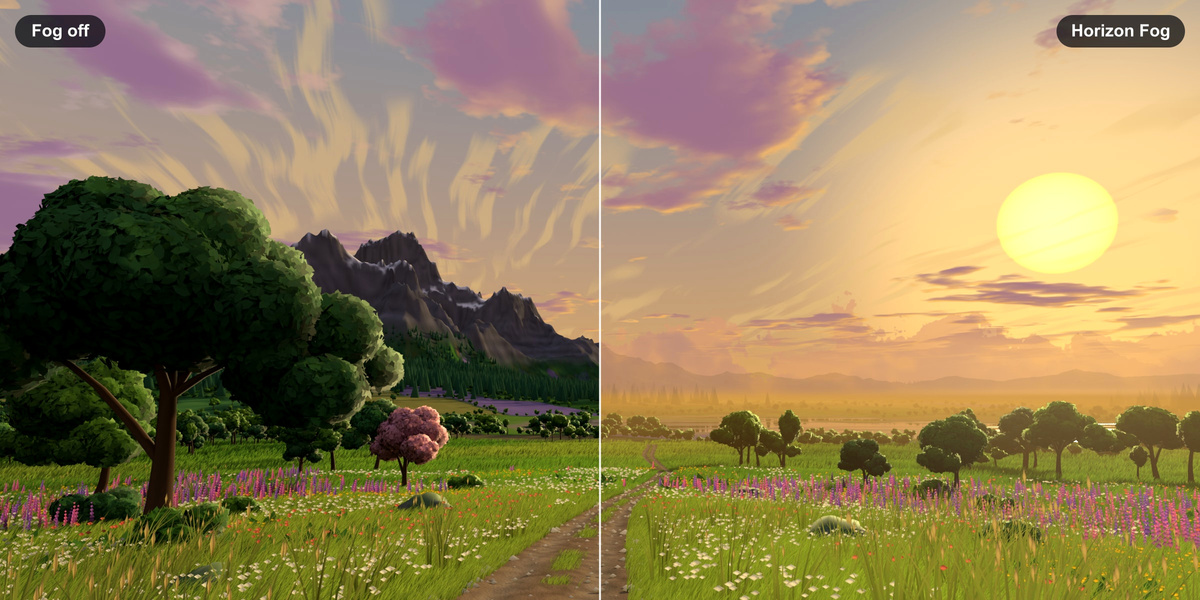
9. Horizon Fog
Lighting → Horizon Fog fades distant objects in your scene into the skybehind them.
- Start: distance from the camera where the fog begins.
- Distance: the depth over which objects fade.
- Strength: how completely the farthest objects take on the sky colour.
- Falloff: Linear, Quadratic or Inverse Quadratic.
- Show in Viewport (Blender 4.3+): shows the fog in EEVEE Rendered viewports by turning on their compositor.
The fog is a compositing effect: final renders (F12) are exact; the viewportis a close preview. It needs Render Single Layer off (the panel warns you).
OUTPUT AND ANIMATION
10. Export and environment images
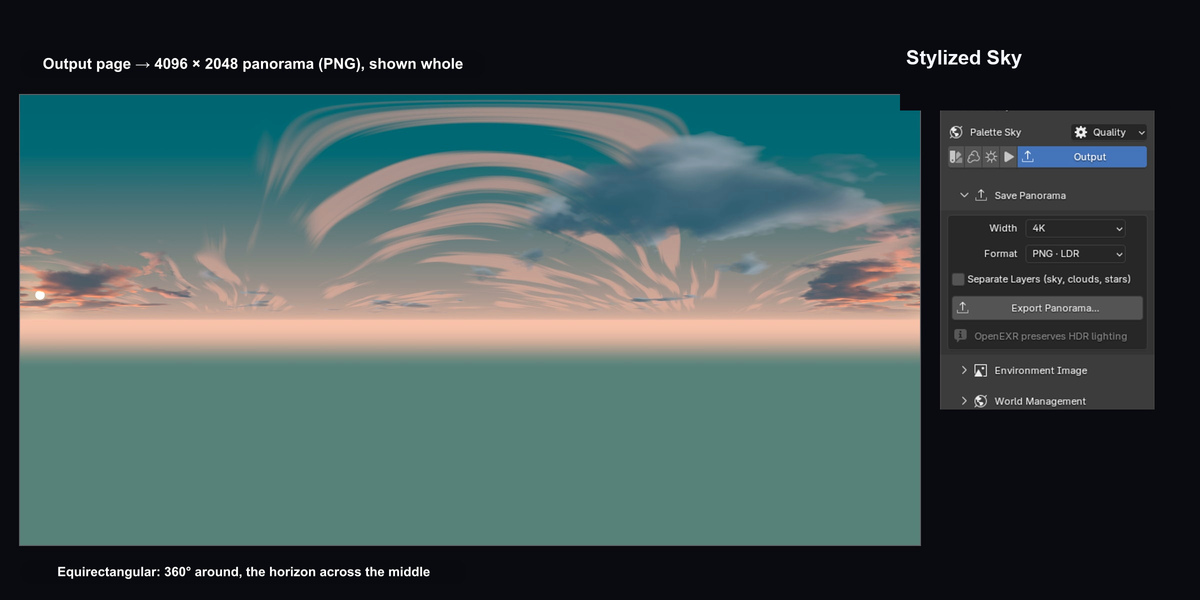
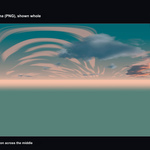
Output → Save Panorama writes a 2:1 equirectangular image at 1K, 2K, 4K or8K width. OpenEXR keeps HDR light values for environment lighting; PNGsuits backdrops. Separate Layers (sky, clouds, stars) also saves the sky,each cloud layer and the stars as their own images. Choosing an existing filename replaces that image (Replace Existing Image, on by default); separatelayer files are never replaced. The status bar shows progress.Exports render with Cycles on your GPU when one is enabled in Edit →Preferences → System → Cycles Render Devices, and on the CPU otherwise.
Take the sky into another scene
The Output panel switches from a 1K to a 2K PNG while the view pans across the exported panorama. Export at 1K–8K in PNG or OpenEXR, with optional sky, cloud and star layers.
Environment Image → Use Environment Image… uses an image instead of theprocedural sky; Back to Procedural Sky returns to the editable sky. Exported images are static: they keep no editable controls oranimation.
OUTPUT AND ANIMATION
11. Preview and quality
Open Quality at the top of the panel.
- Renderer (Anime and Sculpted): GPU caches the clouds as an image for responsive editing and live lighting; Nodes draws them as shader nodes and is needed to render animation from the command line (background rendering).
- While Editing: preview width (default 4K) and samples.
- Refined Preview: after edits pause, the clouds are refined at 4K, 8K (default) or 16K. Refine Now starts it at once.
- Sculpted Detail: Fast or Full billows.
- World Lighting (Blender 4.2+): EEVEE's Lighting Detail and Faster Lighting While Editing.
With the GPU renderer, a Cycles Rendered viewport shows the new cloudswhen you pause or release a control (EEVEE follows every step). On Blender3.2–5.1, Cycles can only reload them by restarting the viewport render, so itrestarts briefly at that moment; on Blender 5.2 it updates in place.
OUTPUT AND ANIMATION
12. Animation
Everything that moves with the timeline is on the Animation page. At thetop it shows the scene's frame range and length, with a Play button. Eachpart has its own switch:
Put the sky on the timeline
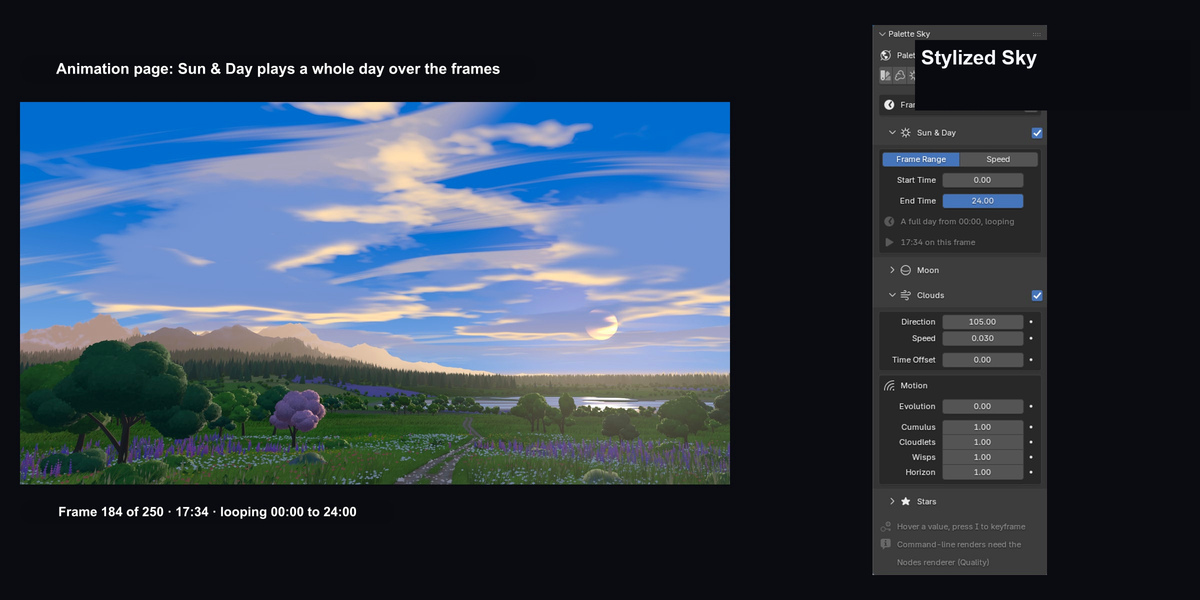
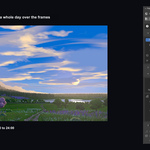
Sun & Day moves the sky from 07:00 to 21:00 over frames 1–241. Watch the cloud bank drift as the timeline runs forward and back.
- Sun & Day moves the time of day with the timeline: the Sun, Moon, sky colours, stars and linked lights follow during playback, in renders and in panorama exports, without keyframes. It turns on the Day Cycle.
- Frame Range timing (the default): the first frame shows Start Time and the last frame End Time. The default, 00:00 to 24:00, is a whole day that loops without a jump; 06:00 to 18:00 plays only the daylight; an End Time earlier on the clock than Start Time runs past midnight. Change the scene's frame range to make the day longer or shorter.
- Speed timing: a set number of hours per second of animation from Start Time (24 is a whole day each second; a negative speed runs backwards). The day keeps going past the last frame.
- Changing Time of Day while it animates (for example by dragging the Sun with the gizmo) moves Start Time and End Time together, so the animation passes through the new time.
- It works by animating Time of Day, so it stays off while Time of Day has keyframes of your own; delete them to use it.
- Moon: Follow Sun and Face the Sun (section 8); with Sun & Day on, the Moon rises and sets with the day.
- Clouds moves the clouds without keyframes: Direction, Speed and Time Offset (seconds, can be keyframed). The Motion card adds Evolution (clouds change shape as they drift) and a speed for each layer.
- Stars: Twinkle amount, speed and time (needs Rich Stars).
Hover over any value and press I to keyframe it; colours, cloud settings,Sun and Moon settings all animate. To render an animation from the commandline, use the Nodes renderer (Quality).
FILE MANAGEMENT AND SUPPORT
13. What Stylized Sky changes in your file
- Create Stylized Sky adds a World named Stylized Sky, assigns it to the scene and remembers the previous World. It adds linked Sun and Moon lights when Link Scene Lights is on.
- Restore Previous World puts the previous World back and keeps the sky for reuse (Use Existing Sky shows it again). It also removes Horizon Fog's compositing.
- Horizon Fog adds a view layer named Stylized Sky Fog, turns on the Mist and Environment passes and adds compositor nodes. Turning the fog off removes them and restores your pass settings.
- Your objects, materials and other Worlds are not modified.
- Stylized Sky operations can be undone with Ctrl+Z.
- Saved files render the sky without the add-on.
FILE MANAGEMENT AND SUPPORT
14. Troubleshooting
No Stylized Sky tab
Likely cause Add-on not enabled, or two copies installed
What to do Enable it in Preferences; remove any duplicate and restart Blender
Sky not visible in the viewport
Likely cause Solid shading
What to do Switch to Rendered shading (Z → Rendered)
Sky missing in renders
Likely cause Film → Transparent is on
What to do Turn off Render Properties → Film → Transparent
Controls greyed out
Likely cause The sky was made by an older version
What to do Click Update Sky when the panel offers it
Fog does not show
Likely cause Render Single Layer is on, or the viewport is not EEVEE Rendered on 4.3+
What to do Turn off Render Single Layer; check with F12
Animation renders without moving clouds from the command line
Likely cause GPU renderer
What to do Switch the renderer to Nodes in Quality
Sun & Day switches itself off
Likely cause Time of Day has keyframes of your own
What to do Delete those keyframes, then turn Sun & Day on
Page names missing above the panel
Likely cause A narrow sidebar names only the open page
What to do Widen the sidebar, or hover an icon for its name
GPU options missing
Likely cause Blender 3.0 or 3.1
What to do Use the Nodes renderer, or Blender 3.2+
If a problem remains, contact us (section 16) with the steps that show theproblem and a screenshot or the error text. Paste in the details from CopySystem Information (the add-on's preferences, Status or About): theylist the Stylized Sky and Blender versions, your operating system and graphicscard.
FILE MANAGEMENT AND SUPPORT
15. Known limitations
- Tested on Windows only; macOS and Linux are untested.
- The fog shows in viewports only with EEVEE on Blender 4.3+; elsewhere it shows in final renders.
- Clouds are World-shader approximations: no volumes, local shadows or parallax.
- With the GPU renderer, Cycles Rendered viewports show new clouds when an edit pauses; on Blender 3.2–5.1 the viewport render restarts briefly then.
- At very high cloudlet coverage, a faint crease can remain where Anime cloudlets merge.
- Rich Stars and Sculpted Full detail add render time.
FILE MANAGEMENT AND SUPPORT
16. License, credits and support
Stylized Sky 1.0.0 is © 2026 Tachyon Studio, licensed under the GNU General PublicLicense v3 or later (LICENSE in each ZIP). It includes GPU shader functions fromBlender (GPL-2.0-or-later); see THIRD-PARTY-NOTICES.md.
For help, message Tachyon Studio through Superhive or join the Discord community.
Include the Stylized Sky version, Blender version, operating system, graphics card and the steps that show the problem.
Have questions about this product?
Login to message
| Blender Extension Compatible | Yes |
| Published | 2 days ago |
| Blender Version | 3.0 - 5.2 |
| Extension Type | Add-on |
| Render Engine Used | Cycles, Eevee |
| License | GPL |
Discover more products like this
sky procedural anime clouds NPR environment hdri day cycle stylized world