Perfect Weld
 yujie studio


Perfect Weld — Documentation
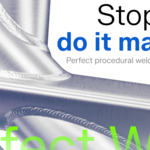
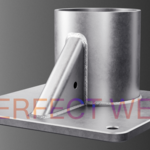
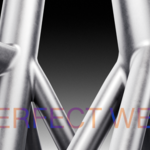
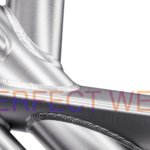
Perfect Weld creates a procedural, live weld bead along the joint between two objects. It never modifies your source meshes, and the weld updates automatically as you move or edit the parts.
Installation
- In Blender, go to Edit → Preferences → Add-ons.
- Click the dropdown (top-right) → Install from Disk… and select
perfect_weld.zip. (Install the .zip — the weld maps are bundled inside it.) - Enable the Perfect Weld checkbox.
The tools appear in the 3D Viewport sidebar: press N, then open the Weld tab.
Quick start (30 seconds)
- Position two objects so they overlap (intersect, not just touch).
- Select both meshes.
- In the Weld sidebar tab, click Create Weld.
A weld bead appears along the seam. Select it and use the sliders to shape it.
Creating welds
- Check normals/face orientation.
- Two objects selected → one weld between them.
- More than two objects selected → a weld is created at every intersecting pair automatically.
- The objects must overlap in space. If they only touch, or don't intersect, no weld is produced.
- Create Weld is also available in the Object menu.
Your original objects are never changed. The weld is a separate object you can move, hide, or delete freely.
Shaping parameters
Select a weld to reveal its controls. Everything updates live.
- Weld Size — thickness of the bead (how far it climbs each surface).
- Roundness — smoothness of the cross-section (more = rounder).
- Length Density — how finely the bead follows the seam along its length.
- Concavity — profile shape: positive values give a concave, dished weld; 0 is flat; negative gives a convex bead.
- Edge Blend — how softly the weld's edges dissolve into the surfaces. Higher values create a seamless transition with no visible line where the weld meets the parts.
Live updating
- Auto Update (on by default) — the weld re-computes automatically when you move or edit either source object.
- Update Now — recompute the active weld manually (useful if you turn Auto Update off on heavy scenes).
- Object A / Object B — the two source objects for this weld. You can reassign them here if needed.
Weld normal maps
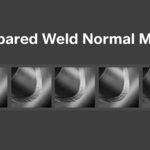
Add realistic bead detail from the built-in map library:
- Select a weld.
- Under Normal Map, click Add Weld Map.
- Pick a weld style from the thumbnail grid.
Once a map is applied you also get:
- Normal Strength — intensity of the normal map.
- Scale X / Scale Y — scale the map along and across the weld.
- Location Y — offset the map across the weld.
- The small X button clears the map.
Notes:
- Applying a map copies your source object's material and inserts the weld normal map into it — your original material is left untouched.
- If the source material already uses a Bump node on its Normal input, the weld map is fed into the Bump node so your existing surface detail is preserved.
- The UV for the weld is generated automatically — no manual unwrapping needed.
Copying settings between welds
Tuned one weld and want the rest to match?
- Copy From Target — set the Target field to a finished weld, and the active weld adopts its settings.
- Copy To Selected Welds — select all the welds you want to update, then click the reference weld last so it's the active object, and press this to push its settings onto every other selected weld at once.
Source object assignments (A/B) are never copied, so each weld keeps welding its own parts.
Finishing
- Freeze Weld — stops the weld updating and turns it into standard geometry you can export, sculpt on, or hand off like any other mesh.
Tips
- Apply scale on your source objects (Ctrl+A → Scale) for the most predictable results.
- Objects need to overlap, not just touch.
- On very heavy meshes, live recomputes can lag — turn Auto Update off and use Update Now when you're positioned. Frozen welds have no overhead.
- Give your "master" weld a recognizable name to make copying settings easier.
Troubleshooting
"No intersection found" when I click Create Weld. The two objects aren't overlapping. Push them together so they actually intersect, then try again.
The weld looks blocky. Raise Roundness and/or Length Density.
There's a visible line where the weld meets the part. Increase Edge Blend to soften the transition.
Nothing happens when I move a part. Make sure Auto Update is on for that weld. You can always press Update Now.
Requirements
- Blender [4.2]+
- Works in EEVEE and Cycles
Have questions about this product?
Login to message
| Sales | 10+ |
| Published | about 2 months ago |
| Blender Version | 4.2 - 5.2 |
| Extension Type | N/A |
| Render Engine Used | Cycles, Eevee |
| License | GPL |
Discover more products like this
weld seam fillet procedural seam weld generator metal hard surface welding weld mechanical sci fi non-destructive