Pianoflare – Cinematic Midi Piano Vfx For Blender
 Egon Castle


PianoFlare – Cinematic MIDI Piano VFX for Blender
Documentation / User Guide
Overview
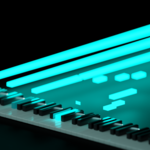
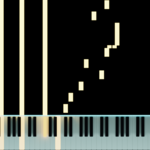
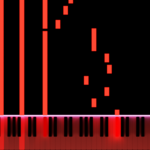
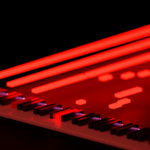
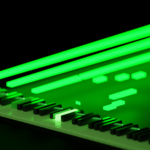
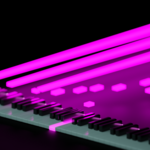
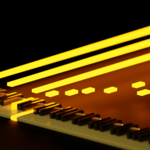
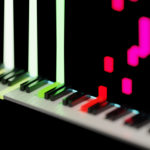
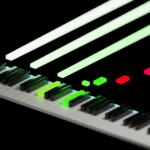
PianoFlare is a Blender add-on for creating cinematic piano MIDI visualizers. It generates a 3D piano keyboard, animated glowing MIDI note bars, key light-up effects, sparks, and camera-ready VFX scenes directly inside Blender.
PianoFlare is designed for musicians, motion designers, video creators, Blender artists, and music visualizer creators who want to create beautiful piano-based animations without building everything manually from scratch.
Main Features
Generate a full 3D piano keyboard inside Blender
Create glowing MIDI note bars
Animate notes moving horizontally across the scene
Keys light up when notes interact with them
Optional key press animation
Optional spark / particle hit effects
Cinematic glow and bloom-ready materials
Test note generation without requiring a MIDI file
MIDI file import support
Customizable colors, glow strength, note speed, and animation range
Camera setup for cinematic renders
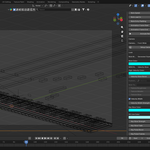
Clean sidebar UI inside Blender
Requirements
Recommended Blender version:
Blender 3.6 or newer
Blender 4.x supported where possible
Optional Python dependency for MIDI import:
mido
If MIDI import does not work, make sure mido is installed into Blender’s Python environment.
Installation
Download the PianoFlare
.zipadd-on file.Open Blender.
Go to:
Edit > Preferences > Add-ons
Click:
Install
Select the PianoFlare
.zipfile.Enable the add-on by checking the checkbox.
Open the 3D Viewport.
Press
Nto open the sidebar.Go to the PianoFlare tab.
Basic Workflow
Step 1: Generate the Piano Scene
Open the PianoFlare panel and click:
Generate Piano Scene
This creates the piano keyboard, materials, hit line, and scene collection.
Step 2: Generate Test Notes
Click:
Generate Test Notes
This creates a sample note animation so you can test the add-on without importing a MIDI file.
Step 3: Animate the Notes
Click:
Animate Notes
The note bars will animate across the scene, and the piano keys will light up when the notes reach them.
Step 4: Setup Camera
Click:
Setup Camera
This creates a cinematic camera angle for previewing or rendering the scene.
Step 5: Render
Go to Blender’s render settings and render your animation normally using:
Render > Render Animation
MIDI File Workflow
Prepare a
.midor.midifile.In the PianoFlare panel, choose your MIDI file path.
Click:
Import MIDI
After import, click:
Animate Notes
The add-on will convert MIDI notes into visual note bars and key animations.
Important MIDI Notes
PianoFlare works best with clean piano MIDI files.
For best results:
Use single-instrument piano MIDI files
Avoid extremely complex orchestral MIDI files
Keep the MIDI file organized
Use quantized notes if possible
Very dense MIDI files may create many objects and slow Blender down
Controls
Note Direction
Choose how notes move across the scene:
Left to Right
Right to Left
Note Speed
Controls how fast the glowing note bars travel.
Note Color
Controls the emission color of MIDI note bars.
Key Glow Color
Controls the color used when keys light up.
Glow Strength
Controls how strong the key and note emission appears.
Enable Sparks
Turns hit sparks on or off when notes reach keys.
Particle Amount
Controls how many sparks appear during note hits.
Frame Start / Frame End
Controls the animation frame range.
Recommended Render Settings
For best visuals, use:
Render Engine: Eevee / Eevee Next
Bloom: Enabled if available
World Background: Dark
Resolution: 1280 x 720 or 1920 x 1080
Motion Blur: Optional
Depth of Field: Optional
For cinematic music videos, use:
24 FPS or 30 FPS
For short social media videos, use:
1080 x 1920 vertical format
Known Limitations
PianoFlare is a visualizer add-on, not a full music production tool.
MIDI playback audio is not generated automatically.
Audio must be added separately in Blender or video editing software.
Very large MIDI files may slow down Blender.
MIDI import requires the
midoPython package.Live MIDI input may require extra setup depending on your operating system and MIDI device.
The add-on focuses on visual piano-style animation, not perfect music notation.
Troubleshooting
The add-on does not appear in Blender
Make sure the .zip file contains the correct add-on folder and __init__.py file.
Try restarting Blender after installing.
MIDI import does not work
Make sure mido is installed in Blender Python.
The error may look like:
mido is not installed
Install mido into Blender’s Python environment and restart Blender.
The scene looks too dark
Check that:
Bloom is enabled
Emission strength is high enough
Camera is facing the piano
The world background is not fully black without lights
Blender becomes slow
Try:
Using fewer notes
Using a shorter MIDI file
Disabling sparks
Reducing particle amount
Rendering in Eevee instead of Cycles
Support
For support, please contact the creator through the Superhive product page.
When reporting an issue, include:
Blender version
Operating system
PianoFlare version
Screenshot of the error
Steps to reproduce the problem
MIDI file details if the issue is MIDI-related
License
This product is intended for use according to the license selected on Superhive.
Do not redistribute, resell, or reupload the add-on files unless the license allows it.
 Included
Includes 12 months of
- Support from Egon Castle
- Product updates
Extend this product’s Support Period +12 months: 25% of product price
Have questions before purchasing?
Login to message
| Published | 3 months ago |
| Blender Version | 3.6 - 5.1 |
| Render Engine Used | Cycles, Eevee |
| License | GPL |
Discover more products like this
visual effects music animation music video Piano Visualizer MIDI Visualizer motion graphics Procedural Animation animation tools Piano VFX Blender Add-on keyboard animation eevee