Poly Engine - Retopology Best Friend
 Gorilla Fang Studio


Poly Engine
Professional Retopology for Blender · 4.0 – 5.x
by Gorilla Fang Studio
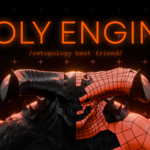
Retopology is slow by nature. Poly Engine makes it less so.
Every tool runs inside the 3D viewport. Geometry snaps to your reference mesh automatically on every action. No shrinkwrap modifier, no post-process cleanup, no switching between modes. You place a vertex, it lands on the surface. You drag an edge, it stays on the surface. That's the foundation everything else is built on.
PolyDraw
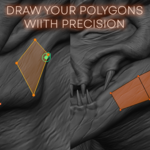
The core tool. Set a reference mesh as your Live Surface, press Start, and draw directly onto it.
Placing geometry
CTRL + Click places a vertex, snapped precisely to the surface. SHIFT + Click creates a quad from the four nearest vertices. In Mixed mode, CTRL + SHIFT + Click creates a triangle instead. Switch between Quad, Tri, and Mixed mode at any time from the panel.
Moving geometry
Drag without any modifier and Poly Engine figures out what's under your cursor, vertex, edge, or face and moves it. Geometry stays snapped to the surface as you drag. Release close to another vertex and they merge automatically. The merge distance threshold is yours to set.
Edge loops
Hold ALT and hover over any edge. A yellow line previews exactly where the new loop will land. Click to insert it. Works on quad faces, keeping your topology clean.
Relax brush
Hold R and drag to smooth out vertex distribution without lifting anything off the surface. Scroll while holding R to change brush size. Strength is adjustable from the panel. Useful for evening out uneven areas without redrawing them.
Ghost Symmetry
Enable X symmetry in the panel and a real-time mirror of your mesh appears on the opposite side as a faint GPU overlay. It's purely visual, no geometry is created, so you can check symmetry at a glance without committing to it.
Quick Bands
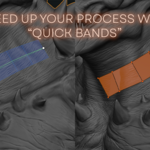
Click to place a chain of points along your Live Surface. Poly Engine fits a smooth quad strip through them, oriented to the surface normals at each point.
Good for quickly blocking out long directional runs of topology: arms, legs, fingers, panel lines, clothing seams anywhere you'd otherwise spend time placing individual quads one by one.
Scroll to control how many quad columns run between each pair of points. SHIFT + Scroll adjusts the width of the strip. Backspace removes the last point. Enter commits the strip to the mesh.
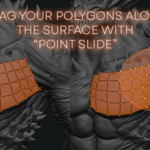
Point Slide
A soft-grab brush for refining existing topology. Drag over your retopo mesh to push and pull vertices within the brush radius. Every moved vertex stays snapped to the Live Surface throughout the stroke, so you're reshaping topology, not pulling it away from the reference.
Falloff is quadratic strongest at the center, tapering smoothly to the edge so strokes feel natural rather than mechanical. Scroll to resize the brush, SHIFT + Scroll to adjust strength.
Overlay Reference
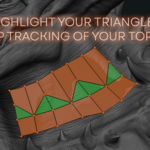
While PolyDraw is active, the viewport uses color to tell you what each element is and what's about to happen:
| Color | Meaning |
|---|---|
| Orange | Quad faces |
| Green | Tri faces |
| Cyan | Hovered face |
| Yellow | Edge loop preview (ALT held) |
| Orange | Relax brush radius |
| Faint blue | Ghost symmetry mirror |
Getting Started
- Install and enable the addon in Blender Preferences
- Open the PolyEngine tab in the N-panel
- Assign your high-res sculpt or scan as the Live Surface
- Press ▶ START POLY ENGINE
- Quick Bands and Point Slide are available in the section below
Compatibility
Blender 4.0 through 5.x. Requires a mesh object as the Live Surface. The addon handles mode switching automatically on activation.
Support
Poly Engine is a commercial product. All rights reserved — Gorilla Fang Studio / Ricardo Campos.
Have questions about this product?
Login to message
| Blender Extension Compatible | Yes |
| Sales | 30+ |
| Dev Fund Contributor | |
| Published | 3 months ago |
| Blender Version | 4.0 - 5.2 |
| Extension Type | Add-on |
| Render Engine Used | Arnold, Blender-Internal, Blender-Game-Engine, Cycles, Eevee, Octane |
| License | GPL |
Discover more products like this
VFX topology Geometry sculpting Workflow Optimization #Character Modeling game development 3d modeling 3D Pipeline retopology performance tools high poly