Pose Offset — Nudge A Bone Across A Whole Animation In One Click (Blender)
 Click & Snap


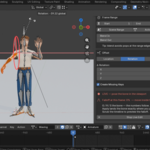
Pose Offset for Blender — Documentation
by Click & Snap — Nudge animation, not every key.
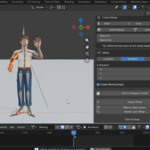
Pose Offset moves a bone across a whole stretch of animation without touching keyframes one by one. Pick a bone, pick a frame range, dial in a location / rotation / scale offset — and it is applied to every keyframe in that range in a single click.
The offset can be feathered with Blend In / Blend Out, so instead of popping at the range borders the change ramps up and back down smoothly and melts into the surrounding animation. Everything is reversible: Apply is one undo step, Revert Last Offset plays the exact inverse, and Bake to New Action leaves the original action untouched.
Requirements
| Blender | 4.2 LTS or newer |
| Platforms | Windows, macOS, Linux |
| Dependencies | None — pure Blender Python |
| License | GPL-3.0-or-later |
Installation
- Edit → Preferences → Add-ons → Install…
- Select the downloaded
.zip. - Enable Pose Offset.
- Select an armature, press N in the 3D viewport and open the Offset tab.
Quick start
- Select your armature and enter Pose Mode.
- Click the bone you want to shift, then press the From Active Bone button in the Target block.
- Set the frame range — type it in, use Set From Playhead for either end, or press Scene Range / Action Range.
- Give it some Blend In and Blend Out (5–10 frames is a good start).
- Enable Location, Rotation or Scale and dial in the delta.
- Press Apply Offset.
Prefer working by eye? Press Edit in Viewport (Live) and pose the bone with G / R / S — the panel values follow your hands.
The workflow in detail
Target
Choose the bone by name, with the eyedropper to pick it in the viewport, or with From Active Bone.
Children controls what happens below the target in the hierarchy:
- Follow — keys are written on the target bone only, and children follow through normal parenting, exactly as they do when you pose the bone by hand. This is the default and what you want most of the time.
- Same Delta — every bone in the subtree receives its own copy of the delta. Use it to curl all fingers at once, or to fan a chain of bones.
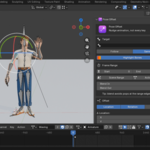
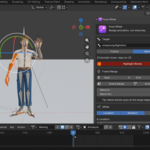
The panel reports how many bones will move and how many of them actually carry keys, so you never apply into thin air. Highlight Bones paints the affected bones orange in the viewport, and Select Affected selects them for you.
Frame range
- Type the start and end frames, or push the playhead value into either end with the arrow buttons.
- Scene Range takes the scene's frame range; Action Range takes the extent of the current action and pre-fills your default blend value.
Blend In / Blend Out are the heart of the tool. They are the number of frames over which the offset ramps from zero to full and back, so the correction never pops against untouched animation on either side.
Falloff shapes those ramps:
| Profile | Shape |
|---|---|
| Linear | Straight, constant speed |
| Smooth | Smoothstep, eased on both ends — the default |
| Ease In | Slow start, fast finish |
| Ease Out | Fast start, slow finish |
| Sharp | Stays low, then snaps up near the end |
Offset values
Enable any combination of Location, Rotation and Scale:
- Δ Location is added to every location key in the range.
- Δ Rotation is added in the bone's local space. Quaternion, Euler and axis-angle rotation modes are all handled — on quaternion channels the delta is properly composed rather than added component-wise, so there is no gimbal surprise.
- × Scale multiplies every scale key in the range.
Keyframe handles are shifted along with their keys, so the shape of your curves survives the offset — it is a move, not a re-interpolation.
Create Missing Keys covers the case where a channel you want to offset has no keys at all: anchor keys are added at the start and end of the range so the offset has something to act on. Leave it off if you would rather be told that nothing happened.
Copy and Paste in the Offset header carry a set of values — channels and deltas together — to another bone or another range. Reset zeroes them.
Live viewport editing
Edit in Viewport (Live) starts an interactive session:
- Pose the target bone with the normal G / R / S tools — the panel deltas follow live.
- Edit the numbers in the panel — the bone moves in the viewport.
- Scrub the timeline — the preview shows the offset with its falloff applied, and the panel reports the exact weight at the current frame, so you can see how much of the correction lands where.
- Nothing is keyed until you press Apply. Stop Live Edit restores the original pose and keeps the measured deltas in the panel.
The session warns you if Auto-Key is on, since that would write keys behind your back. Turn it off before you start.
Applying
- Apply Offset — writes the offset into the current action as a single undo step.
- Bake to New Action — writes into a copy and leaves the original action untouched. The safest option when you are experimenting on someone else's file.
- Revert Last Offset — plays the exact inverse of what was last applied, including its falloff.
Preferences
Edit → Preferences → Add-ons → Pose Offset:
- Default Blend In/Out — the blend value pre-filled when you press Action Range.
- Show inline tips — turn the hints inside the panel off once you know the tool.
Typical uses
- A character's hand passes through a prop for forty frames — offset the arm over that stretch and blend the fix in and out.
- The director wants the whole walk cycle two units to the left — offset the root, no re-keying.
- A finger curl reads too weak in the whole take — target the finger root in Same Delta mode and add a few degrees.
- A camera bone drifts across a shot — offset it and let the falloff hide the seams.
- A rig gets rescaled after animation is done — multiply the scale keys over the whole action.
Tips
- Blend In / Blend Out of zero is a hard cut. If the range does not start and end on still frames, always give it a few frames of blend.
- When something looks wrong after Apply, use Revert Last Offset rather than undo history — it is exact and it survives other edits made in between.
- Work in Bake to New Action while you explore, then apply directly once you know the value you want.
- Live edit plus scrubbing is the fastest way to judge a falloff length: watch the weight percentage in the panel as you move through the range.
Support
Questions, bug reports and feature requests are welcome through this product page. Please include your Blender version, your operating system and, where useful, the output from Blender's system console.
© Click & Snap. Released under GPL-3.0-or-later.
Have questions about this product?
Login to message
| Blender Extension Compatible | Yes |
| Published | 2 months ago |
| Blender Version | 4.2 - 5.2 |
| Extension Type | Add-on |
| License | GPL |

Discover more products like this
falloff Bone animation Animation Workflow pose offset Animator Tools batch keyframes Keyframe editing animation fixes blend in blend out armature Pose Mode rigging