 Skava
Skava


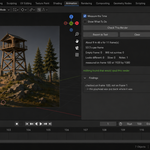
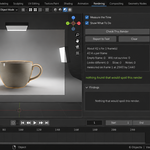
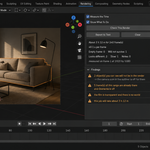
Download the zip and do not unpack it. In Blender open Edit > Preferences > Add-ons, click the drop-down arrow in the top-right corner and choose Install from Disk, then pick the zip. Tick the checkbox next to Preflight. Press N in the 3D Viewport and open the Preflight tab.
Whether anything will be visible at all: no active camera, a camera switched off for rendering, objects in frame cut by the near or far clip, nothing in the scene enabled for rendering. Whether it will look like the viewport: objects visible but not rendering and the other way round, excluded collections, texture files missing on disk, materials that reach no output, subdivision lower in the render than in the viewport, a leftover exposure or look. Whether the result will survive: no output path, an output folder that is missing or read-only, transparency that the chosen format drops, frames of this range already in the output folder, File Output nodes, a long animation going straight into a video file, a frame range that ends before the animation does. And what it will cost: CPU instead of GPU in Cycles, persistent data off for an animation, many samples with the denoiser off, and the measured time.
By rendering. With Measure the Time on, Preflight renders a quarter-size frame first. If that took less than 25 seconds, it renders the full-size frame twice and takes the faster one as the per-frame time, then multiplies by the number of frames in the range. If the quarter-size frame was already slower, the full frame is not rendered: the number is scaled up from the quarter and labelled in the panel as a lower bound, not a measurement. The panel also shows how many seconds the measurement itself took; turn Measure the Time off to run only the checks.
No. While the probe frame renders it temporarily changes the resolution percentage, output path, file format, overwrite and placeholder flags and the current frame, writing into a temporary folder. All of them are put back afterwards, also when the probe fails halfway, and the temporary files are removed. A fingerprint of the render settings is taken before and after the check, and the panel warns if anything came back different.
No. Every finding says what is wrong and, with Show What To Do on, what to do about it. Which of those you change is your call. Findings about a specific object have a button that selects that object, and Report to Text writes the findings and the measured time into a text block inside your file.
Blender 4.2 and later, with Cycles and EEVEE. The documentation lists live tests on Blender 5.1 and 5.2.
No. The add-on contains no network code; everything runs locally inside Blender. It is pure Python with no compiled binaries.
Yes. The add-on is licensed under the GNU GPL v3; the full text is in LICENSE.txt inside the zip. The license covers the add-on code; what you create with it is yours.
Have questions about this product?
Login to message
| Published | about 2 months ago |
| Blender Version | 4.2 - 5.2 |
| Extension Type | N/A |
| Render Engine Used | Cycles, Eevee |
| License | GPL |