Pro Measure 2.1.1
 CreateVisions


Pro Measure Documentation
"Pro Measure" provides real-time measurements with professional visualization in the viewport.
Built for technical modeling, architectural design, precision engineering, and quality assurance.
What's New in Version 2.1.1
- Feet & Inches: A new imperial length unit shows measurements in the combined notation architects and builders expect, for example 12' 6".
- Follow Scene Units: Switch this on and Pro Measure takes the unit system, the length unit, Separate Units and the rotation unit straight from Blender's Scene Properties, including the Unit Scale. Set your units once and everything matches.
- Separate Decimals for Radians: Degrees and radians now have their own decimal setting, so a radian readout stays as precise as the degree one.
- Exact Version in the Sidebar: The panel header shows the full version number, which makes it easy to tell which build you are running.
What's New in Version 2.1
- Smarter X-Ray Logic: With "Show Through" disabled, only the measured objects hide their own measurements. Unrelated foreground objects never block your annotations, and dimension/bounds lines are clipped piece by piece, staying visible right up to the geometry.
- Flip Controls: New "Flip Side" toggles in the Object Dimensions and Object Bounds settings move the X, Y, and Z lines to the opposite side of the model. Labels reposition automatically.
- Vertex Stick in Free Mode: While placing points freely with Ctrl, nearby vertices catch the point and anchor it to real geometry. The red "unanchored" marker disappears while the point sits on a vertex.
- Text Background Opacity: The text background color field now includes an alpha slider directly in the color picker.
- Clipboard Feedback: Selecting measurements shows a brief confirmation of what was copied to the clipboard.
- Instant Measuring Starts: Snap caches persist between measurements. The one-time preparation for heavy meshes no longer repeats on every new measurement.
- Instant Grab Feedback: In the point editor, the grabbed point highlights the moment you press the mouse button.
What's New in Version 2.0
- Interactive Point Editor: Edit existing measurements directly in the viewport: move, insert, and delete points with live distance feedback.
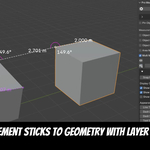
- Free Surface Placement: Hold Ctrl to place points anywhere on a surface; they slide smoothly across faces and glide along edges. Hold Ctrl+Alt to snap to edge midpoints and face centers.
- Show Through Toggle: Choose whether measurements are drawn on top of geometry or hidden where objects occlude them.
- Custom Colors per Measurement: Every measurement gets its own color swatch in the list.
- Multi-Select & Clipboard Reports: Shift+Click selects multiple measurements and automatically copies a text report to the clipboard.
- Text Background: Optional colored box behind all measurement texts for perfect readability.
- Total Length & Decimal Precision: Show the summed length of a measurement and configure decimal places for lengths and angles.
- Auto-Restore: The display state is saved with the .blend file; measurements are visible immediately after reopening.
- Optimized for Heavy Meshes: Snap caches are built in the background (blinking indicator next to "Multi Measurements"), no more freezes on multi-million-polygon meshes.
- Smarter Snapping: Snapping ignores elements hidden behind geometry; points always land on the surface you actually see.
Features:
1. Object Dimensions
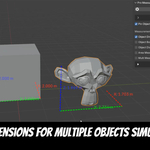
Display X, Y, Z dimensions for selected objects. Color-coded axis indicators: Red (X), Green (Y), Blue (Z). Precise measurements with customizable positioning. Use the "Flip Side" toggles in the settings to move each axis line to the opposite side of the object.
2. Object Bounds
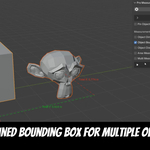
Calculate total dimensions when multiple objects are selected. Shows overall width, height, and depth of entire selection for assembly validation and space planning. "Flip Side" toggles are available here as well.
3. Object Distance
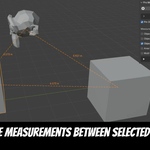
Measure distances between object centers. Clear connecting lines with numerical values for spatial arrangement verification. With "Show Through" disabled, the line is clipped to the visible gap between the objects.
4. Multi-Point Measurements
Create custom measurements in three modes:
- Vertex Mode: Click vertices with intelligent snapping. Hold Ctrl for free surface placement (slides across faces, glides along edges, and sticks to nearby vertices), or Ctrl+Alt for edge midpoints and face centers.
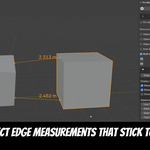
- Edge Mode: Click edges to measure between midpoints.
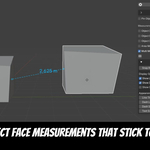
- Face Mode: Click faces to measure between centers.
Measurements are saved with your .blend file and persist across save/reload. Individual management: rename, recolor, hide/show, delete, multi-select. Supports cross-object measurements and angle calculations for 3+ points. Free surface points (no geometry reference) are marked with a red core: they keep their position but do not follow mesh deformation.
5. Interactive Point Editor
Click the edit icon of a measurement in the list to modify its points directly in the viewport:
- Move: Click and drag a point. It highlights the moment you press the mouse button and follows the snap target in real time (vertices, or with Ctrl freely on the surface, Ctrl+Alt midpoints/centers).
- Insert: Hover over the measurement line, a plus marker appears; click to insert a point exactly there, keep the mouse pressed to drag it into place.
- Continue: Short-click the first or last point to extend the line from that end.
- Delete: Hover over a point and press X or Del; Backspace removes the last point.
- Apply/Cancel: Enter or double-click applies the changes, ESC or right-click cancels without modifying the measurement.
All segment lengths are displayed live while you edit: every move, insert, and delete updates the values in real time.
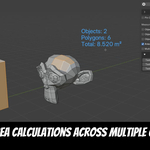
6. Area Calculations
Real-time area measurement for selected faces in Edit Mode. Multi-object support. Displays total area, polygon count, object count with configurable positioning.
7. Pin Objects
Maintain measurements visible after deselection. Real-time updates when objects transform. Independent management for different measurement types.
8. Show Through
Global toggle in the Settings panel. Enabled (default): measurements are always drawn on top of geometry. Disabled: parts of measurements hidden behind objects are not drawn, lines, values, angles, and points respect occlusion from the current view. Only the measured objects themselves count as occluders, so unrelated objects in the foreground never hide your measurements. Dimension and bounds lines are clipped piece by piece and stay visible up to the geometry.
9. Unit Systems
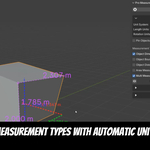
Metric and imperial units with automatic or manual selection. Range: micrometers to kilometers, mils to miles. Feet and inches can be shown combined as 12' 6". Degree/radian angles. Decimal precision is fully configurable and set separately for lengths and areas, for degrees, and for radians.
Follow Scene Units: Pro Measure normally uses its own unit settings in the sidebar. Switch this option on and it takes the unit system, the length unit, Separate Units and the rotation unit straight from Blender's Scene Properties, including the Unit Scale. Everything then matches the rest of Blender without setting it twice.
10. Customization
Control all visual aspects:
- Line thickness and dash patterns
- Text size and positioning
- Text background box (on/off, color and opacity)
- Per-measurement colors and transparency
- Flip sides for dimension and bounds lines
- Snap radius
- Arc visualization
Installation
- Download the Pro Measure addon (.zip)
- Install: simply drag and drop the .zip file into the Blender window and confirm. Alternatively use Edit > Preferences > Get Extensions > Install from Disk (or Add-ons > Install in older versions)
- Activate "Pro Measure"
Usage
Setup
- Access: Press N → "Pro Measure" tab
- Enable: Click "Enable Measurements" (the state is saved with your file)
- Settings: Expand "Settings" for units, decimal precision, Show Through, and text background. Switch on "Follow Scene Units" to take the units from Blender's Scene Properties instead
Basic Measurements
- Object Dimensions: Select objects → enable "Object Dimensions"
- Object Bounds: Select multiple objects → enable "Object Bounds"
- Object Distance: Select multiple objects → enable "Object Distance"
- Area: Edit Mode → select faces → enable "Area Measurements"
Interactive Measurements
- Vertex: Enable "Multi Measurements" → vertex icon → click vertices (Ctrl = free on surface with vertex stick, Ctrl+Alt = midpoints/centers)
- Edge: Edge icon → click edges
- Face: Face icon → click faces
- Correct: Backspace removes the last point while drawing
- Finish: Enter or double-click; ESC/right-click cancels
- Manage: Eye (hide/show), color swatch, edit icon (point editor), pencil (rename), trash (delete)
- Select & Copy: Click a measurement name to select it (white highlight); Shift+Click for multi-select. A text report is copied to the clipboard automatically (a brief confirmation appears below the list), ready to paste with Ctrl+V
- Save: Measurements are automatically saved with your .blend file
Advanced
- Pin Objects: Keep measurements after deselection
- Show Through: Disable in Settings to hide measurements behind the measured geometry
- Flip Side: Move dimension and bounds lines to the opposite side of the model in their settings
- Total Length: Enable in the Multi Measurements display options to show the summed length at the last point
- Settings: Expand panels for appearance customization
- Reset: Brush icon clears all measurements
- Angles: Toggle inner/outer angle display in settings (off by default)
Shortcuts
- Ctrl: Free surface placement (slides along edges, sticks to nearby vertices)
- Ctrl+Alt: Snap to edge midpoints / face centers
- Backspace: Remove last point (drawing and editor)
- X / Del: Delete hovered point (point editor)
- Enter / Double-click: Finish or apply
- Right-click / ESC: Cancel
- Shift+Click (list): Multi-select measurements + clipboard report
- N: Toggle sidebar
Tips
- Use Pin Objects for complex scenes
- Adjust snap radius for easier selection
- Name important measurements for easy identification
- A red core in a point means it has no geometry reference and will not follow mesh deformation. Drag it onto a vertex in the point editor (or let it stick with Ctrl) to anchor it
- On very dense meshes, two small blinking dots next to "Multi Measurements" indicate that snap data is being prepared. Blender stays responsive while they blink, and the preparation runs only once per scene, not on every measurement
- Multi-measurements are saved automatically, just save your .blend file as usual
- If a referenced object is deleted, the measurement will be skipped gracefully
- Working in feet and inches? Set Unit System to Imperial and Length Units to "Feet & Inches", or simply switch on "Follow Scene Units" and Pro Measure follows whatever Blender is set to
- The panel header shows the exact version you are running, which is handy when reporting an issue
Support
Andreas Fülscher
www.create-visions.de
[email protected]
Have questions about this product?
Login to message
| Blender Extension Compatible | Yes |
| Sales | 30+ |
| Dev Fund Contributor | |
| Published | about 1 year ago |
| Blender Version | 4.3 - 5.2 |
| Extension Type | Add-on |
| Render Engine Used | Cycles, Eevee |
| License | GPL |
Discover more products like this
measurement overlay bounding box measurement tool dimension lines measurements Measure Tool exact measurements measure easy measurement better measure measurement measure objects