Procedural Clock
 Blender Easy


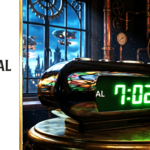
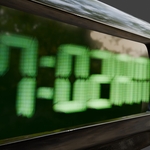
Documentation: Procedural Clock
Quick Start Guide
Installation: Install the
.zipfile via Blender's Add-on Preferences.Creation: Open the N-Panel (Sidebar) and find the "Geo Clock" tab. Click "Create Clock."
Setup: A cube named "Procedural Clock" will appear with the modifier already applied. Use the sidebar to adjust time, colors, and effects.
Changing Fonts: To use a custom font, select the clock object and open the Geometry Nodes Editor. Locate the node named "ClockText" and click the folder icon to load your own
.ttfor.otffile.
Settings Overview
Time Configuration: Adjust the mode (12h/24h), show/hide AM/PM, and set your starting time. Use Clock Speed to speed up or slow down the time progression.
Layout & Typography: Control the overall scale and the distance between characters.
Hologram & Shading: Use "Holographic Layers" to create a 3D glass depth effect. Higher "Emission" values make the clock glow brighter.
Digital Effects: Add "Noise" for a glitchy look or "Pixel Shift" to make the numbers look like they are on a digital screen.
 Included
Includes 12 months of
- Support from Blender Easy
- Product updates
Extend this product’s Support Period +12 months: 50% of product price
Have questions before purchasing?
Login to message
| Dev Fund Contributor | |
| Published | 5 months ago |
| Blender Version | 5.0 - 5.1 |
| Extension Type | N/A |
| Render Engine Used | Cycles, Eevee |
| License | Mit |
Discover more products like this
geometry nodes Blender Market motion graphics timer procedural cyberpunk screen effect holographic display digital-clock tech hud Generator clock UI Design real-time animation sci fi hologram dashboard