Product Material Manager
 StudioFlyMonkey_


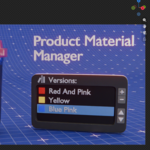
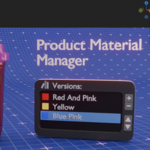
Blender Add-on · User Guide · v1.0.0
Product Material Manager
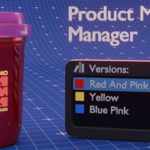
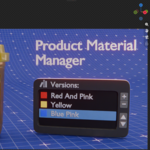
Save a product's materials as named looks, then switch between them from a thumbnail grid — or keyframe them to change across a render.
Contents
- What it does
- Install
- Quick start
- The panel, mapped
- Products & objects
- Versions
- Version setup
- How it thinks
- Object-linked slots
- Animating
- Options
- Import & export
- Troubleshooting
- Support
What it does
You have one product model and five colourways to render. This add-on stops you from rebuilding the material setup five times.
You tell it which objects make up your product — the bottle, the cap, the label. You set the materials the way you want them and press +. That look is now saved as a version, with every material on every slot remembered.
Change the materials, press + again, and you have a second version. From then on, clicking a thumbnail puts that whole look back on the model instantly. Nothing is duplicated, nothing is baked — it simply reassigns the material slots.
Because the version number is an animatable property, you can also keyframe it. Frame 1 renders the red one, frame 2 the yellow one, and a 5-frame render gives you your whole range.
It manages which material sits in which slot. It does not copy, edit, or generate materials — you build those yourself in the Shading workspace, exactly as you always have.
Install
Three steps, about twenty seconds.
-
Open the add-ons list
In Blender, go to Edit › Preferences › Add-ons.
-
Install from disk
Click the dropdown arrow at the top right of that window and choose Install from Disk…. Pick
product_material_manager-1.0.0.zip. -
Find the panel
Hover over the 3D Viewport and press N to open the sidebar. There is a new tab down the right edge called Product Materials.
Everything you build lives inside the .blend file itself, so it travels with your scene. To move a setup to a different file, use Export Full Setup — see section 12.
Quick start
A worked example: one perfume bottle, two colourways. Five minutes.
-
Create a product
Press the + beside the product list. Double-click its name to rename it — say, Perfume Bottle.
-
Tell it which objects belong to the product
Select the bottle, the cap and the label in the viewport, then press Add Selected. Only mesh objects are accepted; anything else in your selection is ignored.
-
Build your first look
Assign materials normally, in the Material Properties tab. Get the model looking exactly the way you want the first variant to look.
-
Capture it
Press the + under Versions. Every material slot on all three objects is recorded. Rename it to RedAndPink in Selected Version Setup.
-
Build the second look
Change the materials to your yellow variant. Press + again. You now have two versions.
-
Switch between them
Click either thumbnail. The whole model changes at once. The version currently applied shows as a pressed-in button.
-
Add thumbnails
Render or screenshot each variant, then load the image into the version's thumbnail slot in Selected Version Setup. Now the grid shows real previews instead of placeholder icons.
The panel, mapped
Everything lives in one sidebar tab. Here is what each zone is for, top to bottom.
- ProductsOne entry per product you are managing. A scene can hold several, each with its own objects and versions.
- Tracked ObjectsWhich meshes belong to the selected product. Versions only ever touch these.
- VersionsThe saved looks, as a thumbnail grid. Click one to apply it.
- Version sliderThe same choice as a number. This is the property you keyframe to animate variants.
- Selected Version SetupRename the current version, give it a thumbnail, and fine-tune individual material slots.
- OptionsBehaviour and grid appearance, plus two repair buttons.
- Import / Export and HelpSave the whole setup to a JSON file, and the link for reporting bugs.
Products & tracked objects
A product is a named group of mesh objects. Everything else hangs off it.
- Product listClick a row to make it the active product. Double-click the name to rename it. Everything below the list applies to whichever product is highlighted.
- Add & remove product+ creates a product. − deletes the highlighted one along with all of its versions — there is no confirmation, but Ctrl‑Z undoes it.
- Expand arrowShows or hides the list of tracked objects. The number in brackets is how many objects are currently tracked, so you can check the count without expanding.
- Add SelectedAdds every selected mesh object to this product. Non-mesh objects are skipped, and objects already tracked are not added twice.
- Sync SlotsRe-scans your objects and updates every version to match their current material slots. Run this whenever you add or remove a material slot after having captured versions — see the note below.
- Remove objectStops tracking that object and strips its entries out of every version. The object itself is untouched.
A version records one entry per material slot, captured at the moment you pressed +. If you later add a fourth slot to the bottle, your existing versions know nothing about it and will leave it alone.
Sync Slots fixes that: it adds the missing slot to every version (using whatever material is on it right now) and drops entries for slots that no longer exist.
Versions
Each version is one complete look: every slot, on every tracked object, remembered together.
- Grid toggleSwitches to the thumbnail grid (Figure 4). List mode is the compact view: better when you have many versions or a narrow sidebar, and you can rename a version by clicking its name directly.
- SwatchThe version's thumbnail image, shown small. Versions without a thumbnail show a generic material icon instead.
- Active versionThe highlighted row is the look currently on your model. Click any row to apply it.
- Add versionCaptures the materials currently on your tracked objects as a new version, and switches to it.
- Remove versionDeletes the active version.
- Duplicate versionCopies the active version, including its thumbnail. Useful when a new variant differs from an existing one in only one or two materials.
- Move up / downReorders versions. Order matters if you are animating, because the slider steps through them by position.
- Version sliderThe active version as a number, starting at 0. Right-click it to insert a keyframe.
Thumbnail grid
Switch the grid toggle on and the same versions become large previews. A Columns field appears next to the toggle, and Thumbnail Size in Options controls how big each preview is drawn.
- Grid toggle, switched onBlue means the grid is active. The same button in Options is labelled Thumbnail Grid.
- ColumnsHow many thumbnails sit side by side. Only appears while the grid is on. Two or three suits a normal sidebar width.
- PreviewThe version's thumbnail, drawn large. Set its size with Thumbnail Size in Options.
- Version buttonClick to apply. The version currently on the model is drawn pressed in, so you can always see which look is live.
Selected Version Setup
Where you name a version, give it a thumbnail, and adjust individual slots without re-capturing everything.
- NameRename the version. This is the text shown on its button in the grid, so keep it short — Matte Black reads better than Version 3 final v2.
- ThumbnailBlender's standard image picker. The folder icon loads an image from disk — that is the one you want. The icon on the far left drops down a list of images already in the file, the shield keeps the image saved even when nothing uses it, and × clears the thumbnail. Render each variant to a small square image and load it here.
- Update From SceneOverwrites this version with whatever is currently assigned in the scene. Use it when you have tweaked a material and want the version to remember the change rather than undo it next time you switch away and back.
- Object groupOne sub-box per tracked object, so you can see at a glance which object a slot belongs to.
- Slot nameThe material slot's name on that object, exactly as it appears in Material Properties.
- Material for this versionChange what this one slot uses in this one version, without touching any other version. This is the surgical edit — useful for a one-material change that does not justify re-capturing the whole look.
Editing a material field here changes one slot in this version. Update From Scene replaces every slot in this version with the scene's current state. Reach for the first when you know exactly what you want to change, and the second after a round of free-form material work.
How it thinks
One diagram that makes the rest of the add-on obvious.
Everything is stored in your .blend file, on the scene. A product owns two lists: the objects it tracks, and the versions you have captured. A version is nothing more than a table of rows, one row per material slot.
Three consequences fall out of this, and they explain most of the behaviour people ask about:
| Because… | …this happens |
|---|---|
| Rows are captured once | Adding a material slot later leaves old versions blind to it, until you press Sync Slots. |
| Rows point at real datablocks | Deleting a material or object leaves gaps. Clean Up Missing Data removes the dead rows. |
| Only listed slots are written | Any object you have not tracked is never touched, no matter how many versions you switch through. |
Object-Linked Slots
The one option worth understanding properly. It matters the moment you use linked duplicates.
In Blender, every material slot is attached to one of two things: the mesh data, or the object. Data is the default. It rarely matters — until you make linked duplicates with Alt‑D, where several objects share a single mesh.
Share a mesh, and a data-linked slot is shared too. Assign a material to one bottle and all six bottles on the shelf change together. That is exactly wrong for a shelf of colourways.
So which should you use?
| Situation | Setting |
|---|---|
| A shelf of linked duplicates, each a different colourway | On. This is what the option exists for. |
| Only ordinary duplicates (Shift‑D), separate meshes | Makes no difference. Leave it on. |
| You want linked copies to change together, on purpose | Off. Keeps them ganged. |
| You have hand-tuned slot links and want them left alone | Off. The add-on will not touch the link setting. |
With the option on, applying a version switches the managed slots to object-linked. That is a real edit to your scene, not just a display setting — and it is what makes per-copy variants possible. It only ever affects slots on tracked objects.
Animating variants
Render your whole range in one go by keyframing the version number.
-
Go to the frame you want
Set the playhead to frame 1.
-
Pick the version
Click the thumbnail for your first variant.
-
Keyframe it
Right-click the Version (keyframe to animate) slider and choose Insert Keyframe.
-
Repeat for each frame
Move to frame 2, click the next thumbnail, insert another keyframe. Continue for every variant.
-
Set the interpolation to Constant
In the Graph Editor or Dope Sheet, select the keyframes and press T › Constant. Without this, Blender smoothly interpolates the number and you get the wrong variant on in-between frames.
-
Render the animation
Render frames 1 to n. Each frame comes out as a different colourway.
The add-on listens for frame changes and re-applies the active version of every product. That means the variant is correct during a background or command-line render, not just in the viewport.
Options
Two behaviour settings, two appearance settings, two repair buttons.
- Object-Linked SlotsPins managed slots to the object rather than the mesh, so linked duplicates can hold different variants. On by default. Explained in full in section 09.
- Thumbnail GridThe same toggle as the small grid icon beside the Versions heading. Off gives you a compact name list.
- ColumnsHow many thumbnails per row.
- Thumbnail SizeHow large each preview is drawn. Raise it for a contact-sheet look; lower it to fit more versions on screen.
- Re-apply All ProductsForces every product back onto its active version. Use it if something has drifted — you hand-edited a material, appended objects, or undid past a version switch.
- Clean Up Missing DataRemoves tracked objects and override rows that point at deleted data. The panel warns you in red when there is anything to clean.
Import & export
Move a setup between files, or keep it under version control.
Export Full Setup writes every product, version and material assignment to a JSON file. Import Setup reads one back. Both live in the Import / Export Data sub-panel.
Import offers a Replace Existing Products checkbox. Leave it off to append the imported products alongside what you already have; switch it on to clear the list first.
Import finds your objects and materials by their names. If the target file calls the bottle Bottle.001 instead of Bottle, that row is skipped.
When anything is skipped you get a warning saying how many objects and materials were missing, and the full list is printed to Window › Toggle System Console.
What a file contains
Each product stores its name, its tracked object names, and its versions. Each version stores its name, its thumbnail path, and one row per material slot — the object name, the slot number, the material name, and whether the slot was object- or data-linked.
Thumbnail paths are written relative to the .blend where possible. If a thumbnail cannot be found at import time, the add-on also looks for a file of the same name sitting next to the JSON.
Troubleshooting
The things people hit first.
Almost always the object is not tracked. Expand Tracked Objects and check it is listed — the count in brackets tells you quickly.
If it is listed, the version may have been captured before that object was added. Press Sync Slots, then Update From Scene on each version.
Switch on Object-Linked Slots in Options, then click each version once to re-apply it. See section 09 for why.
Versions record slots as they were when captured. Press Sync Slots to bring every version up to date with the object's current slots.
A generic material icon means no image is assigned — load one via Open in Selected Version Setup.
If an image is assigned but shows blank, the file has probably moved. Blender's Image Editor will show it as missing. Consider File › External Data › Pack Resources to embed thumbnails in the .blend.
You deleted an object that was being tracked. Press Clean Up in the warning, or Clean Up Missing Data in Options. Nothing is broken in the meantime — dead rows are skipped when versions are applied.
Your keyframes are interpolating. Select them in the Dope Sheet and set interpolation to Constant with T.
Hover the mouse over the 3D Viewport and press N to open the sidebar, then look for the Product Materials tab down the right edge. If the tab is not there, the add-on is installed but not ticked — check Edit › Preferences › Add-ons and search for “Product Material Manager”.
Support
Found a bug, or stuck on something?
Send me a message on Instagram. To get a useful answer fast, include your Blender version, what you were doing when it broke, and anything printed in Window › Toggle System Console.
There is a shortcut to this in two places inside Blender: the Help & Support sub-panel at the bottom of the sidebar, and the add-on's own entry in Preferences.
Product Material Manager 1.0.0 · requires Blender 5.0 or newer · GPL-2.0-or-later · by tonydoes3d
 Included
Includes 12 months of
- Support from StudioFlyMonkey_
- Product updates
Extend this product’s Support Period +12 months: 50% of product price
Have questions before purchasing?
Login to message
| Blender Extension Compatible | Yes |
| Published | about 2 months ago |
| Blender Version | 4.5 - 5.2 |
| Extension Type | Add-on |
| Render Engine Used | Arnold, Cycles, Eevee, Octane |
| License | GPL |
Discover more products like this
label variants product Design packshot mockup Material product render colorway material manager packaging product-visualization material switcher