 3D CADence


PropScatter
Placement and layout tools for scene props
PropScatter — a powerful Swiss Army knife for working with props and placing objects in Blender
One addon — the full toolkit you need for fast, neat work with lots of meshes. Ideal for kitbashing, environment dressing, asset libraries, and architectural scenes.
What PropScatter does:
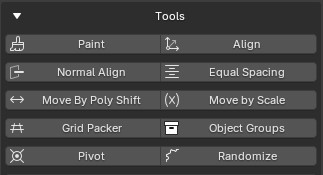
Paint — a full brush scatter workflow in one tool. Sources, targets, distribution, live preview, overlap cleanup, and final output. You paint — and everything lands where it should. Built for props and set dressing—not mass vegetation scattering.
Align — snaps objects to surface isuing surface normals.
Normal Align — object alignment on a whole new level.
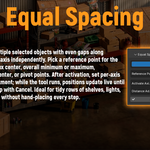
Equal Spacing — even spacing along any axis
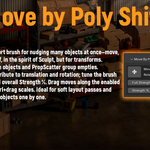
Move by Poly Shift — nudge many objects with a soft brush right in the viewport (like Sculpt, but for transforms).
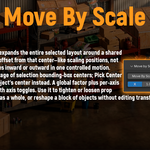
Move by Scale — compress or expand the entire selected layout around a center.
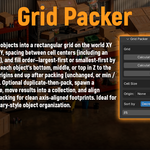
Grid Packer — quickly arranges objects on a floor grid. Great for clean kits and library layouts.
Object Groups — wraps the selection in a pivot empty with proper parenting in one click (kit-style).
Pivot — a convenient way to move and orient origins: by bounds, by grid, or by click in the viewport.
Randomize — variation in position, rotation, and scale with a seed and a live real-time preview. Apply the result when you're happy with it.
All feedback and settings are conveniently in the N-panel.
PropScatter replaces several standalone tools and speeds up routine prop workflows. If you often place, align, and randomize objects — it is a must-have in your arsenal.
Paint
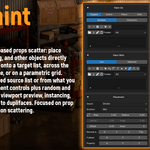
Paint is PropScatter's brush-based props scatter: place furniture, clutter, set dressing, and other objects directly onto scene geometry. Scatter onto a target list, across the visible scene, on a picked plane, or on a parametric grid. Drive instances from a managed source list or from what you have selected. You get placement controls plus random and aligned transforms and scale, viewport preview, instancing, and exit options such as bake to duplifaces. Focused on prop placement—not mass vegetation scattering.
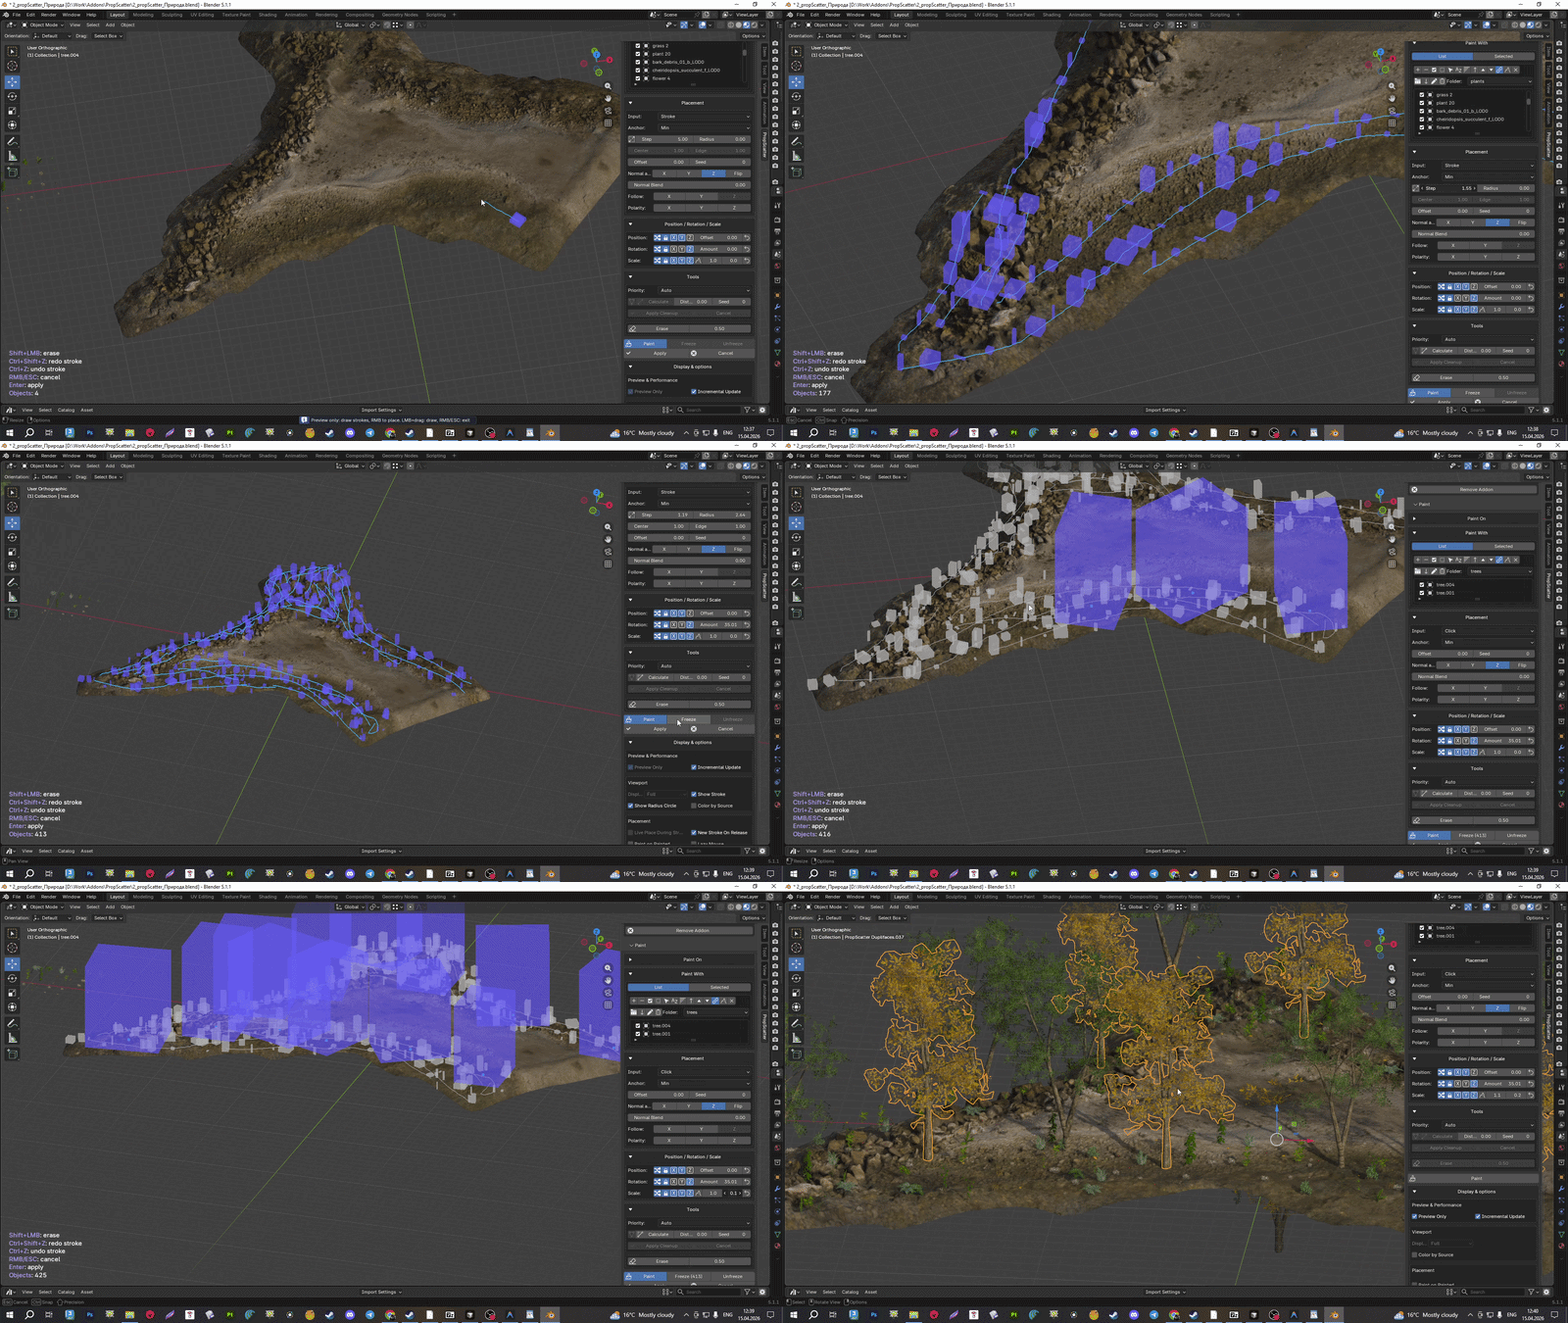
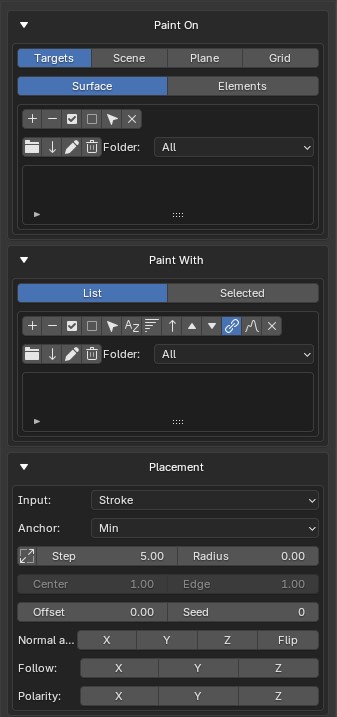
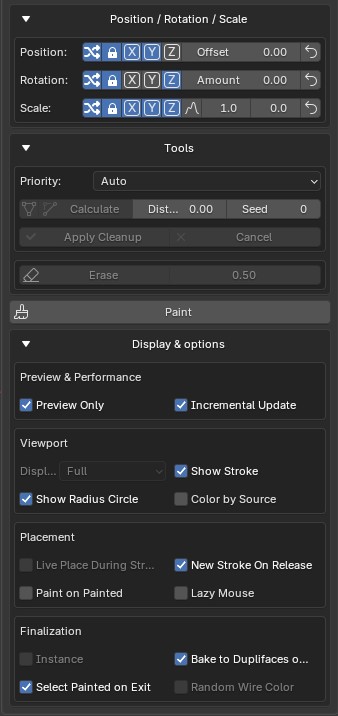
1. Paint With: flexible source control
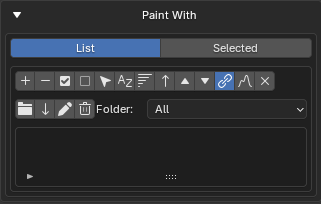
-
Source list
- Add selected objects to the list: with an active folder, objects go into that folder; with All, they go into the global list.
- Folders: create (including empty), rename, delete a folder together with every object from that folder in the list.
- Move objects between folders: the move button only moves checked items, with a choice of destination folder.
- Delete, clear, select all, and deselect operate within the current folder filter (visible items).
- Sort alphabetically, by size, reverse order, move items up or down.
-
How sources are picked
- List Order: strictly in list order.
- Random Order: random picks for natural variation.
- List / Selected: in List mode the list and folders are used; in Selected mode sources are objects from the current viewport selection.
2. Paint On: a clear target workflow
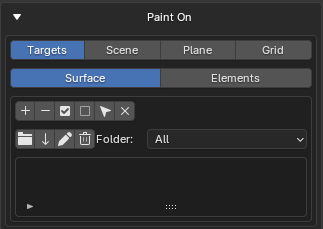
-
Assignment modes
- Targets: a list of target objects with folders, add/remove/move — same idea as the source block.
- Surface: free painting on target object surfaces.
- Elements: placement on selected mesh elements; submodes Faces / Vertices / Edges (face centers, vertices, edge midpoints).
- Scene: raycast against visible objects on the active view layer.
- Plane: working plane from a surface click; plane size and highlight are configurable.
- Grid: rows and columns with spacing; independent or linked row/column counts and step; optional grid highlight.
-
Elements tools
- Place for quick placement on selected elements.
- Pick for interactive element selection.
- Clear / Clear All to reset selection.
- Random % and Step for fill strategy.
3. Placement: logic along the stroke
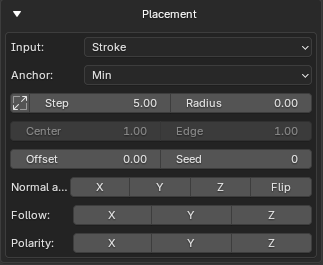
Stroke: slots along the stroke — one object every Step meters, with optional Radius for organic scatter. Click: one object per click, without stroke Step and radius.
-
Step + Radius mode
- Step: distance between placement slots along the stroke. Fewer objects — increase Step; more — decrease it.
- Radius: maximum random lateral offset from the stroke line. 0 — strictly on the stroke; above 0 — organic scatter.
- Falloff Center / Falloff Edge: when Radius > 0, they set how likely objects appear toward the stroke center vs. the edge of the radius zone.
- Parameters: Step, Radius, Offset, Seed; the button next to Step sets Step from the largest bounds of objects in Paint With (or from the current selection if any).
- Anchor: object anchor at the hit point — Pivot, Min, Center, Max of the bounding volume.
-
Normal orientation
- Normal align: which local object axis follows the surface normal (or no alignment).
- Normal Bend: smoothly reduces or increases how strongly objects follow the surface normal, making placement on uneven surfaces easier to art-direct.
- Follow: which axis looks along the stroke direction; can be disabled.
- Flip for the normal and polarity on X/Y/Z.
4. Transform and Scale: quick variation
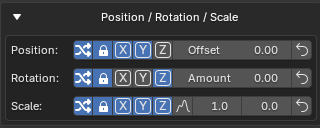
-
Position / Rotation
- Per-axis offset and rotation with locks, axis choice for “single” offset/angle, and random toggles.
- One-click reset for fast iteration.
-
Scale
- Uniform and non-uniform scale.
- Random scale and ramp scale with start/end range.
- Ramp reverse and reset for quick tuning.
5. Paint session and preview
-
Session control
- Paint / Apply / Cancel loop.
- In Tools, the overlap cleanup block sits above Erase (as in the panel).
- Erase mode with adjustable radius; easy switching with Shift+LMB during the session.
- Options Paint on Painted and New Stroke On Release.
- Live Place During Stroke for real-time placement in real-objects mode.
-
Preview and performance
- Preview Only for safe tuning before applying.
- Incremental Update: apply setting changes one stroke per frame or recalc all strokes at once (matters on heavy scenes).
- Stroke path (Show Stroke), radius circle when Radius > 0, preview tint by source in Preview Only.
- Viewport Display for real objects: full geometry, bounds only, or points — for performance.
- Lazy Mouse with adjustable smoothing for smoother strokes.
-
Freeze / Unfreeze — layered painting in one session
Mix different object types and settings inside one Paint session while still computing overlaps across all layers.
- Paint the first type with your settings, press Freeze — strokes lock and show in white/gray.
- Change parameters, paint the next type, freeze again. Repeat for any number of layers.
- Calculate includes frozen and active objects together when resolving overlaps.
- Unfreeze returns all layers to an active state.
- The Freeze button shows a counter: Freeze (N). Objects marked for removal (overlap) appear bright red.
- Works in Preview Only and with real objects.
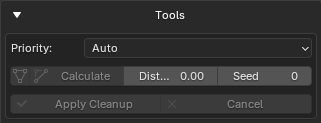
6. Overlap cleanup
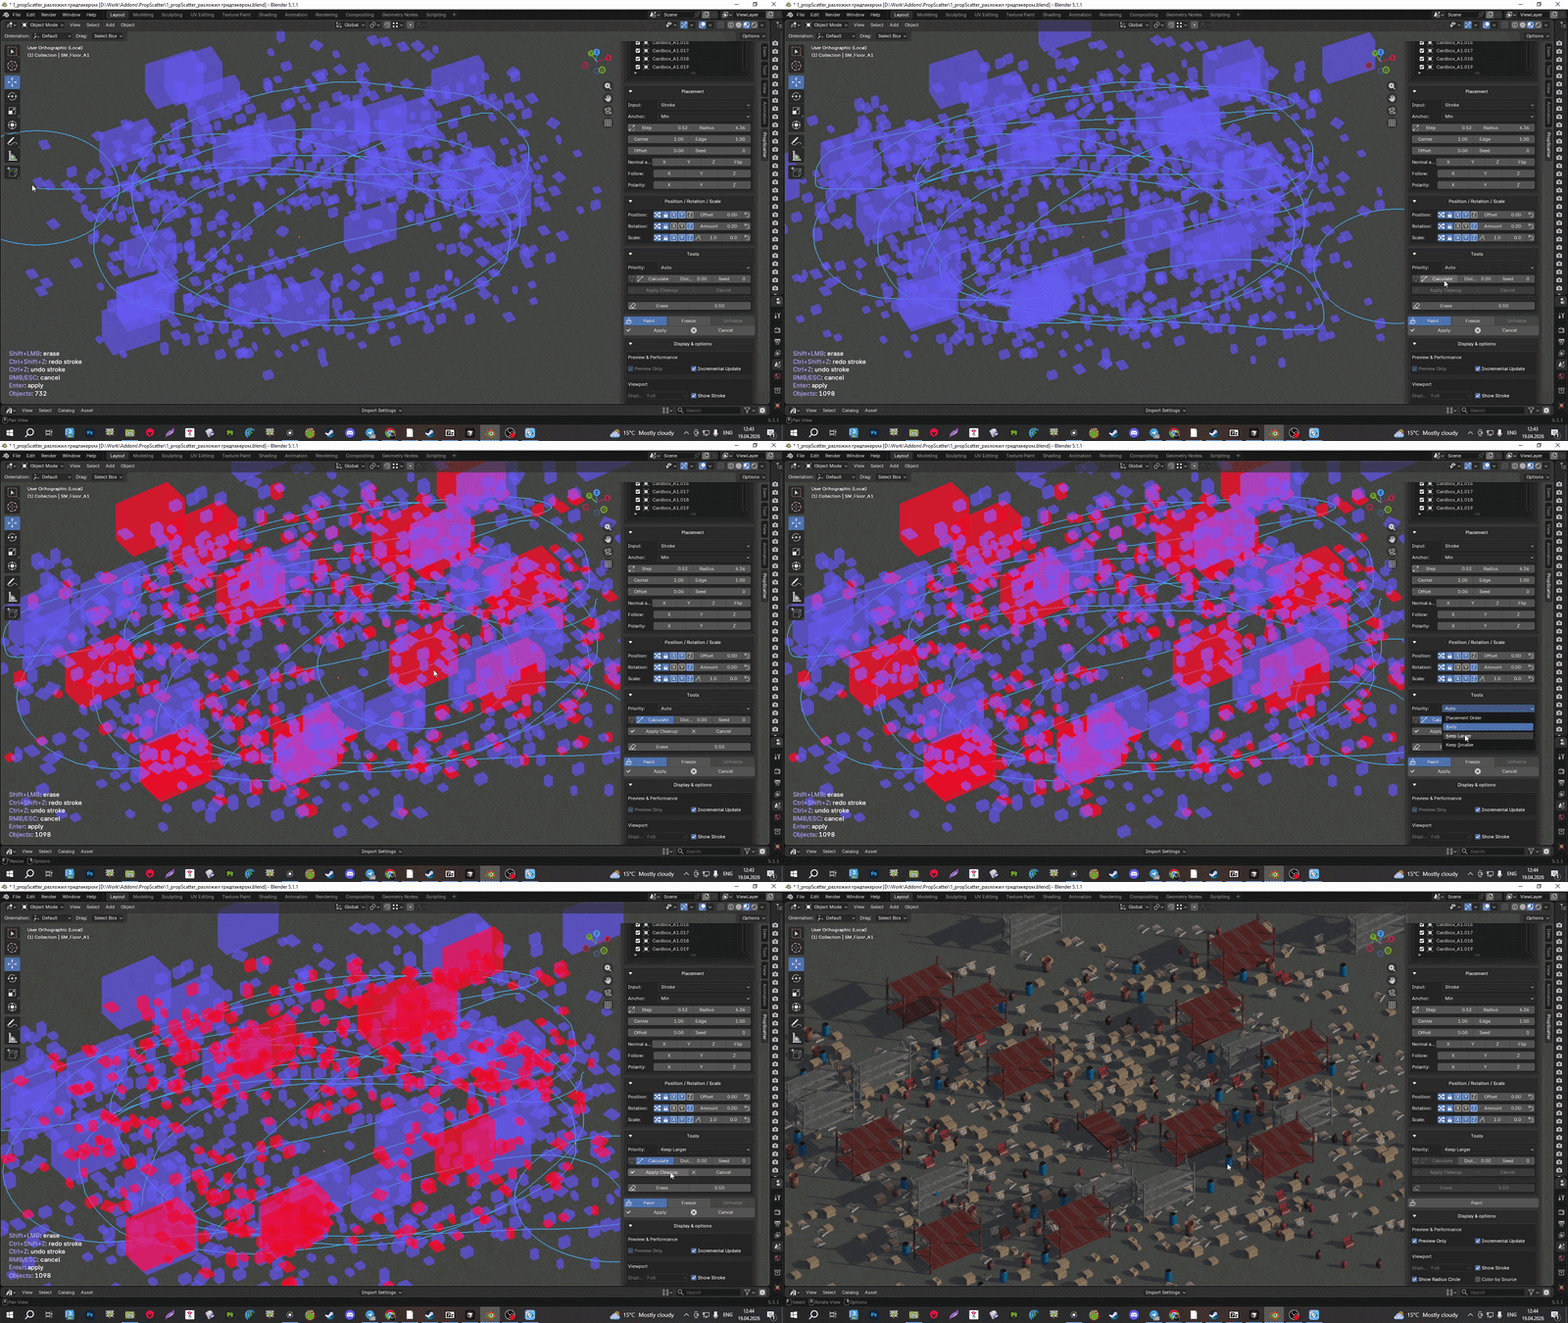
-
Cleanup pipeline
- Calculate in Preview Only works as a toggle with auto-recalc while painting.
- Calculate in real-objects mode runs a one-off pass and shows red overlap cubes for objects slated for removal.
- A compact Precise button with the MESH_DATA icon sits before Calculate: enables tighter mesh-to-mesh checks in real-objects mode, disabled in Preview Only and auto-reset when the Paint session ends.
- Fine-tune with Priority, Distance (minimum gap: 0.0 allows touching; higher values require more space), Random Seed.
- Apply Cleanup or cancel, depending on the result.
7. Finalizing the result
-
Ready for the scene
- Instance mode to save memory and stay fast.
- Control how the result draws in the viewport (see Display above).
- Auto-select placed objects when finishing.
- Optional duplifaces bake on exit.
- Optional random wire color (Random Wire Color) to tell instances apart.
Align
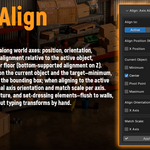
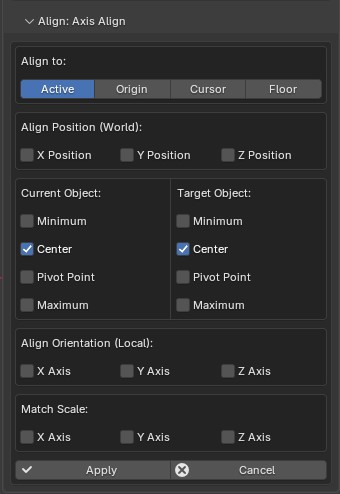
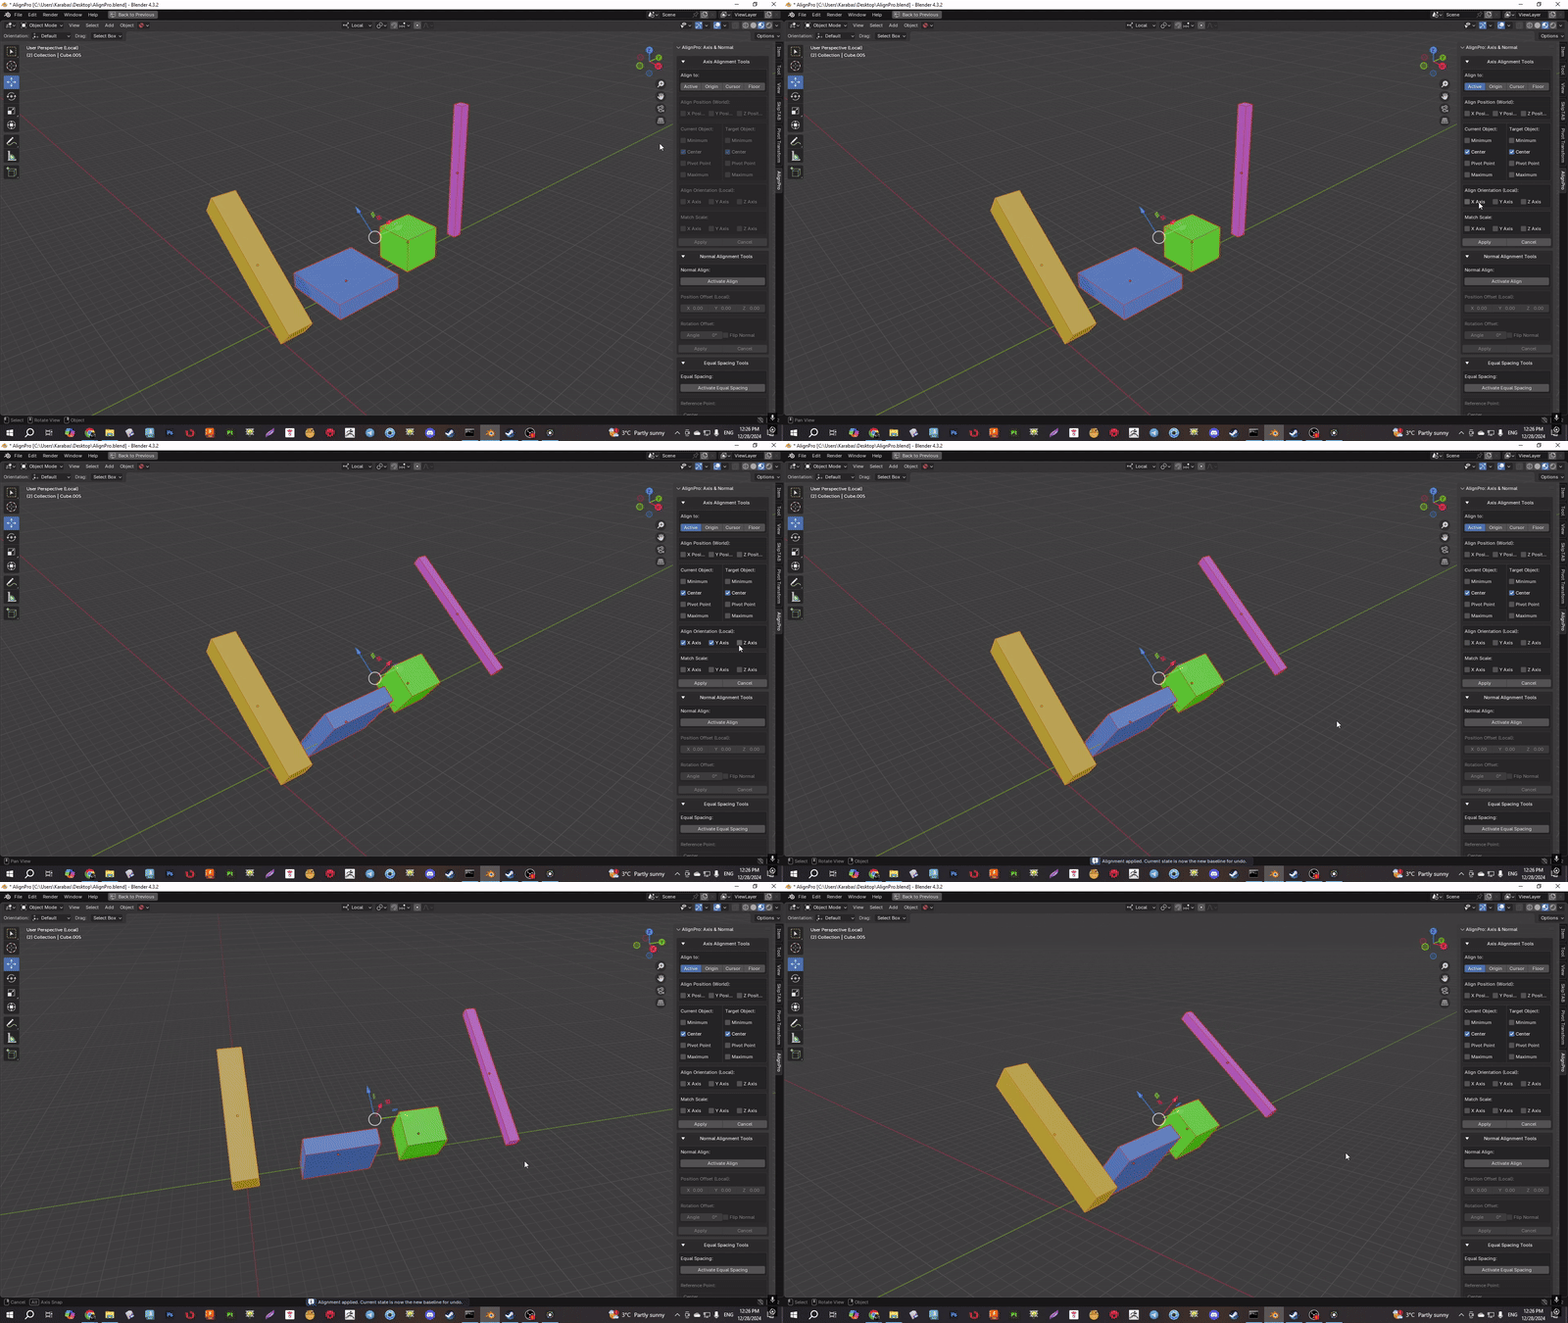
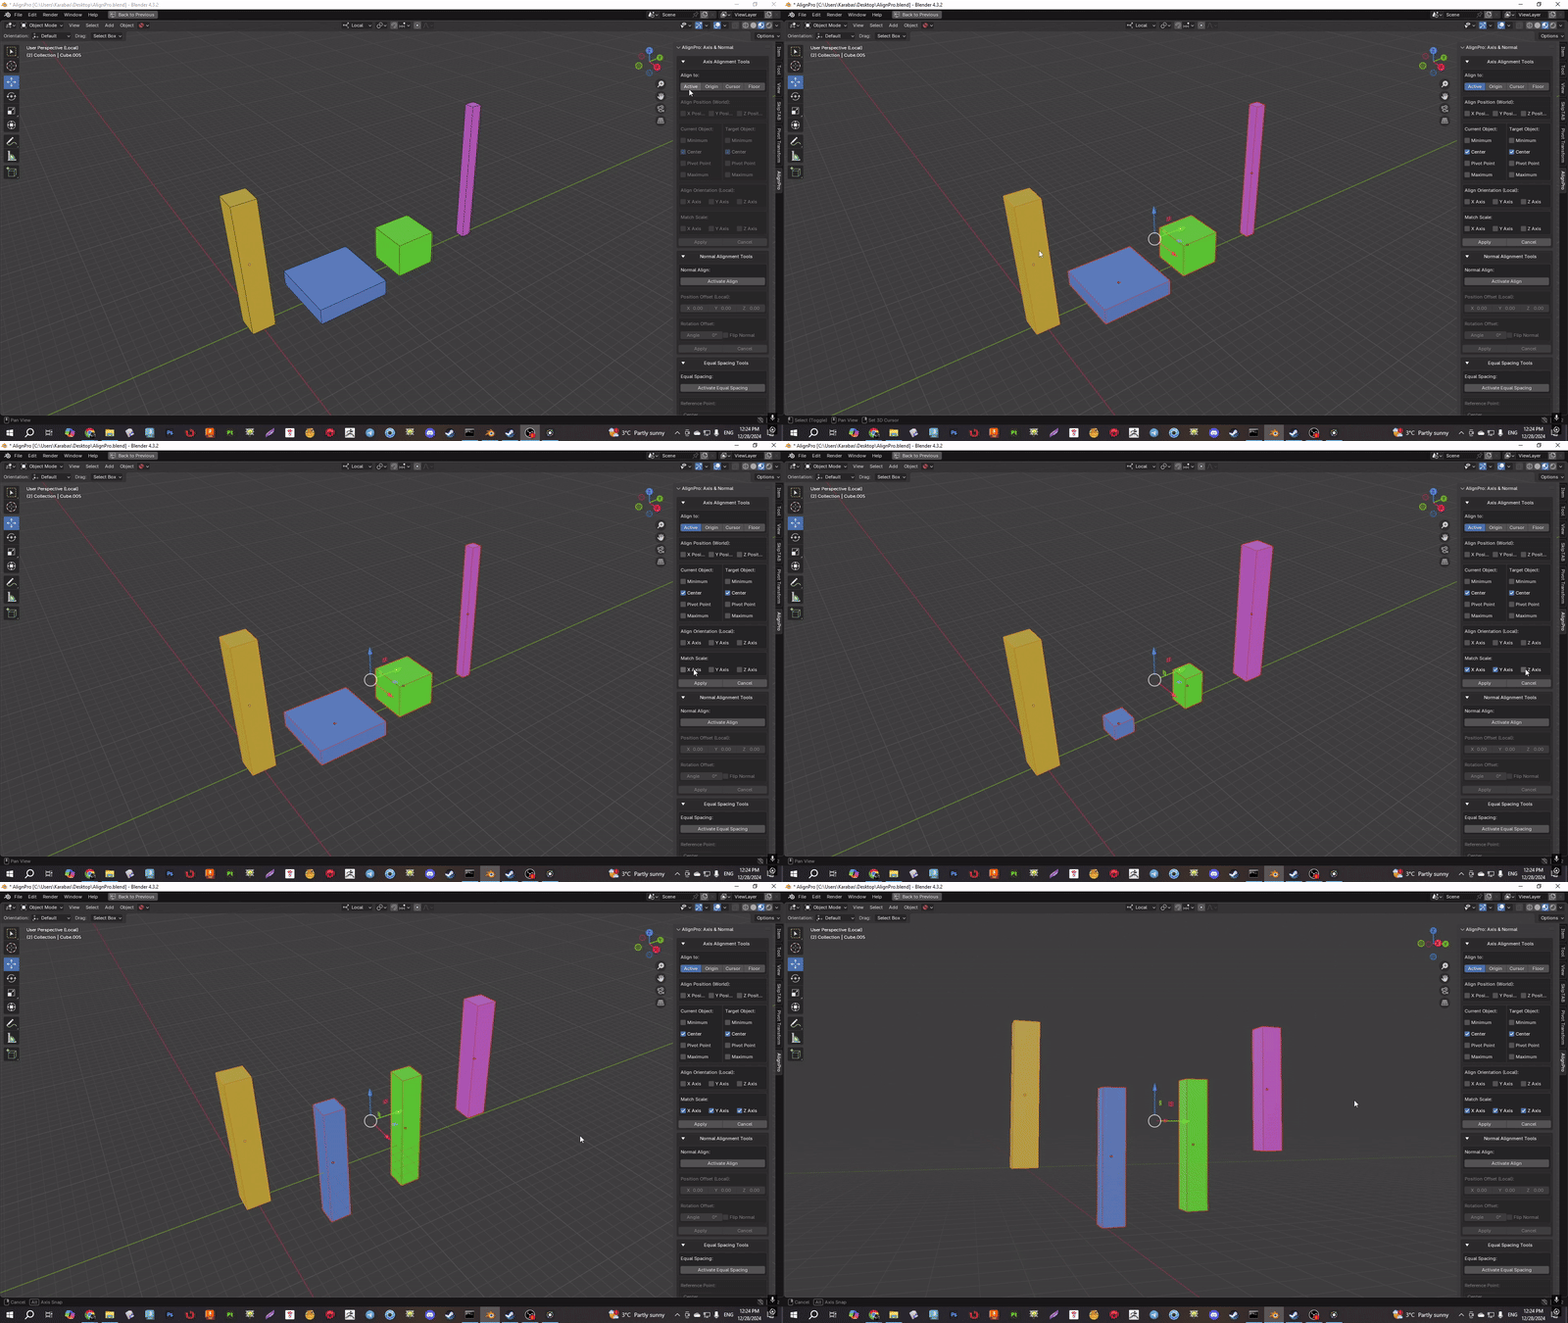
Align aligns selected objects along world axes: position, orientation, and optionally scale. Choose alignment relative to the active object, scene origin, the 3D cursor, or floor (bottom-supported alignment on Z). Per axis, pick what to match on the current object and the target—minimum, center, pivot, or maximum of the bounding box; when aligning to the active object you can also match local axis orientation and match scale per axis. Ideal for lining up props, furniture, and set dressing elements—flush to walls, floors, and each other—without typing transforms by hand.
-
Reference points and targets
- Alignment relative to other objects, world origin, 3D cursor, or floor plane.
- Reference points on the current and target sides: bounding-box minimum, maximum, center, or pivot.
-
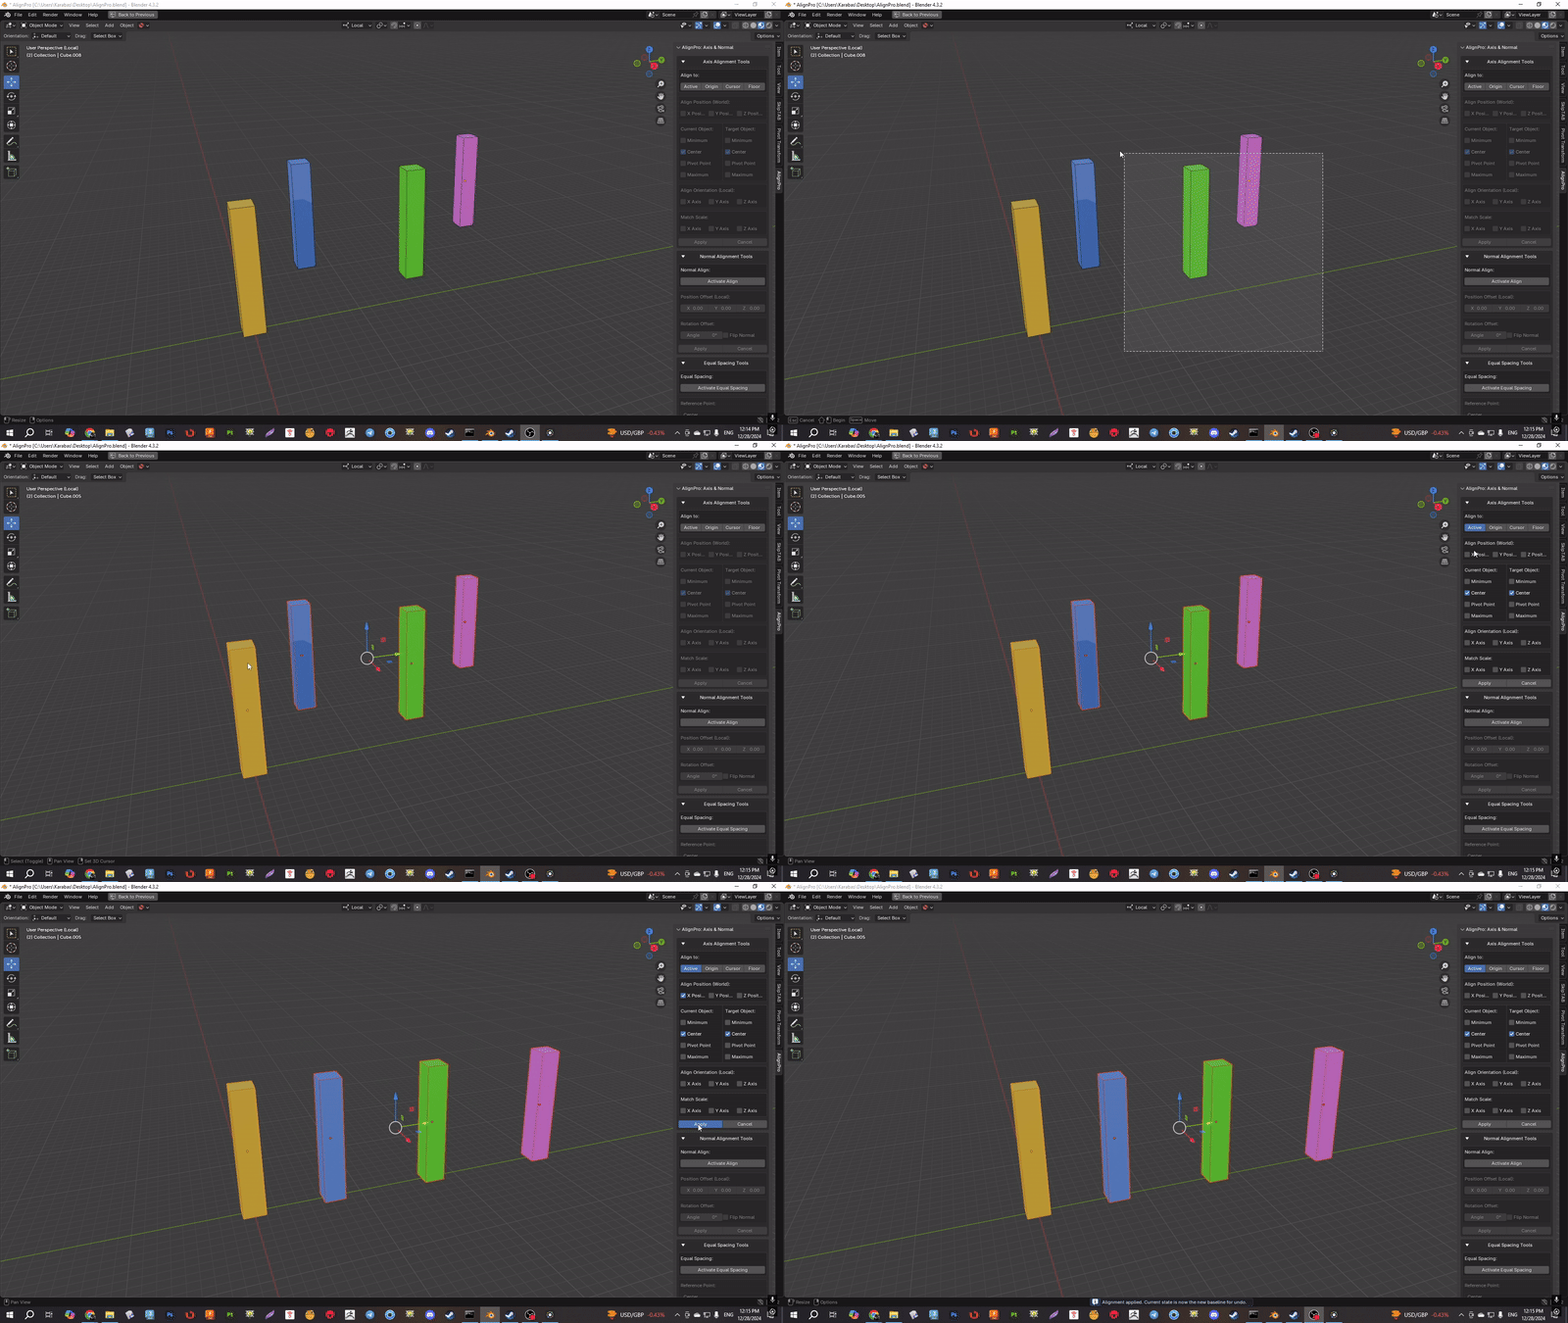
Active mode
- Align one or more selected objects to the active object as the target.
-
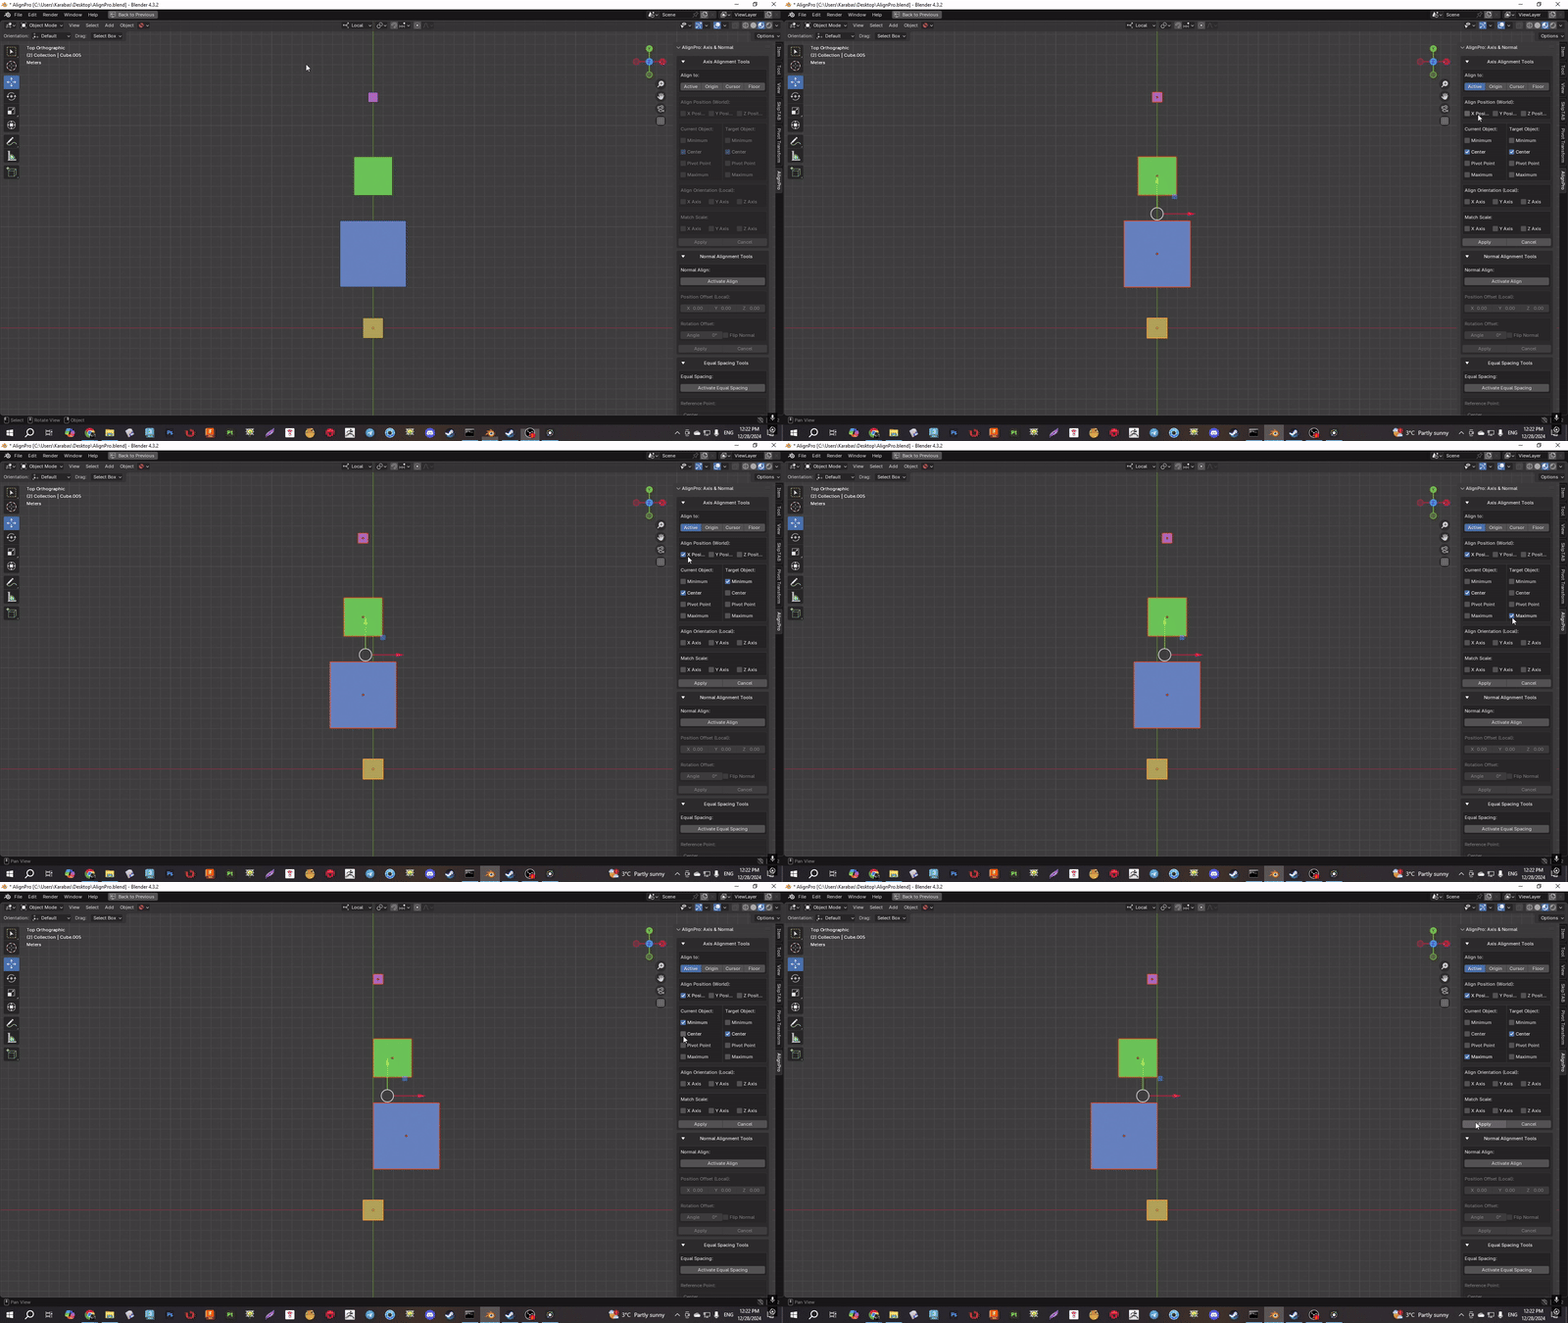
Current and target
- Independent minimum, center, pivot, and maximum for current vs. target.
-
Orientation and scale
- Match rotation on chosen axes to the target and fit scale to the target bounds.
Normal Align
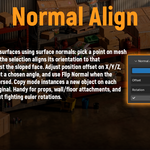
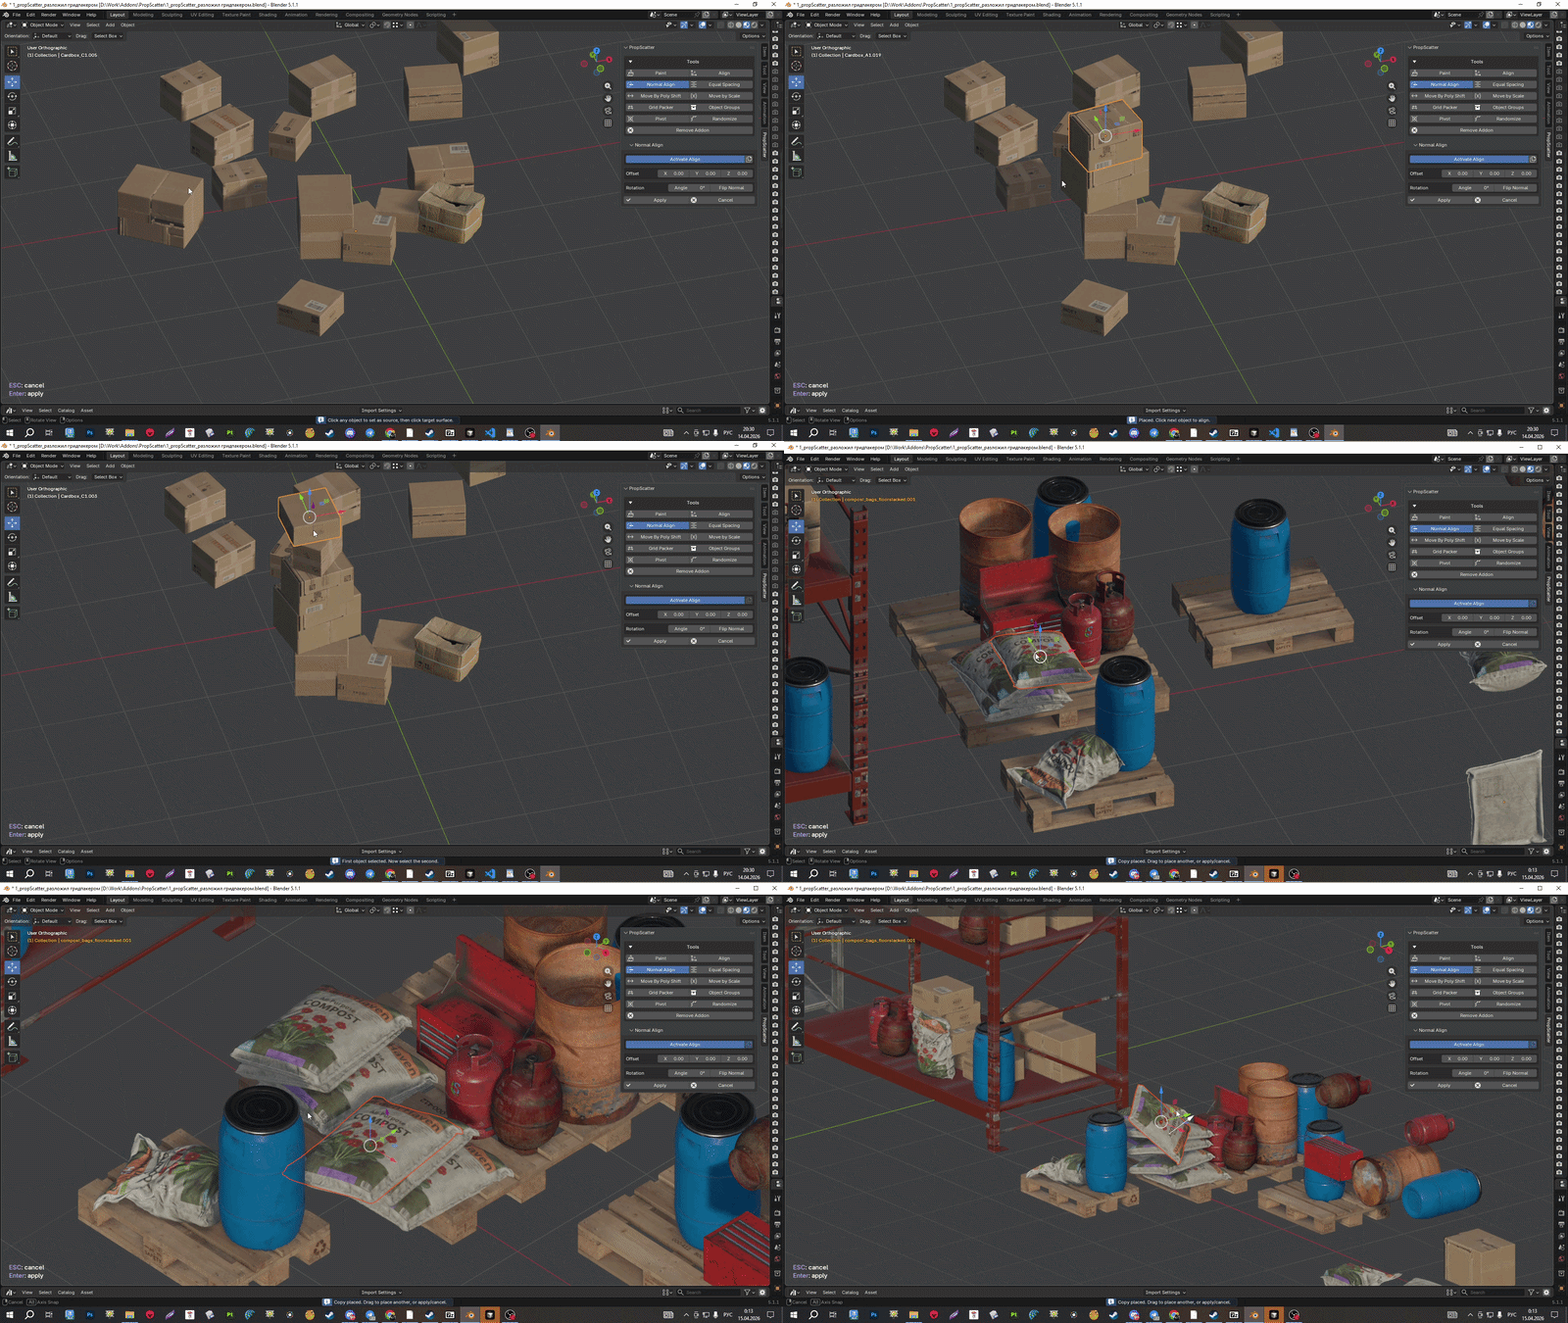
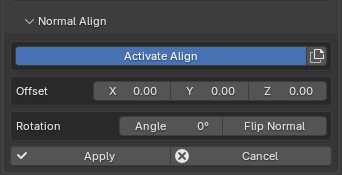
Normal Align snaps objects to surfaces using surface normals: pick a point on mesh geometry in the viewport, and the selection aligns its orientation to that normal—as if it sits flush against the sloped face. Adjust position offset on X/Y/Z, add a spin around the normal at a chosen angle, and use Flip Normal when the facing direction should be reversed. Copy mode instances a new object on each click instead of moving the original. Handy for props, wall/floor attachments, and fast orientation tweaks without fighting Euler rotations.
-
- A point on one surface and a point on another: the object moves and rotates so the normals match.
- Invert the normal, position and rotation offsets, viewport normal gizmo visualization.
Equal Spacing
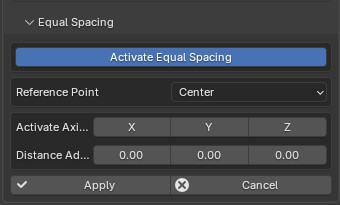
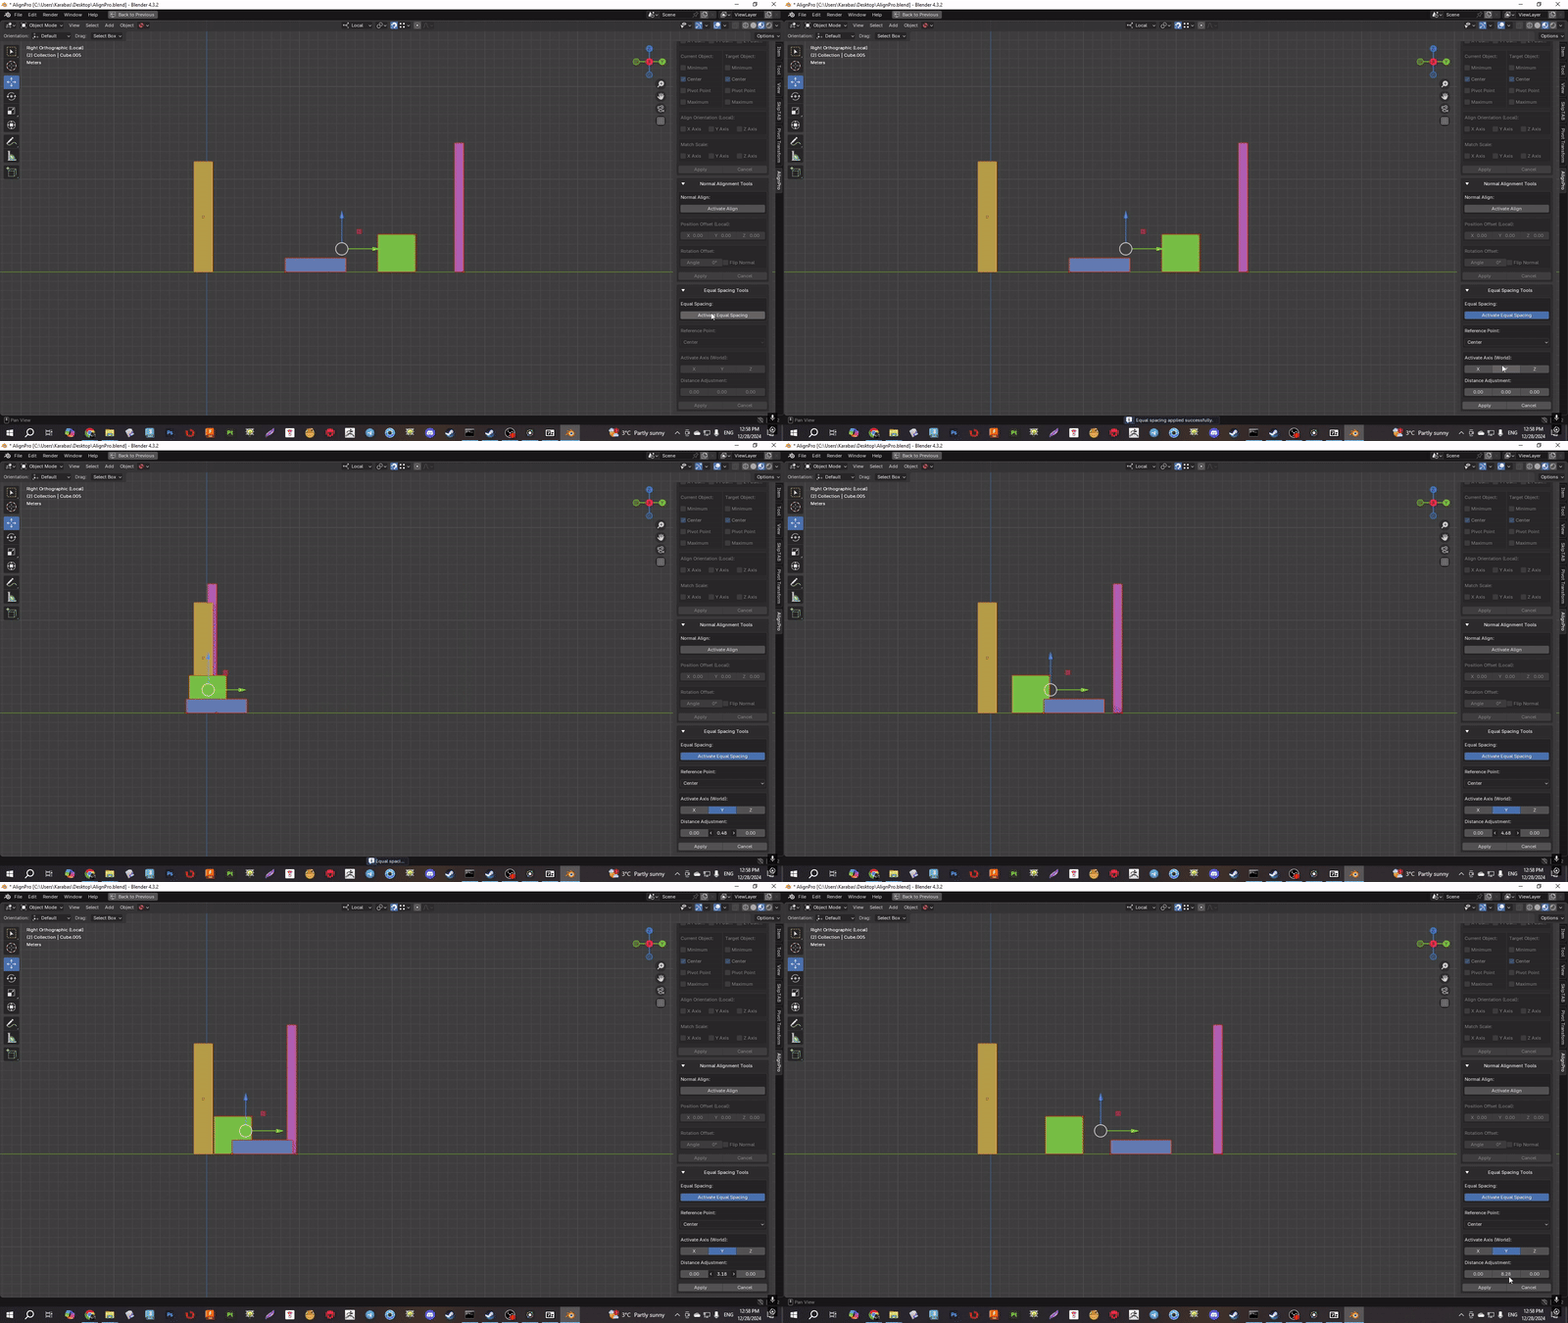
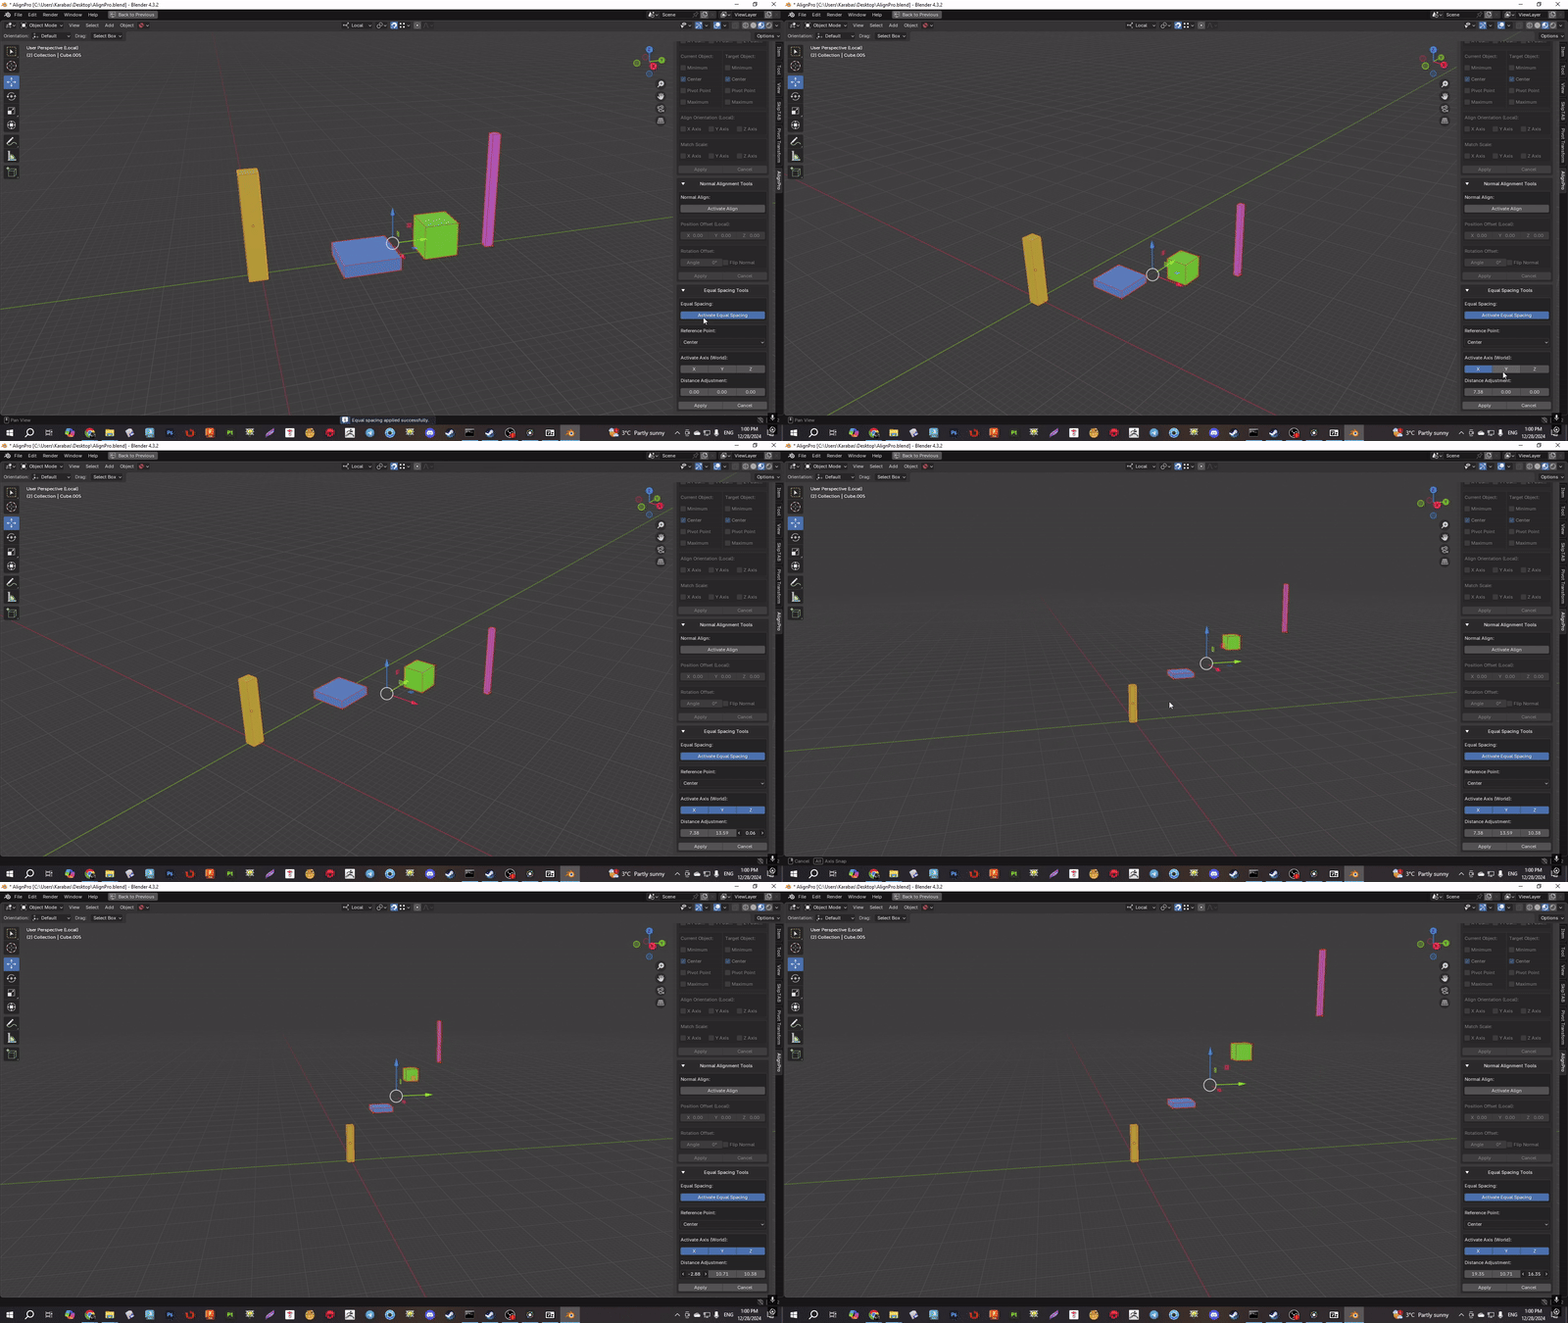
Equal Spacing distributes multiple selected objects with even gaps along world X, Y, and Z—toggle each axis independently. Pick a reference point for the layout: combined bounding-box center, overall minimum or maximum, each object's bounding-box center, or pivot points. After activation, set per-axis distance with Distance Adjustment; while the tool runs, positions update live until you confirm with Apply or stop with Cancel. Ideal for tidy rows of shelves, lights, columns, and repeating props without hand-placing every step.
-
- Distribute selected objects along X, Y, and/or Z with equal gaps. Reference points min, max, center, pivot for even layouts.
Move by Poly Shift
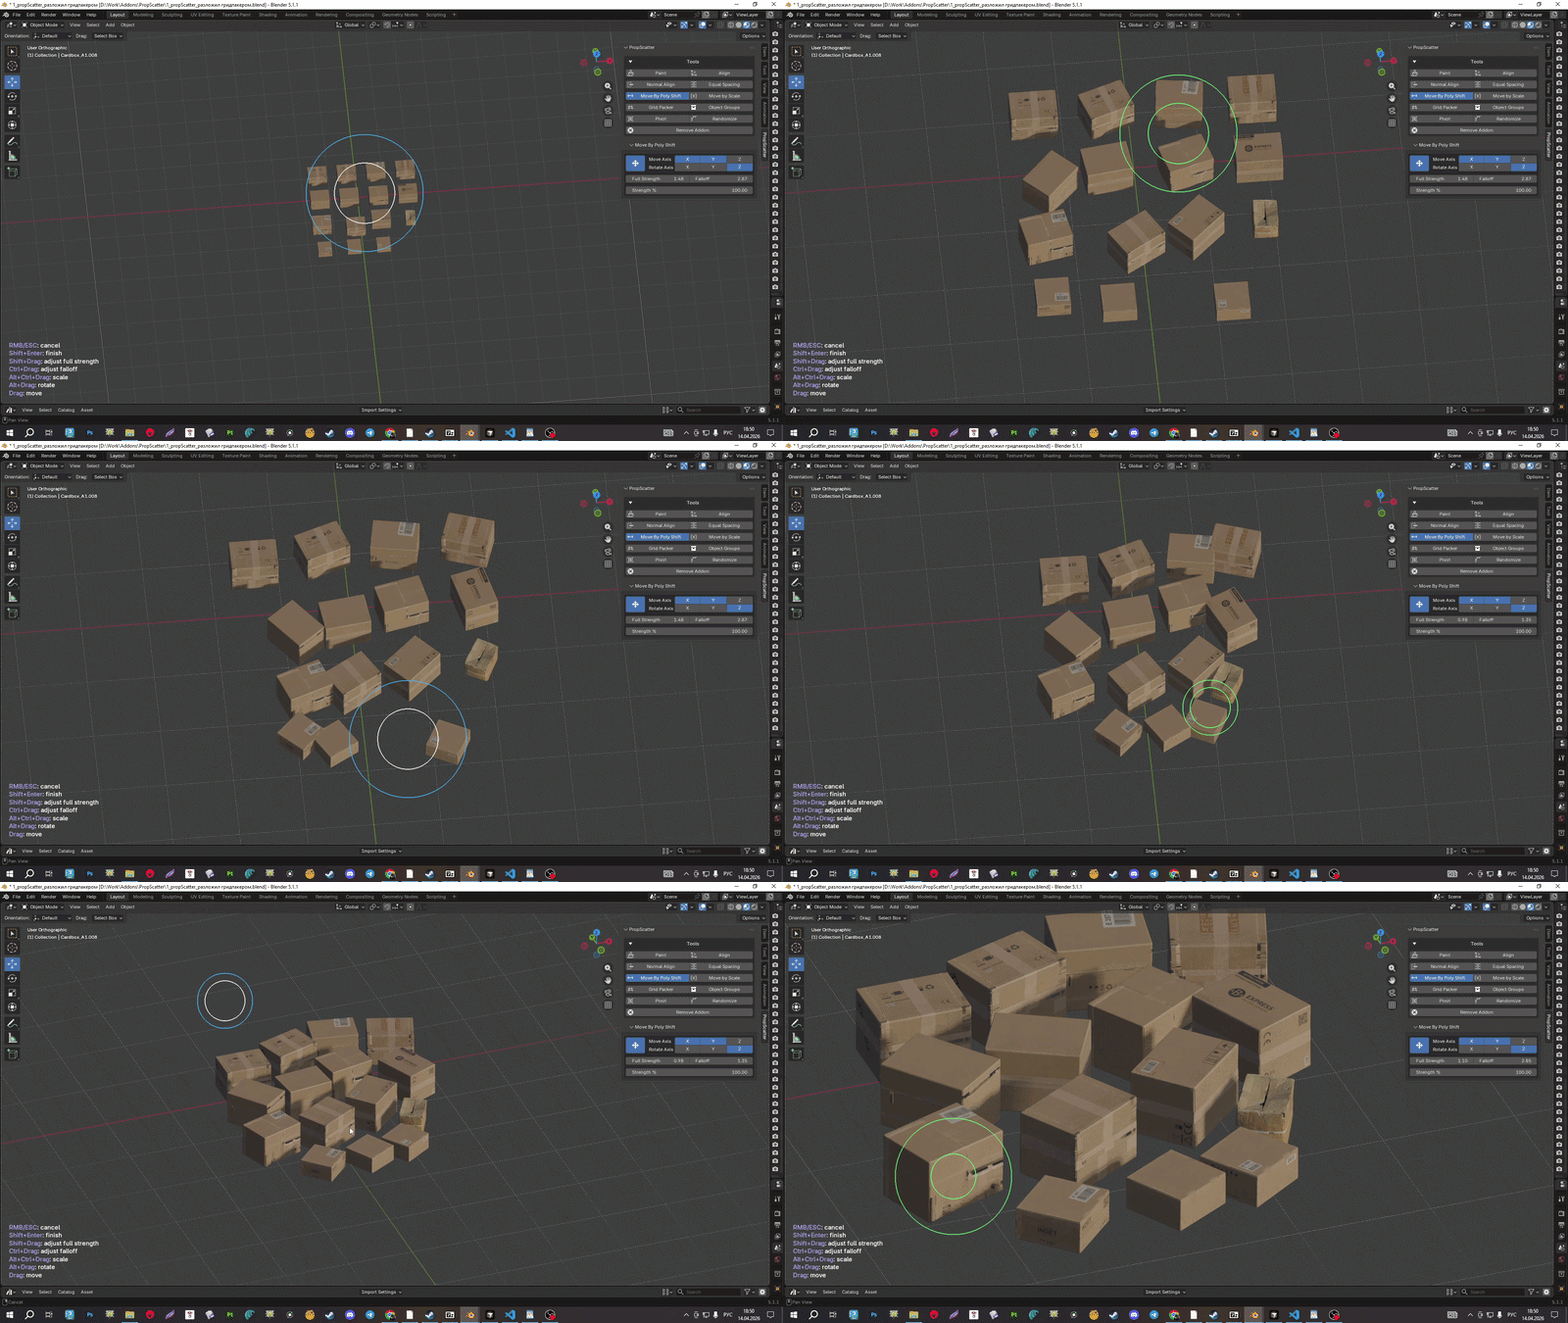
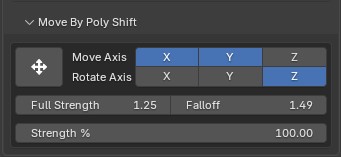
Move by Poly Shift is a viewport brush for nudging many objects at once—move, rotate, and scale with a falloff, in the spirit of Sculpt, but for transforms. Use it in Object Mode on mesh objects and PropScatter group empties. Toggle which world axes contribute to translation and rotation; tune the brush with Full Strength, Falloff, and overall Strength %. Drag moves along the enabled axes; Alt+drag rotates; Alt+Ctrl+drag scales. Ideal for soft layout passes and mass tweaks without editing objects one by one.
-
Brush-driven transforms
- In Object mode the tool works on meshes: first the selection, or if nothing is selected, every mesh in the scene.
- A circular brush in the view sets effect strength: objects at the center move, rotate, or scale fully; influence falls off toward the edge (strength depends on each object’s position vs. the brush).
- Drag to move; Alt — rotate around the chosen axis; Alt+Ctrl — scale; all weighted by the brush.
-
Panel
- Enable move axes (X, Y, Z), pick the rotation axis, tune Full Strength, Falloff, and overall Strength %.
Move by Scale
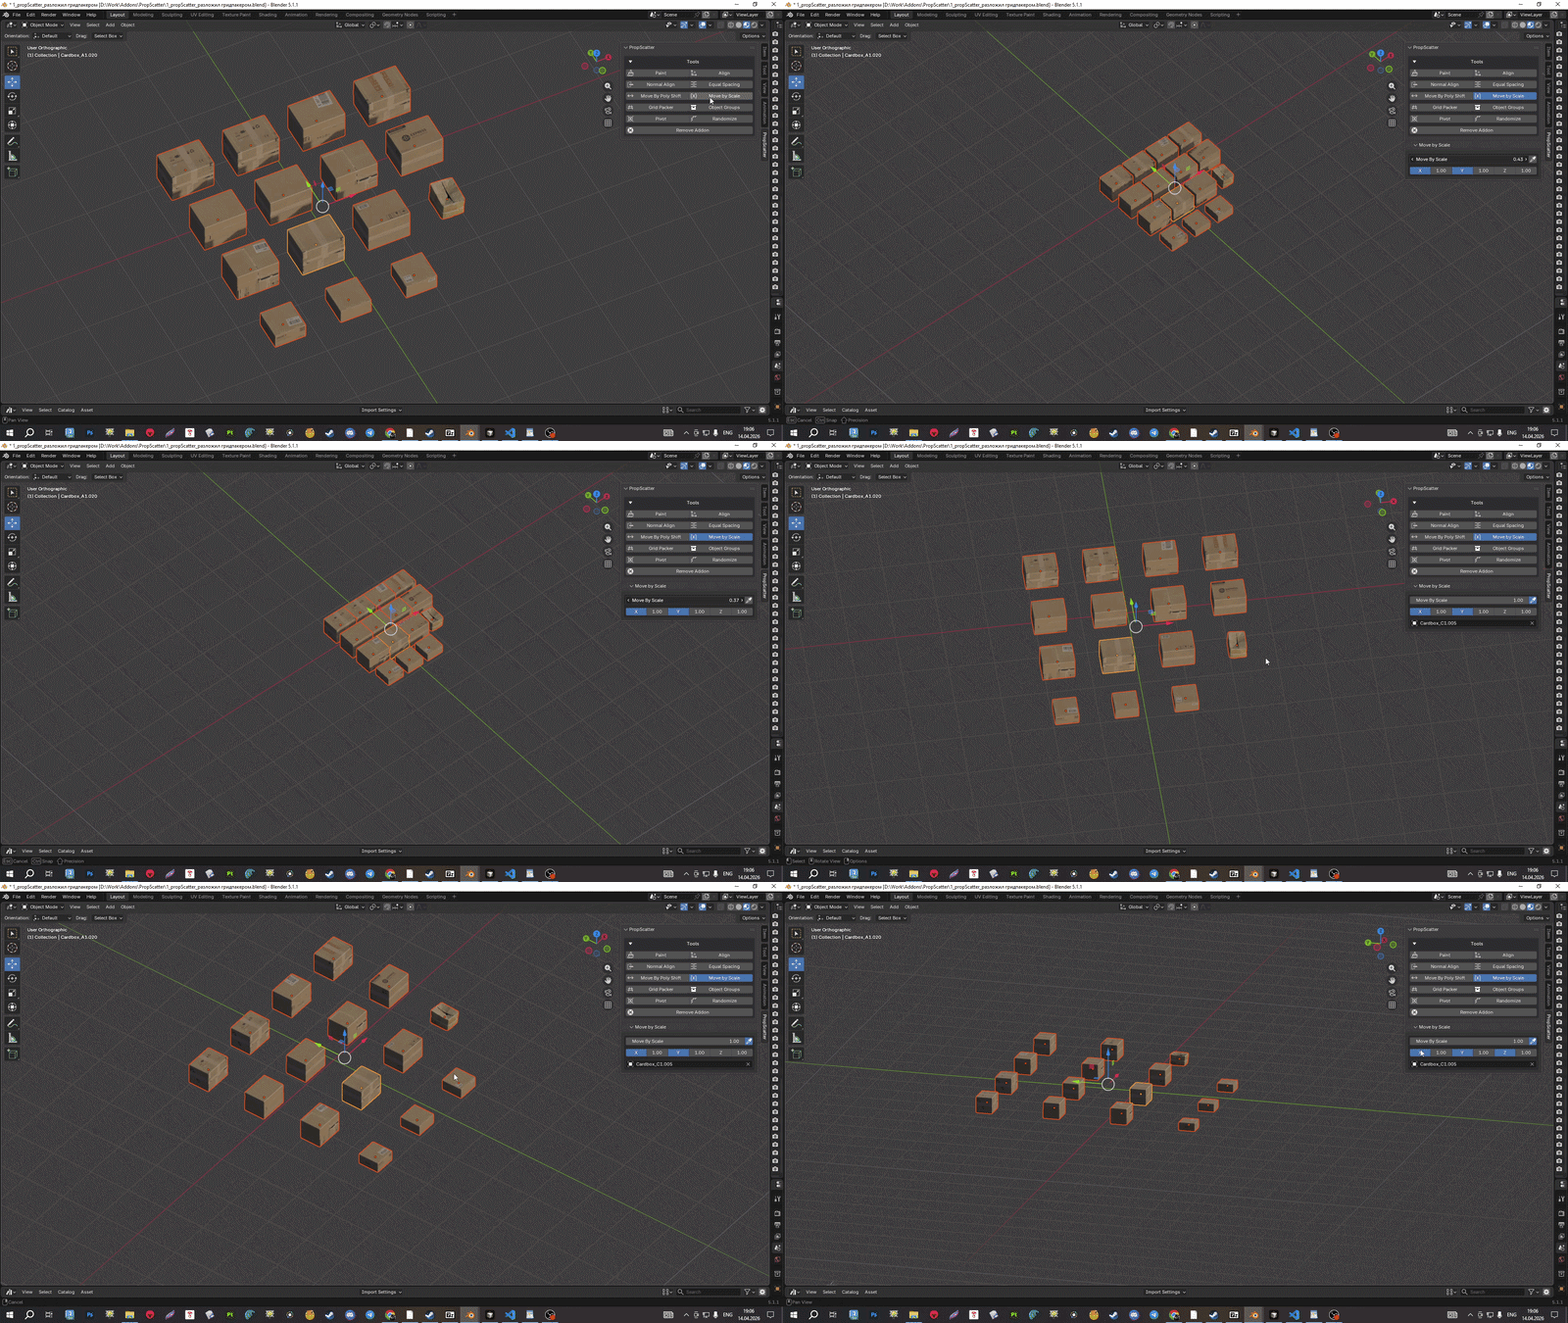
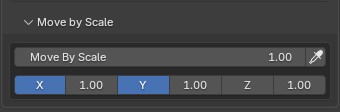
Move by Scale compresses or expands the entire selected layout around a shared pivot by scaling each object's offset from that center—like scaling positions, not mesh scale—so the group moves inward or outward in one controlled motion. By default the pivot is the average of selection bounding-box centers; Pick Center (eyedropper) uses a chosen object's center instead. A global factor plus per-axis X/Y/Z factors are available, with axis toggles. Use it to tighten or loosen prop arrangements, adjust spacing as a whole, or reshape a block of objects without editing transforms one by one.
-
Layout from a center
- In Object mode select objects. The tool measures distances from a shared layout center (average of bounding-box centers) and moves objects so spacing scales — the group compresses or expands without changing object scale values.
- Optional Pick center: eyedropper to set the center from one object’s bounds. Right-click the eyedropper with an active object to use it as the center.
-
Controls
- The main Move by Scale slider sets the spread multiplier; X / Y / Z choose world axes.
- Per-axis sliders stretch or compress spread along one axis. Shift+click an axis button to isolate it.
Grid Packer
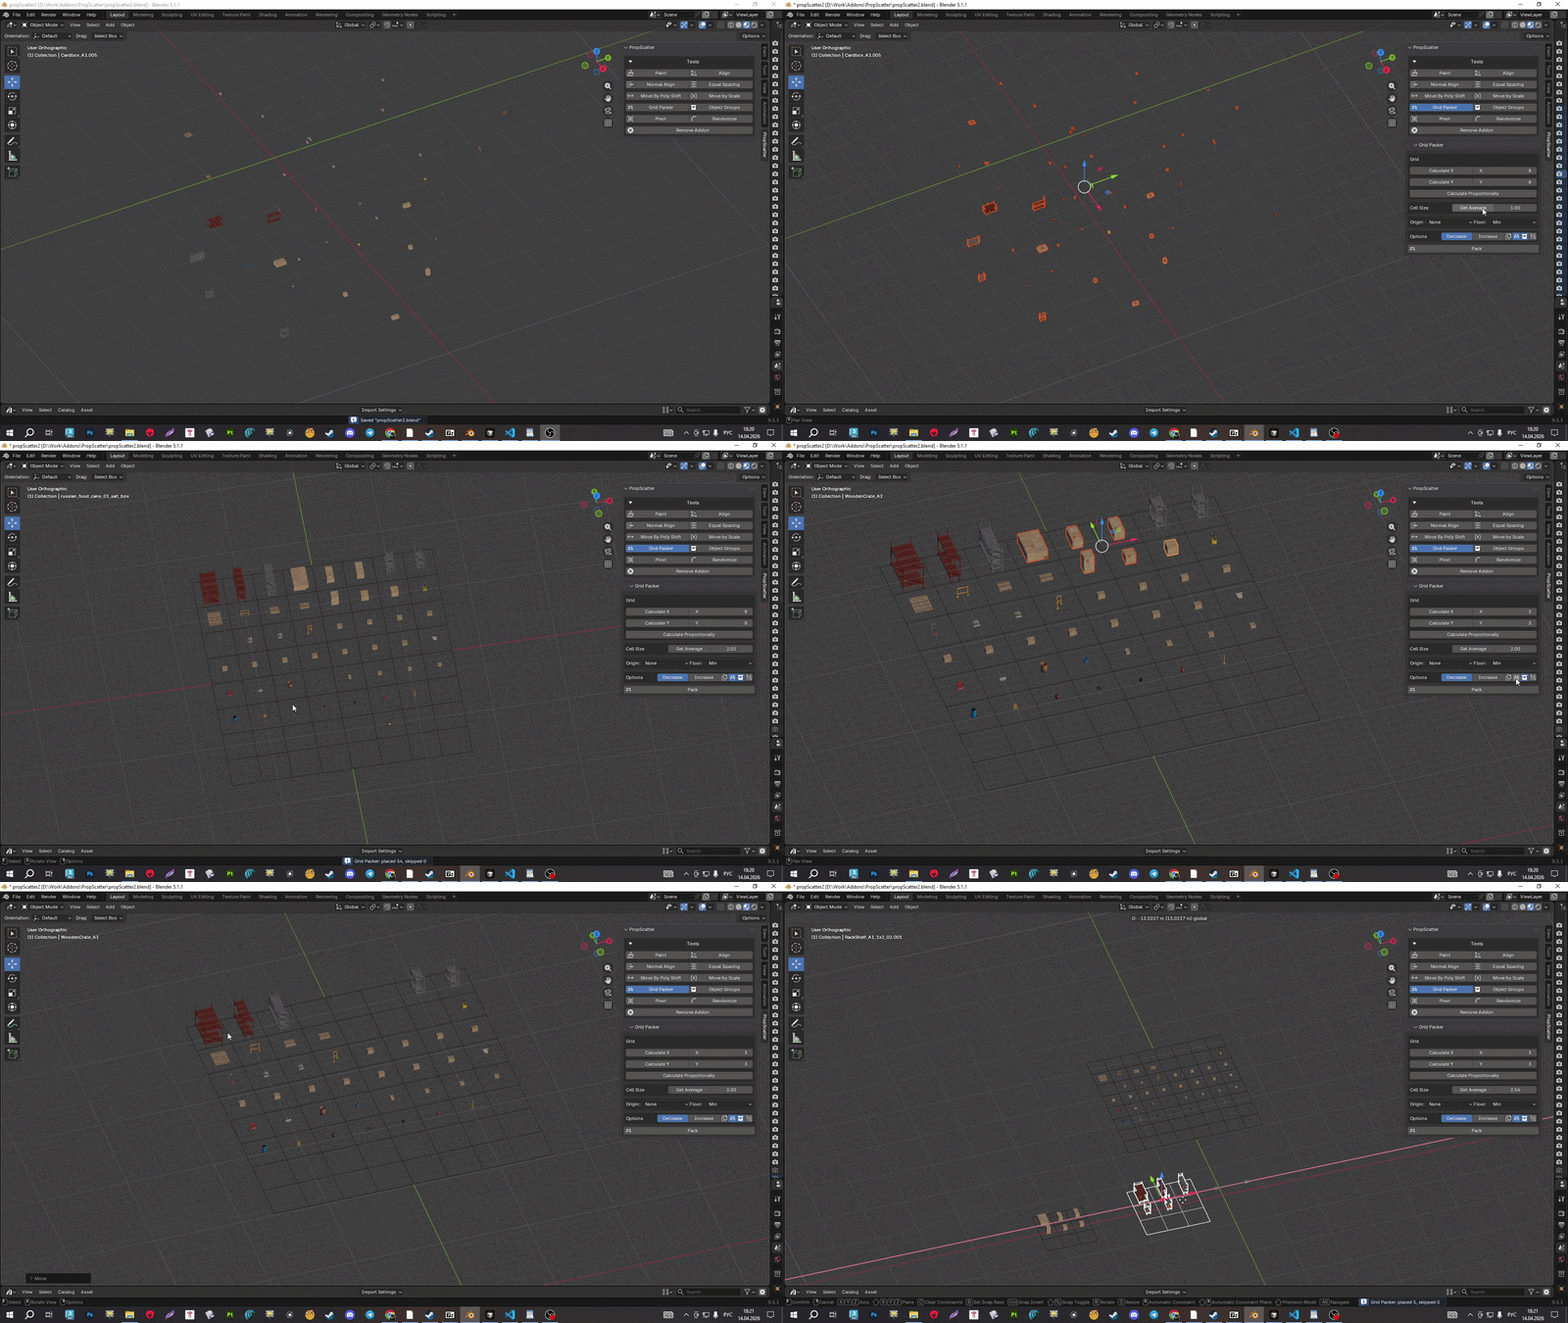
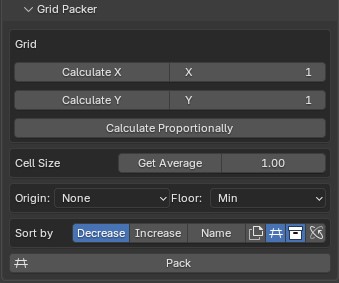
Grid Packer arranges selected objects into a rectangular grid on the world XY plane: set cell counts on X and Y, spacing between cell centers (including an average-from-selection helper), and fill order—largest-first or smallest-first by XY footprint, or by name. Snap each object's bottom, middle, or top in Z to the grid floor, and choose where origins end up after packing (unchanged, or min / max / center in height and XY). Optional duplicate-then-pack, spawn a wireframe grid mesh as a guide, move results into a collection, and align objects to world axes before packing for clean axis-aligned footprints. Ideal for floor grids, kit layouts, and library-style object organization.
-
Pack to a floor grid
- In Object mode select meshes and run Pack. Objects line up on a regular grid in the horizontal plane (world XY, up Z), centered at the origin — handy for kits, trim, and export blocks.
- Set cell counts on X and Y or quick presets based on object count (including roughly square splits). Cell size manually or Get Average from horizontal bounds of the selection.
- Sort fills the grid by size (large to small or reverse) or by Name with natural order (letters, numbers, and indices). Extra objects stay put and stay selected.
-
Placement options
- Floor — lower, middle, or upper bbox level to the grid “floor”. Origin — optional pivot shift after packing (none, bottom, top, or true bbox center).
- Align to Grid straightens world rotation before packing. Duplicate — pack copies; wireframe grid — guide mesh; GridPacker collection — optional.
Object Groups
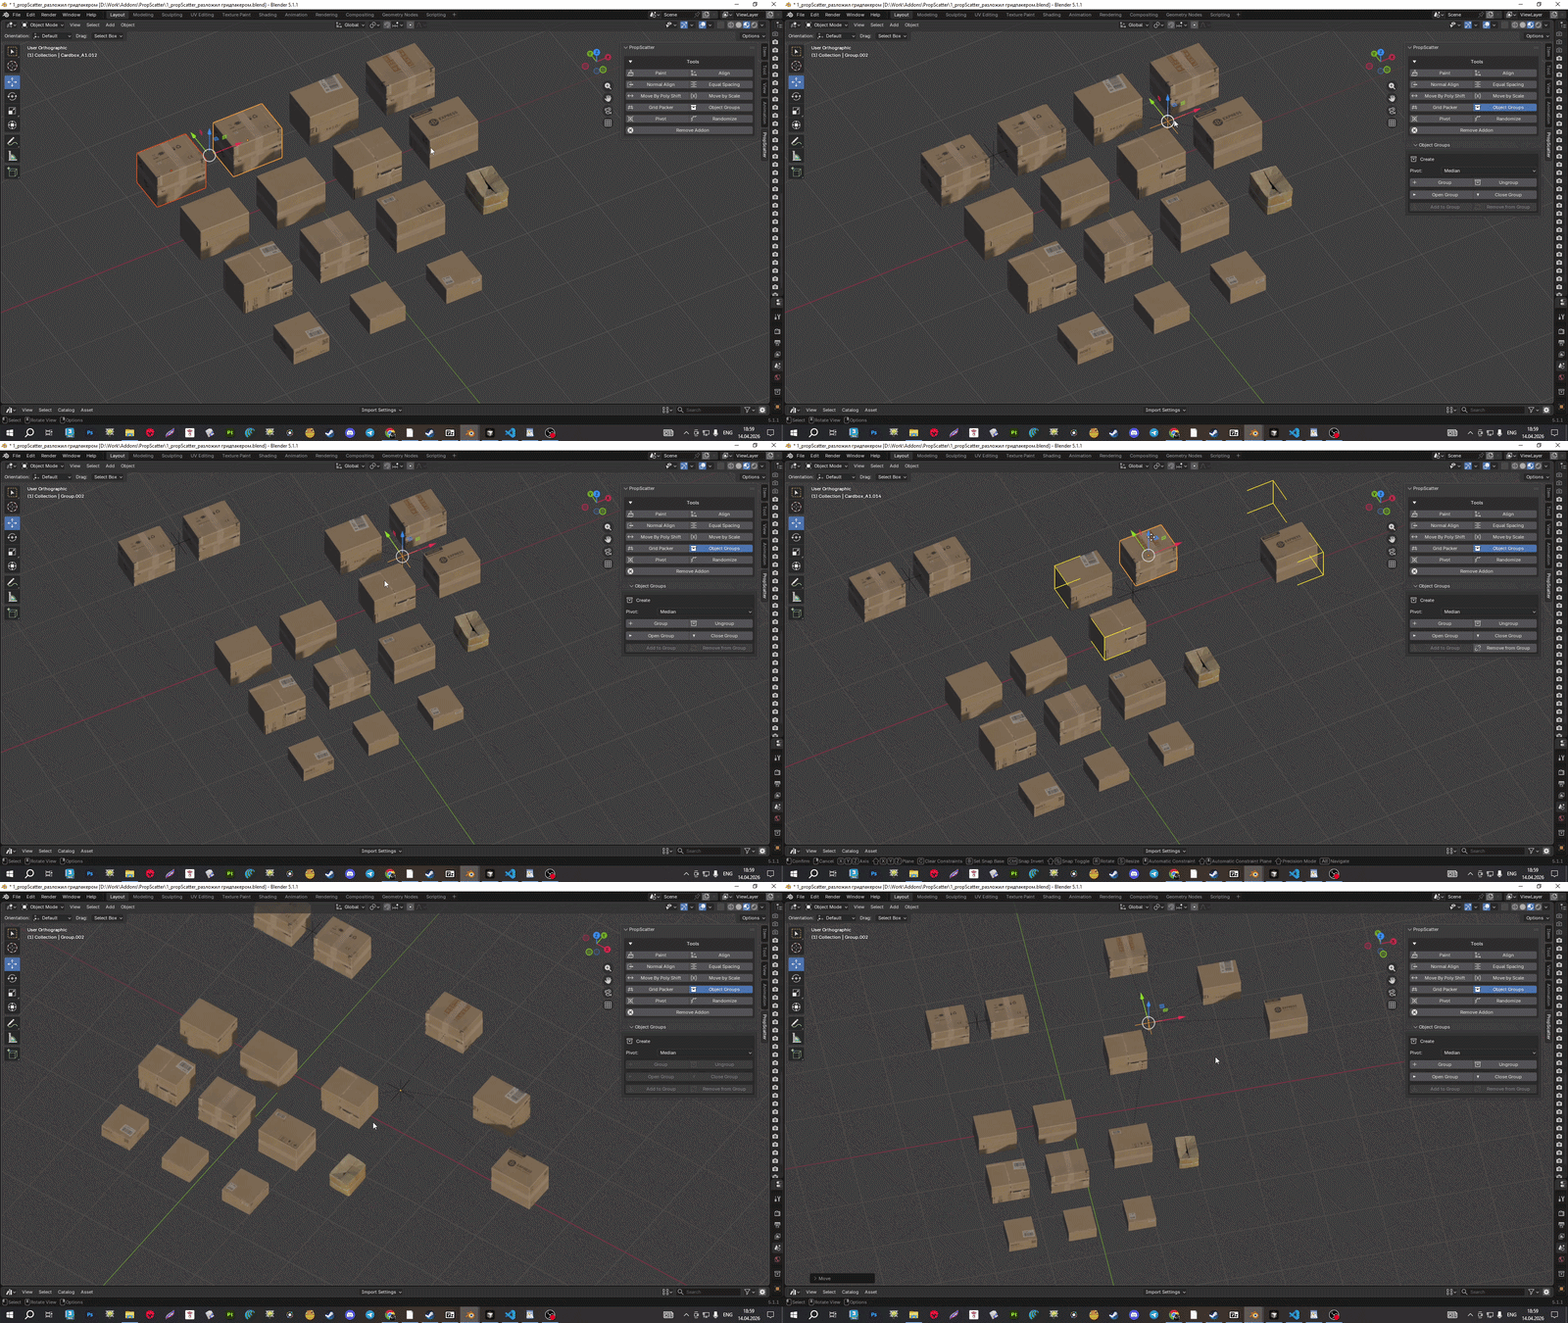
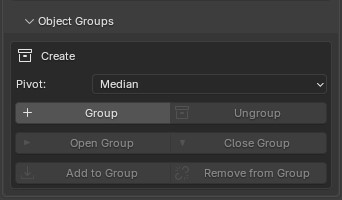
The Object Groups tool wraps the selection into a PropScatter-marked pivot empty: children are parented with transforms preserved, and the empty is placed at the selection median, the active object, or the 3D cursor, depending on Pivot. Ungroup removes the outer wrapper, Add to Group parents more objects under the active group empty, and Remove detaches selections (orphan empties are cleaned up). Open and Close switch between editing contents comfortably and selecting the group empty again. Handy for kit-style assemblies, batch-moving props under one transform, and keeping hierarchies tidy without manual parenting busywork.
-
Create and edit
- In Object mode pick a pivot for new groups — selection median, active object, or 3D cursor. Group parents the selection under a compact axes empty (names like Group.001) while keeping transforms.
- Ungroup removes the outer PropScatter group; children stay in place. Add to Group — add objects under the active group empty; Remove from Group — detach selected (empty removed if only one child left).
- Open / Close Group — edit contents or work with the group empty; when open, the empty stays out of the way for selecting inside.
Pivot
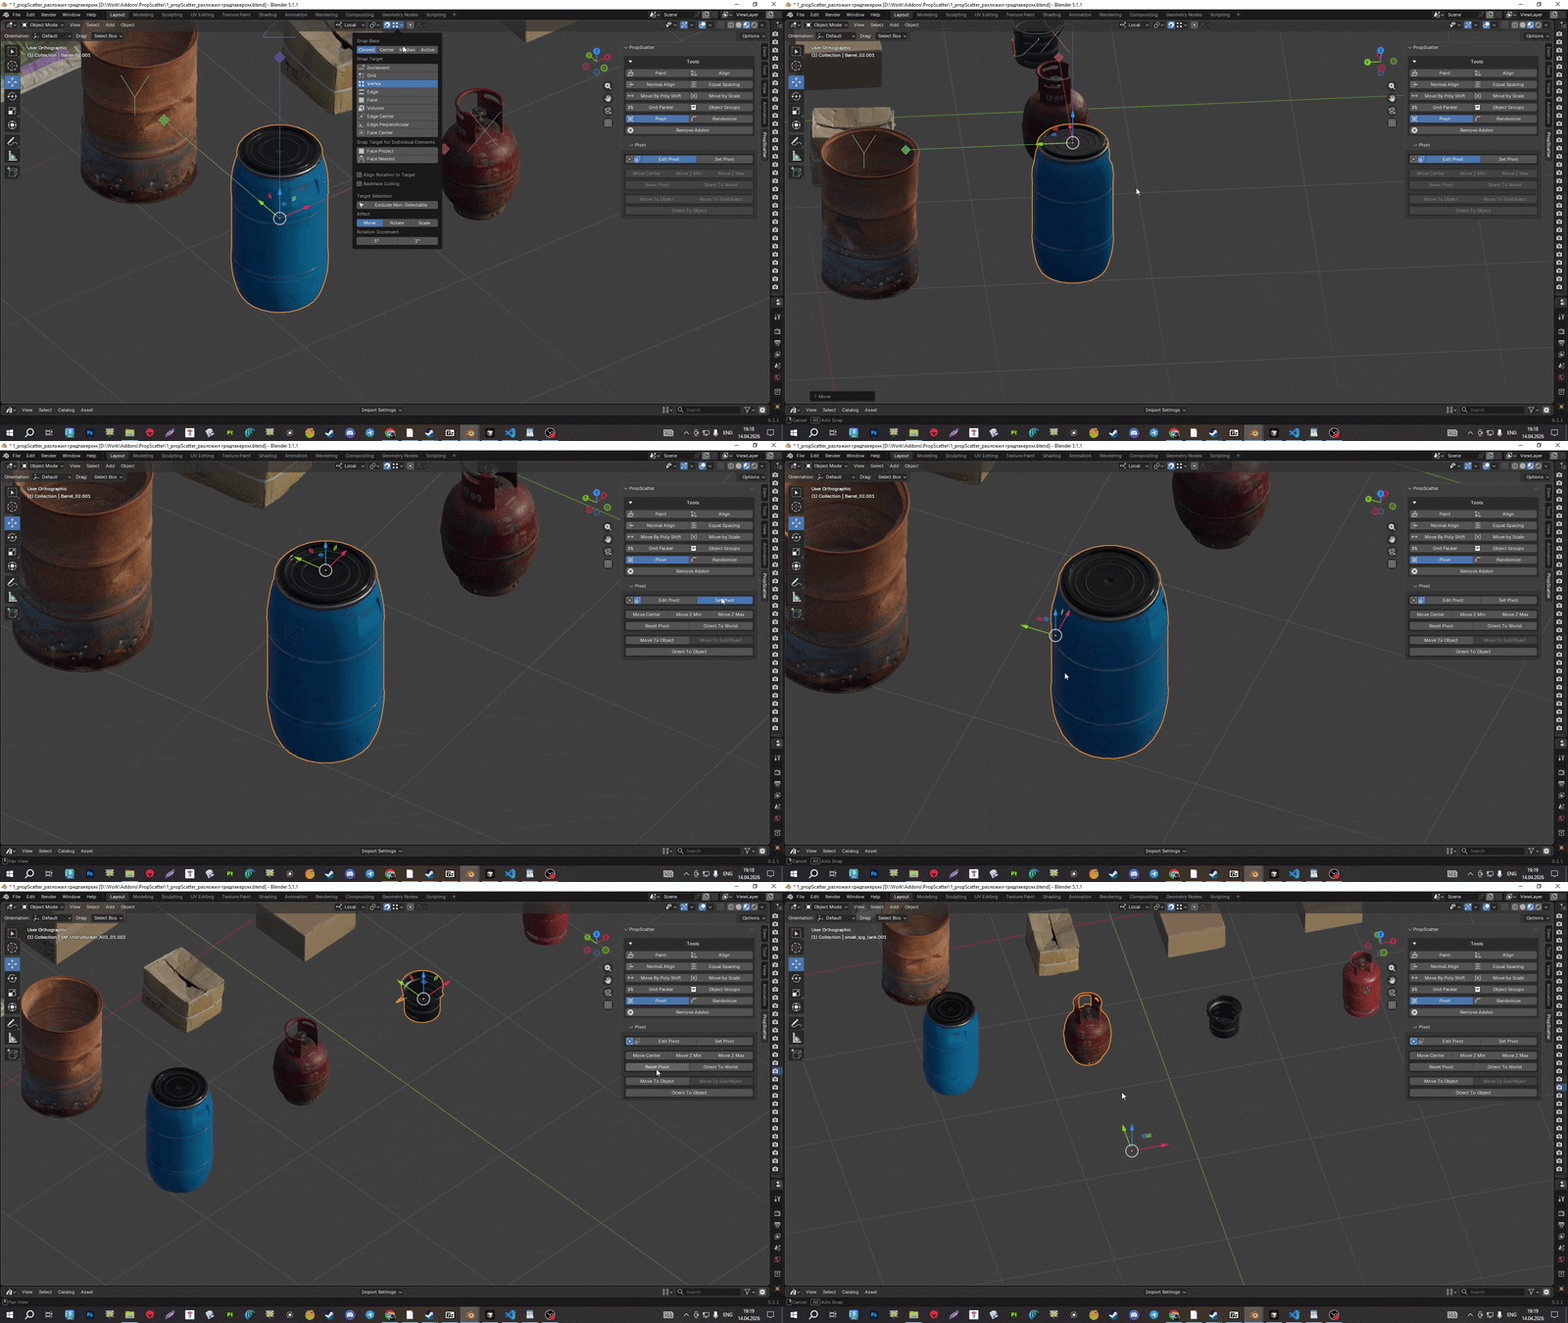
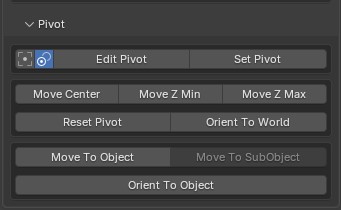
Pivot streamlines object origins: Multiple vs Single chooses whether operations use each object's own bounds or one combined selection bounds. Edit Pivot toggles pivot-only editing. Set Pivot snaps the origin to one of 27 lattice points around the bounding box. Move Center, Move Z Min, and Move Z Max place the origin at the bbox center, bottom, or top in world Z; Reset Pivot moves the origin to the geometric center (mesh vertex average) and aligns axes to the world; Orient To World aligns the pivot rotation to world axes while keeping mesh placement. Move To Object and Orient To Object use viewport picking; Move To SubObject targets the center of selected verts, edges, or faces in Edit Mode. Built for prop workflows, floor alignment, and clean origins before scattering or kit-style grouping.
-
Modes and quick moves
- For mesh, curve, surface, text, lattice: Multiple — each object’s own bounds; Single — one bbox for the whole selection (for Move Center, world Z Min / Max, and the lattice).
- Reset Pivot puts the origin at the mesh vertex average (other types — bbox center) and aligns the pivot to world axes. Orient To World — geometry stays put, pivot rotation matches global axes.
-
Set Pivot and Edit Pivot
- Set Pivot shows a 3×3×3 lattice on bounds — click a corner, edge, face, or center to move the origin, then exit.
- Edit Pivot enables transforms on the origin only (like “affect pivot only”): Move tool and local orientation for manual tweaks.
-
Pick in the viewport
- Move To Object — click a visible mesh; selected objects’ origins meet its position. Move To SubObject — in Edit mode, origin to the average of selected verts, edges, or faces.
- Orient To Object — click a mesh to copy rotation to the selection’s pivots; right-click — also position.
Randomize
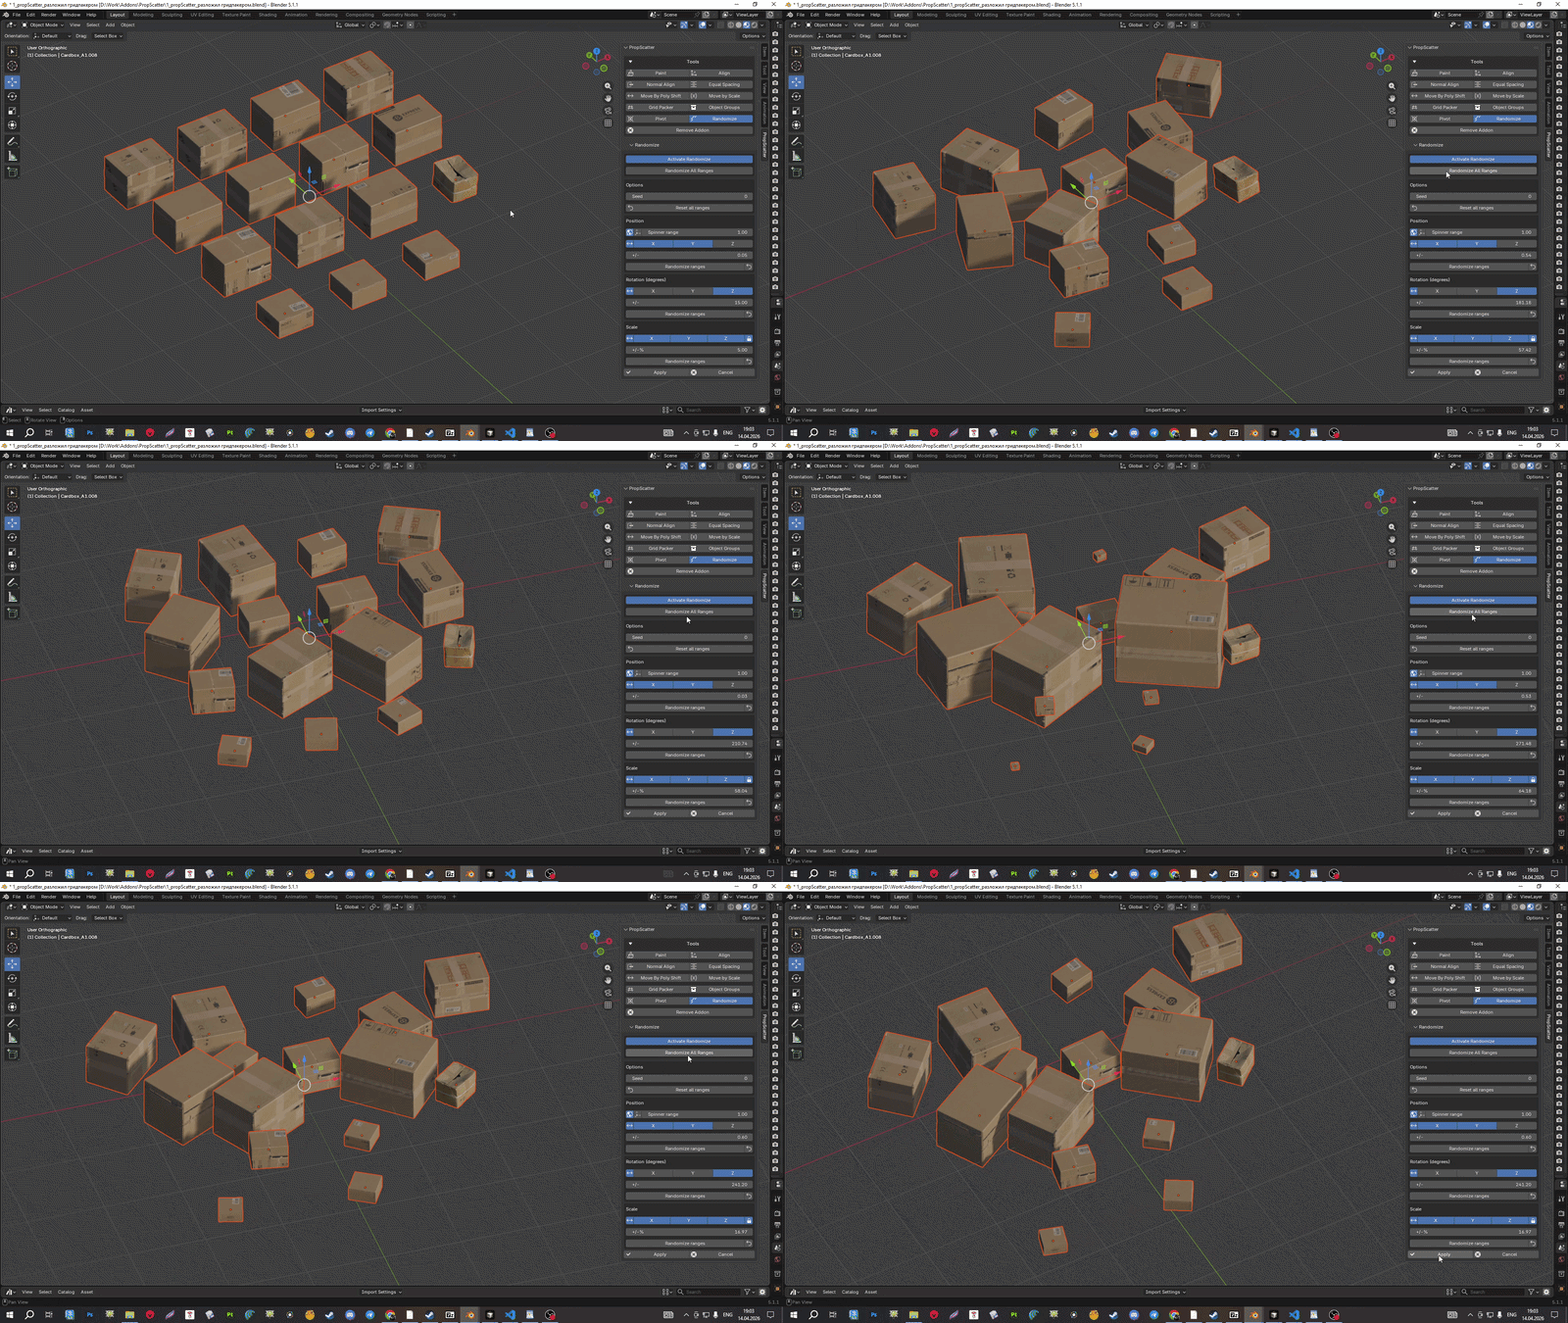
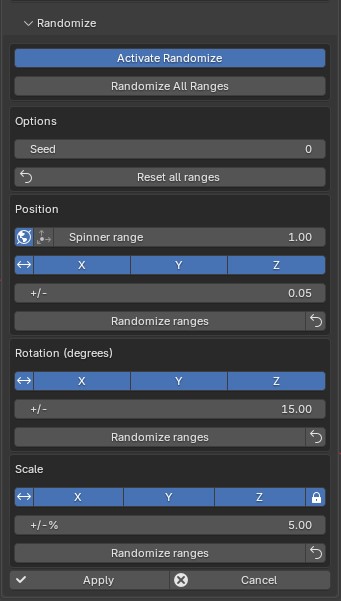
Randomize applies random position, rotation, and scale to the selection with a live preview you commit only when it looks right. After activation, tune per-axis ranges: translation in world or local space, rotation in degrees, scale in percent with optional axis locking; use a single ± slider per block or separate min/max per axis. A seed makes results repeatable; Randomize ranges / Randomize All Ranges reshuffle the limit values themselves, and Reset clears range presets. Ideal for prop variation, set dressing variety, and fast iteration without typing random numbers by hand.
-
Preview session
- In Object mode select objects and press Activate Randomize. Original matrices are stored, then live preview updates as you change ranges — Apply commits; Cancel or turning off Activate Randomize restores originals and ends the session.
- Seed drives random draws; a positive seed gives repeatable variation, zero — a new random set on re-entry or session refresh.
-
Ranges and spinners
- Randomize All Ranges and per-block Randomize ranges assign new random min/max limits for quick exploration. Reset all ranges returns sliders to baseline.
-
Position, rotation, scale
- Position — World or Local; axes; one +/- range or separate min/max. Spinner range caps position range width when using randomize-ranges buttons.
- Rotation — degrees per axis, same single-slider or min/max mode.
- Scale — min/max percent per axis; lock — shared X/Y/Z variation for uniform size jitter.
Workflow
- Interactive workflow: many alignment and tool options update the viewport as you adjust — depending on mode.
- Sidebar: all these tools are available in the 3D View sidebar with the rest of PropScatter.
Who It Is For
- Environment artists who need to populate large scenes quickly.
- Lookdev and motion artists who care about speed and repeatable results.
- Technical artists who want controllable scatter without complex node setups.
- Anyone aligning and laying out props and decor who wants scatter and alignment in one addon.
- Blender users combining brush workflows with precise parametric control.