 Gllone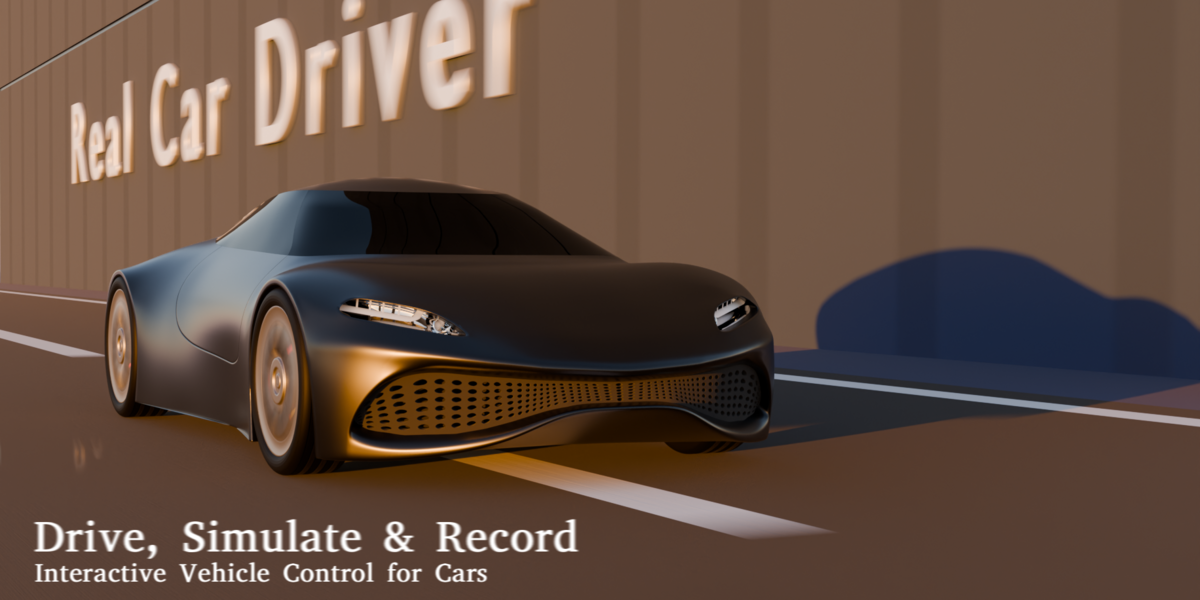
Real Car Driver — Custom Physics 4.0.1 Documentation
Compatibility
- Minimum Blender version: 4.0.0
- Directly tested: Blender 5.2, 5.1.2 & 4.0.0 on Windows
- Product version: 4.0.1
This release has not been separately verified for other Blender versions or operating systems.
What the Add-on Does
Real Car Driver provides an independent fixed-step road-vehicle solver for a conventional four-wheel vehicle. Driving Mode operates directly in the 3D Viewport without requiring a Blender rigid-body world or timeline playback. An optional recording workflow can export the completed take as editable Blender timeline keyframes.
The add-on supports:
- Mesh Mode for direct body and wheel mesh assignments
- Collection Mode for vehicles whose visible parts remain separate
- Any assigned mesh road or ground
- Vehicle and simulation-quality presets
- Keyboard or optional analog mouse steering
- Optional automatic transmission and live P-R-N-D controls
- Drive recording, preview, disk save/load, and keyframe export
- Optional visual caliper, LED, hazard, brake, reverse, and headlight behavior
- An optional supplied test-road builder
Installation
- Exit Driving Mode and save the current Blender file.
- Disable the previous Real Car Driver version if one is installed.
- Open Edit → Preferences → Get Extensions.
- Open the menu in the upper-right and choose Install from Disk.
- Select real_car_driver_custom_physics_4.0.1.zip. Do not extract the archive before installation.
- Install and enable Real Car Driver — Custom Physics.
- Open 3D Viewport → Sidebar → Car Drive.
When Superhive offers drag-and-drop extension installation, the purchased ZIP may also be dragged into Blender.
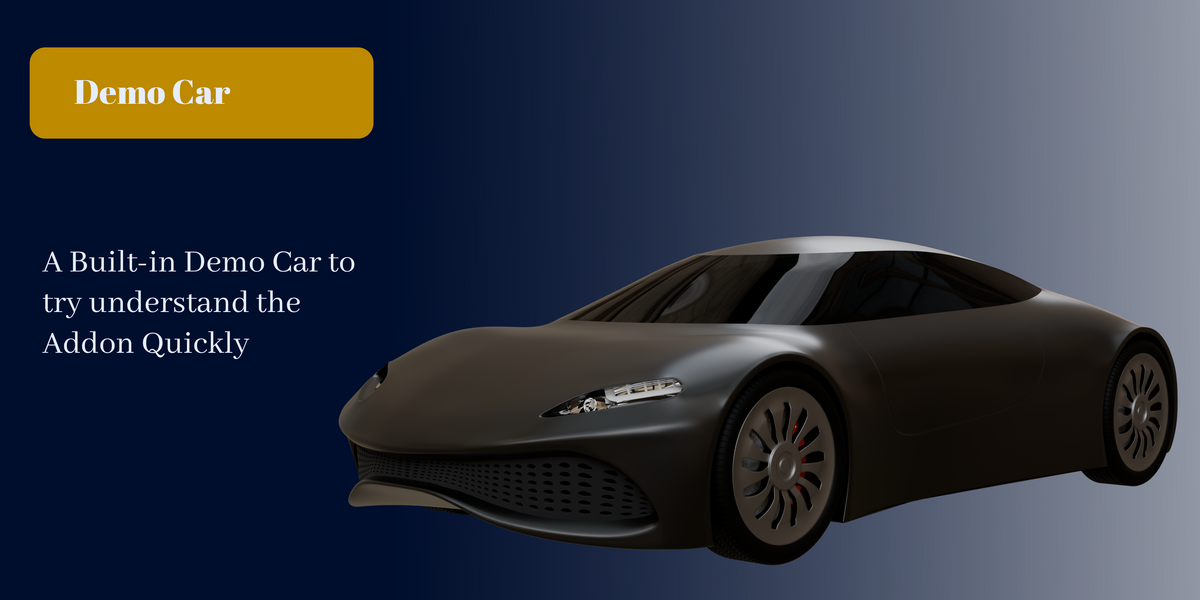
Quick Start with the Included Demo
- Open 3D Viewport → Sidebar → Car Drive.
- Press Create Custom-Physics Demo Car.
- Review the assigned car parts and Road / Ground.
- Press Prepare Custom Physics.
- Enable Drive Recording if the drive should be kept.
- Press Driving Mode.
- Drive with the default controls.
- Press Esc to finish.
- Preview the take if it was recorded.
- Choose an export quality and timeline start frame, then press Export Keyframes.
Preparing Your Own Vehicle
The supported vehicle layout is:
- One body role
- One front-left wheel role
- One front-right wheel role
- One combined rear-wheel role
- One mesh road or ground
The rear-wheel role contains both rear wheels in Mesh Mode. The two rear contact positions are solved independently, while the combined rear-wheel mesh uses one averaged visual spin angle.
Mesh Mode
Use Mesh Mode when the visible setup can be assigned through four direct vehicle mesh roles:
- Assign the visible body mesh.
- Assign the front-left wheel mesh.
- Assign the front-right wheel mesh.
- Assign the combined rear-wheel mesh.
- Assign the mesh road or ground.
- Use Auto Setup or verify the detected vehicle axes.
- Apply a quality and vehicle preset if desired.
- Press Prepare Custom Physics.
Wheel origins may remain offset. The solver derives wheel centers, radii, widths, pivots, suspension mounts, and rear contact positions from evaluated geometry.
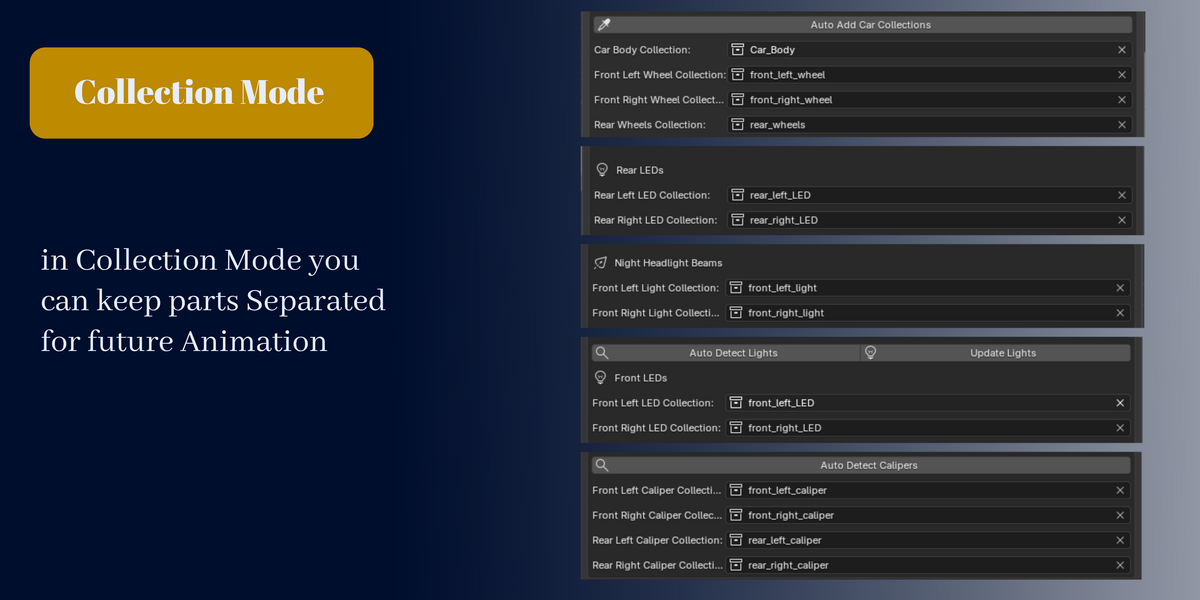
Collection Mode
Use Collection Mode when the vehicle must remain made from separate visible objects.
Assign these core role collections:
- Body collection
- Front-left wheel collection
- Front-right wheel collection
- Rear-wheels collection
The rear-wheels collection may contain the two rear assemblies as separate objects. Nested collections and existing internal parent-child hierarchies are supported. Each source object must belong to only one assigned role collection.
Collection Mode creates non-rendering controller geometry for the solver. It does not join or replace the visible source meshes.
Automatic Name Detection
Core collection names recognized by automatic collection detection are:
- car_body
- front_left_wheel
- front_right_wheel
- rear_wheels
In Mesh Mode, Auto Add Car Parts can detect:
- front_left_wheel
- front_right_wheel
- rear_wheels
- ground
A body named car_body is detected when available. Name matching is case-insensitive and accepts spaces or hyphens in place of underscores. Every supported role can also be assigned manually.
Road and Ground
Assign any mesh object as Road / Ground. A custom road may keep its own topology, materials, UVs, and modifiers. The add-on uses the evaluated mesh for collision and does not rebuild, reshape, or topology-check a custom surface.
The road collision data is prepared before Driving Mode and remains fixed during that session.
After changing the physical road surface:
- Exit Driving Mode.
- Complete the road edit.
- If using the optional test-road builder, allow its live update to finish.
- Press Prepare Custom Physics again.
- Start Driving Mode.
For very large environments, keep distant scenery separate from the driveable collision surface so the road collision mesh remains practical.
Per-Material Surface Response
Road materials can adjust tire behavior with Blender custom properties:
- rcd_surface_grip — grip multiplier, commonly around 0.2 to 1.5
- rcd_surface_rolling — rolling-resistance multiplier, commonly around 0.5 to 4.0
These are optional material properties. If they are absent, the normal road response is used.
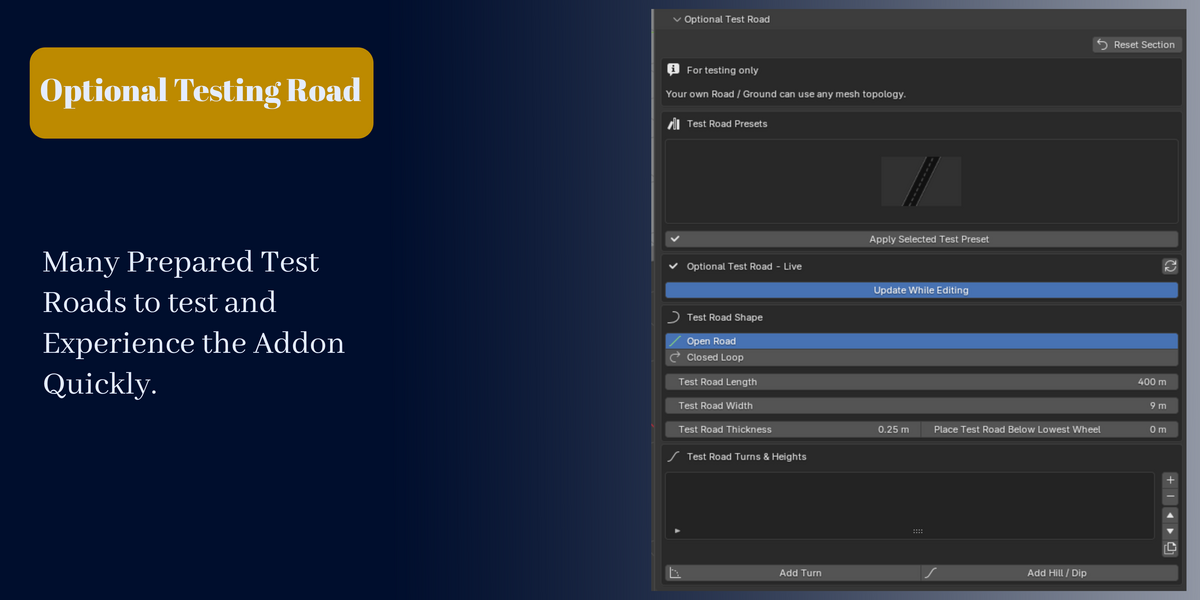
Optional Test-Road Builder
Press Create Optional Test Road to append the included author-supplied segmented asphalt test asset with its UV layout, procedural material, and shader groups.
For a road that remains recognized as the generated test road, the panel provides live controls for:
- Length
- Width
- Collision thickness
- Placement
- Smooth left or right turns at measured positions
- Smooth hills or dips at measured positions
Six starting layouts are supplied:
- Straight Test Road
- Circle Circuit
- Oval Loop
- Rounded Circuit
- Technical Loop
- Rolling Hills Loop
The supplied lane paint is visual only. Shader micro-detail does not create physical displacement.
The builder applies only to a road still recognized as the optional generated test road. A user-assigned road, reassigned object, or edited custom surface is treated as custom and is not rebuilt by these controls.
The optional road is a testing aid. It is not required and is not a general production-road generator.
Presets
Vehicle Presets
- Road Car
- Sports Car
- Off-Road
- Drift
Vehicle presets are editable starting points rather than locked modes.
Quality Presets
- Performance — 90 Hz with reduced body-contact workload
- Balanced — 120 Hz and the recommended default starting point
- Maximum Realism — 180 Hz with denser contacts and more collision iterations
Higher settings increase the simulation workload. Actual viewport performance depends on scene complexity and computer hardware.
Portable Profiles
Vehicle tuning can be exported to and imported from JSON. Profiles store scalar physics and presentation settings. They intentionally omit Blender object references and runtime state so they can be reused between files.
Default Driving Controls
Use P-R-N-D Selector is off by default.
- W — forward request
- S — reverse request
- Space — brake
- A / D — steer left or right
- 1–9 — select accelerator power level
- Shift — boost
- B — toggle Brake Hold
- C — set Cruise Control to the current forward speed; press again to cancel
- Shift+C — resume Cruise Control at the stored target
- = / Numpad + — increase the cruise target
- - / Numpad - — decrease the cruise target
- M — toggle optional analog mouse steering
- H — toggle rear hazard-light flashing when the optional rear LEDs are configured
- O / Pause — pause or resume the independent solver
- R — reset to the Driving Mode entry pose
- Esc — exit Driving Mode
Manual braking, Brake Hold, Park, Neutral, Reverse, or an explicit cancellation safely disables Cruise Control.
Optional P-R-N-D Selector
Enable Use P-R-N-D Selector when separate transmission states are wanted:
- P — Park; engine torque is disconnected and brake hold is applied
- N — Neutral; the engine returns to idle without engine torque at the wheels
- Ctrl+D — Drive; W accelerates forward and S or Space brakes
- Ctrl+R — Reverse; W accelerates backward and S or Space brakes
Park applies its firm wheel lock only below the configured Park Lock Speed.
Analog Mouse Steering
Enable Steering → Mouse Steering, then press M during Driving Mode. The pointer is captured inside the 3D Viewport and relative left-right movement becomes a continuous steering target. A/D remains available as a temporary keyboard override.
Mouse-steering response follows the configured full-lock width, center deadzone, response curve, steering speed, and high-speed steering reduction.
Drive Recording and Keyframe Export
Enable Drive Recording before or during Driving Mode. Recording samples are taken from the solver steps rather than from scene-frame playback.
After exiting Driving Mode:
- Preview Recording starts playback of the captured take.
- Press the preview control again to pause and later resume.
- Stop holds the current preview pose.
- Reset returns the preview to the beginning.
- Save Recording stores the take as a compressed .rcdrec file.
- Load Recording restores a saved take for preview or export.
- Export Keyframes writes the supported body, wheel, brake, light, and LED changes to the Blender timeline.
Choose:
- Exact export for every captured sample
- Balanced export for a reduced keyframe set
- Light export for the lightest editable result
- A timeline start frame
The Driving Mode chase camera is not included in the exported animation.
If the recording-cache folder is left empty, the system temporary directory is used.
Optional Calipers and Lights
Calipers
Four optional caliper roles can follow their matching wheel positions:
- Front left
- Front right
- Rear left
- Rear right
Calipers do not receive tire spin and do not affect physics.
LED and Headlight Roles
Optional visual roles include:
- Front-left LED
- Front-right LED
- Front-left headlight placement mesh
- Front-right headlight placement mesh
- Rear-left LED
- Rear-right LED
Front and rear LED emission can be enabled, disabled, colored, and applied to compatible emission materials. Rear LEDs can brighten for braking or reversing and can pulse as hazard lights.
Managed night beams use the dedicated front light meshes for placement and provide color, power, distance, angle, drop, and softness controls. Turning on the night beams does not automatically turn on decorative front LEDs.
These roles are optional and do not change vehicle physics.
Resetting the Setup
Each panel-section Reset restores the settings and object slots owned by that section. Reset Whole Add-on restores all sections and clears car, road, brake, and light assignments.
Exit Driving Mode before resetting or changing physical setup objects.
Known Limits
- One Driving Mode session is active at a time.
- The supported setup is a conventional four-wheel vehicle.
- All-wheel drive and arbitrary wheel counts are not provided.
- Vehicle-to-vehicle rigid-body simulation is not provided.
- This is not a general-purpose Blender rigid-body replacement.
- A custom road is not rebuilt by the add-on.
- Road collision data remains fixed during Driving Mode.
- The optional road builder is a testing tool, not a final production-road generator.
- Scene performance depends on vehicle complexity, road complexity, quality settings, and hardware.
Troubleshooting
Driving Mode does not start
Confirm that the body, front wheels, combined rear-wheel role, and Road / Ground are assigned. Run Auto Setup or check the vehicle axes, then press Prepare Custom Physics before starting Driving Mode.
The car no longer follows an edited road
Exit Driving Mode and press Prepare Custom Physics again. Collision data from the previous physical road shape remains in use until preparation is refreshed.
Test-road controls no longer affect a road
The controls apply only to an object still recognized as the optional generated test road. A reassigned or edited custom surface is intentionally protected from rebuilding.
Automatic assignment misses an object
Use the documented role names or assign the role manually. Confirm that each Collection Mode source object belongs to only one assigned role collection.
A recorded take is missing
Drive Recording must be enabled before or during Driving Mode. Finish the drive with Esc, then use the recording controls to preview, save, or export it.
Viewport performance is low
Start with the Performance or Balanced quality preset. Keep distant scenery separate from a very large collision surface and reduce unnecessary scene complexity.
Product Support
Use the support or message button on the Superhive product page so the request reaches the creator through the Superhive Inbox.
For a reproducible problem, include:
- Proof of purchase
- Blender version
- Operating system
- Vehicle assignment mode
- Vehicle role setup
- Road or ground details
- Exact reproduction steps
- Screenshots
- Visible error text
Support covers installation, add-on activation, vehicle setup, and reproducible add-on errors on supported Blender versions. General Blender training, custom vehicle modeling, and bespoke vehicle tuning are outside the included product-support scope.
Licensing and Included Assets
The readable Python add-on source is distributed under GPL-3.0-or-later. The archive includes the complete GPL text and per-file notices.
The supplied demonstration scene, road asset, documentation, branding, and other non-code material are governed by the separate notices and commercial terms included in the product archive unless a file states another license. Those assets may not be redistributed as standalone products.
 Included
Includes 12 months of
- Support from Gllone
- Product updates
Extend this product’s Support Period +12 months: 50% of product price
Have questions before purchasing?
Login to message
| Blender Extension Compatible | Yes |
| Dev Fund Contributor | |
| Published | about 2 months ago |
| Blender Version | 4.0 - 5.2 |
| Extension Type | Add-on |
| Render Engine Used | Cycles, Eevee |
| License | GPL |
Discover more products like this
recording car rig mouse steering Keyframe animation driving viewport driving vehicle physics suspension car-animation vehicle simulator