 ArtLab


Getting Started with ReelFlow
ReelFlow (formerly Timelapse Pro+) automates your content creation process. It captures your modeling workflow in the background, allowing you to create viral "Making Of" videos for Instagram, TikTok, and YouTube Shorts without managing heavy OBS files.
1. Installation
- Go to Edit > Preferences > Add-ons.
- Click Install... and select the downloaded
.zipfile. - Enable the addon by checking the box next to "ReelFlow".
2. How to Use
The addon interface is located in the N-Panel (Sidebar) of the 3D Viewport under the ReelFlow tab.
⚠️ Important: Please Save your .blend file before starting! ReelFlow creates a folder for images relative to your project file.
Step-by-Step:
-
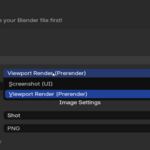
Select Mode:
- Viewport Render (Recommended): Captures a clean image of your model without grids, cursors, or UI buttons. Perfect for professional showcases.
- Screenshot (UI): Captures the entire Blender window, including tools and menus. Good for tutorials.
-
Configure Capture:
- Capture on Change (Smart Mode): Keeps this ON. It only records a frame when you actually modify something. This saves disk space and eliminates static parts of the video.
- Start: Click Start Timelapse. The addon runs in the background.
- Finish: Click Stop when done. Use the Folder Icon to open the directory with your image sequence.
3. Settings Explained
-
Min Interval: Controls the speed. Setting this to
2.0means it won't take a picture more often than every 2 seconds. - Image Settings: Choose between PNG (higher quality) or JPEG (smaller size).
-
Output Path: By default, images are saved in a
//timelapfolder next to your project. You can change this to a specific folder in the Add-on Preferences.
$4
Have questions about this product?
Login to message
| Blender Extension Compatible | Yes |
| Published | 12 months ago |
| Blender Version | 3.6 - 4.5 |
| Extension Type | Add-on |
| Render Engine Used | Cycles, Eevee |
| License | GPL |
Discover more products like this
timelapse addon automatic render tutorial tool viewport animation ArtLab time capture productivity viewport render addon screenshot modeling