Render Roster
 Urushigusa Software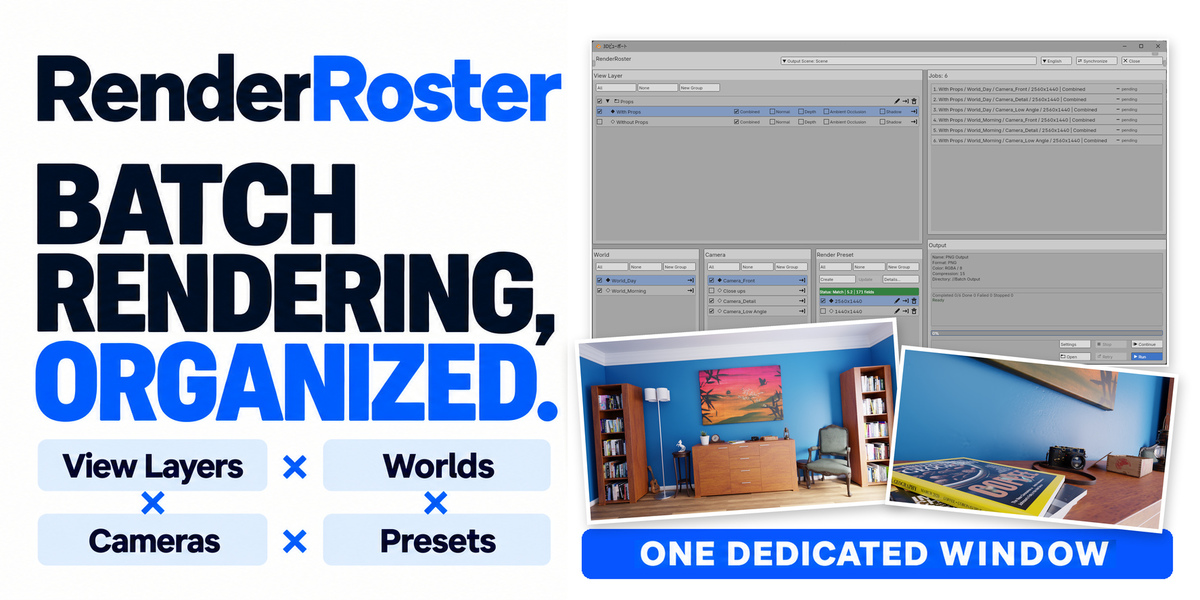
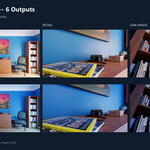
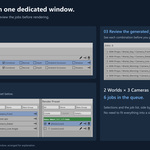
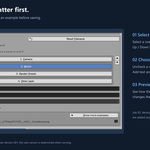
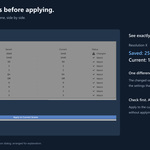
RenderRoster is a Blender add-on for combining render conditions and producing multiple images in sequence.
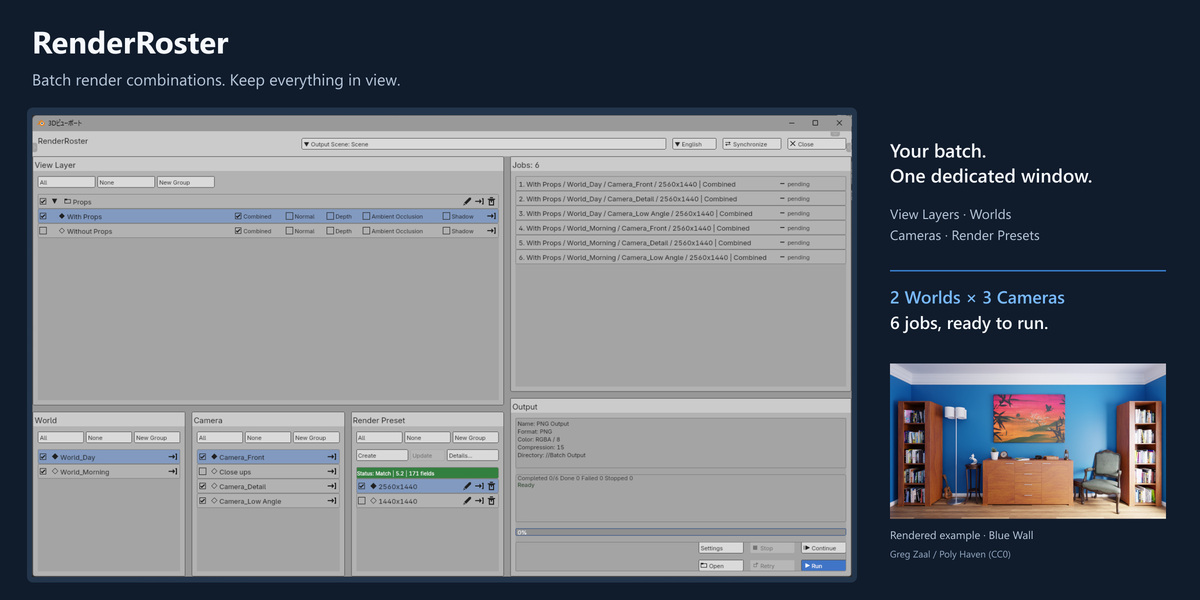
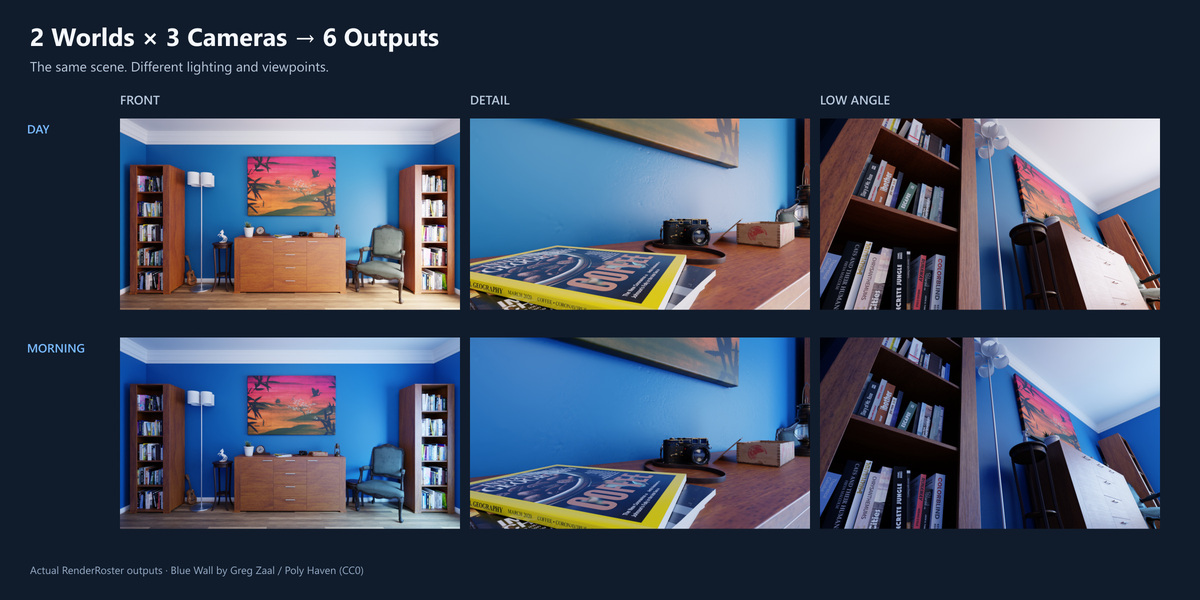
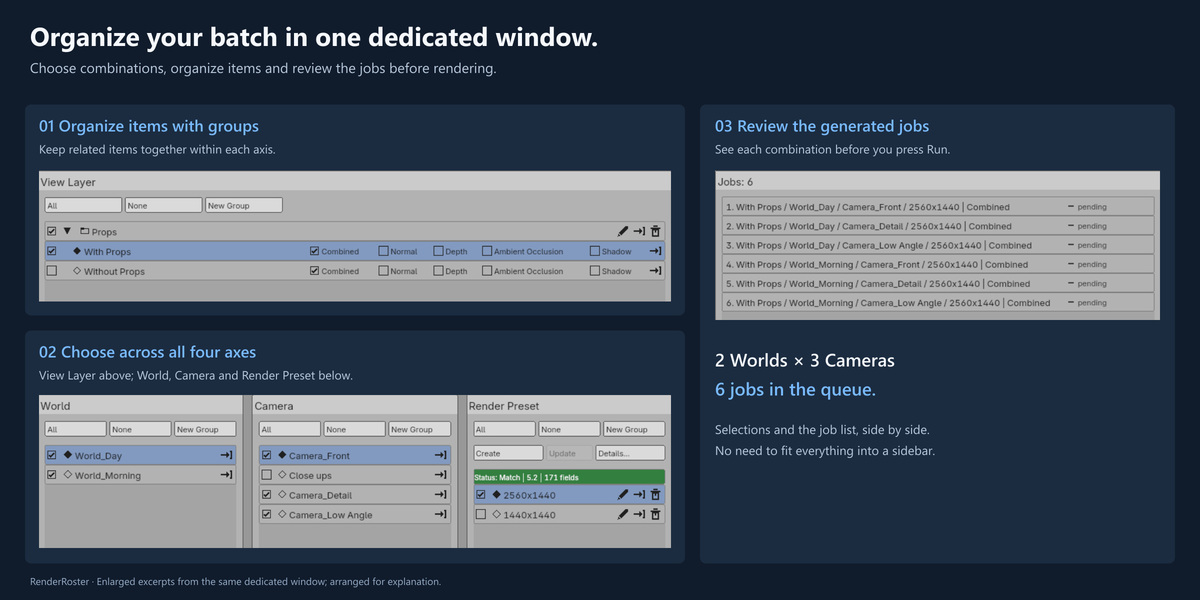
For example, one View Layer, two Worlds, three Cameras, and one Render Preset produce six Jobs. RenderRoster lets you review these combinations in one dedicated window and run them as one batch. This guide takes a first-time user from installation through the first batch.
First things to know
RenderRoster combines these four axes:
| Axis | What it selects |
|---|---|
| View Layer | Visible Collections and render-pass setup |
| World | Background and environment lighting |
| Camera | Viewpoint used for the render |
| Render Preset | Resolution, render engine, sampling, and other render settings |
One selection from each axis makes one Job. For example, selecting two View Layers, two Worlds, one Camera, and one Render Preset creates 2 × 2 × 1 × 1 = 4 Jobs.
The destination folder and PNG options are separate Output Settings. They apply to the entire batch and do not increase the number of Jobs.
Groups are optional. They help organize long lists, but you do not need them for your first batch.
Supported environment and UI languages
Windows with Blender 4.5 LTS or 5.2 LTS. Tested versions are 4.5.13 and 5.2.0. macOS and Linux have not been tested.
The RenderRoster UI supports English, Japanese, Simplified Chinese, Korean, Spanish, Russian, and French. Use the language selector in the window header to choose a language or follow Blender’s language setting. Support is available in Japanese and English.
Installation
On Windows, drag the supplied Extension ZIP from File Explorer into Blender and follow the installation prompt. Enable RenderRoster if prompted.
Alternatively:
- In Blender, open
Edit > Preferences > Get Extensions. - Open the menu in the upper-right corner and choose
Install from Disk. - Select the Extension ZIP and enable RenderRoster.
Do not extract the ZIP or create a new ZIP from its folder. Select the supplied ZIP directly.
Run your first batch
1. Save the .blend file
Save the .blend file first and make a backup if necessary. The default output location is relative to the saved .blend file, so saving before setup makes the destination predictable.
2. Set up RenderRoster
- In the 3D View, press
Nto open the sidebar. - Open the
RenderRostertab. - If the panel says
RenderRoster is not set up for this Scene, clickSet Up RenderRoster.
Setup imports the current Scene's View Layers, Worlds, and Cameras. It also creates the first Render Preset from the current render settings and an Output Setting named PNG Output.
Setup does not clear existing Blender data or start a render.
3. Open the dedicated window
Click Open RenderRoster in the sidebar. The dedicated window shows the View Layers, Worlds, Cameras, Render Presets, generated Jobs, and Output Settings in one place.
Choosing another Output Scene in the header also switches the original Blender window to that Scene.
4. Select what to render
Turn on the checkboxes for the items you want to include on all four axes. The Job list and Job count update automatically as the selection changes. For a small first test, select one item on each axis to create one Job.
Each View Layer also has output checkboxes for Combined, Normal, Depth, Ambient Occlusion, and Shadow. Combined alone is enough for a first test. A View Layer with every output checkbox turned off is excluded from the Jobs. Passes that the selected render engine does not support are unavailable.
5. Check the Render Preset
The first Render Preset contains the Blender render settings captured during initialization. You can use it unchanged for the first test.
To add another quality or settings variation:
- Change resolution in Blender's Output Properties, or sampling and other render settings in Render Properties.
- Click
Create from Currentin RenderRoster. - Enter a name that describes its purpose, such as
PrevieworFinal.
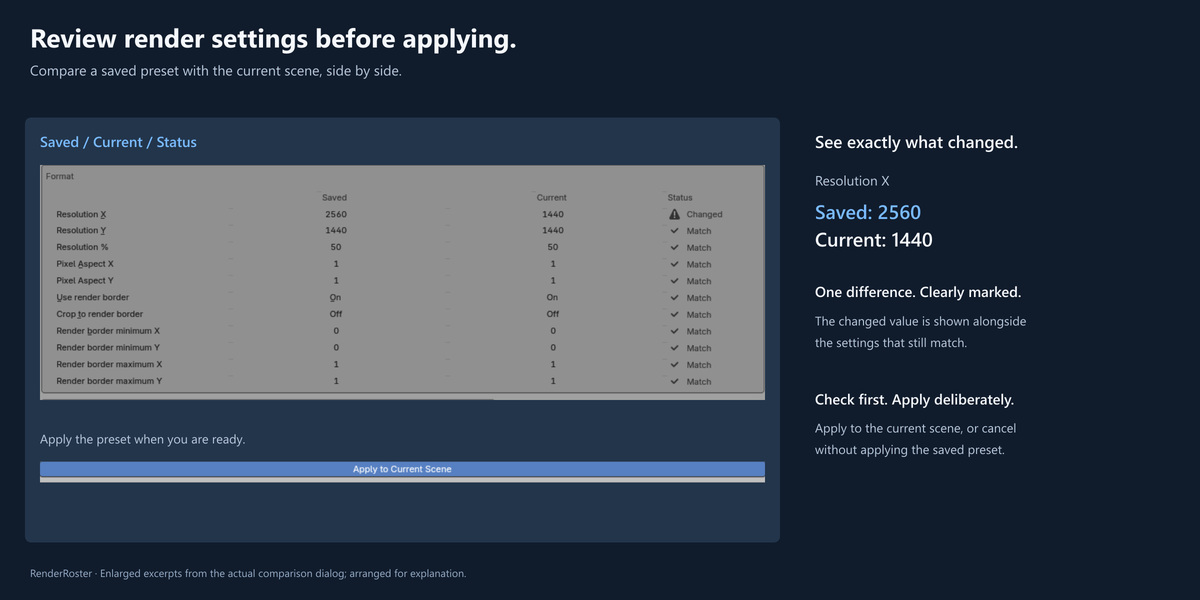
Review and Apply... compares the saved settings with the current Scene before applying the Preset. Update replaces the selected Preset with the current render settings.
A Render Preset does not store the destination folder or PNG options. Configure those in Output Settings.
6. Check the destination
Open Output Settings at the bottom of the window (shown as Settings in compact layouts) and check:
-
Output settings name: the name of this output configuration -
Output folder: where rendered images will be saved -
Color Mode,Color Depth, andCompression: PNG image settings
The output format is PNG. With the initial settings, starting the render creates a new folder named Batch Output next to the saved .blend file and writes the rendered images into it. Batch Output is only the default folder name; you can choose another location in Output Settings.
The // in //Batch Output is Blender notation meaning “from the folder that contains the current .blend file.”
Customize output filenames
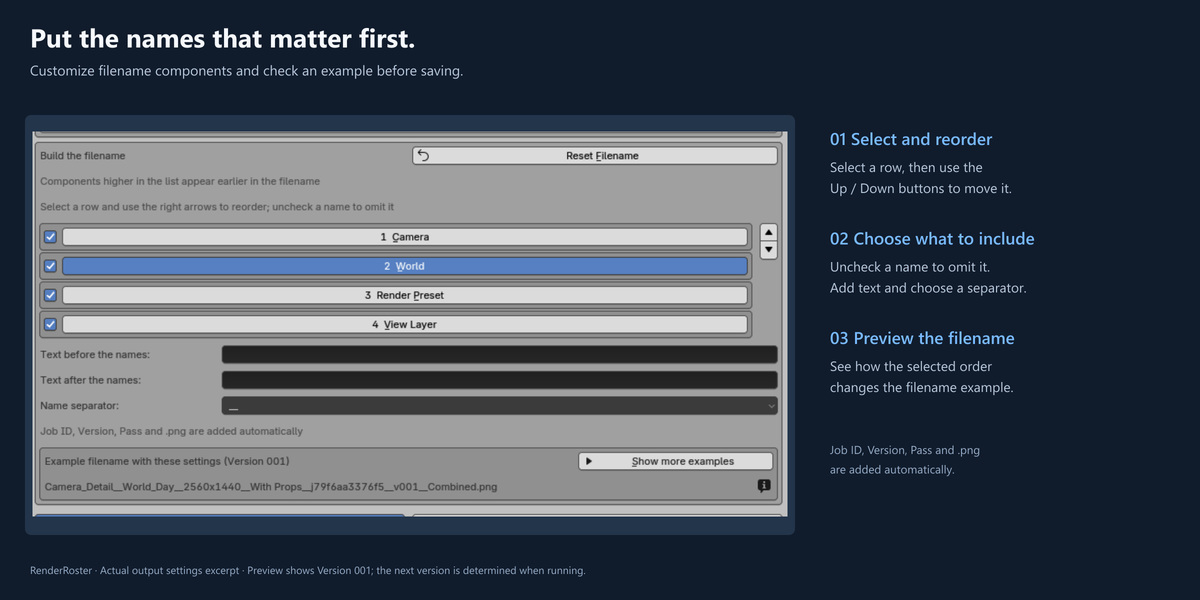
Under Build the filename in Output Settings:
- Select the row for the name component you want to move.
- Use the up/down arrows on the right of the list. The selection follows the moved item, so you can press the same arrow again to keep moving it.
- Place the component you want first in the filename at the top.
This changes filename sorting, not render Job order. Uncheck components to omit their names, keeping at least one axis. Use Text before the names and Text after the names for fixed text, and Name separator for _, __, or -. Reset Filename restores the default naming settings, including order and fixed text, without changing the output folder or PNG options.
The preview initially shows one filename. Click Show more examples beside the preview heading to show up to six from the current selection, sorted within that sample. Examples always show the version number as v001. They do not check existing files in the output folder, so the actual output version number may differ. Safe character replacement and long-name shortening use the same rules as the actual output.
The job identifier, Version, Pass, and .png remain at the end. Changing the display order or fixed text preserves Version numbering for the same four-axis combination; previous files are not renamed.
Confirm the dialog to save the changes or cancel to keep the old settings. A confirmed naming change changes the batch setup: start a new run instead of continuing or retrying the batch created with different settings.
7. Review the Jobs and run
Before running, check at least the following:
- Only the required View Layers, Worlds, Cameras, and Render Presets are selected
- The Job count is what you expect
- The destination is correct
- The destination has enough free space for the expected images
Click Run to render the listed Jobs from top to bottom and write their files. This button starts the actual rendering and file output.
During and after a run
The Job list shows which Jobs are waiting, running, completed, or failed.
-
StopStops after the current Job finishes. It does not interrupt a Job while Blender is rendering it. -
ContinueRuns the pending Jobs from the same batch setup. -
RetryRuns only the failed Jobs again. -
OpenOpens the current destination folder.
If one Job fails, RenderRoster continues with later Jobs when possible. After each Job, it restores the Camera, World, Render Preset, and other Scene settings that it changed temporarily, as far as Blender allows.
Output filenames contain Versions such as v001 and v002. If an image for the same combination already exists, RenderRoster uses the next Version instead of automatically renaming the existing image.
When Blender data changes
After initialization, if you add, delete, or rename a View Layer, World, or Camera in Blender, click Synchronize or Sync Changes in RenderRoster.
Merely opening or viewing RenderRoster does not import Blender-side changes automatically. If the window shows Sync Required, review the Scene and synchronize explicitly.
Organize items with Groups
When a list becomes long, use New Group on that axis to create a Group.
Use a unique Group name within each axis, even at different nesting levels. The same name is allowed on a different axis. Creating or renaming a Group checks this rule; moving a Group does not introduce a name restriction. Existing same-name Groups from older files are preserved and can still be moved or renamed.
Turning off a Group temporarily excludes everything inside it from the Jobs. The checkboxes of the child items are preserved, so turning the Group on again reuses the previous selections. Move items and Groups by dragging their names or by using the Move button.
A Group organizes items and temporarily excludes a set of them. It is not a fifth combination axis.
Troubleshooting
- The Job count is 0 Check that every axis has an enabled item, its parent Groups are enabled, and at least one selected View Layer has an output pass such as Combined enabled.
- The window shows
Sync RequiredReview the current Blender data, then clickSynchronizeorSync Changes. - A Render Preset says it requires an update Select the Preset, review the settings available in the current Blender version, and then click
Update. - Files cannot be saved Check that the destination exists or can be created and that Blender can write to it.
Important limitations and precautions
-
Stopwaits for the current Job to finish. - Do not render from multiple Blender processes into the same destination at the same time.
-
ContinueandRetryapply to the same batch setup in the currently open Blender session. There is no browser for selecting an old run after restarting Blender. - If applying a Render Preset changes the Working Space, the change affects the entire .blend file, not only the current Scene. Read the warning before applying it.
- For important work, back up the .blend file and output destination before running a batch.
Getting an update
Download the supplied update ZIP through the purchase channel. Keep the ZIP intact. Finish the current batch, save the project if you want to keep its settings, and close the RenderRoster window before replacing the extension.
Install the update through Edit > Preferences > Get Extensions > Install from Disk, using the same local repository as the existing RenderRoster install. Restart Blender, enable RenderRoster if necessary, and reopen the saved project. Check the selected items, Render Presets, destination, and filename settings before starting a new batch. A batch that was in memory is not a saved run you can continue after restarting Blender.
A ZIP installed from disk has no automatic update feed from that local repository. This guide describes manual ZIP installation; it does not promise a store-specific one-click update integration.
Support and access to updates
A Superhive purchase includes an initial 12-month Support Period. During an active period, product updates and individual support are included. You can optionally renew for another 12 months at 50% of the then-current product price; renewal is not automatic. After expiry, access to new releases and individual support requires renewal. Versions you have already received remain usable.
For technical help, first check this guide and the product FAQ, then contact us through the product page on Superhive; we reply in our Superhive Inbox. Include your Blender version, operating system, the steps that led to the problem, and the error message if one appeared. Do not send confidential project files in an initial report.
You can also use our contact form or [email protected]. Support is available in Japanese and English.
Code license
The add-on source code is supplied under GPL-3.0-or-later. The complete license text is included in the Extension ZIP as LICENSE.
Guide and icon
Except where otherwise indicated, copyright in this guide (README.md) and the product icon (renderroster-icon.svg) belongs to Urushigusa. These materials are not additionally licensed under the GPL by this notice.
Lawfully obtained copies may be viewed, displayed, copied and backed up as necessary to use RenderRoster, including for commercial production. This permission does not generally authorize standalone reuse, modification, redistribution, resale or use in other products. Other uses require prior permission unless separately authorized or permitted by applicable law or license.
These terms do not restrict rights in GPL-covered code or impose additional conditions on your own projects or rendered output. Third-party materials remain subject to their respective rights notices and licenses. This notice does not revoke permissions previously granted for earlier copies.
 Included
Includes 12 months of
- Support from Urushigusa Software
- Product updates
Extend this product’s Support Period +12 months: 50% of product price
Have questions before purchasing?
Login to message
| Blender Extension Compatible | Yes |
| Published | 11 days ago |
| Blender Version | 4.5 - 5.2 |
| Extension Type | Add-on |
| Render Engine Used | Cycles, Eevee |
| License | GPL |
Discover more products like this
Workflow view layer render manager batch render camera render-preset world