Shademix
 Yasser Idris


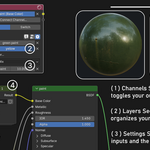
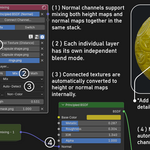
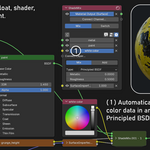
ShadeMix is a multi-channel layer system for Blender's Shader Editor. It provides a structured node framework that allows you to build and organize complex shader layers from a single interface, while it automatically handles data conversions and math in the background.
1. Getting Started
Adding a ShadeMix Node
- Open the Shader Editor.
- Press
Shift + A, navigate to the add menu, or search for ShadeMix. (Note: ShadeMix is only available in the Shader Editor and acts as a single, multi-purpose node). - You can move the node with your mouse immediately after adding it. Click to place it in your graph.
Core Concepts
A ShadeMix node manages the flow of your materials using Channels and Layers.
- Channels (Outputs/Targets): The destinations for your data, such as the Albedo, Roughness, or Normal sockets of a Principled BSDF, or the Material Output. A single Channel can be wired to multiple targets simultaneously, and each individual target gets its own visibility toggle.
- Layers (Inputs/Sources): The individual textures, colors, or shaders that feed into a specific Channel. When a new layer is connected, it automatically becomes the active input.
2. Channel Modes
Every Channel in a ShadeMix node operates in one of two modes:
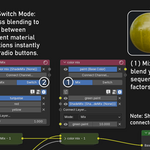
Mix Mode
Used for traditional layer stacking.
- Layers are stacked sequentially from top to bottom.
- Each Layer blends over the ones before it based on its Blend Mode and Factor (mask weight).
Switch Mode
Used for fast material iterations and look-development.
- Skips all blending operations.
- Presents your inputs as a list of radio buttons, allowing you to instantly click through and switch between material variations or texture sets.
- Note: The Factor mask and its mute toggle are still accessible and functional in Switch mode if you need to mask the chosen output.
3. Data Processing & Auto-Conversion
ShadeMix automatically detects the data type of the socket it is connected to and adjusts its behavior. Node socket colors will dynamically update to reflect the data flowing through them.
Shader Targets
If you connect color or texture data to a Shader Channel (like the Material Output), ShadeMix automatically wraps the data in a BSDF node.
- By default, it generates a Principled BSDF.
- Metallic and Roughness properties can be adjusted directly from the ShadeMix node interface.
- You can change the wrapper type to Diffuse or Emission via the inline settings panel.
- Shader mixing supports standard Mix and Add modes.
Normal & Displacement Targets
When routing maps into a Normal or Displacement Channel, ShadeMix generates the necessary Bump, Normal Map, or Displacement nodes.
- Override Auto-Detect: You can explicitly force a layer to be interpreted as a "Height Map" or a "Normal Map".
- Strength vs. Factor: ShadeMix separates physical Strength from the layer's Factor (mask weight). Typing a negative value into the Strength slider physically inverts the bump direction, whereas a negative Factor value will invert the connected mask (if one exists).
-
Foldable Advanced Settings: Click the triangle icon to expand advanced settings:
- Normal Maps: Switch between OpenGL and DirectX formats, or change coordinate space.
- Displacement: Adjust Midlevel, Scale, and Space.
- Blend Algorithms: Toggle the blending mode between accurate Add UDN normal combining, standard Color Mix overlays, or direct Math vector operations.
4. Factor Control
The Factor slider acts as the opacity mask or multiplier for an input layer.
-
Smart Button Labels: The Factor's text label automatically inherits the name of the mask connected to it and functions as a button.
Alt + Clickit to jump to the source node in the graph. -
Overdrive: Push factors beyond standard limits (e.g.,
10.0) to aggressively multiply the blend weight. -
Factor Inversion: Type a negative value into the factor slider (e.g.,
-1.0) to instantly invert the driving mask. - Mute Masks: Temporarily mute an external factor link using the Eye icon, reverting the blend weight back to the manual slider value without breaking the physical wire.
5. Edit Mode & Organization
Clicking the Edit Mode checkbox (the options icon at the top of the node) unlocks organizational tools. (See Section 8 for keyboard modifiers like Cut-Paste and Settings-Paste).
Move and Remove
Use the Up/Down arrows to reorganize your stack, and the Trash icon (or 'X' buttons) to delete slots.
- Quick Move: If no specific layers are selected, the Up/Down arrows will automatically move the currently active layer.
-
Batch Removal Modifiers:
-
SHIFT: Safe Remove (preserves background nodes). -
CTRL: Remove All. -
ALT: Isolate (keeps only the clicked item). - (Modifiers can be combined: e.g.,
Ctrl + Shiftto safely remove all).
-
6. Accessing Node Settings & Graph Synergy
Because ShadeMix is designed as a clean GUI, it hides the messy connection lines between nodes.
Finding Connected Nodes (N-Panel Synergy)
To access the settings of a node connected to ShadeMix (such as a Noise Texture scale):
-
Alt + Clickthe text label of any Target, Layer, or Factor on the ShadeMix node. - This instantly selects the connected node in the background. You can adjust its settings directly from Blender’s N-Panel (Sidebar) without losing focus on ShadeMix.
Batch Multi-Node Connection
Wire up entire texture sets in seconds:
- Select multiple nodes in the Shader Editor (e.g., Albedo, Roughness, and Normal textures).
- Drag a single wire from one of them into a ShadeMix layer input.
- ShadeMix will automatically generate and route new layers for all the selected nodes at once.
Multi-Target Routing & Socket Conflicts
Channels support multiple targets simultaneously.
- Expand the channel tab to view all connected destinations and their individual visibility toggles.
- Error Checking: If you route multiple ShadeMix Channels into the exact same destination socket, or if a connected node goes missing, an Error Icon will appear next to the item's name to warn you.
7. Multi-Select & Consolidation
Consolidate multiple workflows (Mixers, Switchers, Shaders) into one Mega Node:
-
Straight Mode (
SHIFT + ClickTab): Selects multiple Channel tabs and expands them sequentially. Useful for managing a Switch channel and a Mix channel from the exact same interface. -
Paired Mode (
CTRL + ClickTab): Selects multiple Channel tabs in Switch mode and links them logically. Clicking an input on one layer will automatically switch all paired channels to the corresponding input index. (Ideal for synchronizing Albedo, Roughness, and Normal map variations).
8. Modifier Shortcuts & Tooltips
ShadeMix uses a universal logic for modifier keys across its interface. You can hover over the Info ('i') Icon on the node to see a tooltip with all the available shortcuts.
[ Alt + Click ] — Isolate & Focus
- Visibility (Eye): Solo item (mutes all others). Alt-click again to restore all.
- Remove (X): Keep ONLY the clicked item, severing/removing the rest.
- Labels (Channel / Layer / Factor): Select and focus the connected node in the background graph.
- Paste Icon: Perform a Cut-Paste (removes original items after pasting).
[ Ctrl + Click ] — Batch & Sync
- Remove (X): Remove ALL items in the list.
- Channel Tab: Activate Paired Mode (synchronizes Switch selections across multiple channels).
- Paste Icon: Paste only the settings (Blend mode, wrapper values, etc.) to currently selected layers.
[ Shift + Click ] — Preserve & Extend
- Remove (X): Remove the item from ShadeMix, but preserve its generated background nodes in the graph.
- Channel Tab: Activate Straight Mode (expands multiple channels sequentially).
- Move Arrows: Jump the selected item immediately to the top or bottom of the stack.
- Ctrl + Shift + Click (Remove 'X'): Combines modifiers (e.g., Remove ALL layers, but preserve their generated nodes).
Have questions about this product?
Login to message
| Blender Extension Compatible | Yes |
| Dev Fund Contributor | |
| Published | 2 months ago |
| Blender Version | 5.0 - 5.2 |
| Extension Type | Add-on |
| Render Engine Used | Cycles, Eevee |
| License | GPL |