 KVD
KVD


Simple Wall Add-on User Manual:
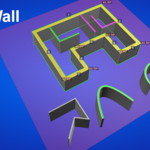
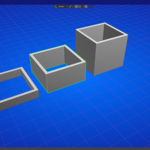
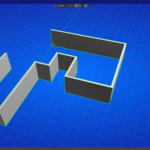
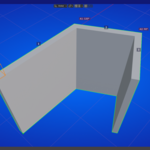
The Simple Wall add-on is a set of tools for Blender designed to create architectural elements quickly and intuitively. It allows you to draw Straight Walls, Curved Arcs, Polylines, and Rectangles directly in the 3D Viewport.
Key features include:
Interactive Drawing: Click to place points, with live previews of wall width and length.
Snapping: Snap to vertices, midpoints, and grid points for precise placement.
Workplanes: Create reference planes to draw on any surface or orientation.
Live Editing: Adjust the width, height, and alignment of existing walls and arcs.
Locking Mechanism: Lock walls/arcs to prevent accidental modifications.
Visual Helpers: Display segment numbers, angle measurements, and lock indicators.
2. Installation & Setup:
In Blender, go to Edit > Preferences > Add-ons.
Click Install... and navigate to the .zip file .
Enable the add-on by checking the box next to "Mesh: Simple Wall".
The "Simple Wall" panel will appear in the 3D Viewport's N-panel (press N to toggle).
3. The Main Panel (Simple Wall v1.0)
Located in the 3D Viewport's N-Panel under the "Simple Wall" tab.
Top Section:
Snap to Vertex / Midpoint: Toggles snapping to mesh components.
Cursor Start: When enabled, the first point of a wall, arc, or rectangle will be placed at the 3D Cursor's location.
Use Workplane: When enabled, drawing and snapping will be constrained to the active Workplane object (see section 4).
Ortho Mode: Locks mouse movement to horizontal or vertical axes for drawing straight lines.
Wall-Arc Alignment & Lock Section:
Alignment: Controls the vertical placement of the wall's geometry relative to the path you draw.
Base: The path is at the bottom of the wall.
Middle: The path is at the vertical center of the wall.
Top: The path is at the top of the wall.
The Refresh button updates the alignment for selected objects.
Lock: A powerful feature to protect objects. You can lock/unlock selected walls and arcs. Locked objects cannot have their width, height, or alignment changed. The panel shows a count of locked objects in the scene.
4. Workplanes:
Workplanes are helper objects that define a 2D drawing surface in 3D space.
Create Workplane: Creates a new planar mesh object. You can choose its axis (XY, YZ, XZ). It has a semi-transparent red material for visibility.
Align Workplane (Click Face): Click this, then click on any face of a mesh object in Object Mode. A new workplane will be created, perfectly aligned with that face.
Align View to Active (Top): Aligns the 3D viewport to look top-down at the currently selected workplane.
Note: You can hide all workplanes in the scene by toggling the "Show Workplanes" property found in the main panel's "WORKPLANE" box.
5. Creating Walls:
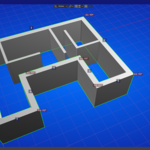
The "WALL" section is for creating straight, extruded walls.
Settings:
Wall Width / Height: Set the dimensions. The refresh buttons (↻) apply the current settings to all selected, unlocked walls.
Closed Wall: Creates a closed loop from your path (connects the last point back to the first).
Extrude Along Workplane Normal: If using a workplane, the wall will extrude along the workplane's local Z-axis instead of the global Z-axis.
How to Draw a Wall:
Click the Start Wall button.
Left-click in the 3D viewport to place points.
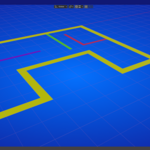
Live Preview: A yellow rectangle will show the wall's width as you move the mouse.
Numeric Input: After placing a point, type a number (e.g., 5) and press Enter to set the exact length of the next segment. This can be done by using the keyboard numbers or the numpad.
Angle Lock: After placing a point, hold Shift and move the mouse to see a preview, then click to open a dialog to set an exact angle for the next segment.
Ortho Lock: Press the O key during drawing to toggle ortho mode.
Grid Snap: Hold Ctrl while moving the mouse to snap the next point to a 1-unit grid.
Finish: Right-click or press Esc to finish drawing and create the wall mesh.
Editing Walls (Post-Creation):
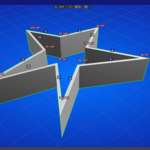
Segment Numbers: Enable "Show Segment Numbers" to see labels (1, 2, 3...) above each segment. Click the pencil icon next to a segment's length in the panel to edit it.
Angle Numbers: Enable "Show Angle Numbers" to see angles (A1: 90°, A2: 45°...). Click the pencil icon next to an angle in the panel to change it.
Edit Fixed Point: When editing a segment's length, you can choose which end (Start, Middle, End) stays fixed.
6. Creating Arcs
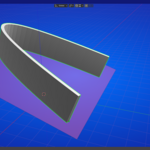
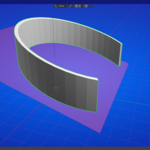
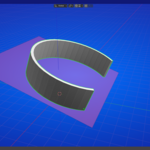
The "ARC" section creates curved walls defined by three points.
Settings:
Arc Width / Height: Set the thickness and extrusion height of the arc. Use the refresh buttons to apply changes.
Use Circular Arc: When enabled, creates a true circular arc between the three points. When disabled, creates a quadratic Bézier curve.
How to Draw an Arc:
Click the Start Arc button.
First Point (P0): Left-click to place the first endpoint of the baseline.
Second Point (P2): Left-click to place the second endpoint of the baseline.
You can use numeric input to set the baseline length.
Hold Shift after placing the first point to set an exact baseline angle.
Third Point (P1): Left-click to place the "apex" or control point, which defines the arc's curve.
You can use numeric input to set the exact height of the arc's peak.
Segments: After placing the third point, use the mouse wheel (Wheel Up/Down) to increase or decrease the number of segments for a smoother curve.
Finish: Right-click to finalize and create the arc mesh.
Editing Arcs (Post-Creation):
The panel displays the arc's Baseline Length and Top Height. Click the pencil icons next to these values to edit them directly.
The arc's geometry will update in real-time to preserve the other dimension.
7. Creating Polylines & Rectangles
These tools are for creating simple 2D meshes (without thickness or height) for layout or reference.
Polyline:
Click Start Polyline.
Left-click to add vertices. The drawn lines are shown in yellow.
Uses the same Ortho (O) , Snapping, Numeric Input, and Angle Lock (Shift) features as the Wall tool.
Draw Mode: Choose how the polyline is finalized:
Polyline: Creates an open chain of edges.
Close: Creates a closed loop of edges.
Close and Fill: Creates a closed loop and fills it with a face.
Right-click to finish.
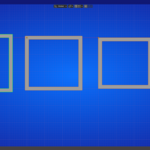
Rectangle:
Click Start Rectangle.
First Click: Defines the first corner.
Second Click: Defines the opposite corner.
Dimension Input: After the first click, you can press Shift to open a dialog to enter exact Length (X) and Width (Y) dimensions.
Uses the same Snapping and Grid Snap (Ctrl) features.
8. Additional Features & Tips
Top Face Color: You can assign a color to the top faces of your walls and arcs.
Select the objects.
In the "TOP FACE COLOR" box, choose a color.
Click Apply to Selected. The add-on will create a dedicated material for this color and assign it only to the top faces.
Lock Indicators: When a wall or arc is locked, a small orange lock icon (a padlock shape) will appear floating above it in the 3D viewport. This visual cue helps you quickly identify protected objects.
Unit Handling: The add-on respects Blender's scene unit settings (Metric/Imperial). Lengths displayed in the interface will use your chosen units (e.g., meters, feet, inches).
9. Troubleshooting & Important Notes
Object Mode Required: Most editing operations (updating width/height, toggling lock, applying colors) require the target objects to be in Object Mode, not Edit Mode.
"Polysolid" and "Arc" Data: The add-on stores its data (centerline, width, alignment, etc.) as custom properties on the mesh objects. Do not manually delete these properties, or the editing features will break.
Workplane Parent: When "Use Workplane" is active, newly created walls, arcs, and rectangles will be automatically parented to the active workplane. This makes transforming the entire drawing easy.
Performance: For very complex arcs, keep the number of segments reasonable (e.g., 32-64) to maintain performance.
Have questions about this product?
Login to message
| Blender Extension Compatible | Yes |
| Sales | 10+ |
| Dev Fund Contributor | |
| Published | 5 months ago |
| Blender Version | 4.2 - 5.1 |
| Extension Type | Add-on |
| Render Engine Used | Blender-Internal, Cycles, Eevee |
| License | GPL |
