 Lumitools


Installation
- Download the SimpleSkelly ZIP file.
- In Blender, open Edit → Preferences → Add-ons.
- Click the dropdown in the top-right and choose Install from Disk.
- Select the downloaded ZIP file.
- Enable SimpleSkelly.
- Open the 3D Viewport and press N.
- Find the SimpleSkelly tab in the sidebar.
SimpleSkelly uses Blender’s built-in Rigify add-on for generating control rigs. It will attempt to enable Rigify automatically. When Rigify is unavailable, SimpleSkelly will show a message explaining what needs to be enabled.
Quick Rig
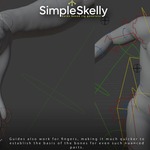
Use Quick Rig when starting with an unrigged biped or quadruped character.
- Choose Biped or Quadruped.
- Select the direction your character is facing.
- Click Create Guides.
- Move the guides into position around your character.
- Adjust the torso and neck settings when required.
- Click Build Skeleton.
- Inspect the generated skeleton.
- Click Create Rig to generate the final animation controls.
The guide stage remains separate from rig creation, so you can correct proportions before committing to the final control rig.
Mecha Bind
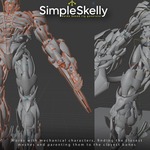
Mecha Bind is a separate workflow for rigid models made from multiple mesh objects.
It works well for:
- Robots
- Mechanical characters
- Armour pieces
- Hard-surface assemblies
- Modular character parts
To use it:
- Select the armature.
- Select the mesh objects you want to bind.
- Open the Mecha Bind section.
- Choose how object positions should be evaluated.
- Click Bind Selected.
Each selected object is assigned to the closest appropriate bone. This avoids manually parenting every separate mechanical part.
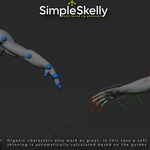
Use this workflow for rigid objects. Organic characters that need smooth deformation should normally use standard weight painting or automatic weights.
Custom Rig
Custom Rig is intended for characters that already have a humanoid skeleton.
SimpleSkelly builds a Rigify-based control rig over the existing bones while allowing the original skeleton to remain as the deformation structure.
- Select your existing armature.
- Open the Custom Rig section.
- Let SimpleSkelly detect the main character bones.
- Check the bone assignments.
- Correct any assignments that were not detected properly.
- Generate the control rig.
The required body bones include the hips, spine, head, arms and legs. Bone naming differs between characters, so always check the detected assignments before generating the rig.
The generated setup includes animation controls and IK where appropriate.
Important Notes
- Apply sensible object scale before starting.
- Keep the character near the scene origin during setup.
- Avoid changing bone names after creating the final rig.
- Save a backup of the Blender file before generating or replacing rig structures.
- Complex or unusual skeletons may require manual bone mapping.
- Mecha Bind is intended for separate rigid objects, not smooth organic deformation.
Support
For help, updates and product information, visit LumiTools.io.
Thank you for supporting LumiTools. We build focused Blender tools designed to remove repetitive production work without making the workflow more complicated than it needs to be.