 SineWave


Why I built this
I got tired of doing the same thing every single time.
Open Blender. Go to Render Settings. Pick the engine. Set samples. Set bounces. Toggle denoising. Set resolution. Set FPS.
Set aspect ratio. Set output folder. Maybe wire up a compositor for bloom. Then render.
Five to ten minutes. Every new scene. For the same settings I already knew I wanted.
One day I was setting up a 9:16 Reels render for the fourth time that week and realized — I wasn't thinking anymore. I was
just clicking through muscle memory. That's exactly the kind of work a computer should do.
So I sat down and wrote this add-on. Not to reinvent rendering. Just to turn "the settings I use every time" into one button.
What it does
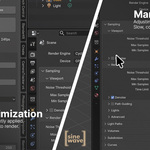
One panel in the N-sidebar. You pick:
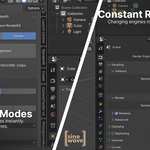
Engine — Cycles or Eevee
Resolution — 1080p or 4K
Frame rate — 24, 30, or 60 fps
Aspect ratio — 16:9, 9:16, 1:1, 4:5, 21:9, 2.35:1, 4:3, 3:2
Quality — Normal (fast) or High (clean)
Compositing preset — Clean, Cinematic, Bloom, Lens Flare, Chromatic, Film Look, or Full FX
Hit Optimize. Your scene is render-ready.
Hit Compositing and it builds the node tree for you — Glare, Lens Distortion, Color Balance, Vignette, Film Grain, all
pre-wired.
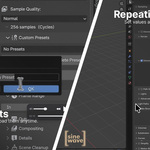
You can also save your own settings as a custom preset and load it on any project.
Performance
Tested on MacBook Pro M4, 16GB RAM:
1080p at 30 fps, 256 samples → 10 seconds (vs 45 seconds without)
4K at 30 fps, 256 samples → 25 seconds (vs 2:45 minutes without)
4K at 60 fps, 256 samples → 36 seconds (vs 3:00 minutes without)
Up to around 6–7 times faster renders — not because the math got faster, but because the sample counts, denoiser settings,
and light path limits are tuned for final-quality output without overshooting.
How to use
1. Install from disk, enable the add-on
2. Open the N-sidebar in the 3D Viewport, find the SineWave RenderKit tab
3. Pick your engine, resolution, fps, aspect, quality
4. Click Optimize
5. Optionally pick a compositing preset, click Compositing
6. Render
That's it.
Who it's for
Motion designers and 3D freelancers shipping client work. Short-form creators rendering for Reels, TikTok, YouTube Shorts.
Anyone who's tired of copy-pasting render settings between scenes.
Compatibility
Blender 4.2 through 5.0+. Cycles (GPU path tracing) and Eevee (realtime). Works on macOS, Windows, and Linux.
What's included
2 resolutions times 3 frame rates times 8 aspect ratios equals 48 output combinations. 7 compositing presets with Cycles and
Eevee variants. Custom preset save, load, and delete. Auto output folder creation. Compositor fallbacks for Blender 4.x and
5.0 node changes.
A note on the compositing presets
Every cinematic look — bloom, chromatic aberration, film grain, vignette — is a real compositor node tree. Nothing is baked
or hidden. After you apply a preset, open the Compositing workspace and tweak any node you want. The add-on just saves you
the setup work.
Thanks
— Johannes
Have questions about this product?
Login to message
| Blender Extension Compatible | Yes |
| Published | 5 months ago |
| Blender Version | 4.2 - 5.2 |
| Extension Type | Add-on |
| Render Engine Used | Cycles, Eevee |
| License | Mit |