 auron3d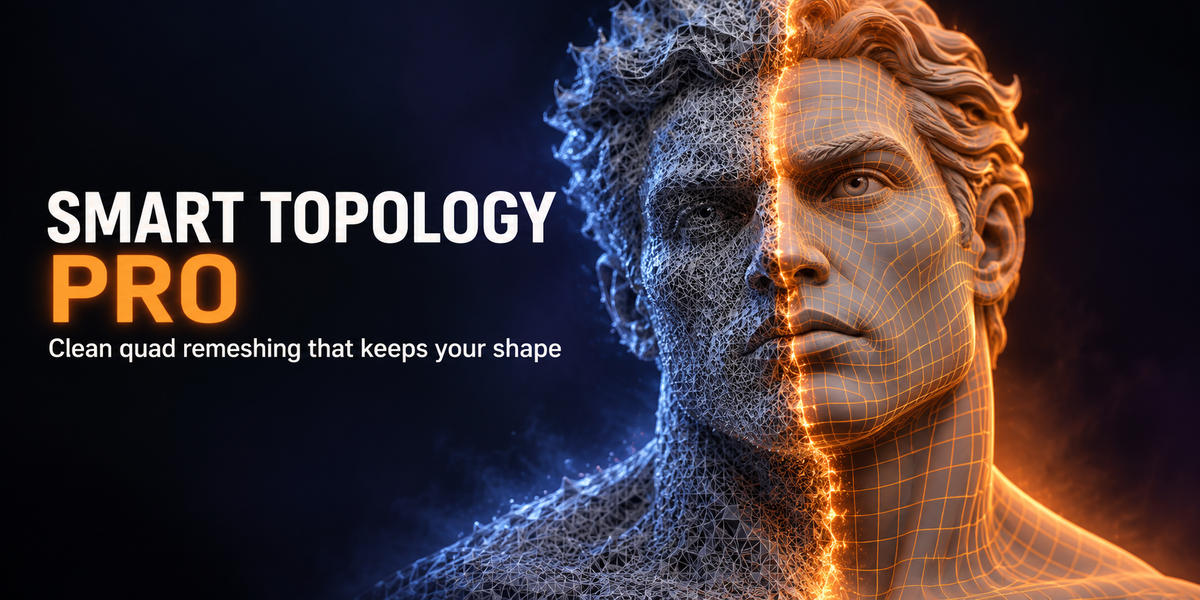

Smart Topology Pro turns any mesh into clean, all-quad topology without losing its shape or volume, and hands back a model that is still ready to animate. Version 1.2.0.
New in 1.2.0: the remesh engine is now pure Python and runs inside Blender on Windows, macOS and Linux. Every feature works on every platform and there is nothing extra to install.
Overview
Smart Topology Pro is a Blender add-on for quad remeshing and hand-guided topology work, built for artists who retopologize characters, sculpts, scans and hard-surface parts and need the result to stay faithful to the original.

- Remesh (Object Mode): rebuilds the whole mesh as quads. UVs, materials, vertex groups, shape keys, drivers and the armature setup carry over to the result.
- Topology Tools (Edit Mode): Remesh Selection, Smart Subdivide, Shape Subdivide with exact shapes or your own curves, Joint Topology for elbows and knees, Auto Bevel, loop checks and reusable topology templates.
Every tool edits the Basis shape and keeps every shape key in step, so a rigged character stays rigged.
Why Smart Topology Pro
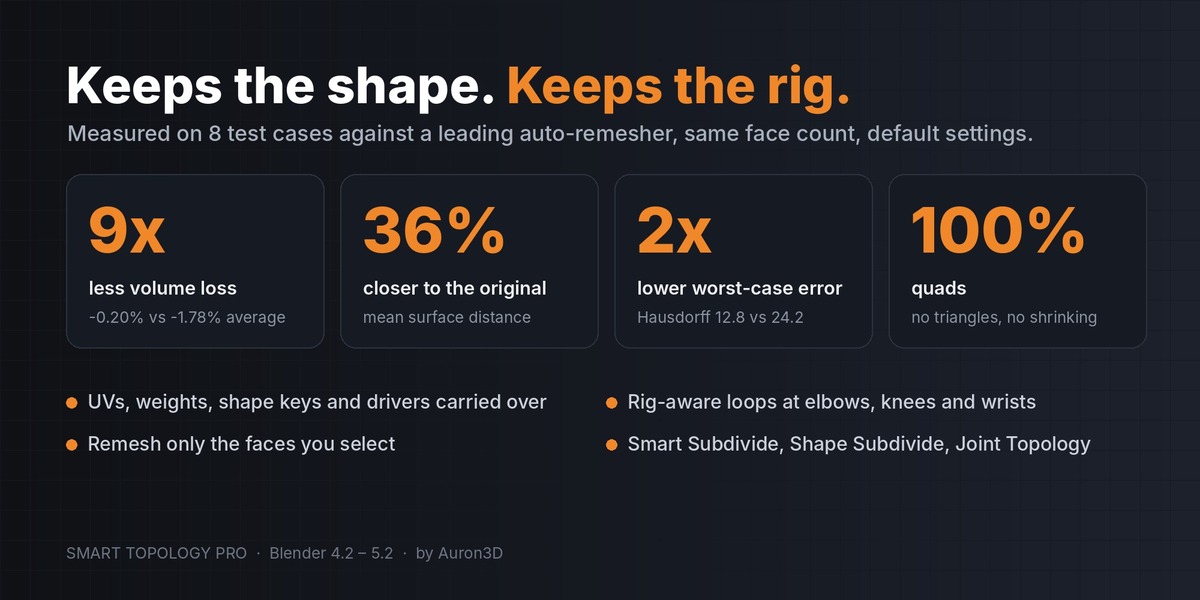
The result keeps the shape: in a measured test against Smart Remesh 3.0.0 it lost about 8x less volume and stayed about 37% closer to the original surface.
- Shape and volume first. Preserve Volume fits the new surface through the original, so models do not shrink. Hard corners snap back, and the deviation is measured on every candidate.
- Rig-ready output. UVs, materials, vertex groups, every shape key, shape-key drivers, parent and Armature modifiers are rebuilt on the result.
- Character-aware flow. It reads the armature to run loops around limbs and place exact loops at elbows, knees, wrists and knuckles.
- Exact symmetry. It remeshes one half and mirrors it, so both sides match to the vertex.
- Remesh only what you select. Rebuild a messy area and stitch it into the untouched mesh around it.
- Control when you want it. Paint density with a vertex group, draw guide curves, or let marked edges, UV seams and sharp edges become loops.
- Several variants, best one kept. Auto runs engine variants in parallel and keeps the best-scoring result.
- Non-destructive and fast. The original is kept, Restore and Compare are one click, and the engine runs in the background (Esc cancels).
Measured results (average of 8 cases: beveled box, cylinder with a pocket, Suzanne, organic blob and a 12.5k-face character (CC0 human base mesh) at two densities each; default settings and the same face target for both add-ons; distances in thousandths of the bounding-box diagonal):
| Measure | Smart Topology Pro | Smart Remesh 3.0.0 |
|---|---|---|
| Volume change | -0.22% (worst -0.54%) | -1.88% (worst -6.2%) |
| Mean distance to the original | 0.84 | 1.34 |
| Worst-point deviation (Hausdorff) | 14.3 | 22.0 |
| Distance from hard edges | about 1.4x closer | baseline |
| Shrinks the model | Barely (-0.09 on average) | Yes, in all 8 cases (-0.78 on average) |
| Time per run | 0.9 to 11 s | 1.1 to 5 s |
Test date: October 6, 2026, Blender 5.2, Windows (32 threads). Smart Remesh stalled on the blob at 400 faces in an earlier run, so its numbers for that model come from the October 5 run of the same mesh.
Installation and requirements
| Blender | 4.2 or newer (tested on 5.2) |
| Windows, macOS, Linux | Smart Topology engine, all features (pure Python, runs in Blender's own Python; no compiled code) |
- In Blender, open Edit > Preferences > Get Extensions.
- Open the drop-down at the top right and choose Install from Disk.
- Pick
Smart_Topology_Pro-v1.2.0.zip. The add-on is enabled right away. - Open the 3D Viewport sidebar (N) and select the Smart Topology tab.
The tab name, how many CPU cores the Auto variants may use at once (default: all) and the engine timeout (default 600 s) are in the add-on preferences.
Quick start
A first remesh takes four clicks and leaves your original untouched.
- Select the mesh in Object Mode.
- In the Smart Topology tab, leave Model and Engine on Auto.
- Set Faces to the count you want (for example 10,000 for a full character).
- Optional: set Symmetry to X for a symmetric model.
- Press Remesh. A progress bar shows each stage; Esc or Cancel stops it.
The result appears as a new object named after the original plus _STP (for example Body_STP), with UVs, materials, vertex groups, shape keys and rig already on it. The Result panel shows its score, face count, poles and deviation. Toggle compares the two, Restore brings the original back, and Remesh Again replaces the previous result.
Remesh panel reference
| Setting | What it does |
|---|---|
| Model | Auto detects organic vs hard surface. Organic: smooth flow, no forced creases. Hard Surface: loops lock onto creases. |
| Engine | Auto runs several variants in parallel and keeps the best score. Smart Topology runs once. QuadriFlow uses Blender's built-in remesher. |
| Target | Face Count, or Edge Length in scene units. |
| Creases | Auto picks the angle from the shape. Off for characters and sculpts. Custom uses Crease Angle. |
| Symmetry | Off, X, Y or Z. Remeshes one half and mirrors it for an exact match. |
| Pure Quads | All-quad output. Off allows a few triangles. |
- Flow & Quality: Reprojection Steps, Align to Borders, Intrinsic Flow, Deterministic (same input, same result).
- Density: a vertex group as Density Group (More or Fewer Faces, Strength). Paint Density opens Weight Paint on it. Curvature Adaptive spends more faces on curved detail.
- Edge Flow Guides: Sharp Edges and UV Seams become loops; Exact Loops places a loop right on them. Curves in Guide Curves steer the flow; Draw Guide Curve draws one on the surface.
- Hard Surface: Lock Feature Lines, Mark Sharp & Crease, and Support Loops for subdivision-ready results.
- Character Rig: Limb Flow follows the bones; Joint Loops places exact loops at elbows, knees, wrists and knuckles; Include Head lets head bones steer the face.
- Cleanup: Tidy Poles, Relax and Preserve Volume (on by default). Small holes between fingers or toes are closed with quads and loose debris is removed.
- Input: Use Modifiers, Rest Pose (mutes Armature and simulations while reading) and Basis Shape.
- Keep From Original: UV Maps, Materials, Vertex Groups, Shape Keys, Drivers, Rig and Shading.
- Output: Replace Original, Hide Source and Update Previous Result.
- Result: Poles or Deviation overlay, Toggle, Restore, Detail to Multires (projects the original's detail onto a Multiresolution modifier) and Keep Result.
Topology Tools (Edit Mode)
In Edit Mode the tab shows Topology Tools: local edits that keep the smooth shape and volume of the mesh and stay all-quad.
Remesh Selection
Remeshes only the selected faces and stitches the new quads into the rest of the mesh. Faces outside the selection never move, and vertex groups, shape keys, UVs and materials carry over to the new faces.
- In Edit Mode (face select), select the area to rebuild: a messy patch, a sculpted spot, the face, a band around a limb.
- Set Density: 1 gives about as many faces as the selection has now, 2 twice as many, 0.5 half.
- Press Remesh Selection. The new faces stay selected; F9 changes Density and runs it again.
| Selection | What happens |
|---|---|
| Small area (border of up to 40 edges) | Filled with one clean grid that matches its border exactly |
| Larger area | Remeshed by the engine and joined to the border by a strip of quads; where the counts differ, 3-to-1 reductions spread the difference |
| Narrow band with two borders | Rebuilt as clean rings between the two borders |
| Open borders inside it (neck cut, mirror middle line, eye openings) | Kept vertex for vertex, so a Mirror modifier still welds |
| Several separate areas | Each area is done on its own |

Smart Subdivide
Select faces and press Smart Subdivide. The selection is subdivided with a clean quad transition at its border; faces outside it are not touched. Density (cuts) sets how fine the new faces are. With a Subdivision modifier on the object, the new cage subdivides to the same shape.

Shape Subdivide
Subdivides inside an exact shape, with loops that follow its outline.
- Pick a shape: Circle, Oval, Rectangle, Rounded Rectangle or Teardrop, and set Width, Height, Rotation and Roundness.
- Place Shape follows the mouse over the mesh. Click to place it, or click and drag to size it.
- Loops sets how many loops follow the outline (0 = as many as fit); a grid fills the rest.

- Mirror X builds the mirrored copy too. Snap Middle centres a shape placed near X = 0 exactly on it.
| Key while placing | Action |
|---|---|
| Click / drag | Place / place and size |
| S | Scale around the centre (click or Enter confirms, Esc undoes the scale) |
| R | Rotate around the centre |
| G | Let the shape follow the mouse again |
| 1 to 5 | Switch shape |
| X | Mirror X on or off |
| C | Place as a curve instead of subdividing |
| Esc / right click | Cancel |
Curve: your own shapes. Press Curve (or C while placing) to turn the shape into an editable Bezier curve lying on the surface, with as few points as possible (4 for a circle). Move points and handles with G, R and S; its mirror shows in blue when Mirror X is on. Press Subdivide Inside Curve; Edit brings the curve back for another try.
Joint Topology
Rebuilds a band of faces around a limb as clean, fully loopable joint topology. Select Joint Band picks the band around a joint of the rig; the zone (knee, elbow, ankle, wrist, shoulder, hip, finger, neck) is detected automatically. Fold Side gathers loops where the skin folds, Ring Density sets spacing and Clean Seam keeps UV seams tidy. Press Rebuild Joint Topology.
Smart Topology templates
Save the edge flow of one zone (for example a knee cap) with Learn from Selection, then rebuild it on any mesh: put the 3D cursor on the target, press Select Area, adjust Size, Rotation, Centre and Mirror, and press Apply Topology. Templates survive add-on updates.
Auto Bevel and Loops
- Auto Bevel bevels the selected edges, or the Sharp/Creased edges, or edges sharper than Auto Angle. Keep Shape only adds support loops.
- Check Loops reports quads, poles and closed edge loops; Select Loop Breakers selects where loops stop; Make Loopable joins triangle pairs and dissolves doublets.
Shape keys in Edit Mode
- Shape Keys in Edit Mode (on by default) shows the same shape as Object Mode whenever a mesh with shape keys enters Edit Mode, Tab included.
- Topology tools edit the Basis key; select it before using them.
- New vertices get matching positions in every shape key, so morphs and correctives keep working on the edited area.
Tips and known limitations
- Characters: Model Organic, Creases Off, Symmetry X, Character Rig on.
- Hard surface: Model Hard Surface; turn on Support Loops if the result will be subdivided.
- Paint density where you need detail (face, hands) instead of raising the total face count.
- Very rarely a tiny hole stays where the engine folds two faces onto each other (most often at the mouth with Symmetry on); a quick manual fill fixes it.
- Remesh Selection: a narrow slit inside the selection (closed lips) right next to its border may not be kept; leave it out of the selection or select a wider area.
Credits, license and support
Smart Topology Pro is made by Auron3D. Version 1.2.0, © 2026 Auron3D. Released under GPL-3.0-or-later. The Smart Topology engine is a pure-Python port of Instant Meshes (BSD-3-Clause), © 2015 Wenzel Jakob, Daniele Panozzo, Marco Tarini and Olga Sorkine-Hornung; its license ships in engines/stpe/LICENSE-instant-meshes.txt. The add-on contains no compiled code. Fallback engine: QuadriFlow, built into Blender.
Support: message Auron3D on Superhive with your Blender version, operating system, the face count and, if possible, the .blend file.
 Included
Includes 12 months of
- Support from auron3d
- Product updates
Extend this product’s Support Period +12 months: 25% of product price
Have questions before purchasing?
Login to message
| Blender Extension Compatible | Yes |
| Published | 2 days ago |
| Blender Version | 4.2 - 5.2 |
| Extension Type | Add-on |
| Render Engine Used | Cycles |
| License | GPL |
Discover more products like this
auto-retopology retopology sculpting retopo subdivision remesh shape keys quad remesh topology quads rigging character