 AUER
AUER


Requirements
Blender 5.0, 5.1 or 5.2. Windows, macOS and Linux.
Install
Edit > Preferences > Add-ons > Install from Disk, pick spline_uv-v1.zip, and enable it. A Spline UV tab appears in the 3D Viewport sidebar (press N).
Three ways to start
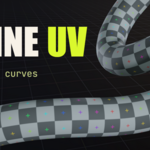
Unwrap Selected Curves: select any curve already in your scene and press the button. It becomes a tube with a real UV map. If that curve already had a round bevel, its thickness and resolution are taken over so the shape does not change, it simply gains UVs.
Add Unwrapped Tube: creates a new Bezier curve that is already a tube, with a checker applied so you can see the mapping immediately. Also available in Add > Curve.
Draw Unwrapped Tube: starts a freehand session. Every stroke becomes a tube the moment you release the mouse.
Your object stays a curve the whole time. Edit points, move handles, extend the spline: the tube and its UVs follow live.
Tube section
- Radius: thickness of the tube. Per-point radius (Alt+S in Edit Mode) is respected and multiplies this value.
- Resolution Around: number of sides around the tube.
- Resolution Along: points per segment along the curve, the native curve resolution.
- Fill Caps: closes the ends. Caps get their own mapping at the same texture density as the tube.
- Close Curve: joins each spline end to end to make a ring. Nothing is moved or deleted, unticking gives you exactly the curve you had.
- Shade Smooth: smooth shading on the tube.
UVs section
Texture tiles are square by construction, whatever the radius, and editing or extending the curve extends the texture instead of stretching it.
- Scale UVs (drag): click, then move the mouse to resize the texture live. Ctrl snaps to whole tiles so the wrap stays seamless, Shift refines, left click confirms, right click cancels. The UV Scale field below does the same with an exact number.
- Non-Square: when you want to stretch the texture on purpose, with separate Scale U and Scale V factors.
- Offset UVs (drag): slides the texture. Horizontal moves it along the curve, vertical turns it around the tube. X or Y locks one axis.
- Rotate UVs (drag): angles the texture on the surface. Ctrl snaps to 15 degree steps.
- Twist UVs (drag): spirals the texture along the curve, for candy cane stripes and twisted sleeves. Ctrl snaps to quarter turns.
- Seam Rotation: turns the texture seam around the tube, so you can hide it against a wall without selecting a single edge.
- Copy Settings to Selected: tune one tube, then push all of its settings to every other selected tube.
Trim Sheet
Maps the tube onto one strip of a trim atlas: the length runs along the strip, the tube circumference fills its height, and the caps stay inside the strip.
With Count Mode on, type how many rows your atlas has and pick the row number, row 1 being the top strip of the texture. With it off you set the strip position and height by hand, for atlases with uneven bands. Trim Position X slides the tube along the strip, which is how you line two pipes up at a connector.
While Trim Sheet is on, the controls that shape U are greyed out because the trim layout drives them.
Texture section
Three checkers in one click: UV Grid, Color Grid, and Gravity, a checker with arrows that instantly shows a flipped or rotated mapping. Your original materials are saved and put back by Remove Checker. Tile Checker makes the checker finer or coarser to judge texel density, and only touches the checker, never your real UVs.
Freehand drawing
Press Draw Unwrapped Tube and sketch in the viewport.
- Mouse wheel: adjusts the stabilizer leash while you draw
- Shift: slow, precise drawing
- Ctrl: straight segments
- Right click, Esc or Enter: ends the session
- The magnet button next to Draw: strokes stick to the models under your cursor
With the magnet on, the cable rests one radius above the surface, rides over edges, keeps its height when your cursor leaves the object, and never bends tighter than a cable that thick physically could. Drawing a cable along a wall, over a crate and down a machine takes a single stroke.
The Stabilize Stroke checkbox and its radius control how much hand jitter is filtered out. Every new tube starts with the settings of the previous one, so a radius you liked carries over to the next cable.
Convert to Mesh
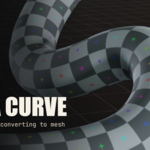
Texture painting and baking need a mesh. One click converts the selection, and the UV map is already a real UV layer, as if you had unwrapped by hand. A hidden copy of the editable curve is kept next to the result, so you can always go back.
Everything the add-on creates or converts is filed in a Spline_UV collection.
Good to know
The UV map is named UVMap and is read by any material in EEVEE and Cycles, no conversion needed.
Curves using a custom profile (bevel object or custom profile mode) are skipped, this version works with round tubes.
Library linked curves are skipped, make them local first.
Legacy extrude and 2D fill are switched off when unwrapping, since that geometry would bypass the UV generation.
Have questions about this product?
Login to message
| Blender Extension Compatible | Yes |
| Dev Fund Contributor | |
| Published | about 2 months ago |
| Blender Version | 5.0 - 5.2 |
| Extension Type | Add-on |
| Render Engine Used | Arnold, Cycles, Eevee, Mental-Ray, Octane, Vray |
| License | GPL |