Stain Dynamics
 Animation Store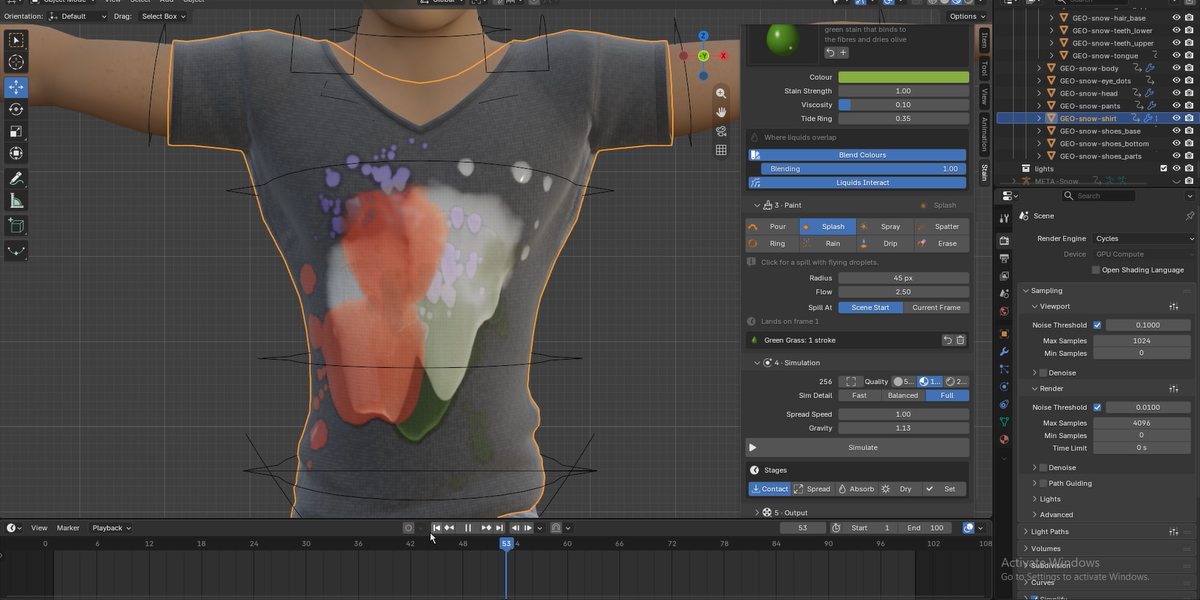
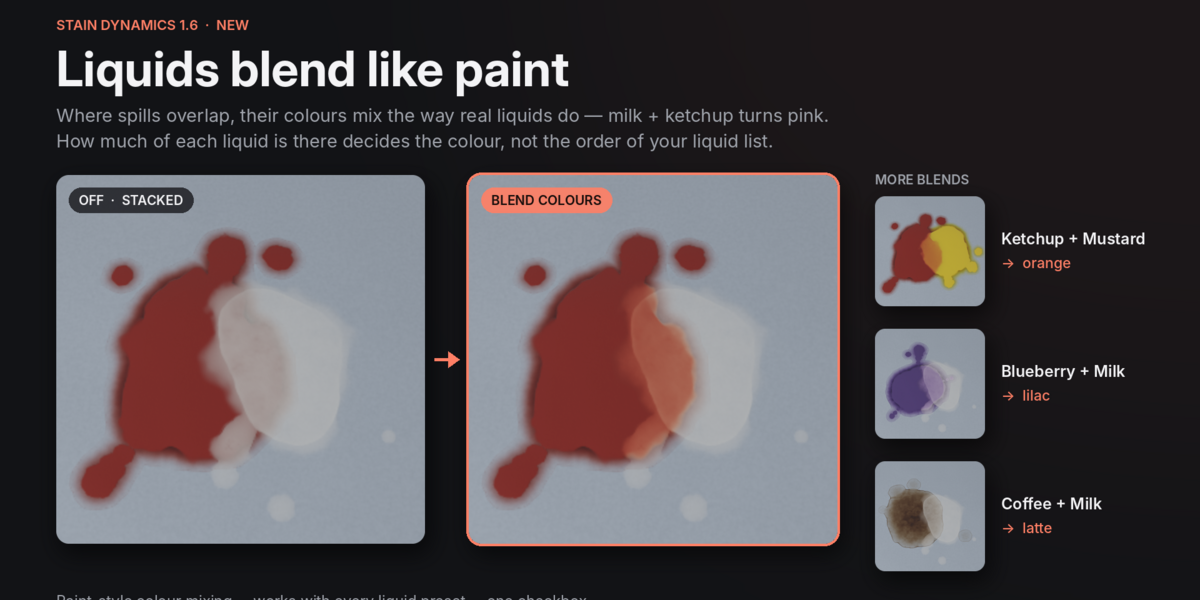
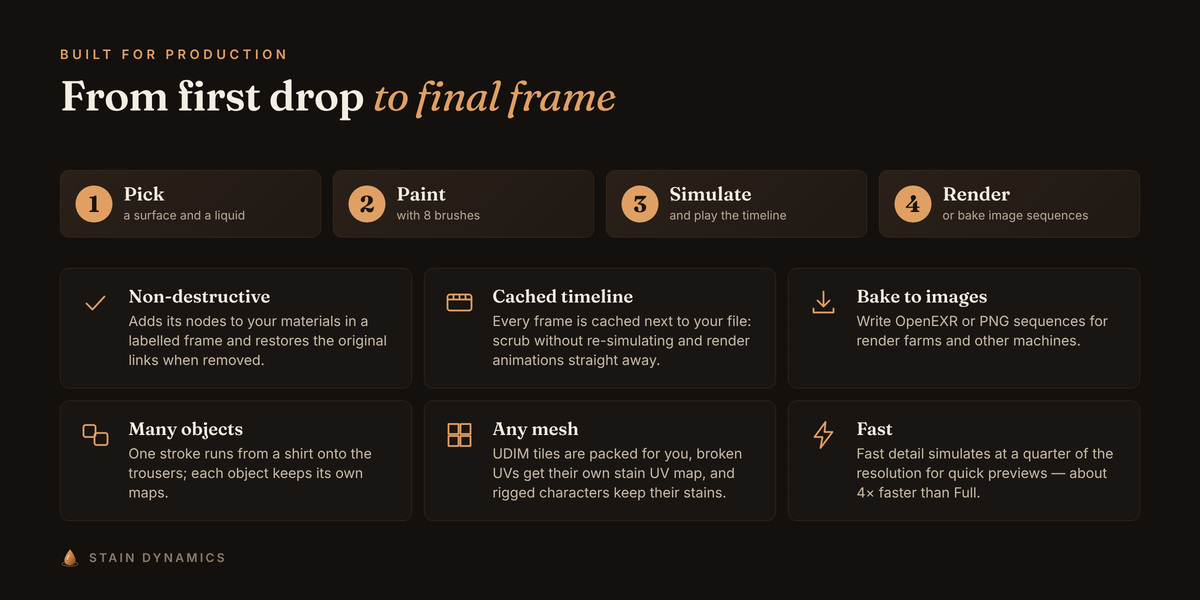
Stain Dynamics Documentation
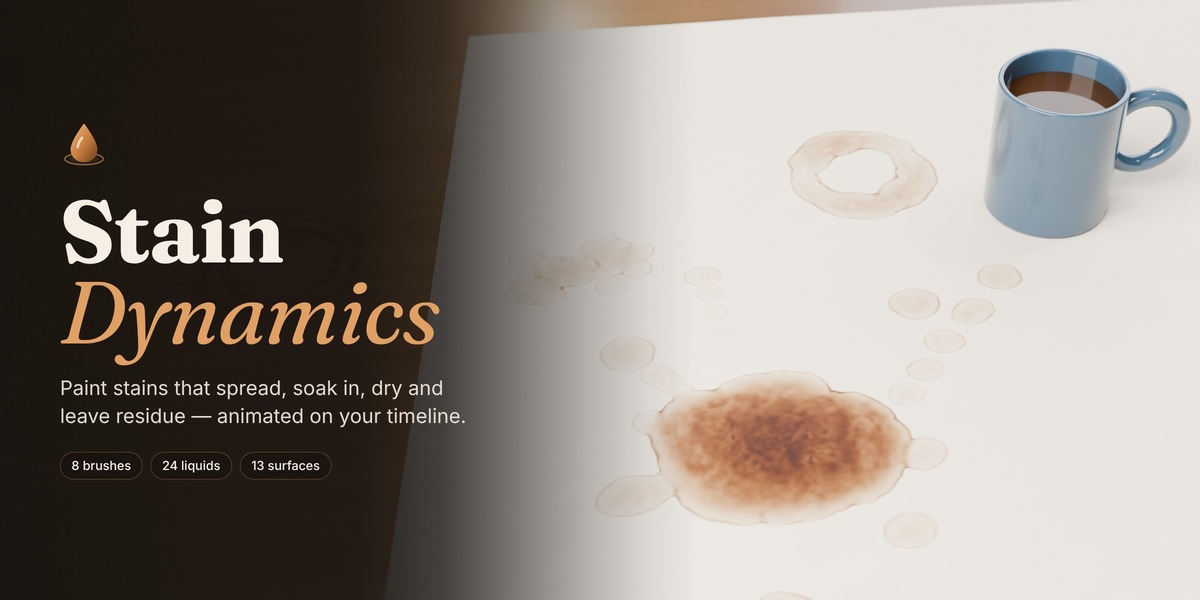
Stain Dynamics paints liquid onto any UV-mapped mesh and simulates how it spreads, soaks in, runs downhill, dries and leaves residue over the timeline. The result is written into image maps that plug into your existing materials without destroying them. You can scrub the animation instantly, render it, bake it to image sequences or freeze it into still textures.
2. Installation
Install as an extension
- Open Edit > Preferences > Get Extensions.
- Open the drop-down menu at the top right of the window and choose Install from Disk.
- Select stain_dynamics-1.5.5.zip. It is installed and enabled.
Dragging the zip file into the Blender window also works.
Where to find it
- 3D Viewport sidebar: press N and open the Stain tab.
- Properties editor: the Physics tab.
- 3D Viewport Object menu.
3. Quick start
- Select a mesh and press Set Up Stain Dynamics.
- In 1 · Surface, click the swatch and choose a surface such as Cotton, Denim, Wood or Metal.
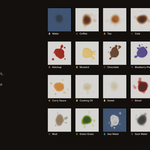
- In 2 · Liquids, click the droplet and choose a liquid such as Coffee, Ketchup, Oil or Mud. Add more liquids with the + button.
- In 3 · Paint, pick a brush, press Paint Stain and paint on the model. Press Enter to finish.
- In 4 · Simulation, press Simulate. When it finishes, scrub or play the timeline.
The simulation always covers the scene's frame range, set in Output Properties > Frame Range.
4. How it works
Stain Dynamics works in three layers: a surface map that describes your mesh, a solver that moves the liquid over it frame by frame, and a material setup that turns the result into colour, wetness, gloss and bump.
The surface map
During setup, the UV layout is rasterised into a grid of texels at the chosen Quality resolution. Each texel stores its rest-pose 3D position, its normal and its real-world size. Because of this, the physics works in true surface distances: UV stretching and islands of different sizes don't distort how far liquid spreads.
Texels that touch in 3D across a UV seam are linked, so liquid flows across seams as if the surface were continuous. It stops at open mesh edges.
Painting stores dabs, not pixels
Every brush stroke is stored as a list of 3D dabs: position, normal, radius, amount, frame and brush type. Nothing is baked into pixels while you paint. That's why you can change the resolution, the surface or the liquid after painting and simply simulate again. While you paint, a quick preview shows the liquid on the model.
The solver
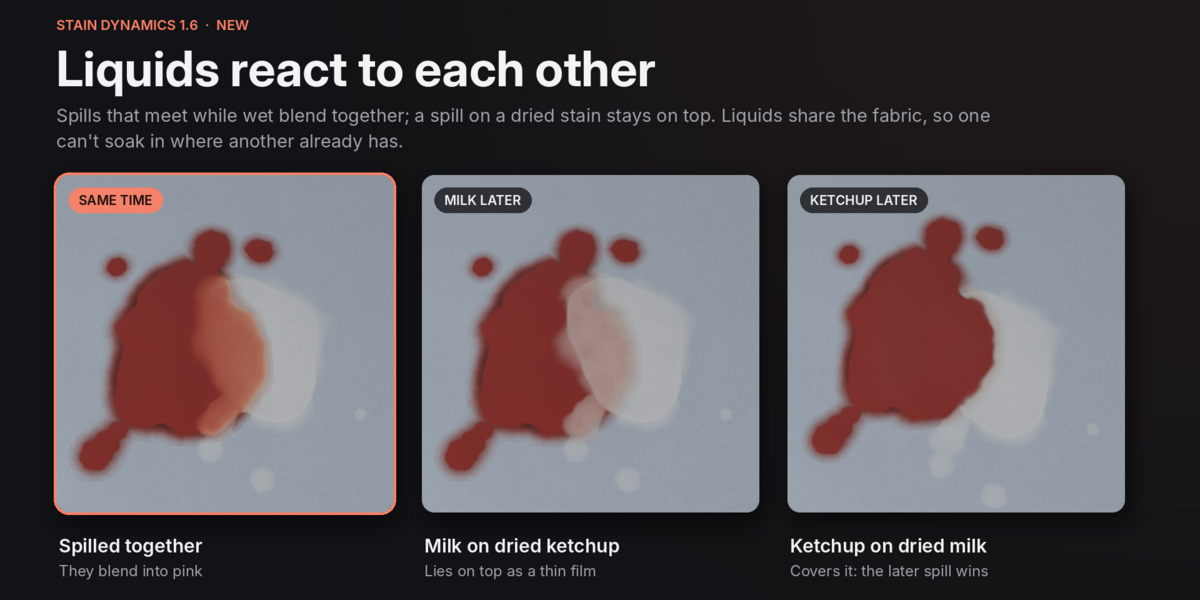
Each liquid you add is its own layer and never mixes data with the others. For every layer, the solver tracks standing liquid, absorbed liquid, dye in each, dye bound to the fibres, suspended solids, residue crust, free oil and absorbed oil. Every frame it applies these rules:
- Spreading: standing liquid spreads as a thin film, following ∂L/∂t = ∇·(D (L − pin)² ∇L). The thinner the film, the slower it moves, so puddles stop at a finite size. Thick liquids such as honey or ketchup spread much less than water or coffee.
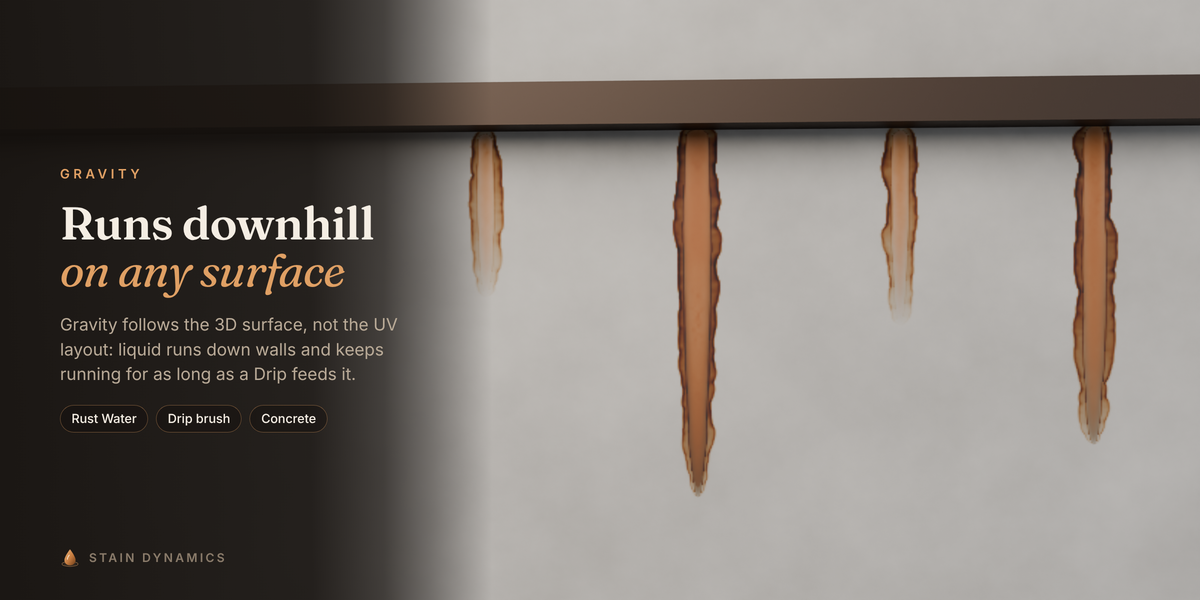
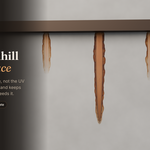
- Gravity: gravity is projected onto the surface's tangent plane (it isn't taken from the UVs), so liquid runs down a vertical shirt and collects in dips. By default, gravity points down in world space.
- Absorption and wicking: liquid soaks into the material up to its capacity and wicks through it. Porosity noise makes the absorption patchy, and wood can wick along a grain direction.
- Drying: water evaporates following W(t) = W₀·e^(−kt), faster at the wet edge. Dye drifts towards that edge as it dries, which forms the tide lines you see in coffee rings.
- Staining: dye binds to the fibres and is deposited when the liquid is gone, so drying never erases a permanent stain. Clean water leaves almost nothing behind.
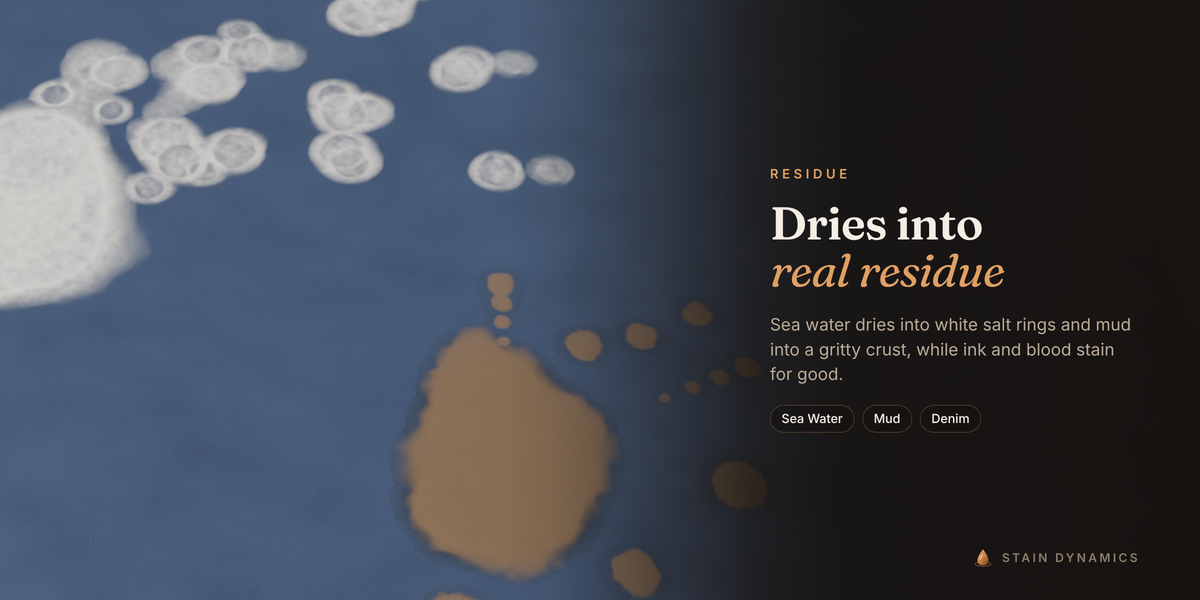
- Residue: suspended solids settle into a crust, as with mud, ketchup or chocolate. Some liquids leave salt rings, such as sweat and sea water.
- Oil: oil never evaporates. It keeps creeping slowly outwards, darkens the surface and adds sheen.
The result is deterministic: the same inputs always give the same frames.
Timing and drying
The simulation runs over exactly the frames you render, the scene's frame range. Drying is scaled to that range automatically: the slowest-drying liquid you painted is dry about 70% of the way from the first spill to the last frame, so the finished stain stays on screen for the rest of the shot. Liquids keep their character relative to each other. Honey still dries slower than coffee, and oils never dry. A longer frame range simply means slower drying.
The five stages
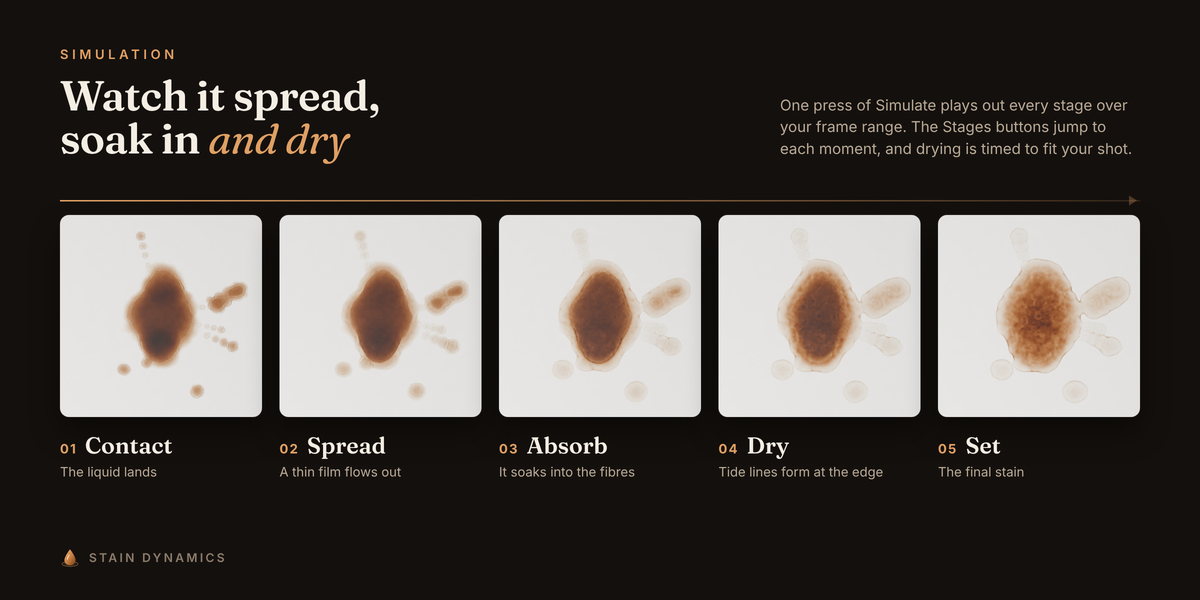
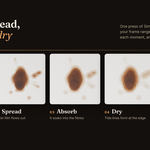
After simulating, Stain Dynamics detects five stages in the result. The Stages buttons at the bottom of 4 · Simulation jump the timeline straight to each one.
- Contact: the first frame with liquid on the surface.
- Spread: the liquid spreads out from where it landed.
- Absorb: most of the standing liquid has soaked into the material.
- Dry: the liquid has started to evaporate noticeably.
- Set: the liquid is essentially gone and the final stain remains. For oils, which never dry, this is the last frame.
The material response
The simulation writes three image maps for each object: Dye, Cover and Data. A node group placed in front of each Principled BSDF reads them and:
- multiplies the base colour by the dye,
- darkens and saturates wet areas,
- adds a glossy coat where liquid stands on top,
- lowers roughness where there is oil,
- composites opaque residue such as paint or mud,
- adds bump from the dried crust.
Your materials stay safe
Stain Dynamics never deletes your nodes. It inserts its nodes in a frame called Stain Dynamics and remembers every link it reroutes. Disconnect Materials or Remove Stain Dynamics restores the original links exactly. The eye toggle on the dashboard bypasses the effect without touching anything. Materials without a Principled BSDF get a Mix Shader overlay that is restored the same way.
Faster simulation with Sim Detail
The liquid can be simulated on a coarser grid than the final maps. Stain Dynamics then rebuilds full-size maps and restores the edge detail. The simulation runs in the background on several CPU cores, so Blender stays responsive, and separate liquid layers are simulated side by side. Frames after everything has dried are not recomputed.
This is an art-directable approximation, not a validated fluid simulation. It reproduces the characteristic behaviour of real stains: spreading, absorption, gravity runs, tide lines and residue.
5. The interface
Dashboard
The top of the panel shows:
- the object's status: painted, simulated or out of date,
- the eye toggle that switches the whole effect on or off,
- what you're about to paint (surface · liquid · brush) and the next step to take,
- the Paint Stain button,
- one-click fixes when something needs attention, such as UV problems, shared materials or disconnected maps,
- a UV map picker when the object has more than one UV map.
The drop-down menu on the dashboard contains Create Stain UV, Connect Materials, Disconnect Materials, Copy Settings to Selected, Reset Simulation and Remove Stain Dynamics.
1 · Surface
Choose a surface preset from the gallery, then adjust:
- Absorbency: how readily liquid soaks in.
- Wicking: how far absorbed liquid travels through the material.
- Irregularity: how patchy the absorption is.
The + button saves your own preset. The reset button reloads the preset values.
2 · Liquids
The liquid list shows each layer's colour, name, number of dabs and a visibility toggle. Use + and − to add and remove liquids. Choose a preset, then adjust:
- Colour: the colour of the dye.
- Stain Strength: how strongly the dye colours the surface.
- Viscosity: how thick the liquid is. Thick liquids spread less and land with crisper edges.
- Tide Ring: how strongly dye collects at the drying edge.
3 · Paint
Pick a brush from the grid. Radius and Flow (the amount of liquid) are always shown, and the selected brush's own settings appear below them.
Spill At decides when the painted liquid lands:
- Scene Start: on the first frame of the scene's frame range. It moves with the range if you change it.
- Current Frame: on the frame you're on. Use this to stage several spills at different times.
The buttons next to it remove the last stroke or clear all paint from the current liquid.
4 · Simulation
- Quality: the size of the stain maps. Draft is 256 px, Medium 512 px, High 1024 px and Ultra 2048 px, or choose Custom.
- Sim Detail: Fast, Balanced or Full. See Performance.
- Spread Speed: how quickly liquid spreads. The amount of liquid decides how far.
- Gravity: how strongly liquid runs downhill on tilted surfaces.
- Simulate: starts the simulation with a live progress bar. Press Esc or Stop to cancel.
- Stages: after simulating, jump to Contact, Spread, Absorb, Dry or Set.
5 · Output
Shows the cache size and contains Bake Image Sequence (OpenEXR or PNG) and the Use Baked Sequence toggle.
Pick a frame and bake the stain exactly as it looks there into still images packed inside the .blend. Choose New Material to get a reusable copy of your material that never changes when you simulate again (optionally listed in the Asset Browser), or Freeze Object to keep this object on that frame until you press Unfreeze.
Look
These settings change how the stain shades without simulating again:
- Stain Intensity: overall colour strength of the stain.
- Wet Darkening: how much darker and more saturated wet areas become.
- Wet Gloss: extra shine on soaked areas. Liquid standing on top always shines.
6. Painting
Press Paint Stain to start. A brush circle follows the surface and a small on-screen panel shows the brush, its settings and the shortcuts. You can keep changing settings in the sidebar while painting.
Shortcuts
- Left mouse drag: paint.
- [ and ], or Ctrl + mouse wheel: change the brush radius.
- Shift + [ and Shift + ]: change the flow (amount of liquid).
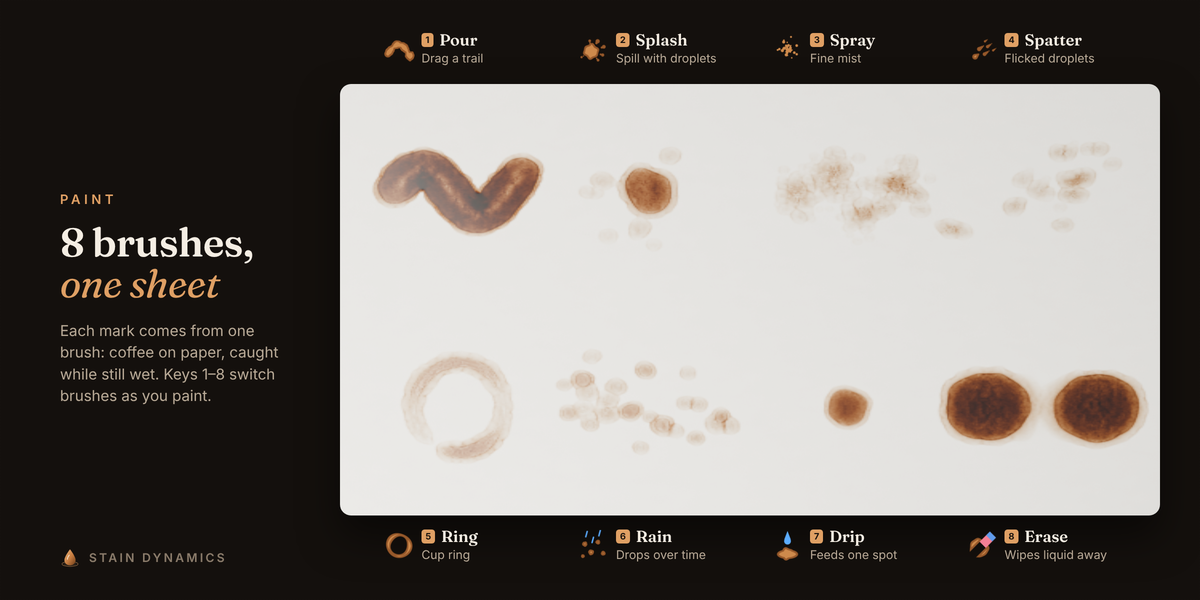
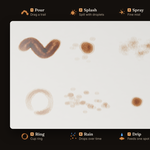
- 1 to 8: switch brush (Pour, Splash, Spray, Spatter, Ring, Rain, Drip, Erase).
- E: toggle Erase.
- Backspace or Ctrl + Z: remove the last stroke.
- H: hide or show the shortcut help.
- Enter, Esc or right mouse: finish painting. Ctrl + Z afterwards undoes the whole painting session.
- Middle mouse, mouse wheel, numpad, arrow keys and Space navigate the view, change frame and play as usual.
Brushes
- Pour (drag): a continuous trail of liquid. More flow spreads further.
- Splash (click): a spill with satellite droplets and streaks thrown away from the view. Thick liquids land with crisper edges.
- Spray (drag): a fine mist of droplets, densest in the middle. Settings: Density and Droplet Size.
- Spatter (drag): droplets flicked in the direction you move, each a small teardrop with its tail pointing where it flew. A click throws them away from the view. Settings: Droplets and Reach.
- Ring (click): the ring a wet cup or glass leaves. The brush circle is the cup and Rim Width sets the rim. The ring is slightly uneven and sometimes broken, like a real one.
- Rain (click or drag): single drops land one after another at random spots for Duration frames, like rain or a leaking ceiling. Settings: Drops and Duration.
- Drip (click): keeps adding liquid at one spot for Duration frames.
- Erase (drag): removes painted liquid on all frames.
Painting several objects at once
Select several meshes. The active object is the source, and painting and simulating work on the whole selection:
- Paint Stain paints whichever selected object is under the brush, so one stroke can run from a shirt onto trousers. Unselected objects in front block the brush (the circle turns grey), just as they would block a real spill.
- A selected object that isn't set up yet is set up the moment you first paint on it, copying the active object's surface, simulation and look settings.
- The liquid you paint is the active object's current liquid. On the other objects it goes into the liquid layer with the same name, which is created with the same settings if it's missing.
- Backspace removes the whole last stroke on every object it touched.
- Simulate simulates every selected object that has painted liquid, one after another, with overall progress. Stop ends the whole batch, and finished objects keep their results.
- Copy Settings to Selected copies surface, liquid, simulation and look settings from the active object. Painted liquid isn't copied.
- Each object keeps its own stain maps. If selected objects share one material, the newly set-up object gets its own copy (for example Fabric.001), so a stain on one object never appears on another.
7. Presets
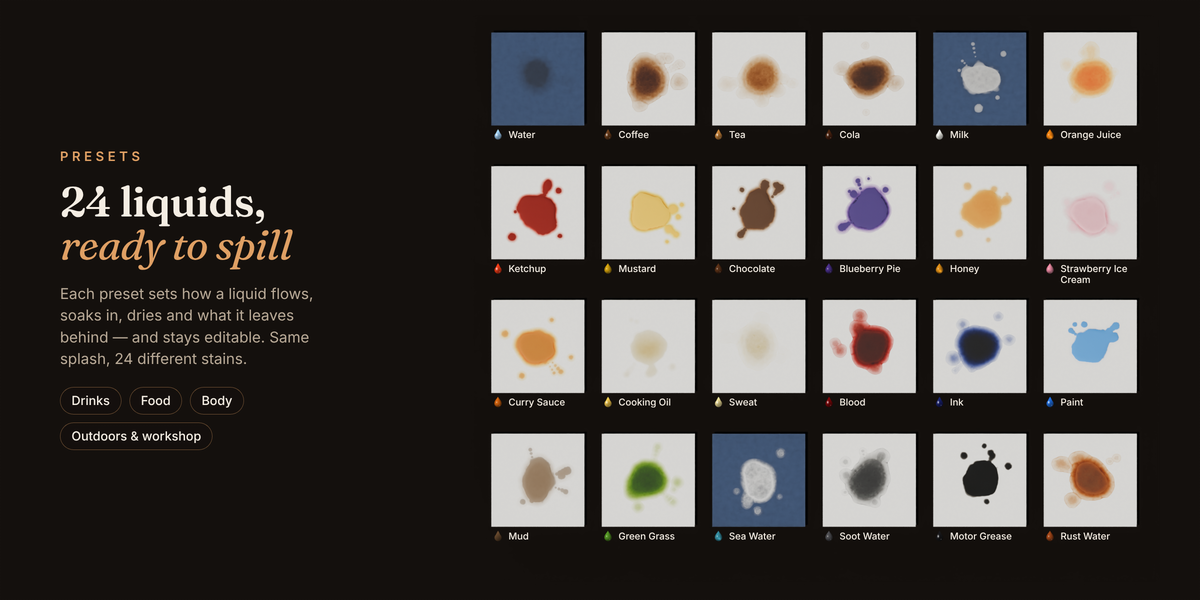
A preset sets everything about a surface or liquid, including detailed behaviour that has no slider in the panels, such as drying speed, dye binding, oil, residue, salt rings and grain direction. The sliders that are shown stay editable. Saved presets are stored in your user folder and are available in every file.
Liquids
Drinks
- Water: darkens while wet and dries back with only a faint tide mark.
- Coffee: fast spread, irregular edge and a dark drying ring.
- Tea: a lighter amber stain with a soft tide line.
- Cola: a brown sugary stain with a slightly sticky residue.
- Milk: a pale, slightly opaque residue.
- Orange Juice: a light orange stain with pulp at the edge and a sticky sugary sheen.
Food
- Ketchup: a thick, glossy tomato blob that barely spreads and slowly sets.
- Mustard: a thick yellow paste whose turmeric dye binds hard.
- Chocolate: a thick brown blob with a fatty sheen and a dry cocoa crust.
- Blueberry Pie: berry juice bleeds into the fibres around sticky, glossy lumps.
- Honey: a very thick amber syrup that hardly spreads and stays glossy and sticky.
- Strawberry Ice Cream: a pink milky stain with a sticky, slightly glossy film.
- Curry Sauce: an oily orange-yellow sauce. The turmeric binds hard and an oil halo creeps around it.
- Cooking Oil: never dries. It darkens, adds sheen and keeps creeping.
Body
- Sweat: dries slowly and leaves yellowish salt rings.
- Blood: thick, binds strongly and browns as it dries.
Outdoors and workshop
- Ink: a very strong dye that feathers along the fibres.
- Paint: an opaque pigment that sits on the surface.
- Mud: opaque deposits with a dry crust on top of the surface.
- Green Grass: a stubborn green stain that binds to the fibres and dries olive.
- Sea Water: darkens while wet, then dries to white salt rings. It shows best on dark surfaces such as denim or leather.
- Soot Water: thin, runny grey ash water with gritty dark edges.
- Motor Grease: a thick black oil, glossy and permanent.
- Rust Water: a permanent orange-brown iron stain with crusty edges.
Surfaces
- Cotton: high absorption. Liquid spreads through the fibres.
- Denim: a thick twill weave that turns dark when wet.
- Silk: fast wicking and crisp tide lines.
- Polyester: a synthetic that absorbs little, wicks well and resists dye.
- Wool: water-repellent at first, then holds a lot of liquid.
- Leather: low absorption. Liquid changes its gloss.
- Raw Wood: liquid spreads along the grain.
- Varnished Wood: sealed, so liquid beads up and dries as a ring.
- Concrete: porous, with patchy absorption and gritty deposits.
- Paper: absorbs instantly and feathers.
- Carpet: a deep pile that soaks up a lot in one place.
- Metal: almost no absorption, so you get puddles and surface films.
- Glass / Plastic: non-porous, giving beads, rings and dried films.
8. UVs, UDIMs and rigged characters
Set Up checks the UV map and picks the right approach automatically. A note tells you when it does something.
- UVs inside 0–1 are used as they are.
- UDIM tiles or UVs outside 0–1: your UVs are left alone. The used tiles are packed into the stain map (for example 3 or 4 tiles into a 2 × 2 grid), and a small Stain UV Fit node in the material does the same mapping at render time. Each tile gets less detail than a single-tile layout, so raise Quality for close-ups.
- Collapsed, empty or heavily mirrored (overlapping) UVs: a separate StainUV map is created with Smart UV Project. Your own UV maps are unchanged.
- Rigged and animated characters: the stain surface is built from the object's rest mesh, so painted liquid stays put while the character moves and painting a posed character lands at the right spot. Subdivision and Armature modifiers cost nothing at setup. Objects with modifiers that create geometry or UVs, such as Mirror, Array, Solidify, Boolean or Geometry Nodes, use the evaluated mesh instead.
- Linked data: a linked object has to be made local or library-overridden first. Linked materials get a local copy automatically. A linked mesh that needs a new UV map has to be made local. The message tells you exactly which.
Baked sequences and exported maps use the stain-map layout (packed tiles or StainUV), not your original UDIM layout.
9. Rendering, saving and caches
- Each simulated frame is cached, compressed and storing only the stained parts, in memory and in //stain_cache// next to your .blend. The result survives closing Blender. Unsaved files use a temporary folder that moves next to the .blend when you first save.
- Timeline playback and animation renders (F12, or -a on the command line) update the maps automatically.
- For render farms or other machines, use Bake Image Sequence. It writes stain_bake//dye_####.exr (plus cover and data maps) and switches the material to read them.
- On save, the current maps are packed into the .blend, so the look survives even without the cache folder.
- bpy.ops.stain.freeze() turns the current frame into packed still images, for static assets.
- Cache Location: next to the .blend (default, travels with the project), a custom folder, or the system temp folder (lost on reboot).
- Pack Current Maps on Save: embeds the current maps in the .blend. On by default.
- HUD Size: the size of the on-screen paint panel.
- Responsiveness: how much simulation runs per interface update while simulating. Lower values keep the interface smoother.
- Fast: simulates at ¼ of Quality. It looks the same at a distance, with softer edges in close-ups. Use it for blocking out and timing.
- Balanced (default): simulates at ½ of Quality and restores the edge detail. It looks the same at normal viewing distances. Use it for almost everything.
- Full: simulates at full Quality resolution, for macro shots of a single stain.
- High (1024 px): Full 52.6 s, Balanced 12.7 s, Fast 9.9 s.
- Ultra (2048 px): Balanced 66.9 s, Fast 31.2 s.
- "Another copy of Stain Dynamics is already enabled": it's installed twice, either as an extension and as a legacy add-on, or as two versions. Uninstall one of them, then enable the other.
- The Stain tab is still there after uninstalling version 1.0.0: restart Blender once. If it's still there, delete any leftover folder named stain_dynamics from your Blender scripts/addons and extensions/user_default folders.
- The status says "out of date": a setting or the frame range changed after simulating. The old result still plays. Press Simulate to update it.
- Stains appear mirrored in two places: the UVs overlap. Use Create Stain UV from the dashboard.
- A stain appears on another object: the objects share a material. Use Make Materials Unique from the dashboard.
- Not enough detail on UDIM assets: raise Quality, or use Create Stain UV for an evenly sized layout.
- Stains look far too big or too small: stains spread according to real-world size, so check that the model is built at real-world scale.
- A note says spreading was rate-limited: very high Spread Speed at high resolution is limited for stability. Lower Spread Speed or Quality.
- Painted liquid only appeared after zooming or clicking (1.5.4 and earlier): update to 1.5.5, which refreshes the viewport as you paint.
- UDIM layouts are packed into one stain map, so many tiles mean less detail per tile.
- On characters, liquid flows over the rest pose (gravity follows the rest pose). The stain then moves with the animated surface, but it doesn't react to the motion itself.
- Liquid flows in 2D over the surface. There are no 3D droplets, splashes in the air or thick fluid volumes.
Preferences
Open Edit > Preferences, find Stain Dynamics and expand it:
10. Performance
Sim Detail decides how finely the liquid itself is simulated. The maps are always written at the Quality resolution.
Measured on a 2-core machine with Blender 4.5, for 100 frames of coffee, ketchup, water and a drip on a hanging 1 m cloth:
More CPU cores help further. Scrubbing reads from the cache and doesn't depend on Sim Detail. The cost grows with stain size and map resolution. Ultra needs about 150 MB of RAM per liquid layer when Sim Detail is Full.
12. Troubleshooting
13. Limitations
 Included
Includes 12 months of
- Support from Animation Store
- Product updates
Extend this product’s Support Period +12 months: 50% of product price
Have questions before purchasing?
Login to message
| Blender Extension Compatible | Yes |
| Dev Fund Contributor | |
| Published | about 8 hours ago |
| Blender Version | 4.1 - 5.2 |
| Extension Type | Add-on |
| Render Engine Used | Cycles, Eevee |
| License | GPL |
Discover more products like this
procedural Rust animation stain simulation stains spill Texture Painting residue liquid drying cloth