 Skava
Skava


TrimForge — Documentation
v1.3.0 · Blender 4.2 LTS and later · Windows / macOS / Linux
1. Install
- Download the zip and leave it zipped. In Blender open Edit → Preferences → Add-ons, press the arrow button in the top right corner, choose Install from Disk, pick the zip and tick the checkbox next to TrimForge.
- Press N in the 3D Viewport → TrimForge tab.
2. What is a trim sheet?
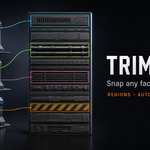
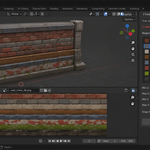
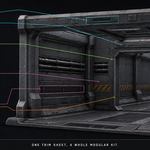
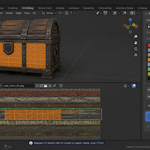
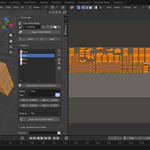
A trim sheet is one texture divided into named strips or rectangles, each containing a piece of material detail (wood plank, metal trim, screw, brick row, …). Your modeller maps each face's UVs to a specific strip; one texture serves dozens of asset variations. Standard practice in modern environment art.
3. Quick start
- In the TrimForge panel, point Trim sheet image at an existing trim sheet PNG (or use Auto-generate, see §5).
- In the Regions panel, click + to add a region; set its bounds (Min U / Max U / Min V / Max V) and name.
- Select faces in Edit Mode → click the region in the list → choose snap mode → click Snap UVs to active region.
- Click Apply sheet material (below the image slot) so the sheet is actually visible on the mesh: TrimForge creates a material with the sheet image wired into the Principled BSDF and assigns it — to whole objects in Object Mode, to the selected faces in Edit Mode.
4. Snap modes
| Mode | What it does | When to use |
|---|---|---|
| Tile | Each UV (assumed in [0,1]) is remapped into the region rectangle: uv = region_min + uv × (region_max - region_min) | Face has clean [0,1] UVs and you want it on a specific trim strip without distortion |
| Stretch | Bounding box of selected UVs is fitted exactly into the region. Allows distortion | Face has an arbitrary UV layout that should fill the region exactly |
| Fit | Like Stretch but with one uniform scale factor: aspect ratio is preserved and the selection is centered inside the region | Round or proportion-sensitive details that must land on a strip without distortion |
All modes work across multi-object Edit Mode: every mesh in the editing session is processed, and Stretch / Fit treat the whole selection as one block. Meshes without a UV map get one created automatically (a per-face reset unwrap) before snapping.
5. Auto-generate from folder
If you have a library of small textures (planks_01.png, planks_02.png, metal_01.png, …) you can pack them into a trim sheet automatically:
- Open the Auto-generate from folder panel.
- Pick a source folder containing your textures.
- Set columns (e.g. 4), output resolution (e.g. 2048) and Padding (e.g. 8 px).
- Click Auto-generate.
A uniform-grid trim sheet is built in numpy and packed into a Blender image. One region per input file is created with the file name and a unique colour hint, replacing the regions already in the list. The image is automatically set as the active sheet.
Padding (against bleeding)
When a trim sheet is mip-mapped or filtered, the pixels at the edge of a strip are averaged with whatever lies next to them — the neighbouring strip or the empty background. That is the colour seam you see along the edges of trimmed faces, worse at a distance.
Padding (pixels, default 8) does two things. It puts a border around every strip on every side and fills it with copies of the strip's own edge pixels (edge extend) — for a normal map that is the edge's own normal, not black or flat. And it lines the strips up with the mip levels, so a texel of a smaller mip, or a 4×4 block of a compressed texture, never spans two strips.
- How far it holds. With 8 px no mip level down to 1/16 size (mip 4) picks up anything from the neighbour; 16 px holds down to 1/32, 4 px down to 1/8. Below that size strips do blend — every trim sheet does at its smallest mips. Measured on six to nine 4K PBR materials, in numpy and in Unity on Unity's own mip-maps, compressed (DXT5) and uncompressed; without padding the edge colour was off by 23–41 levels out of 255 on average.
- Columns and number of files. Cells are placed on a grid (64 px at 8 px padding) from the sheet's corner, and the sheet is always exactly the Output resolution, so the protection does not depend on the column count or the number of images — as long as each cell is at least 64 px wide and tall and the resolution is a multiple of 16 (a power of two always is). Otherwise the report names the smaller mip level that is still clean: for example 1000 px holds down to 1/8, and 40 images in one column at 2048 (32 px cells) down to 1/8. The report says how far down your sheet is clean (“no bleeding down to mip N”).
- Regions cover the image only, not the padding. UVs snapped to a region never reach the border.
- What it costs. Each strip loses 2 × Padding pixels, plus up to 63 px of rounding to the grid, per side length. 4 columns at 2048: strips 496 px wide; 3 columns: 624 px. The leftover stays empty and belongs to no region.
- Values. Scale it with the sheet: about 4 px at 1024, 8 px at 2048, 16 px at 4096. Use a power-of-two resolution — engines usually rescale other sizes, which undoes the alignment; the report warns if you don't.
- 0 turns padding off: strips touch, exactly as in version 1.2.
- If the padding leaves no room for the image, Auto-generate refuses and says so; the current sheet and regions are left as they were. Strips narrower than 16 px are generated with a warning.
Source images
Images are packed with the values stored in their files: a 16-bit PNG or TIF colour or normal map gives the same strip as its 8-bit version. EXR, HDR and PSD files are not packed; the report names every file it left out.
A set of maps
Base colour, normal, roughness: run Auto-generate once per folder with the same Columns, Output resolution and Padding and the same number of files — the layout is identical. Each folder gets its own sheet image, TrimSheet_<folder name>, kept in the .blend, so no map replaces another. Re-running the same folder refreshes its sheet in place — a sheet made by TrimForge 1.2 included, recognised by its pixels, so renamed regions do not matter — until that sheet has been saved to a file; after that a new image is made, the saved file is never overwritten, and the TrimForge materials (from Apply sheet material) that showed the older sheet of this folder are switched to the new one; the report names them. Materials you built yourself keep their image, and the report names those too. If the folder's files changed since a 1.2 sheet was made, that sheet is not recognised and is left as it was; the report names the materials still showing it — select those objects and click Apply sheet material. Set normal, roughness and other data maps to Non-Color where you use them.
6. Region from UV selection
Already have a nice manual UV layout in Edit Mode? Select the relevant UV loops, then click New region from UV selection. TrimForge computes the bounding box of the selected UVs and creates a region matching it — that's now a reusable trim region.
7. JSON library
Save writes the current image reference (by name + filepath) and every region to a JSON file. Load restores it; if the original image isn't loaded into the .blend, TrimForge attempts to load it from the JSON's filepath. If neither works, the image slot is left empty and you can re-link manually.
8. Region properties
- Name — shown in the UIList, used as auto-region name from auto-gen.
- Tag — optional category (wood / metal / stone …). Shown next to the name. Free text — no controlled vocabulary.
- Color hint — small swatch in the UIList for visual identification. Doesn't affect the mesh.
- Min U / Max U / Min V / Max V — the rectangle in [0,1] UV space.
9. Troubleshooting
"Snap reports 'No faces selected'" — you must be in Edit Mode with at least one face selected. UV selection is inferred from face selection.
"Snap reports the region has zero width or height" — the active region's Min/Max bounds enclose no area. Fix the rectangle in the region editor first.
"Stretch mode distorted my round detail into an ellipse" — Stretch maps the selection's bbox to the region's bbox regardless of aspect. Use Fit to preserve proportions, or Tile if the source UVs already have correct proportions.
"Auto-generate found no images" — folder must contain PNG / JPG / TGA / TIF / BMP (EXR / HDR / PSD are named in the report but not packed). Subfolders are ignored. Check the folder path is absolute or starts with // for blend-relative.
"A thin line of another colour runs along trimmed edges" — that is bleeding from the neighbouring strip. Regenerate the sheet from the same folder with Padding above 0 (8 px at 2048), then snap the faces again so their UVs use the new, padded regions. The material made by Apply sheet material follows the regenerated sheet by itself (a 1.2 sheet is updated in place; a sheet saved to a file is replaced by a new one and the report says which materials moved). The report names every material still showing an older sheet — a material you built yourself, or one on a 1.2 sheet whose files have changed since: point it at the new sheet (or click Apply sheet material on those objects). If it shows only far away, the object is on a mip smaller than the padding protects — raise Padding (16 px holds down to 1/32 size).
"Auto-generate says the padding does not fit" — the cells are too small for that much padding on every side. Lower Padding or Columns, or raise Output resolution.
"Auto-generated sheet looks blurry" — TrimForge uses nearest-neighbour resize for the grid cells. Sharp pixel-art stays sharp; large gradients may show step artefacts. For hero sheets generate at high resolution (4K+) and downscale in a separate pass.
"Load JSON: image not found" — the JSON's image_name and image_path don't match any image in the current .blend. Drag the image into the Image slot manually after load.
10. Limitations
- Auto-pack uses a uniform grid; cells of different sizes are not supported.
- Region bounds are axis-aligned rectangles — diagonal strips aren't supported.
- Auto-gen resizes via nearest-neighbour only.
- Multi-map atlas combining (BC/N/R/M sets) is not included.
11. Changelog
v1.3.0
- New: Padding in Auto-generate from folder: an edge-extended border around every strip, with the strips aligned to the mip levels. At the recommended values no mip level down to 1/16 size (8 px) mixes in the neighbouring strip or the background, compressed or not, for any number of files as long as cells are at least 64 px (the report names the mip it guarantees). Regions cover the image only, so snapped UVs stay off the border. Default 8 px; 0 gives exactly the 1.2 layout.
- Each folder now gets its own sheet image: generating the normal map after the base colour no longer replaces the base colour, and a sheet saved to a file is never overwritten by a re-run. Re-running a folder keeps the TrimForge material on the regenerated sheet (a 1.2 sheet of the same files is updated in place, even with renamed regions); materials left on an older sheet are named in the report.
- Fixed: 16-bit PNG / TIF sources were packed with linear values — colours came out dark and a flat normal (0.5, 0.5, 1) as (0.22, 0.22, 1). They are now packed as stored in the file, like 8-bit ones.
- The report names files it did not pack (EXR, HDR, PSD, unreadable ones) and warns about strips narrower than 16 px or a resolution that is not a power of two. A padding that leaves no room for the images is refused, and the current sheet is left untouched.
- The Source folder label sits on its own line, so it is no longer cut to "Source f…" in a narrow sidebar.
v1.2.1 — maintenance release. The package ships the full licence text and an updated README (install, first run, uninstall). No changes to the tools.
v1.2.0
- Overlapping regions are now flagged in the region list itself, with a count above it — not only after a snap. Two regions sharing a strip of the sheet is the one mistake a trim sheet cannot survive, and it used to stay invisible until the texture was painted.
- Snapping in Tile mode says so when the UVs were already inside the target region, instead of silently packing them into a quarter of it.
- Snapping warns when the target region overlaps another one. Auto-generate refuses a relative source folder on an unsaved file instead of scattering images.
v1.1.0
- New: Apply sheet material — one click creates/updates a material with the sheet image wired into the Principled BSDF and assigns it to objects (Object Mode) or selected faces (Edit Mode).
- New: Fit snap mode — uniform scale, aspect ratio preserved, centered in the region.
- New: multi-object Edit Mode support for snapping and "New region from UV selection" (Stretch / Fit span the whole selection as one block).
- New: meshes without a UV map get one created automatically when snapping.
- Fixed: re-running Auto-generate now refreshes the existing sheet image in place instead of piling up trim_sheet.001 duplicates (materials keep working).
- Fixed: all region / auto-gen / load operations are now undoable.
- Fixed: clear, specific error messages (zero-size region, no selection, unreadable source images) and honest reports ("Mapped N face(s) to region '…'").
- The Save / Load file dialogs now start in the Library folder from the addon preferences.
v1.0.0 — initial release.
12. Support & License
Through marketplace messaging. GPL-3.0.
Have questions about this product?
Login to message
| Published | about 2 months ago |
| Blender Version | 4.2 - 5.2 |
| Extension Type | N/A |
| Render Engine Used | Cycles, Eevee |
| License | GPL |
Discover more products like this
texture Atlas Trim Sheet kit bash environment art uv auto-pack modular hard surface asset Game Library