 Skava
Skava


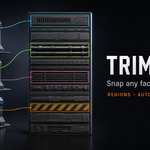
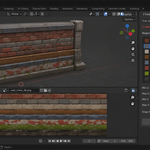
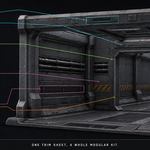
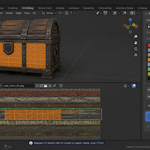
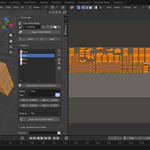
Download the zip and do not unpack it. In Blender open Edit > Preferences > Add-ons, click the drop-down arrow in the top-right corner and choose Install from Disk, then pick the zip. Tick the checkbox next to TrimForge. Press N in the 3D Viewport and open the TrimForge tab.
Set Trim sheet image in the TrimForge panel, add regions in the Regions panel with + and set their Min U / Max U / Min V / Max V. In Edit Mode select the faces, click the region in the list, choose the Snap mode and press Snap UVs to active region. Apply sheet material creates a material with the sheet image wired into the Principled BSDF and assigns it, to whole objects in Object Mode or to the selected faces in Edit Mode.
Already have a good manual UV layout? Select those UVs in Edit Mode and press New region from UV selection: their bounding box becomes a new region.
Tile remaps each UV from the 0 to 1 square into the region and keeps the original layout; use it when faces already have clean 0 to 1 UVs. Stretch scales the selection so its bounding box exactly fills the region, which can distort. Fit uses one uniform scale so proportions are kept, centred inside the region.
Yes. In the Auto-generate from folder panel pick a Source folder, set Columns, Output resolution and Padding and press Auto-generate from folder. Every PNG, JPG, TGA, TIF or BMP in the folder (subfolders are ignored) goes into a uniform grid, one region per file named after it, and the sheet is packed into the .blend and set as the active image. Each folder gets its own sheet image, so generating the normal map after the base colour does not replace it. Cells are resized with nearest-neighbour sampling. EXR, HDR and PSD files are not packed; the report names every file it left out. Note that this replaces the regions already in the list.
Yes. Save writes the regions and the image reference (name and file path) to a JSON file; Load restores them in another .blend and tries to load the image from the stored path. If the image cannot be found, the slot stays empty and you pick the image by hand.
Regions are axis-aligned rectangles; diagonal or rotated strips are not supported. Auto-generate uses a uniform grid with equal cells and nearest-neighbour resizing. Supported Blender versions: 4.2 LTS and later.
No. The add-on contains no network code; everything runs locally. It is pure Python with no compiled binaries (the image packing uses numpy, which ships with Blender).
Yes. The add-on is licensed under the GNU GPL v3; the full text is in the LICENSE file inside the zip. The license covers the add-on code; the trim sheets and JSON files you create with it are yours.
Yes, since 1.3.0. Auto-generate from folder has a Padding setting (pixels, default 8): every strip gets a border filled with copies of its own edge pixels, and the strips are aligned to the mip levels. With 8 px no mip level down to 1/16 size mixes in the neighbouring strip, compressed or not, whatever the number of files as long as cells are at least 64 px (the report names the mip it guarantees); 16 px holds down to 1/32. Regions cover the image without the border, so snapped UVs stay off it. About 8 px at 2048 and 16 px at 4096; 0 switches it off. Regenerate the sheet from the same folder and snap the faces again to use the padded regions; the material made by Apply sheet material follows the regenerated sheet by itself, and the report names any material left on an older sheet.
Have questions about this product?
Login to message
| Published | about 2 months ago |
| Blender Version | 4.2 - 5.2 |
| Extension Type | N/A |
| Render Engine Used | Cycles, Eevee |
| License | GPL |
Discover more products like this
Library Game asset uv Atlas kit bash texture auto-pack Trim Sheet hard surface environment art modular