 tykuii's lil shop


Greybox Efficiently:
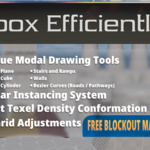
Tykuii's Level Design Toolkit comes packaged with a full suite of operations and features to facilitate quick iteration in blockout environments, along with twenty two textures suitable for greybox environments.
For Blender 5.2 LTS.
Features:
Automated Material Incorporation
Works for most of the Level Design Toolkit's operations, excluding Bezier Roads.
Traditional Primitives:
Spawn a traditional primitive at the center of the world.
1x1 Cube
1x1 Plane
Origin / Pivot Point Manipulation:
Quickly adjust the selected object's pivot point and centers to world.
Corner: Toggle's which corner the pivot point will be placed.
Center
Bottom Center
- X Edge
+ X Edge
- Y Edge
+ Y Edge
Modal Drawing Tools:
Plane
Box
Stairs and Ramps
Cylinders
Walls
Curved Walls
Bezier Roads
Arch Profiles:
Arc
Semi-Circle
Gothic
Lancet
Tudor
Ogee
Bell Curve
Triangle
Square
Shouldered
Corbel
Parabola
Catenary
Custom Profile
Clean Triangulation Operation:
Detects n-gons and utilizes blender's built in triangulate beauty feature.
Face Grid Dicing:
Great for meeting vert density specifications for vertex painting workflows. Select the desired faces to dice and the plane to project the dice onto (For example, if you click -Y on the gizmo you will face the Z-X plane as can be seen on the gizmo-- so by selecting X and Z in the panel you will correctly specify a dicing operation projected parallel to this plane onto your face selections).
Modular Kit Instancing Sets:
Create modular kits directly out of your blockouts to quickly progress in your greyboxing. Once a kit is created, a master source is created of the instance at the scene's origin point for ease of exporting.
Operations per instance:
Quickly enter edit mode of the instance in the list
Manipulate the rotation transform of the instanced object on the chance of issues, about the x y and z axes.
Mirror the instanced object on the chance of issues on the selected axis.
Remove from the instance list.
Create a variant at the location of the listed instance. Great for, obviously, creating variants (like Window A, B, C, Destroyed, etc).
Currently, the face sizes must match since these are instantiated objects that have no transform operations applied to them regarding their scale. So if you select a smaller or larger face and add it to the list of instances using the source .
Also, the operation is all on a per object basis and not per collection. You will only instantiate on a per-object basis. Any further additions need to be merged into the same object and more complex props will not be supported through this method. Please look forward to the Prop Authoring Hub plugin for a more refined modular kit workflow, given that the plugin progresses to incorporate such features.
Easy Grid Adjustments:
Standardize Blender's grid to conform to typical Unity or Unreal Engine units.
Quickly toggle between the saved snapping method and the snapping method meant for grid based workflows.
Quickly manipulate the scene's grid by powers of 2.
The Grid scale is also measured based on 32 units per 1 meter. This is because this plugin comes with a complimentary texture material that has 32 units / squares per meter that can and is expected to be used alongside this plugin. Users can just ignore the text regarding units however if they just want to refer to conventional means of measurement (meters).
Texel Density Conformation with World Based UVs:
Users can specify their desired Texel Density and the texture map's size. Once specifications are made and the user clicks "Sync UV Texel Density", the operation will match the singular object selection to conform to the inputted TD. If no seams are detected on the object, the operation will perform a cube projection unwrap before syncing the UVs.
The UVs will appear as if they are world space aligned, however it is recommended before exporting to engine to adjust the UVs location. Though they are sized properly, they may be placed in an undesirable manner that wouldn't be considered final.
Quick Boolean Panel for Commonly Used Overlays or Features :
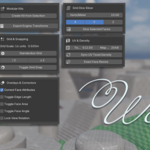
Commonly utilized toggles found natively within Blender, but easy to find in our panel all in one place.
Correct Face Attributes
Toggle Edge Length
Toggle Face Area
Toggle Face Angle
-
Custom Lock View Rotation
NEW:
Two new modal drawing tools:
- Draw area (lines): Draw lines to create the enclosed area as a grid.
- Draw area (curves): Draw curves to create the enclosed area as a grid.
NEW: Terrain Grid System:
Initialize Terrain: Sets up the blender scene to track terrain chunks. Required to start using Terrain Tools.
Settings:
Target Engine: Define the target engine (Blender is a safe default; Only changes conventions used in the processes).
Grid Scale: Define the size of each terrain chunk.
Resolution: Define the amount of vertices per terrain chunk.
Material: Define the blender material (existing in the scene) to use when creating new terrain chunks.
Base Vertex Color: Define the starting vertex colors per new terrain chunk.
Selected Chunk: Visible when a terrain chunk is selected.
Add Heightmap Displacement: Adds a displacement modifier to the selected chunk directly in the panel with matching parameters.
Conform Borders: Experimental feature to attempt to force-match border vertices. Currently it does not function well with corners.
Sync Geometry Heights: Experimental feature to blend chunks.
Gradient Blending: Blends the selected chunk to neighbors with a gradient influence to help match heights better. Currently has issues with corner vertices.
Linear Blending: Blends the selected chunk to linear neighbors only. Currently more stable.
Seam Shading: Tools to attempt to help blend normals between nonmatching geometry.
Bake Seamless Shading: The process is similar creating a duplicate -> joining and merging the chunks -> transferring the normal data to the original chunks individually and applying.
Averages normals between neighbors to attempt better normals.
Paint Normal Mask: The processes above can detract from desired normal details. Painting areas where you want normal blending operations to occur through this operation saves normals elsewhere.
Rotate CCW and Rotate CW:
Rotate the selected chunk counterclockwise or clockwise.
Swap: Having two chunks selected, properly swap places between the chunks while retaining proper tracking in the terrain grid system.
Delete: Delete and properly remove the selected chunk from the terrain grid system.
Merging:
Merge the selected chunks and enter sculpt mode for sculpting operations.
Lock X/Y Sculpting: Toggles a lock so that users can only sculpt on Z axis if desired.
Separate Into Original Chunks: Properly separate the merged chunks and retain terrain grid system tracking. Good for sculpting detail between borders.
Export:
Export Coordinates to Text: Stores the names and their coordinates of each terrain chunk to a text block to recreate in desired game engine.
Prep Meshes for Export: Zeros the transforms of all terrain chunks returning them to world origin.
Emergency Reset: If issues arise with the terrain chunk system, pressing this button will reset the system and allow for reinitialization.
Best example: Deleting a terrain chunk piece manually without having a second available to add more! Silly quirk of data tracking that I haven’t accounted for yet.