Ultimate Origin Tools
 Tesseract assets


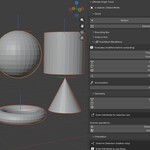
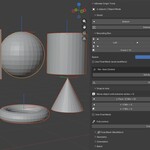
Ultimate Origin Tools
User Documentation
Version 1.3 · Blender 4.2 – 5.x
A comprehensive origin management addon for Blender, providing over 45 operators for bounding box placement, geometry analysis, axis alignment, modifier-aware computation, interactive editing, batch processing, and more.
Table of Contents
Table of Contents 2
1. Introduction 4
What is Ultimate Origin Tools? 4
Key Capabilities 4
Compatibility 4
2. Installation 5
Installing the Addon 5
Verifying the Installation 5
Updating 5
3. Interface Overview 6
Accessing the Tools 6
The N-Panel 6
The Pie Menu 6
The Status Bar 7
4. Operator Reference 8
4.1 Bounding Box 8
Face Centers 8
Corners 8
Per-Axis Control 8
Drop to Floor 8
4.2 Snap to Axis 9
4.3 Final Mesh (Modifiers) 9
4.4 Geometry 10
Object Mode 10
Edit Mode 10
4.5 Orientation 10
Orient to Selection (rotation only — Edit Mode required) 10
Align & Move (position + rotation — Edit Mode required) 11
Modify Axes (Object Mode) 11
4.6 Interactive Mode 11
Origin to Surface (Raycast) (New in v1.3) 12
4.7 Batch 12
4.8 3D Cursor 13
4.9 Presets 13
4.10 Offset / Numeric (New in v1.3) 14
5. Keyboard Shortcuts 15
Customizing the Pie Menu Shortcut 15
6. Settings & Preferences 16
Default Settings 16
Local vs World Space 16
The Origin Gizmo 16
7. Common Workflows 17
Preparing Assets for a Game Engine 17
Drop to Floor / Snap to Wall (Updated in v1.2) 17
Correcting Axis Orientation After Import 17
Orient to Selection (New in v1.2) 18
Placing Origin on a Specific Face for Rigging 18
Saving and Reusing Origin States 18
Interactive Origin Placement 19
Snapping a Prop onto a Surface (New in v1.3) 19
8. Tips & Troubleshooting 20
Tips 20
Troubleshooting 20
9. Operator Quick Reference 22
10. Changelog 23
v1.3.0 23
v1.2.1 23
v1.2.0 24
v1.1.0 24
v1.0.3 / v1.0.2 / v1.0.0 24
1. Introduction
What is Ultimate Origin Tools?
Ultimate Origin Tools (UOT) is a Blender addon that replaces and dramatically extends the native Set Origin workflow. Instead of a single dropdown with six options, UOT gives you a full suite of tools organized around how you actually work: quickly for common tasks, deeply for complex ones.
Whether you are positioning assets for a game engine, preparing models for 3D printing, rigging characters, or doing architectural work, UOT has a dedicated tool for every scenario.
Key Capabilities
Bounding Box — Set origin to any of 22 named positions (6 face centers, 8 corners, 12 edge midpoints), with per-axis independent control.
Geometry — Geometry center, center of mass (surface or volumetric), origin to selected vertices/edges/faces, active element.
Modifier-Aware — A dedicated Final Mesh section evaluates all modifiers (Mirror, Array, Displace, Shrinkwrap, etc.) before computing.
Orient to Selection — Align local axes to face normals, vertex normals, or edge directions, with or without moving the origin position.
Snap to Axis — Translate objects so their extreme vertex on X, Y, or Z sits exactly at zero — floor, wall, ceiling.
Batch — Apply any operation to every selected object independently in a single click.
Interactive — Grab and drag the origin live in the viewport, like Maya's Affect Pivot Only mode.
3D Cursor — Full bidirectional integration with the 3D cursor. Save and restore cursor positions.
Presets — Save named origin states and reapply them to any object later.
Origin Gizmo — X/Y/Z colored axis lines with two-pass rendering: solid where visible, ghost lines through geometry (like Blender’s In Front for bones).
Origin to Surface (Raycast) — Click on any face of another mesh to project the origin onto that surface, with optional Z-axis alignment to the impact normal.
Origin Offset (Numeric) — Displace the origin by an exact XYZ offset (Local or World space) without touching geometry.
Origin to Loose Parts — Automatically place the origin at the bounding-box center of each disconnected island in a multi-part mesh, with optional separation.
Batch Drop to Target Z — Drop multiple objects to a custom Z height or to the surface of a chosen reference object, not just Z=0.
Compatibility
2. Installation
Installing the Addon
Download the file ultimate_origin_tools.zip.
In Blender, open Edit → Preferences → Add-ons.
Click Install, navigate to the ZIP file, and confirm.
Enable the addon by checking the box next to Object: Ultimate Origin Tools.
Verifying the Installation
After enabling, open the N-Panel in the 3D Viewport (press N) and look for the Origin tab. If it appears, the addon is active.
Updating
Disable and remove the current version in Edit → Preferences → Add-ons.
Install the new ZIP using the same procedure above.
Re-enable the addon.
3. Interface Overview
Accessing the Tools
UOT provides three access points designed for different workflows:
The N-Panel
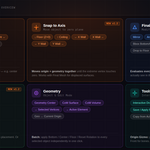
The N-Panel is organized into collapsible sections. The Quick section is always expanded; all others are collapsed by default to keep the panel compact. Click any section header to expand it.
The Pie Menu
Press Alt + O in Object Mode or Edit Mode to open the pie menu. The layout adapts to the current mode:
Object Mode:
West: Left (−X) · East: Right (+X) · South: Bottom · North: Top
NW: BBox Center · NE: Geo Center · SW: CoM Volume · SE: Interactive
Edit Mode:
West: Align Face · East: Align Edge · South: To Selection · North: Active Element
NW: Align Vertex · NE: Orient & Move to Face · SW: Cursor → Origin · SE: Origin → Cursor
The Status Bar
The top of the N-Panel always shows how many objects are selected and the current mode. It turns red if nothing is selected in Object Mode, signalling that most operators will not run.
4. Operator Reference
Every operator listed below is accessible from the N-Panel. Operators marked ★ also appear in the Pie Menu. After executing an operator, its parameters appear in the Last Operator panel (F9 or bottom-left of the viewport) where you can adjust them.
4.1 Bounding Box
These operators move the origin to a geometric position on the object's axis-aligned bounding box. Each object in the selection is computed independently.
Face Centers
Corners
Use Set Origin (BBox) from the N-Panel and choose a corner key such as CORNER_000 (min X, min Y, min Z) through CORNER_111 (max X, max Y, max Z). Corner buttons also appear as small icon buttons in the Bounding Box grid.
Per-Axis Control
The Set Axes Independently operator (under Bounding Box → Per-Axis Control) lets you set the origin on only selected axes while leaving others unchanged.
Affect X / Y / Z — Toggle which axes are updated.
X / Y / Z Mode — For each active axis: Min, Center, or Max.
Drop to Floor
Translates the object (moving both origin and geometry) so the lowest world-space point of the mesh is at Z = 0. The origin moves with the object — no geometry distortion occurs.
Use Final Mesh — When enabled, the lowest point is computed from the evaluated mesh, correctly handling Displace, Shrinkwrap, and other deforming modifiers.
4.2 Snap to Axis
Translate the object so its extreme vertex on a chosen axis sits exactly at zero. Unlike bounding box operators, this moves the whole object (origin + geometry together) — no geometry distortion. Works with Final Mesh (modifiers evaluated) when enabled.
4.3 Final Mesh (Modifiers)
The operators in this section always evaluate modifiers before computing. This is critical when your effective mesh shape differs from the base mesh — for example, an object with a Mirror modifier whose bounding box is twice as wide as the base half.
4.4 Geometry
Object Mode
Edit Mode
4.5 Orientation
The Orientation section is divided into two distinct groups with different behaviors:
Orient to Selection (rotation only — Edit Mode required)
These operators only change the rotation of the local axes. The origin position stays exactly where it is. Use these to realign axes to geometry without disturbing placement.
Align & Move (position + rotation — Edit Mode required)
These operators move both the origin position and its rotation to the selected element.
Modify Axes (Object Mode)
These operators use pure rotations (not reflections). Mesh normals and backfaces are never affected.
4.6 Interactive Mode
Interactive Mode lets you drag the origin freely in the viewport, similar to Maya's Affect Pivot Only. Press Alt + Shift + O or click the button in the Quick section.
Origin to Surface (Raycast)
Projects the origin onto the surface of another object. Click on any visible face in the viewport and the origin snaps to the hit point. This is ideal for level design and game development workflows such as placing props on floors, walls, or irregular terrain — operations that would otherwise require multiple steps with the 3D Cursor.
4.7 Batch
Batch operators apply an operation to every selected object, each computed independently. For example, Batch: Origin to Bottom computes a separate bounding box for each object and moves its own origin — objects do not share a combined bounding box.
4.8 3D Cursor
4.9 Presets
Presets save the full origin state (position + rotation) of the active object and allow you to reapply it to any object later. Presets are stored in addon preferences and survive Blender restarts.
Save — Opens a dialog for a name, then saves the active object's current origin.
Apply (✓) — Applies the preset to all selected objects. You can choose to apply Location only, Rotation only, or both via the Last Operator panel.
Delete (✕) — Removes the preset permanently.
4.10 Offset / Numeric
The Offset / Numeric section provides precise, value-based origin placement. It complements Interactive drag (which is intentionally free-form and approximate) and avoids the need to manually enter coordinates via the 3D Cursor.
5. Keyboard Shortcuts
UOT registers the following shortcuts by default. You can remap the Pie Menu shortcut in Edit → Preferences → Add-ons → Ultimate Origin Tools.
Customizing the Pie Menu Shortcut
Go to Edit → Preferences → Add-ons, find Ultimate Origin Tools, and expand it.
Under Pie Menu Shortcut, toggle the modifier keys (Alt, Ctrl, Shift) and type the desired key letter.
Restart Blender to apply the change.
6. Settings & Preferences
Access addon preferences via Edit → Preferences → Add-ons → Ultimate Origin Tools. These settings persist across sessions.
Default Settings
Local vs World Space
The Default Space setting controls how bounding boxes are computed:
Local — The bounding box is computed in the object's local coordinate system. This means "bottom" always refers to the object's own −Z axis, regardless of its rotation in the world. Recommended for most workflows.
World — The bounding box is computed in world space. "Bottom" means the lowest point in the world Z axis. Useful when objects must align to the world grid regardless of their local rotation.
The Origin Gizmo
When enabled, UOT draws colored axis lines at the origin of every selected object:
Red line — Local X axis
Green line — Local Y axis
Blue line — Local Z axis
This helps you quickly see the current orientation of the origin without having to enable Blender's Axes overlay. Toggle it from N-Panel → Display → Origin Gizmo or from the Preferences.
7. Common Workflows
Preparing Assets for a Game Engine
Most game engines (Unity, Unreal, Godot) expect the origin at the bottom center of a character or prop.
Select one or more objects.
Press Alt + O → Bottom, or click Bottom in the Quick section.
If the object has modifiers (Mirror, Array, etc.), use Final Mesh → Final Bbox → Bottom instead, to account for the full final shape.
Drop to Floor / Snap to Wall (Updated in v1.2)
The Snap to Axis section handles all six directions — floor, ceiling, and four walls:
Select your model.
In Snap to Axis, click ↓ Floor (Z Min=0) for floor, or any other direction button.
For walls: ← X Min=0, X Max=0 →, ← Y Min=0, Y Max=0 →.
For a displaced mesh, enable Use Final Mesh in the Snap to Axis panel.
Correcting Axis Orientation After Import
Some file formats import with Z-up or Y-up conventions different from Blender's default.
Select the affected object.
In Orientation → Modify Axes, use Swap to exchange the appropriate axes (e.g., Y↔Z).
If an axis points the wrong way, use Invert to flip it.
Orient to Selection (New in v1.2)
After rotating geometry in Edit Mode, local axes no longer match the mesh. Orient to Selection realigns axes without moving the origin:
Tab into Edit Mode.
Select and click the face, edge, or vertex to make it active (highlighted orange).
In Orientation → Orient to Selection, click the matching operator.
Tab back to Object Mode — axes realigned, position unchanged.
To move origin and orient in one click: use Orient & Move to Face (Quick Edit Mode or Edit Mode Pie Menu).
Placing Origin on a Specific Face for Rigging
Tab into Edit Mode.
Select and click the target face to make it active.
In Orientation → Align & Move, click Align Z → Face Normal.
Tab back to Object Mode.
Saving and Reusing Origin States
Set up the origin exactly as needed on one object.
Open N-Panel → Presets and click Save Current Origin as Preset…
Give it a descriptive name and confirm.
Later, select any other objects, open Presets, and click ✓ next to the preset to apply it.
Interactive Origin Placement
Select the object(s).
Press Alt + Shift + O to start Interactive Mode.
Move the mouse to drag the origin to the desired position.
Hold Shift for precise slow movement.
Click LMB or press Enter to confirm, or RMB/ESC to cancel.
8. Tips & Troubleshooting
Tips
Use F9 after every operation to reveal and adjust parameters such as Space, Use Final Mesh, or axis selection without re-running the operator.
Interactive Mode + Shift gives you sub-millimeter precision. Combine it with snapping (enabled separately in Blender's header snapping controls) for grid-aligned origins.
The Origin Gizmo is a quick visual sanity-check: if the blue (Z) line doesn't point the direction you expect, use Orientation operators to fix it.
Batch operators work on 1 or more objects — you don't need to have multiple objects selected.
Copy from Active is the fastest way to standardize origins across a group of similar objects: set up one correctly, then copy to the rest.
Troubleshooting
The panel does not appear in the N-Panel
Confirm the addon is enabled in Edit → Preferences → Add-ons.
Make sure you are in the 3D Viewport, not in the UV Editor or other editors that also have N-Panels.
Look for the Origin tab specifically — it may be off-screen if you have many tabs. Scroll the tab list by hovering over the tabs and scrolling the mouse wheel.
Bounding Box result looks wrong on a scaled object
If your object has a non-applied scale (visible in the N-Panel → Item tab), the bounding box may not match what you expect.
Apply scale first: Ctrl + A → Scale, then run the operator again.
Alternatively, switch from Local to World space, which always uses world-aligned dimensions.
Center of Mass Volume warning: Non-manifold
The volumetric CoM requires a watertight, closed mesh to be accurate. If your mesh has holes, open edges, or overlapping faces, the result is an approximation.
Use CoM Surface as an alternative — it works correctly on any mesh, closed or open.
Modifier result does not match base mesh
When you have modifiers like Mirror or Array, the base mesh is only half or a fraction of the final shape.
Use the Final Mesh section operators, which evaluate all modifiers before computing.
Interactive Mode is not responding to mouse
Interactive Mode requires the mouse to be over the 3D Viewport window when it starts.
If it launched from a panel click, move the mouse into the viewport immediately after starting.
Pie menu shortcut not working
Go to Edit → Preferences → Add-ons → Ultimate Origin Tools → Pie Menu Shortcut.
Select a key from the dropdown. The change applies immediately — no restart needed.
Check for conflicts in Edit → Preferences → Keymap if the shortcut is still inactive.
Invert / Swap causes backfaces or flipped normals
This was a bug fixed in v1.2.1. Invert and Swap previously used reflection matrices (det=−1) which flipped all mesh normals.
Fixed: both operators now use pure rotations (det=+1). Normals and backfaces are never affected.
If you still see this, you have an older version — reinstall v1.2.1 or later.
Grayed-out buttons in Edit Mode
Object Mode operators (CoM, Geometry Center, Snap to Axis, etc.) are intentionally grayed out in Edit Mode.
These require Object Mode to apply changes. UOT operators that support Edit Mode (selection ops, Orient, Align) are active in Edit Mode.
9. Operator Quick Reference
Complete list of all UOT operators and their bl_idname identifiers (for use in scripts, custom keymaps, or macros).
10. Changelog
v1.3.0
New: Origin to Surface (Raycast) — Interactive raycast operator (uot.origin_to_surface). Click any face of another mesh to project the origin onto that surface. Option: Align Z to Normal rotates the local Z axis to match the impact face normal. Integrated in the Interactive section. Addresses the core level design and game dev use case of snapping props onto surfaces without using the 3D Cursor.
New: Origin to Loose Parts — Batch operator (uot.origin_loose_parts) for objects containing multiple disconnected geometry islands. Automatically computes the bounding-box center of each island and repositions the origin there, then optionally separates each island into its own object. Distinct from existing batch ops that operate on already-separated objects.
New: Origin Offset (Numeric) — New section “Offset / Numeric” in the N-Panel. Operator uot.origin_offset displaces the origin by an exact XYZ delta in Local or World space. Complements Interactive drag for workflows that require sub-millimeter precision. No geometry movement.
New: Batch Drop to Target Z — Operator uot.batch_drop_to_z extends Batch: Drop to Floor. Accepts a numeric Target Z value (default 0) or a reference object whose top surface defines the floor height. All selected objects are dropped so their lowest point lands at the target. Designed for archviz and level design scenes where the floor is not at Z=0.
v1.2.1
Invert / Swap axes — normals bug fixed: Invert and Swap were using reflection matrices (det=−1) which flipped all mesh normals, making every face appear as a backface. Fixed: both operators now use pure rotations (det=+1) by reconstructing the third axis via cross product. Mesh normals and face visibility are never affected.
v1.2.0
New: Snap to Axis section — 6 one-click buttons to snap any object flush to X=0, Y=0, or Z=0 using its min or max vertex on that axis. Covers floor, ceiling, left/right/front/back wall. Includes Use Final Mesh toggle and a full generic operator (uot.snap_to_axis).
New: Orient to Selection — 4 operators that change local axis rotation WITHOUT moving the origin position: Orient Z → Face Normal, Orient Z → Edge Dir, Orient Z → Vertex Normal, Orient & Move to Face. Addresses the key use case from the Orient and Origin to Selected addon.
Orientation section restructured — Two sub-groups now clearly labelled: Orient to Selection (rotation only) and Align & Move (position + rotation). No more ambiguity between the two behaviors.
Pie Menu Edit Mode — NE slot changed from CoM Surface to Orient & Move to Face.
Quick Edit Mode — Added Orient & Move to Face shortcut.
v1.1.0
Origin Gizmo — Two-pass rendering: solid lines where visible + ghost lines through geometry (depth_test ALWAYS). Axes always distinguishable, like bones with In Front enabled.
N-Panel — Redundancy cleanup: every operator in exactly one section.
Pie Menu shortcut — Complete fix: EnumProperty with valid key identifiers. update= callbacks apply immediately.
Keymaps — load_post handler: re-registered after every file load.
v1.0.3
Pie shortcut fix: _get_prefs() now reads prefs safely with fallback defaults at register time.
v1.0.2
Geometry ops mode_set() safety. Dead code removed. Batch poll() fixed. Cursor restore IDPropertyArray fix.
v1.0.0
Initial release. 40+ operators across all categories.
Discover more products like this
Blender origin fixer batch origin origin object-origin Bounding Box Origin Origin Tool custom origin origin management Controlled Origin change origin Origin to selected