Vertex Channel Kit
 PhantomWorks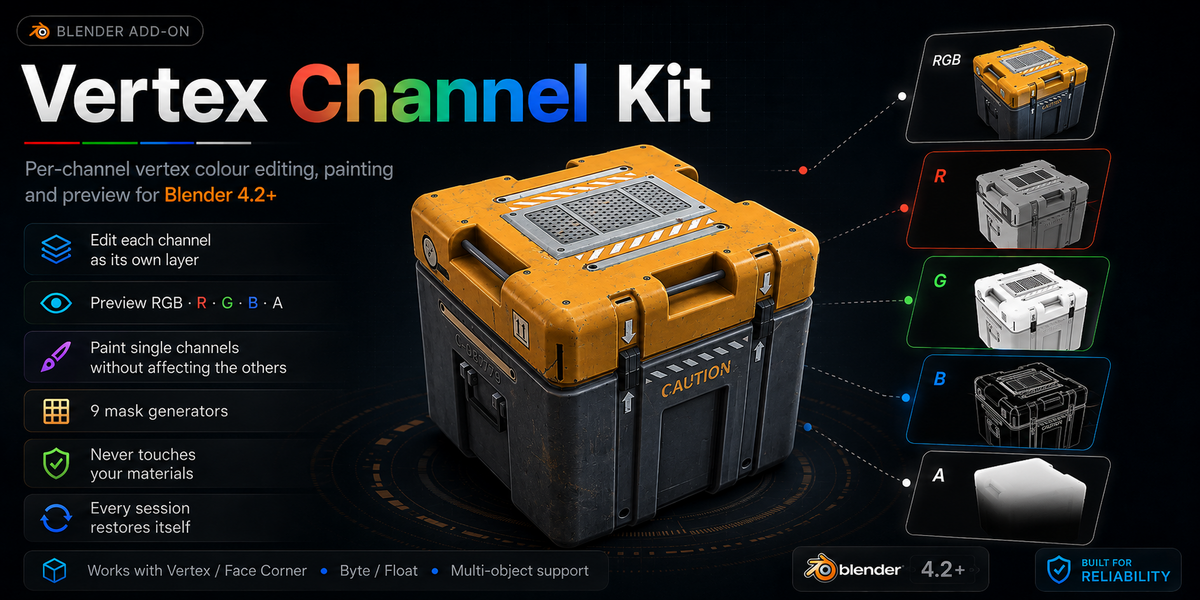


# Vertex Channel Kit — Documentation
Per-channel vertex colour editing, painting and preview for Blender 4.2+ / 5.x.
- [1. Installation](#1-installation)
- [2. Concepts](#2-concepts)
- [3. Colour Attribute](#3-colour-attribute)
- [4. Preview](#4-preview)
- [5. Paint & Values](#5-paint--values)
- [6. Channel painting](#6-channel-painting)
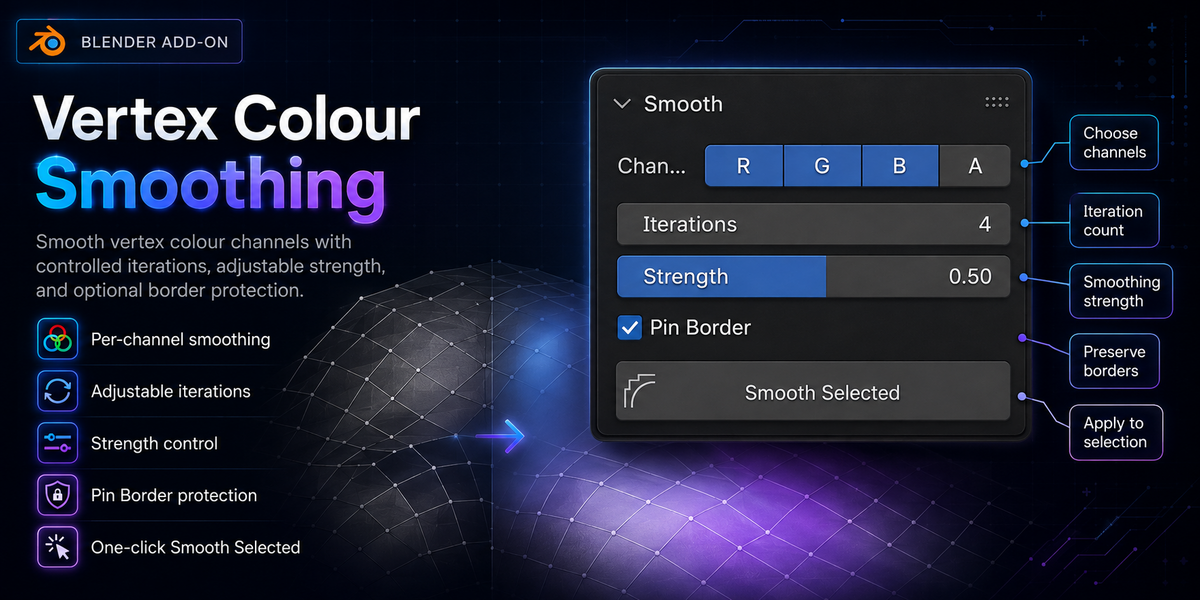
- [7. Smooth](#7-smooth)
- [8. Generate](#8-generate)
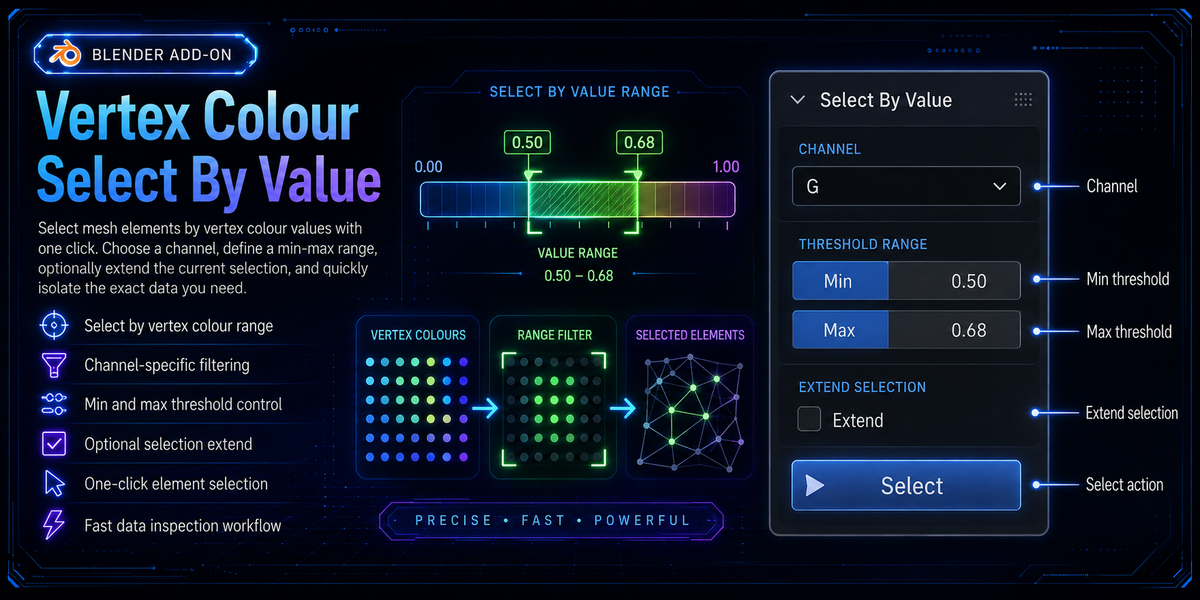
- [9. Select By Value](#9-select-by-value)
- [10. Maintenance](#10-maintenance)
- [11. Preferences](#11-preferences)
- [12. Workflows](#12-workflows)
- [13. Reference tables](#13-reference-tables)
---
## 1. Installation
**Requirements:** Blender 4.2 or newer, including 5.x. No external dependencies.
1. `Edit → Preferences → Add-ons` (or `Get Extensions`)
2. `Install from Disk…` → select `vertex_channel_kit-.zip`
3. Enable it if it is not enabled automatically.
The panel appears in the **3D Viewport sidebar** — press `N`, then pick the
**VCK** tab. The tab is visible in Object Mode, Edit Mode and Vertex Paint mode.
If you would rather install by hand, drop the `vertex_channel_kit` folder into
`…/Blender//extensions/user_default/` and refresh in Preferences.
---
## 2. Concepts
### Channels are masks, not colours
In a modern shader a vertex colour attribute is rarely one colour. Red might be
a wind mask, green a root-to-tip gradient, blue occlusion, alpha a blend factor
— four independent greyscale masks that happen to share one attribute. VCK
treats each channel as its own editable layer: you preview one, paint one,
generate into one, and the other three are never read or written.
### Two guarantees
**Materials are never modified.** No slot is added or removed, and no face's
`material_index` is rewritten. Previewing a channel is not a shader trick — VCK
writes a temporary greyscale attribute and switches the viewport's shading mode.
Your material setup is exactly as you left it, whether the object has zero
materials or twenty.
**Every session restores itself.** The original active colour attribute,
viewport shading, brush colour, blend mode, paint masks and object mode are all
recorded before a preview or paint session starts, and put back when it ends —
including when it ends by way of an error, a file reload, or disabling the
add-on. There is also a cleanup button for the day something goes wrong anyway.
### Value vs Colour
These are deliberately two different kinds of input.
| | Value | Colour |
|---|---|---|
| What it is | Data | Something you look at |
| Gamma | None, in either direction | Display-referred (`COLOR_GAMMA`), converted per attribute type |
| Drives | `R` `G` `B` `A` brushes, single-channel fills | The `RGB (Colour)` brush, full RGBA fills |
| Preset list | **Values** | **Swatches** (stores alpha) |
`0.5` typed into the Value field is `0.5` in the file. A colour, by contrast, is
converted on the way into the attribute — straight through for `BYTE_COLOR`,
sRGB→linear for `FLOAT_COLOR` — so the swatch, the brush, the painted result and
the viewport all show the same thing.
### Attribute layouts
All four combinations are first-class:
| Domain | |
|---|---|
| **Face Corner** (`CORNER`) | One colour per face corner. Allows hard colour splits between faces |
| **Vertex** (`POINT`) | One colour per vertex. Always smooth across faces |
| Type | |
|---|---|
| **Byte Colour** (`BYTE_COLOR`) | 8-bit per channel. What most game engines read. Read/written through `color_srgb` — the raw stored bytes |
| **Float Colour** (`FLOAT_COLOR`) | 32-bit per channel, scene-linear. Read/written through `color` |
### Scratch attributes
VCK's temporary data is always named `VCK_Preview`, `VCK_Paint` or `VCK_Bake`.
Anything with those names is add-on data and is always safe to delete.
### Selection and multi-object
- **Selection Only** — applies in Edit Mode, and in Vertex Paint when a paint
mask is on. In Object Mode with no mask, the whole mesh is used.
- **All Selected Objects** — Fill, Smooth, Generate and Preview run across every
selected mesh, not just the active one. Linked and library-overridden meshes
are skipped.
---
## 3. Colour Attribute
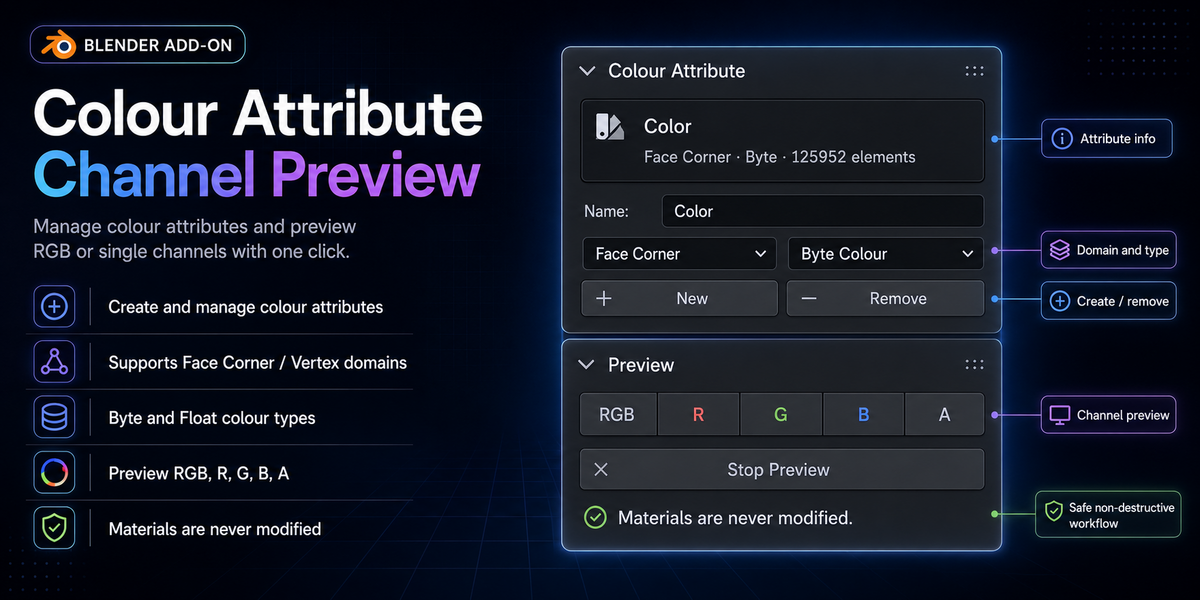
The top panel shows the active attribute's name, domain, type and element count,
so you always know what you are editing.
| Control | |
|---|---|
| **Attribute list** | Appears when the mesh has more than one colour attribute. Click to switch. Hidden while a preview is running |
| **Name / Domain / Type** | Settings for the *next* attribute you create — defaults are `Color`, Face Corner, Byte Colour |
| **New** | Creates the attribute on every selected editable mesh that lacks one |
| **Remove** | Deletes the active colour attribute. Requires the preview to be stopped first |
---
## 4. Preview
`RGB · R · G · B · A` — click a channel to see it as greyscale in the viewport.
Click the lit button again, or **Stop Preview**, to turn it off.
Preview writes a greyscale copy of the channel into `VCK_Preview`, makes it the
active colour attribute, and switches the viewport to **Solid / Flat / Vertex**
shading. Stopping restores the original attribute and your previous shading.
Preview is read-only — nothing you do while previewing changes the real
attribute. It requires the mesh to already have a colour attribute.
Preview obeys **All Selected Objects**, though this panel has no copy of the
toggle — it is shared with Fill and Generate. Objects that fall out of the
selection are restored automatically the next time you click a channel.
---
## 5. Paint & Values
### The shared input
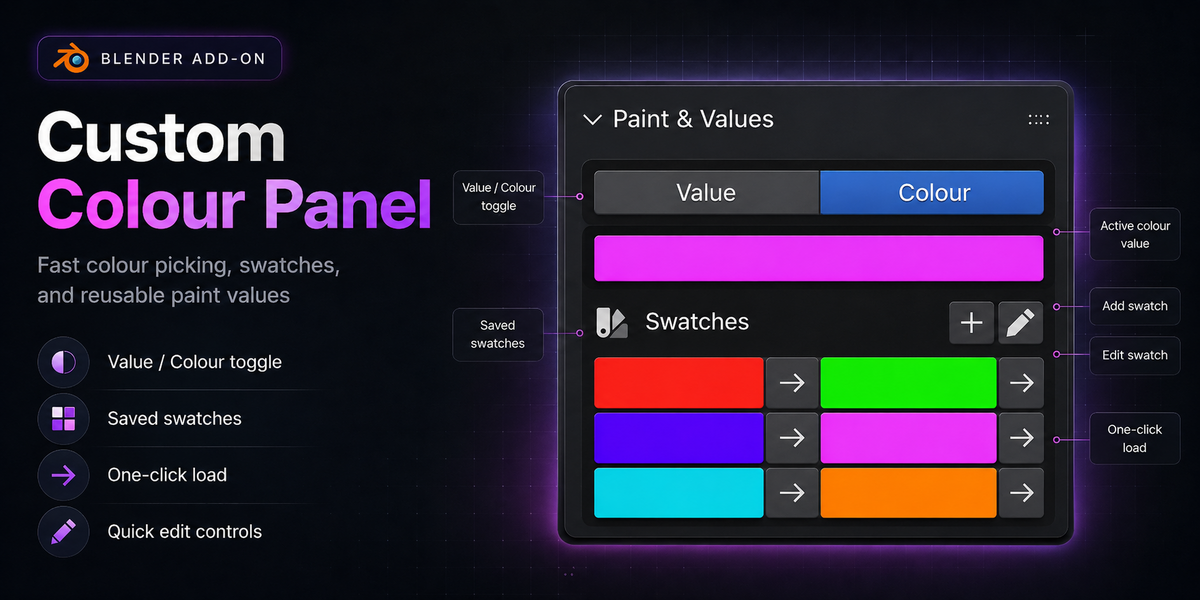
At the top of the panel is **one** value or colour, used by both the brush and
Fill. Set it once and both use it.
- **Value** mode — a 0–1 slider, plus `0 / 0.25 / 0.5 / 0.75 / 1` shortcut buttons.
- **Colour** mode — an RGBA swatch.
Changing it pushes straight through to the live brush, so there is no extra
click during a paint session.
### Presets
The preset list follows the input mode: **Swatches** in Colour mode, **Values**
in Value mode, so the section is always about the input you are actually using.
| Control | |
|---|---|
| `+` | Save what is currently set |
| Arrow (`▶`) | Load that preset into the input field *and* into the live brush |
| Pencil toggle | Reveal names, overwrite, delete, column count and Save/Load |
| **Save / Load Palette** | One file covering both lists |
| **Clear All** | Empty the current list |
Both lists save with the .blend. **Save Palette** writes them to
`palette.json` inside Blender's own config folder
(`…/Blender//config/vertex_channel_kit/`), which is always writable, so
there is no path to configure and the palette carries between files. **Load**
replaces the current lists with the file's contents.
Loading a swatch also sets the Value field to the mean of its RGB, so a swatch
stays useful if you switch to Value mode mid-session.
### Paint
`R · G · B · A` and `RGB (Colour)` start a channel paint session — see
[section 6](#6-channel-painting).
**Mask To Selection** turns on Blender's vertex paint mask when the session
starts, so only selected geometry can be painted.
### Fill
Writes the shared input into the channels ticked in the **Channels** row
(A is off by default), across the whole mesh or just the selection.
| Blend | |
|---|---|
| **Replace** | Overwrite with the value |
| **Mix** | Blend towards the value by **Factor** |
| **Add** | Add the value |
| **Subtract** | Subtract the value |
| **Multiply** | Multiply by the value |
| **Lighten** | Keep whichever is brighter |
| **Darken** | Keep whichever is darker |
**Factor** is only shown for the modes that use it — Replace, Lighten and Darken
ignore it.
**Sample** reads the selection's average back into the input field and reports
the four channel averages in the status bar.
---
## 6. Channel painting
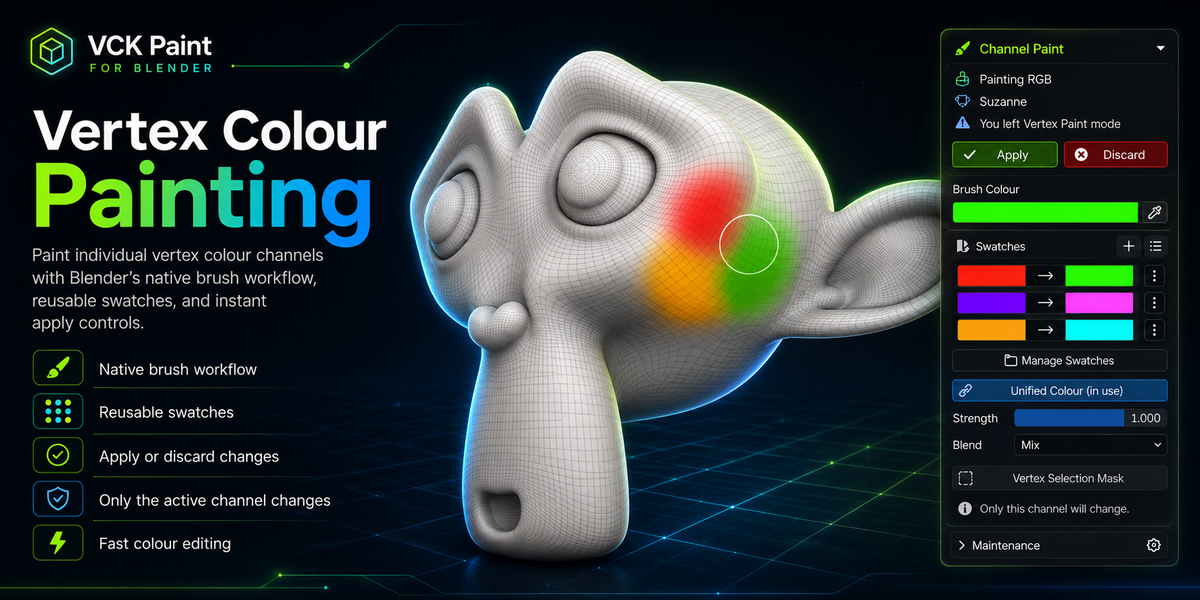
Blender has no per-channel lock for vertex painting. Rather than intercepting
strokes, VCK hands the native brush a **proxy**. Pressing `G` in the Paint
section:
1. expands the green channel into a greyscale scratch attribute (`VCK_Paint`),
2. makes it the active colour attribute and enters Vertex Paint.
You now paint with every native feature intact — pressure, falloff, symmetry,
blur, any brush asset — and you are looking at exactly the channel you are
editing.
While a session is live the sidebar is replaced by a **Channel Paint** banner:
| Control | |
|---|---|
| **Apply** | Merge the proxy back into that channel and end the session |
| **Discard** | Throw the proxy away and end the session |
| **Brush Value / Brush Colour** | The value the brush writes, pushed through as you change it |
| Preset list | Follows what is being painted, not the panel's mode |
| Brush swatch + refresh | The colour Blender is *actually* using, with a manual re-sync button |
| **Strength / Blend** | The native brush's own settings |
| **Vertex Selection Mask** | Blender's paint mask toggle |
`Apply` on an `R`/`G`/`B`/`A` session writes that channel only. The proxy's RGB
is averaged to a scalar, so a coloured brush still resolves sensibly.
`RGB (Colour)` works the same way but the proxy carries real colour, so you
paint in full colour and Apply writes R, G and B together — **alpha is left
untouched**, so a mask packed into A survives a colour repaint.
### About Unified Color
Since Blender 4.3, **Unified Color** is on by default, which means Blender
paints with `unified_paint_settings.color` and ignores `brush.color` entirely.
VCK writes both and the banner shows you whichever one is authoritative, with an
indicator when unified colour is in use. Both are restored when the session ends.
For `BYTE_COLOR` attributes the brush is handed the linear counterpart of the
value you typed, so what you type is what lands in the byte.
### If you leave Vertex Paint mode
The banner warns you but the session stays open — nothing is lost. Go back into
Vertex Paint to keep going, or press Apply / Discard to close it out. Apply and
Discard both put you back in the mode you started from.
---
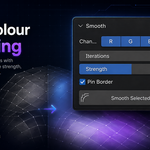
## 7. Smooth
Iterative smoothing over the ticked channels, across the selection.
| Control | Default | |
|---|---|---|
| **Channels** | R G B | Which channels to smooth |
| **Iterations** | 4 | How many passes to run |
| **Strength** | 0.5 | How far each pass moves towards the neighbour average |
| **Pin Border** | on | Hold the outer ring of the selection still so colour cannot bleed past it |
Smoothing runs on a per-vertex graph built from mesh edges. For `CORNER`
attributes the corner values are averaged down to vertices, smoothed, and the
resulting *delta* is added back to each corner — so hard colour splits between
faces survive instead of being flattened.
When the selection is only one ring thick, Pin Border would pin everything, so
it falls back to smoothing the whole selection.
---
## 8. Generate
Nine mask generators. Pick a tool from the grid, set its parameters, press
**Generate**. Every tool produces a 0–1 mask that goes through the same output
tail before landing in **one** channel. The other three are never touched.
### The Output section
Shared by every tool except **Channel**, which has its own buttons.
| Control | |
|---|---|
| **Into** | `R` `G` `B` `A` — the single destination channel |
| **Blend** | Replace / Mix / Add / Subtract / Multiply / Lighten / Darken |
| **Factor** | Blend strength (hidden for Replace, Lighten, Darken) |
| **Contrast** | −1 … 1. Push values towards or away from the midpoint |
| **Min / Max** | Remap the 0–1 mask into this output range |
| **Invert** | Flip the mask |
| **Selection Only / All Selected Objects** | As described in [section 2](#2-concepts) |
### Hierarchical
Colour transitions that follow mesh topology. Built for strands — hair, foliage,
cloth trim.
| Mode | |
|---|---|
| **Base To Tip** | Geodesic distance from each island's root, normalised. Trunk 0, tip 1 |
| **Island Index** | One flat value per loose part — per-strand variation in a shader. Random (with a seed) or an even spread |
| **Object Depth** | How deep this object sits in the parenting chain, up to **Max Depth** |
**Base To Tip** options:
| Root | |
|---|---|
| **Lowest Point** | The island's extreme vertex along the chosen **Axis** |
| **Nearest Origin** | The island vertex closest to the object's own origin |
| **Nearest Target** | The island vertex closest to another object — its **Surface** (nearest mesh vertex, e.g. a scalp or body), its **Origin**, or a named **Bone**'s head in its current pose |
| **Selected** | The vertices you have selected in Edit Mode |
- **Root Width** widens the root from a single vertex to everything within that
distance of it. Raise it on thick strands so the whole base reads as 0 rather
than one lucky vertex.
- **Distance** — *Edge Length* is true surface distance; *Edge Count* is hop
count, which ignores how long the edges are.
- **Normalise** — *Per Island* gives every strand the full 0–1 range; *Whole
Mesh* keeps them proportional, so short strands never reach 1.
Hair hanging *down* from a scalp is the case where an axis root gets it
backwards: the roots are the **highest** vertices, not the lowest. Point
**Nearest Target** at the scalp mesh and it lands correctly no matter which way
the strands run.
### AO
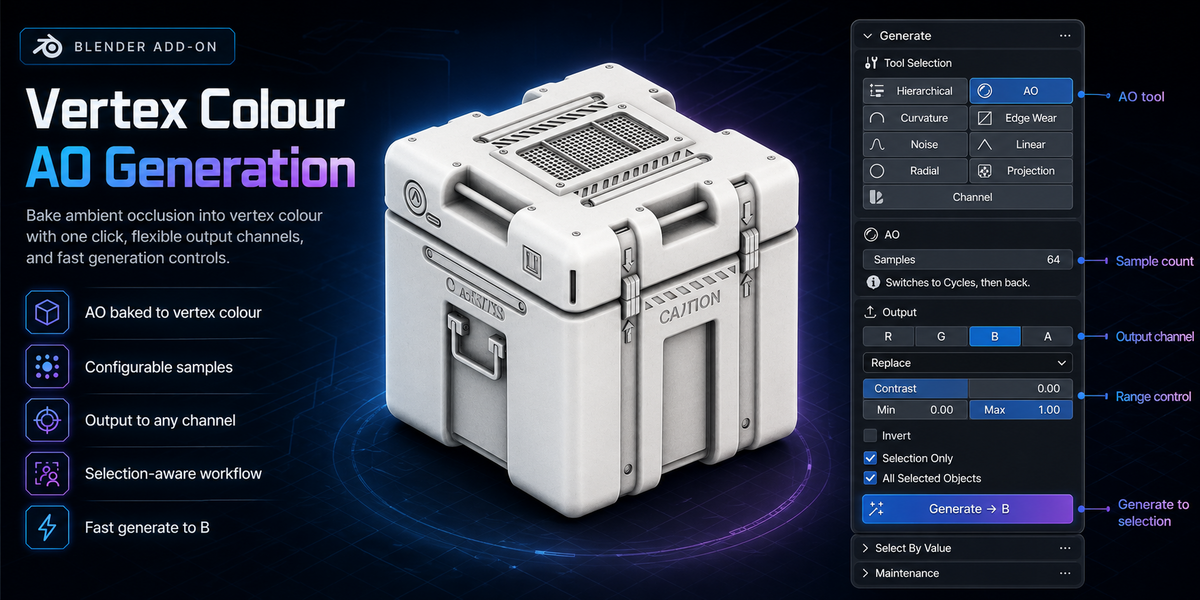
Cycles ambient occlusion, baked to vertices. **Samples** defaults to 64.
The render engine, bake settings and any temporary material are restored in a
`finally` block, so a failed or cancelled bake cannot leave your scene
reconfigured. Requires the Cycles add-on to be enabled.
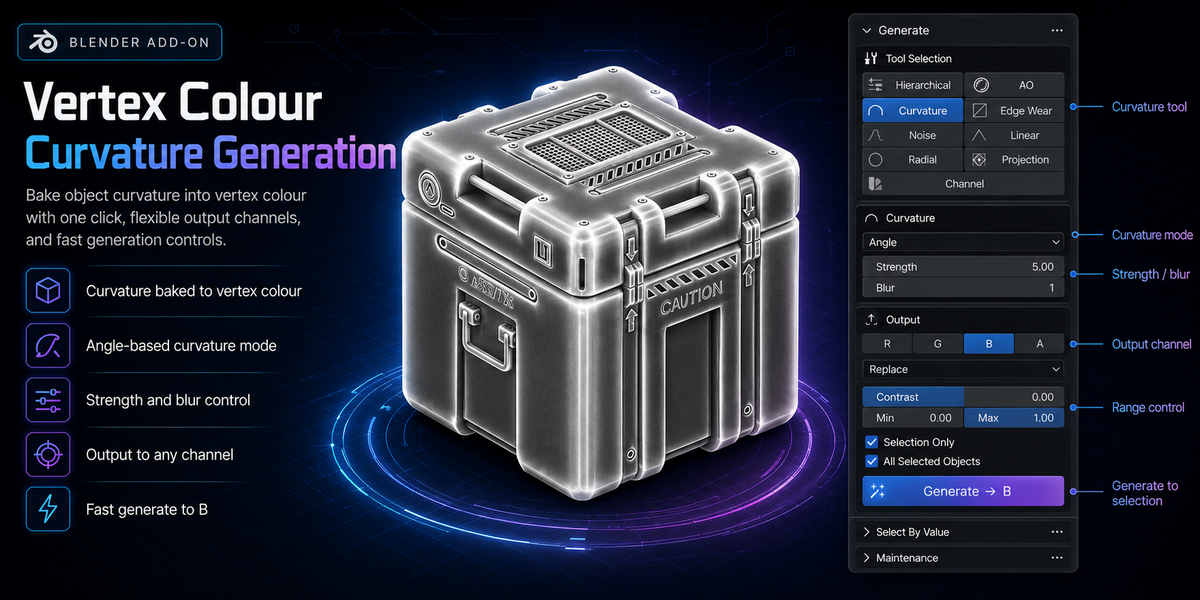
### Curvature
| Method | |
|---|---|
| **Angle** | Convex/concave from vertex normals. Fast and scale independent |
| **Dirty Vertex Colors** | Blender's built-in operator, with **Blur** and **Dirt Only** |
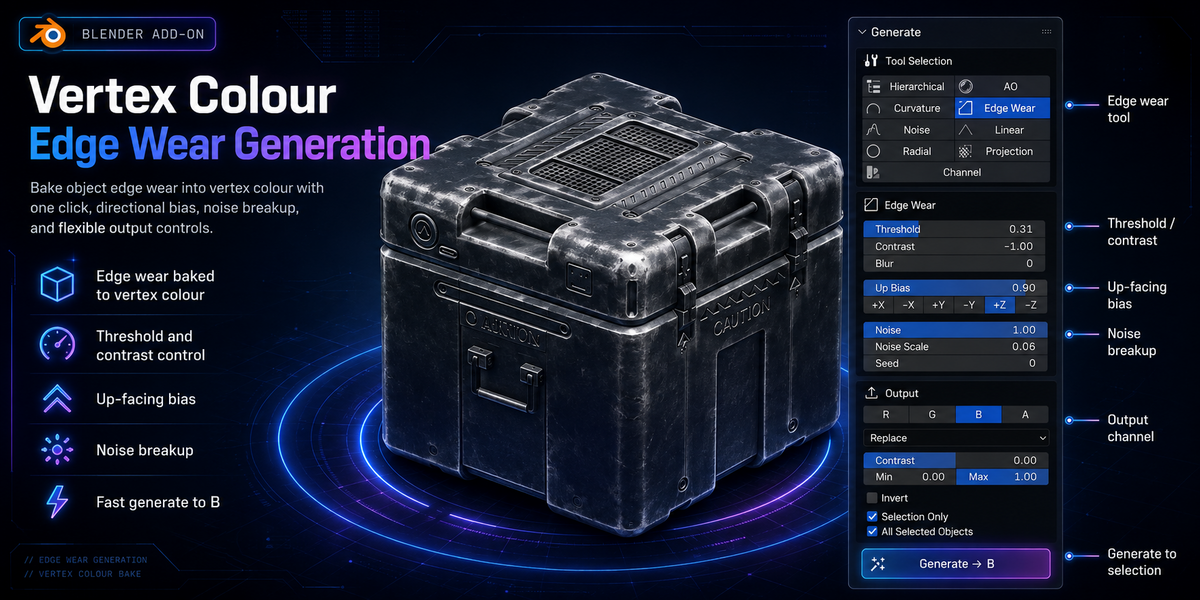
### Edge Wear
Convex edges only — scuffed corners and worn highlights.
| Control | |
|---|---|
| **Strength** | Gain on the convex signal. Raise it to spread wear further down the edges |
| **Threshold** | Cut everything below this away, so wear sits only on the sharpest edges |
| **Contrast** | Default 0.25 |
| **Blur** | Soften the result |
| **Up Bias** | Concentrate wear on edges facing the chosen **Up** axis |
| **Noise / Noise Scale / Seed** | Break the wear up so it does not read as uniform |
### Auto Normalise
Curvature (Angle) and Edge Wear both derive from the same quantity: how far a
vertex's neighbours sit off its tangent plane. That is a sine, so on a smooth
mesh it rarely exceeds 0.2 — feeding it straight into a 0–1 mask would leave
almost nothing visible.
**Auto Normalise** (on by default) divides by a high percentile of the mesh's
own curvature, so the mask fills the full range no matter the object's scale or
subdivision level. **Range** picks that percentile: 99% ignores a handful of
freak vertices; lower values clip harder and widen the bright band.
Turn it off if you need results that stay numerically comparable between
different meshes, and drive the level with **Strength** instead.
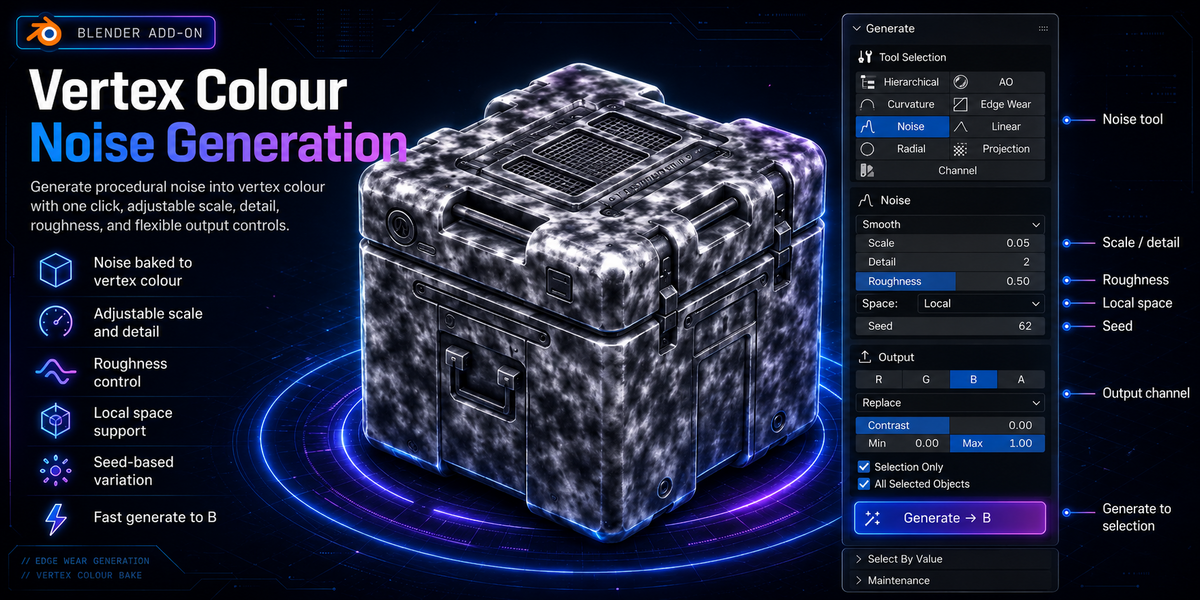
### Noise
| Type | |
|---|---|
| **Smooth** | Continuous 3D value noise, with **Scale**, **Detail** (octaves), **Roughness** and **Space** |
| **White** | Independent random value per vertex |
| **Per Island** | One random value per loose part |
**Space** — *Local* sticks to the object; *World* stays put when the object moves.
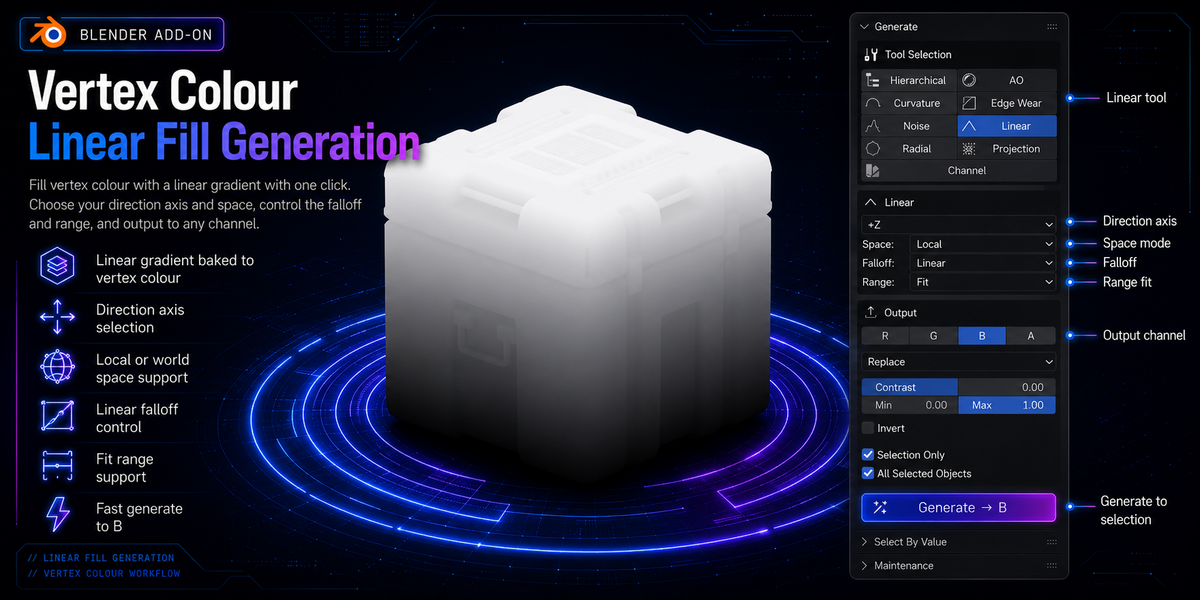
### Linear
A gradient along a direction: an axis, the current **View**, the scene
**Camera**, or a **Custom** vector.
- **Space** — Local or World.
- **Falloff** — six curves.
- **Range** — *Fit* to the mesh bounds, or *Manual* start and end.
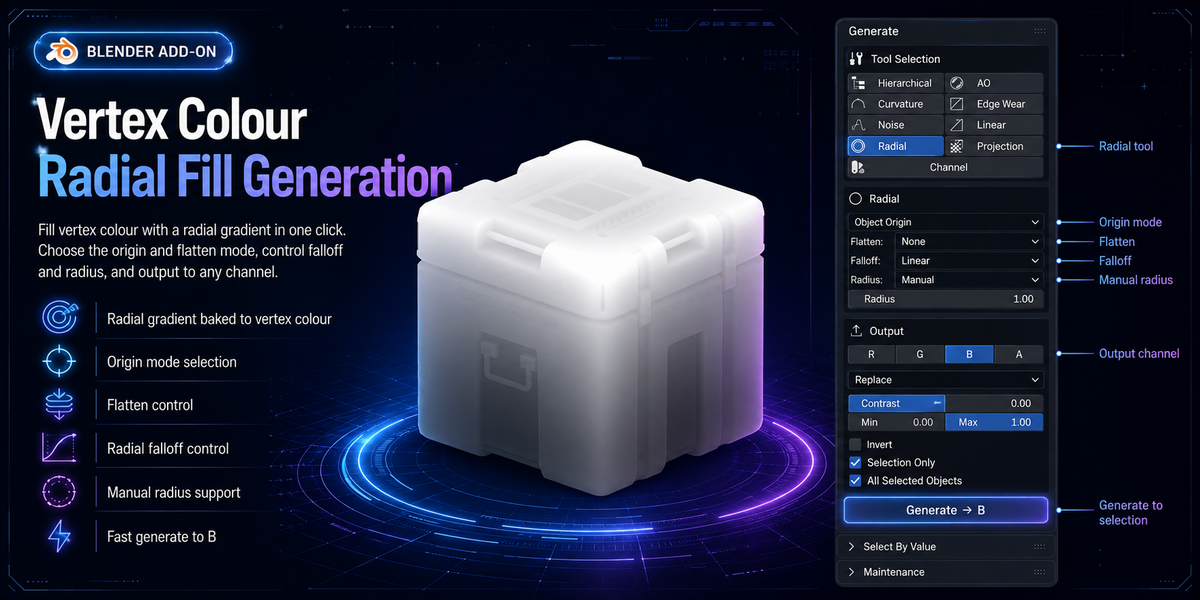
### Radial
A gradient outwards from a centre point.
- **Centre** — Object Origin, Bounds Centre, 3D Cursor, or Selection (the median
of the selected vertices).
- **Flatten** — ignore an axis for a cylindrical falloff instead of a spherical one.
- **Falloff** and **Radius** (*Fit* to the furthest vertex, or *Manual*).
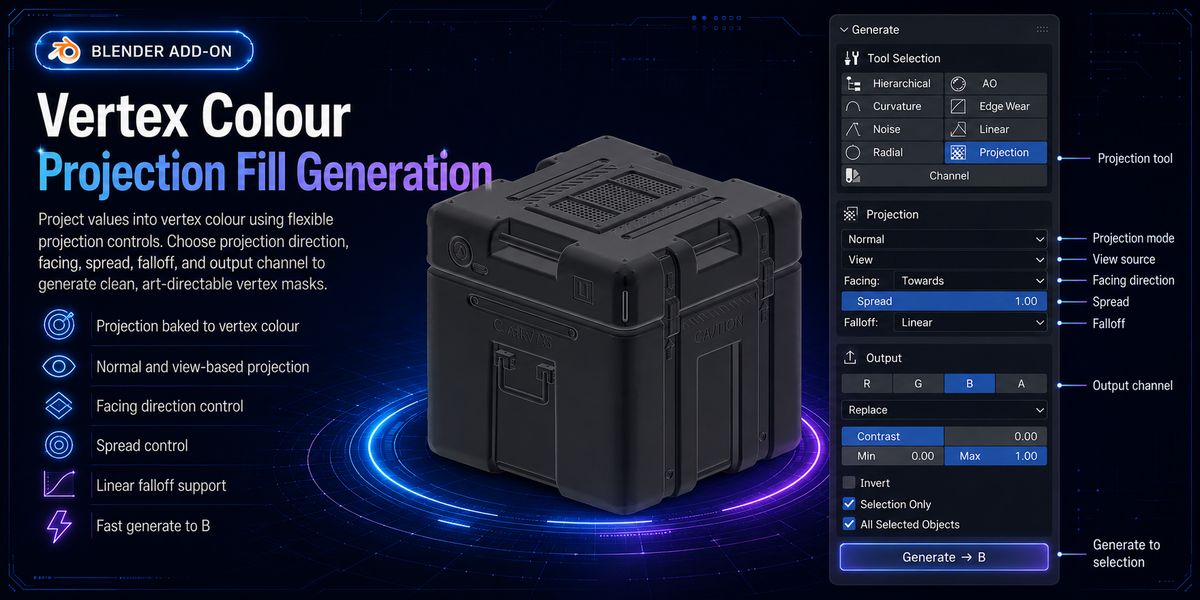
### Projection
| Mode | |
|---|---|
| **Normal** | How much each surface faces the direction — the snow/moss mask |
| **Depth** | How far along the direction each vertex sits |
**Direction** takes an axis, the View, the Camera or a Custom vector.
**Facing** picks whether surfaces pointing towards or away read as 1.
**Spread** tightens the mask around the direction — 1 sweeps the full hemisphere.
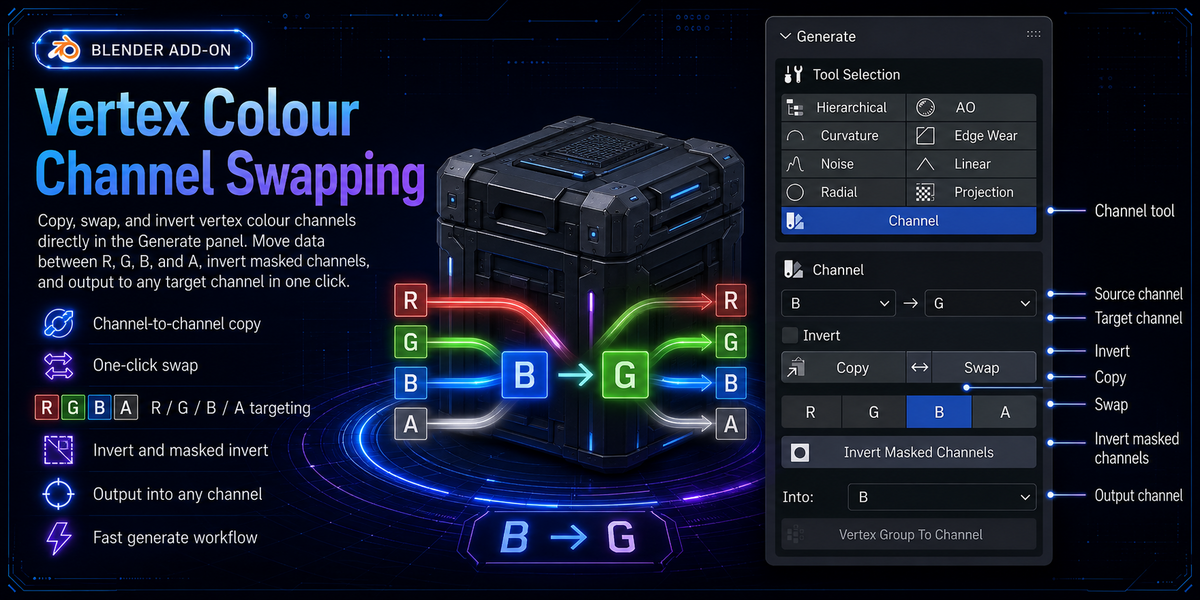
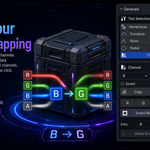
### Channel
This tool has its own buttons; the shared Generate button does not apply to it.
| Control | |
|---|---|
| **From → To**, **Invert** | Which channel to read and write |
| **Copy** | Copy From into To |
| **Swap** | Exchange the two |
| **Invert Masked Channels** | Invert every channel ticked in the row below |
| **Vertex Group To Channel** | Write a vertex group's weights into the **Into** channel. Requires the object to have vertex groups |
---
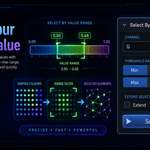
## 9. Select By Value
**Edit Mode only.** Selects vertices whose chosen channel falls between **Min**
and **Max**. **Extend** adds to the existing selection instead of replacing it.
Useful for isolating what a generated mask actually covers so you can keep
editing from there.
This panel is hidden when **Show Advanced Tools** is off in preferences.
---
## 10. Maintenance
**Clean Up Leftovers** removes any stray `VCK_*` scratch attributes and restores
the original active colour layer.
You should not normally need it. VCK already cleans up on Apply, on Discard, on
file load (a `load_post` handler) and on disabling the add-on. The button is
there for the case where something went wrong anyway — a crash, a forced quit, a
script error.
---
## 11. Preferences
`Edit → Preferences → Add-ons → Vertex Channel Kit`
| Setting | Default | |
|---|---|---|
| **Show Advanced Tools** | on | Show the Select By Value panel |
| **Auto Flat Shading** | on | Switch the viewport to flat vertex-colour display when previewing or channel painting |
---
## 12. Workflows
### Packing four masks into one attribute
1. **Colour Attribute → New** — Face Corner, Byte Colour if this is going to a
game engine.
2. **Generate → Curvature**, Into `R`, Blend Replace → Generate.
3. **Generate → AO**, Into `G` → Generate.
4. **Generate → Linear**, axis `+Z`, Into `B` → Generate.
5. **Paint & Values → A** to hand-paint the alpha mask, then **Apply**.
6. Check each one with **Preview → R / G / B / A**.
### Root-to-tip gradient on hair cards
1. Select the hair object; the scalp mesh should be in the scene.
2. **Generate → Hierarchical**, mode *Base To Tip*.
3. **Root** → *Nearest Target*, pick the scalp, **Measure To** *Surface*.
4. Raise **Root Width** until the whole base of each card reads black.
5. **Normalise** *Per Island* so every card runs a full 0–1.
6. Into `G` → Generate, then **Preview → G** to check it.
### Worn edges with a hand-painted touch-up
1. **Generate → Edge Wear**, Into `R`. Leave Auto Normalise on.
2. Raise **Threshold** until only the sharpest edges survive; add **Noise** to
break up the uniformity.
3. **Paint & Values → R** to enter a channel paint session, set **Brush Value**
to `0`, and paint out the wear where you do not want it.
4. **Apply**.
5. **Smooth** with only `R` ticked, 4 iterations, to soften the transitions.
### Reusing a palette between projects
1. Build up the swatches and values you want in one file.
2. Pencil toggle → **Save**.
3. In any other file, pencil toggle → **Load**.

Discover more products like this
add-vertex-color Color Swatches Noise ambient occlusion gamedev vertex color channel vertex color curvature