 MeshMind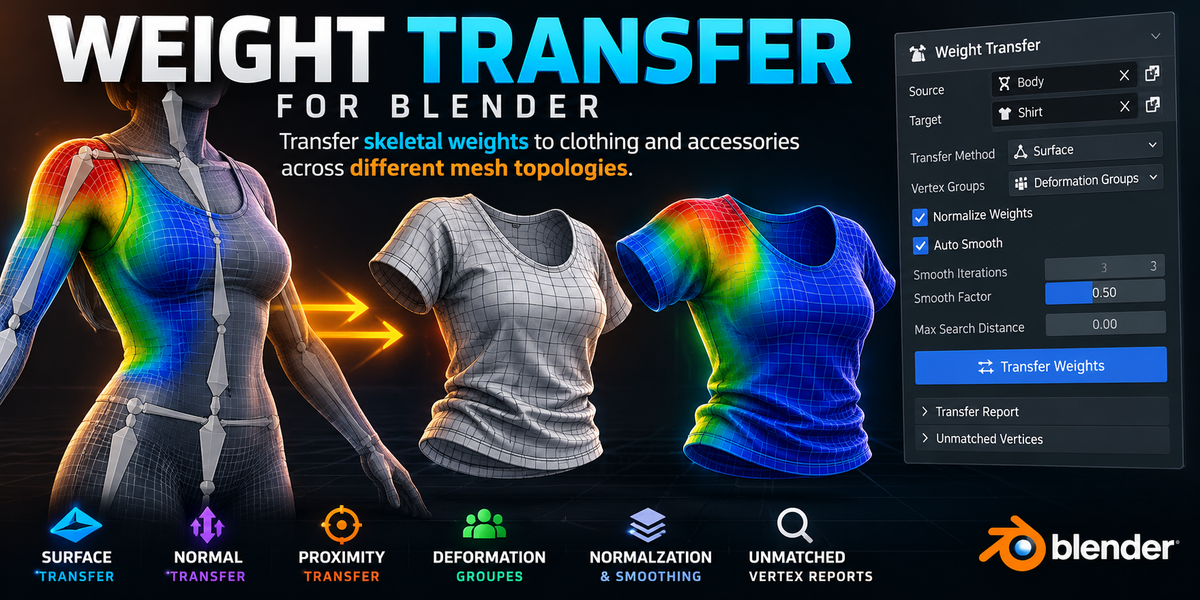
WEIGHT TRANSFER
USER DOCUMENTATION
Transfer character deformation weights to clothing, armor, and accessories—even when mesh topology differs.
Version 1.1.5 • Blender 4.2 or newer
1. Overview
Weight Transfer helps you transfer skeletal deformation weights from a correctly weighted source mesh to a target mesh such as a shirt, jacket, glove, armor piece, or accessory. The source and target do not need identical topology, vertex counts, or matching vertex indices.
A common use case is a character body that already deforms correctly with an armature and a clothing mesh that needs suitable vertex-group weights. Weight Transfer projects or interpolates the source weights onto the target mesh, then lets you inspect and refine the result in Blender.
What it does
· Transfers selected vertex-group weights from one mesh to another.
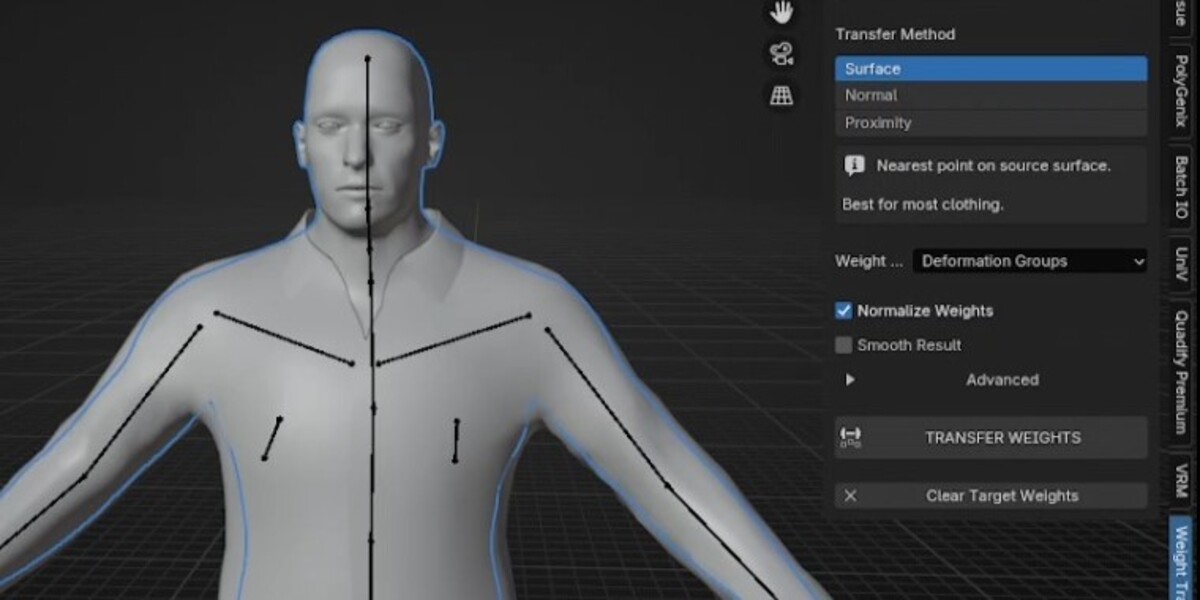
· Supports Surface, Normal, and Proximity transfer methods.
· Can work with deformation groups, all source groups, or a user-selected subset.
· Can normalize transferred weights and optionally smooth the result.
· Reports target vertices that were not successfully weighted so they can be inspected.
What it does not do
· It does not automatically create a complete character rig or bind clothing to an armature.
· It does not transfer shape keys, UVs, vertex colors, or arbitrary mesh attributes.
· It does not guarantee perfect deformation for every garment; results depend on geometry, group names, and the source weights.
2. Requirements
· Blender 4.2 or newer.
· A source mesh with usable geometry and vertex groups containing the weights you want to transfer.
· A separate target mesh with usable geometry.
· For automatic Deformation Groups detection, an Armature modifier on the source mesh with a valid armature object is recommended.
Note: the add-on uses original mesh data for geometric correspondence. Geometry-changing modifiers such as Mirror or Subdivision may make the visible surface differ from the surface used during transfer. See Troubleshooting.
3. Installation
1. Download the Weight Transfer ZIP package. Keep the ZIP compressed; do not extract it first.
2. Open Blender.
3. Go to Edit → Preferences.
4. Open the Add-ons section (or the Extensions/Add-ons interface used by your Blender version).
5. Choose Install from Disk / Install, then select the downloaded ZIP.
6. Enable Weight Transfer in the add-on list if it is not enabled automatically.
7. Move your pointer over the 3D Viewport and press N to open the sidebar.
8. Open the Weight Transfer tab.
If the tab does not appear, confirm the add-on is enabled and that you are viewing the 3D Viewport.
4. Quick-start workflow
9. Open the scene containing your weighted character body and the clothing or accessory mesh.
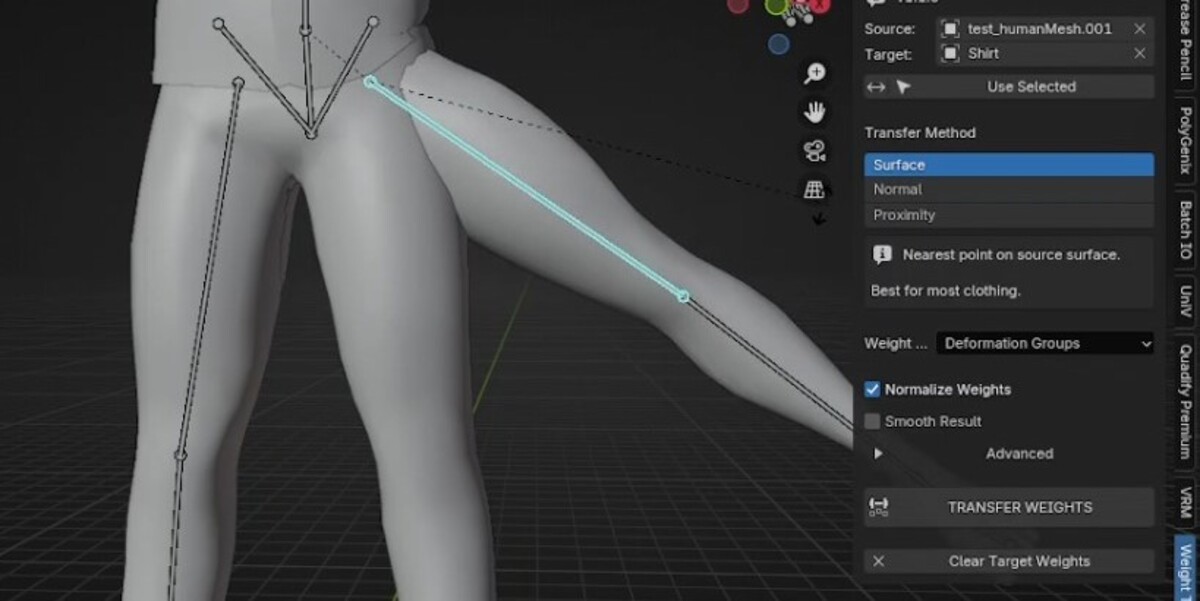
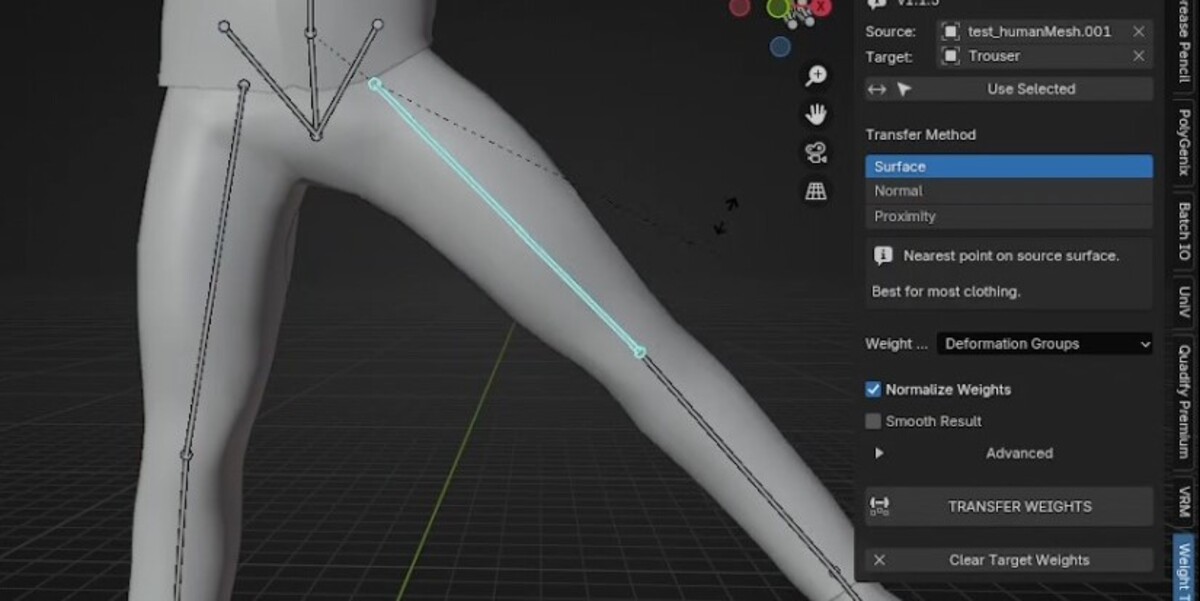
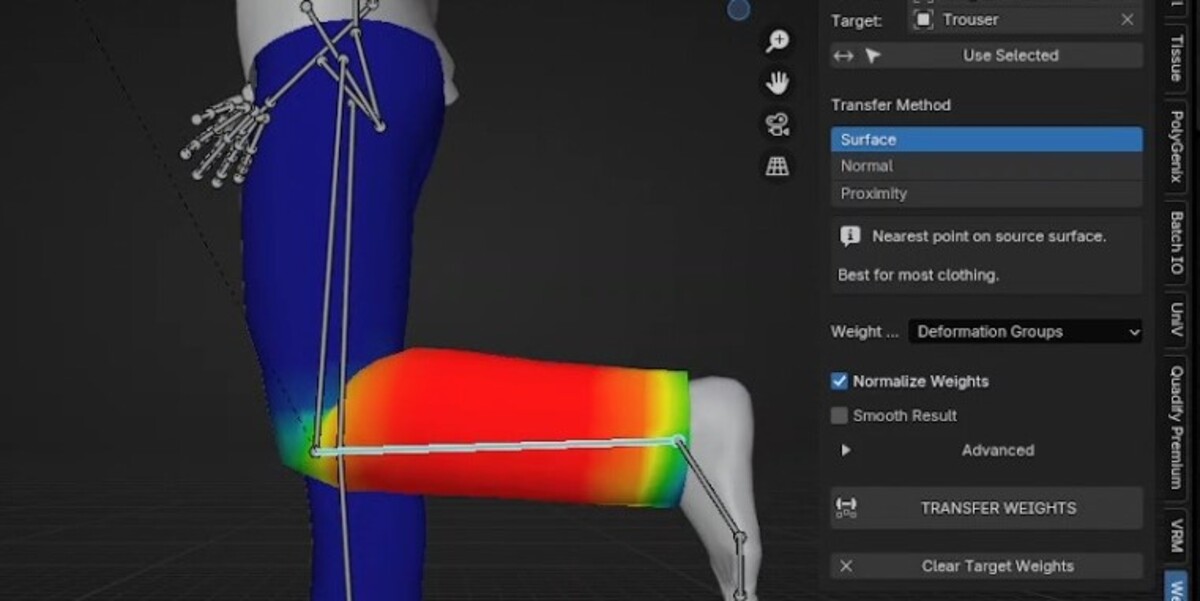
10. In the Weight Transfer panel, set Source to the mesh that already has good deformation weights (for example, Body).
11. Set Target to the mesh that should receive the weights (for example, Shirt).
12. Choose Surface as the initial transfer method.
13. Choose Deformation Groups if the source has a suitable Armature modifier and matching deform-bone groups. Otherwise choose All Groups or Selected Groups as appropriate.
14. Leave Normalize Weights enabled for a typical skeletal deformation workflow.
15. Optionally enable Smooth Result if the transferred weights contain small discontinuities.
16. Click Transfer Weights.
17. Read the transfer report and inspect any unmatched vertices.
18. Test the result by posing the character. If necessary, undo with Ctrl+Z and try another method or adjust the mesh/settings.
5. Source and Target
Source
The source is the mesh that already has the vertex groups and weights you want to reuse. In a typical character workflow, this is the body mesh. A source with clean, appropriate weights generally produces better results than one with poor or incomplete weighting.
Target
The target is the mesh that will receive the transferred weights. This is commonly clothing, armor, gloves, footwear, hair accessories, or another skinned mesh. The add-on creates missing target vertex groups for the groups being transferred and updates their weights.
Source and target must be different mesh objects. The add-on will cancel the operation if either object is missing, invalid, or the same object.
6. Transfer methods
Surface (recommended starting point)
Finds the nearest point on the source surface and interpolates weights from the source triangle. This is usually the best first choice for clothing and accessories that sit reasonably close to the body surface.
Try Surface when: the garment follows the body shape, the source surface is well formed, or you want a general-purpose starting point.
Normal
Projects from the target surface along its normals to find a corresponding location on the source, with a surface-based fallback when needed. It can be useful for close-fitting clothing when the target normals point toward the body.
Try Normal when: the garment closely conforms to the body and Surface produces correspondence on an unsuitable nearby area.
Proximity
Blends weights from nearby source vertices using distance-based influence. It can be useful for loose or unevenly spaced garments, but nearby body parts can influence the result if they are close together.
Try Proximity when: working with loose coats, robes, skirts, or other garments where nearby source vertices provide a useful approximation.
There is no universally best method. Compare results on the actual garment and test the deformation in a few representative poses.
7. Vertex-group modes
Deformation Groups
The default mode attempts to identify groups used by deform bones on an Armature modifier attached to the source. When no usable armature is present, the add-on uses a fallback based on preferred deform-group naming and, if necessary, available groups. If an armature is present but its deform-bone names do not match the source groups, choose another group mode or correct the names.
All Groups
Transfers every vertex group on the source. Use this when you intentionally want all groups copied, not only skeletal deformation groups.
Selected Groups
Transfers only the groups selected in the panel. Use this when you want precise control over which groups are updated.
Important: transferred groups are replaced on the target for the vertices affected by those groups. Groups outside the transfer selection are preserved. If you need to preserve existing weights in groups being transferred, make a backup or duplicate the target first.
8. Options and settings
Normalize Weights
When enabled, the transferred weights are normalized so the selected transferred groups total approximately 1.0 on vertices with usable transferred weights. Normalization is useful for typical skeletal deformation, but it may not be appropriate for every specialized weighting setup.
Smooth Result
Applies optional Laplacian smoothing to the transferred group weights across connected target vertices. It can reduce small abrupt changes, but excessive smoothing may soften important boundaries or reduce deformation detail.
Strength
Controls how strongly each iteration moves weights toward the average of neighboring vertices. Use a low value first.
Iterations
Controls how many smoothing passes are applied. Increase gradually and check the result after each adjustment.
Search Distance
Limits how far the tool searches for a valid correspondence. A value of 0 means unlimited search. A finite limit can help avoid transfers from distant body parts, but it can also leave more target vertices unmatched if set too low. This setting applies to Surface, Normal, and Proximity.
9. Understanding the transfer report
After the operation, read the report rather than relying only on the viewport appearance. It is intended to distinguish geometric misses from matches that did not contain usable source weights, and to verify how many target vertices received weights.
· Unmatched vertices: target vertices for which a suitable source correspondence was not found under the current settings.
· Matches without usable weights: a geometric correspondence may exist, but the matched source area may not contain usable weights for the selected groups.
· Weighted target vertices: a useful sanity check that the operation wrote weights to the target.
If unmatched vertices are reported, use the panel's selection/inspection function when available, then examine the affected regions in the viewport. Do not assume a transfer is successful solely because the operator completed.
10. Best practices
· Save your project or duplicate the target mesh before large transfers.
· Use a source mesh with correct, tested deformation weights.
· Start with Surface, Deformation Groups, and Normalize Weights enabled for a typical fitted garment.
· Keep the source and target in the same character scene and check their world-space placement.
· Try Normal for close-fitting garments and Proximity for loose garments if the first result is poor.
· Use a conservative smoothing strength and a small number of iterations at first.
· Test several poses: shoulder raise, elbow bend, hip bend, knee bend, and any pose that stresses the garment.
· Inspect armpits, crotch, knees, elbows, cuffs, collars, and overlapping garment layers carefully.
· Keep a backup when transferring into groups that already contain important target weights.
11. Troubleshooting
“Please select a
source mesh.”
Choose a valid mesh object in the Source field.
“Please select a
target mesh.”
Choose a valid mesh object in the Target field.
Source and target
cannot be the same object.
Set two different mesh objects as source and target.
Source mesh contains
no vertex groups.
Ensure the source has vertex groups with weights to transfer.
No valid deformation
groups were found.
Check that the source armature's deform-bone names match the source
vertex-group names, or switch to All Groups / Selected Groups.
Many target vertices
are unmatched.
Check the source/target placement, increase Search Distance or set it to 0 for
unlimited search, and inspect sparse, open, or non-manifold source geometry.
Weights appear to
come from the wrong body part.
Try Surface or Normal instead of Proximity, lower Search Distance, and inspect
overlapping or closely spaced source surfaces.
The result looks
different from the visible source surface.
The tool uses original mesh data for correspondence rather than
modifier-evaluated geometry. Apply or account for Mirror, Subdivision, or other
geometry-changing modifiers where appropriate.
The clothing still
deforms poorly.
Confirm the target has the correct Armature modifier and that its armature uses
matching group names; then test the source weights and inspect problem areas in
Weight Paint mode.
The panel is missing.
Enable the add-on, move the pointer into the 3D Viewport, press N, and look for
the Weight Transfer tab.
12. Limitations
· Designed for skeletal weight transfer between character meshes, especially bodies and clothing/accessories.
· Does not transfer shape keys, UV maps, vertex colors, or arbitrary attributes.
· Correspondence uses original source and target mesh data, not modifier-evaluated geometry.
· Sparse, non-manifold, or poorly positioned source geometry may cause unmatched target vertices.
· Automatic transfer is not a substitute for pose testing and manual cleanup on demanding deformation areas.
13. Undo and recovery
The transfer operation is undoable with Blender's Undo command (Ctrl+Z). If the result is not useful, undo the operation, change the method or settings, and run the transfer again. For important production scenes, save a version or duplicate the target before transferring.
14. Frequently asked questions
Do the source and
target need the same topology?
No. They can have different vertex counts and topology.
Can I transfer
weights to a jacket or armor?
Yes. Clothing and accessories are primary use cases, though results depend on
surface correspondence and source weights.
Which method should I
use first?
Start with Surface for most fitted clothing. Compare Normal for close-fitting
garments and Proximity for loose garments.
Will the add-on create
missing vertex groups?
Yes. Missing target groups are created for the groups being transferred.
Does it transfer
shape keys or UVs?
No. It transfers vertex-group weights only.
Can I undo a
transfer?
Yes. Use Ctrl+Z.
What does Search
Distance = 0 mean?
It means unlimited search distance.
Why do I still need
to test poses?
Weight transfer estimates correspondence from geometry. Only deformation tests
reveal whether the resulting weights behave well for your rig and garment.
15. Version and license
Add-on: Weight Transfer
Version documented: 1.1.5
Minimum Blender version declared by the add-on: 4.2.0
License: GNU General Public License, version 3 or later (GPL-3.0-or-later). See the included LICENSE file for the full license text.
Quick reference
|
Goal |
Suggested starting point |
|
Typical fitted shirt or trousers |
Surface + Deformation Groups + Normalize |
|
Close-fitting garment |
Try Normal if Surface maps to the wrong area |
|
Loose coat, robe, or skirt |
Try Proximity; inspect nearby-body-part influence |
|
Transfer only specific bones/groups |
Selected Groups |
|
Transfer every source group |
All Groups |
|
Unmatched vertices |
Inspect report; adjust Search Distance and geometry |
|
Small weight discontinuities |
Enable smoothing conservatively |
Have questions about this product?
Login to message
| Blender Extension Compatible | Yes |
| Published | 2 days ago |
| Blender Version | 4.5 - 5.2 |
| Extension Type | Add-on |
| Render Engine Used | Cycles, Eevee |
| License | Mit |

Discover more products like this
blenderweightpainting BlenderRigging weighttransfer characterclothing vertexpainting skinnedmesh #characterrigging