Adc Autodepth
 ADC - Automotive Design Community


DOCUMENTATION
Getting Started with ADC AutoDepth
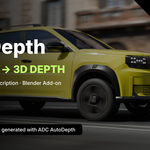
Turn a single 2D photo into real 3D geometry — local AI depth generation, three mesh modes for different subjects, done in a few clicks.
INSTALLATION
|
YOUR FIRST DEPTH MAP
From a flat photo to a depth map, step by step
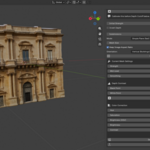
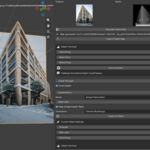
| 1 Load your photoMake sure the Generate tab is selected (top of the panel), then set Image to your photo. Any single image works — architecture, a product shot, a portrait, a landscape. |
| 2 Generate the depth mapClick Generate Depth Map. The local AI reconstructs a depth map directly from your photo — no internet, nothing leaves your computer. Blender stays usable while it works. Once it's done, use Export Depth Map any time if you just want the depth image itself, no mesh. |
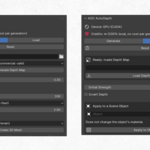
| 3 Calibrate Depth ContrastAdjust Smoothing, Black Point, and White Point — or just click Auto Contrast to let the addon stretch the range for you. Do this before Depth Cutoff (below) if you're using Detailed Mesh or Perspective Mode — it changes what counts as "near" and "far." |
| 4 Choose a mesh mode and generatePick Mode (see the comparison below — this is the most important choice you'll make), set Mesh Size/Subdivisions, then click Create Displacement Mesh. |
THE MOST IMPORTANT CHOICE
Three mesh modes — which one do you need?
All three read the same depth map, but build completely different geometry from it. Picking the right one matters more than any slider.
| ⚡ FASTEST Simple PlaneA single flat plane with a Displace modifier — the depth map pushes vertices in and out, no per-vertex construction needed. By far the fastest of the three, and the only one with no practical subdivision limit. Best for: landscapes, terrain, backgrounds — anything without a hard cutout edge. |
| ✂️ CUTOUTS Detailed MeshBuilds geometry vertex by vertex instead of just displacing a plane, and cuts out the transparent background entirely — so you get an actual silhouette-shaped mesh, not a rectangle with a hole in the texture. Slower than Simple Plane (subdivisions above 400 get capped internally, since it's built one vertex at a time). Best for: portraits, product cutouts, any subject on a transparent/removed background. |
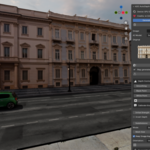
| 🏠 INTERIORS Perspective ModeThe odd one out — instead of displacing a flat plane, it unprojects every pixel through a virtual camera into true 3D space. Floors actually lie flat, walls actually stand up, hallways actually recede — geometry that holds together correctly when you orbit around it, not just a relief that looks right from one angle. Orientation is automatic (Z is always up); adjust Field of View to match how the photo was shot. Best for: interiors, hallways, streets — photos with strong, real perspective. |
Orientation (Simple Plane & Detailed Mesh only)Horizontal (Terrain) — lies flat on the ground, relief points upward. Landscapes, terrain, maps. Vertical (Buildings) — stands upright facing forward, relief points outward. Building facades, portraits, posters. Perspective Mode doesn't need this — its orientation comes from the actual unprojected geometry. |
| 🎯 Depth Cutoff (Detailed Mesh & Perspective Mode)Removes geometry farther away than a threshold you set — useful to isolate a subject from a busy background even when there's no transparent cutout to work with. A live red preview shows exactly what will be removed before you commit (0 = no cutoff, keeps everything). Applied when the mesh is created, not live-adjustable afterward, since it changes the mesh's actual topology. |
AFTER GENERATING
Fine-tune, light it, export it
Current Mesh SettingsAppears right after you generate a mesh — Strength, Smoothing, and (for Simple Plane/Detailed) Black/White Point all stay live-adjustable here without rebuilding the mesh from scratch. Color Correction (Hue/Saturation/Brightness/Contrast) shows up too if your mesh has it. |
One-Click StudioIn Current Mesh Settings, click the camera icon to auto-frame a camera and set up 3-point lighting around your new mesh — instant render-ready setup, no manual positioning. |
Already have a depth map? Use the Load tabSwitch to the Load tab at the top of the panel to skip AI generation entirely: point Ready-made Depth Map at an existing depth image (from AutoDepth's own Export, or anywhere else) and click Load. You can also apply a loaded depth map directly to an existing object in your scene — set Apply to a Scene Object and click the button. This doesn't touch the object's material, just adds/updates its displacement. |
GOOD TO KNOW
FAQ
| Do I need an internet connection? No — everything ships bundled with the addon and runs fully offline from the very first launch. | Do I need a GPU? No. It runs fine on CPU. Any DirectX 12 GPU (NVIDIA, AMD, or Intel) speeds things up automatically — no extra setup needed. |
| Which mode should I start with? If you're not sure, start with Simple Plane — it's the fastest to iterate with. Switch to Detailed or Perspective once you know your subject needs a real cutout or true perspective. | Can I use the results commercially? Yes — everything you generate is entirely yours, no royalties or attribution required. |
Still stuck on something? Reach out through Superhive's messaging and we'll help you sort it out.
-
$5 $19.98
Complete Addon + 1 City Pack (Italy). City packs are ready-to-use building facade images
-
$10 $39.98
Complete Addon + All city packs (Italy + France + future packs). City packs are ready-to-use building facade images.
 Included
Includes 12 months of
- Support from ADC - Automotive Design Community
- Product updates
Extend this product’s Support Period +12 months: 50% of product price
Have questions before purchasing?
Login to message
| Blender Extension Compatible | Yes |
| Published | about 2 months ago |
| Blender Version | 4.5 - 5.2 |
| Extension Type | Add-on |
| Render Engine Used | Cycles, Eevee |
| License | Mit |
Discover more products like this
3D Mesh ai environment background architectural Visualization blender depth map automotive projection backplate blender addon