Ams Splitter
 Imaginacreative


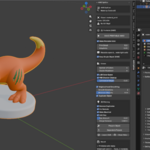
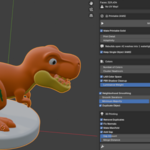
AMS Splitter
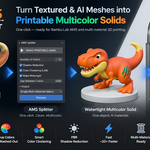
Convert textured 3D models into printable multi-color geometry
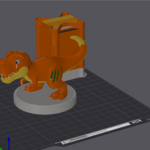
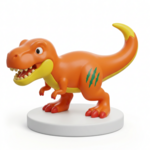
AMS Splitter transforms textured, scanned, or AI-generated meshes into watertight, multi-material models ready for color 3D printing.
The add-on analyzes the model’s Base Color texture, detects its main colors, and converts them into separate material regions—allowing each material to be assigned to a different filament in Bambu Studio or another multi-material slicer.
It is especially useful for models generated by platforms such as Meshy, Rodin, Luma AI, and other image-to-3D or text-to-3D tools.
Key features
Automatically detects colors from a texture
Converts texture colors into printable materials
Creates a single watertight solid from complex or open meshes
Optimized workflow for Bambu Lab AMS systems
Supports up to 24 detected colors
Perceptual LAB color clustering
Reduces false colors caused by baked shadows
Smooths noisy and fragmented color regions
Keeps the result as one object with multiple materials
Optional separation into individual color parts
Built-in manifold, normals, vertex welding, and gap tools
Direct GLB export with materials preserved
Protects the original model by working on a duplicate
Compatibility
Blender: 3.6 or newer
Supported objects: Mesh objects
Required: UV map and Base Color texture
Solid material colors are also supported
NumPy is required for the printable pipeline and is included with Blender
Panel location
3D Viewport > Sidebar (N) > AMS Splitter
Quick Start
Select the mesh you want to process.
Make sure the model has a UV map and a Base Color texture.
Set Number of Colors to match the number of filaments you want to use.
Click MAKE PRINTABLE (AMS).
Export the result or open it directly in your preferred slicer.
In Bambu Studio, assign one filament to each generated material.
For a standard four-slot AMS, set Number of Colors to 4.
The panel header displays the active object, polygon count, and UV status.
When the panel displays No UV Map!, the model cannot be color-sampled. Create a UV map before running the add-on. Blender’s Smart UV Project is usually sufficient.
Main Workflow
Printable (AMS)
This section contains the main tools used to convert the model into printable multi-material geometry.
MAKE PRINTABLE (AMS)
Runs the complete conversion pipeline:
Analyzes the texture
Detects the main colors
Optionally remeshes the object into one watertight solid
Transfers detected colors onto the geometry
Creates separate material regions
Applies optional color-boundary smoothing
Make Printable Solid
When enabled, the model is voxel-remeshed into a single closed and watertight object before the colors are transferred.
This option is strongly recommended for:
AI-generated models
Photogrammetry models
Models containing several disconnected shells
Open or non-manifold meshes
Models generated by Meshy, Rodin, Luma AI, and similar services
Disable this option when the original mesh is already clean and you only want to convert its texture into materials.
Default: Enabled
Print Detail
Controls the voxel resolution used to rebuild the model.
Higher values preserve more detail but generate more polygons and require more processing power. Lower values produce lighter geometry but may remove small features.
Features thinner than approximately two voxels may be fused or removed.
Default: 256
Range: 48–512
Increase this value when small details disappear. Reduce it when the generated mesh becomes too heavy.
Adaptivity
Reduces polygon density in flatter areas of the remeshed object.
A value of 0 creates a more uniform polygon distribution. Slightly higher values can significantly reduce polygon count while preserving important edges and details.
Default: 0.00
Range: 0.0–0.5
Keep Single Object (AMS)
Keeps the result as one object containing multiple material slots.
This is the recommended format for Bambu Studio because each material can be assigned to a different AMS filament.
Disable this option only when you need each color to become a physically separate object.
Default: Enabled
Note: Print Detail and Adaptivity are only displayed when Make Printable Solid is enabled.
Color Detection
Number of Colors
Defines the maximum number of colors and materials that will be detected.
In most cases, this value should match the number of filaments available in your AMS or multi-material system.
Examples:
4colors for one standard Bambu AMS8colors for two AMS units16colors for four AMS units
Default: 6
Range: 2–24
Recommended practical maximum: 12
Cluster Headroom
Allows the add-on to detect additional temporary color clusters before merging them into the requested final color count.
This helps preserve small but important color regions.
For example, without headroom, a large gradient on a character’s clothing may consume several color clusters while a small area such as hair, eyes, or an accessory disappears.
Increase this value when small color details are being lost.
Set it to 0 to disable the feature.
Default: 4
Range: 0–8
LAB Color Space
Analyzes colors using the perceptually uniform LAB color space instead of raw RGB values.
LAB generally provides more natural and visually accurate color separation.
Default: Enabled
Recommended: Enabled
Reduce PBR Shadows
Reduces the influence of baked lighting, ambient occlusion, and shadows found in many AI-generated or PBR textures.
This prevents a single filament color from being incorrectly divided into light and dark material regions.
This setting is available when LAB Color Space is enabled.
Default: Enabled
Luminance Weight
Controls how strongly brightness differences affect color grouping.
Lower values ignore more lighting and shadow variation.
Higher values preserve differences between light and dark tones.
Default: 0.65
Range: 0.25–1.0
For models with baked shadows, try values around 0.40–0.55.
For models where genuinely different light and dark colors are being merged, increase the value.
Recommended adjustment
If one color is being separated into light and dark versions, lower Luminance Weight.
If different tones are being incorrectly merged, raise it.
Color Smoothing
Neighborhood Smoothing
Analyzes neighboring faces and corrects isolated or incorrectly classified polygons.
This helps remove:
Color speckles
Single-face artifacts
Jagged material boundaries
Small classification errors
Default: Enabled
Recommended: Enabled
Smooth Iterations
Defines how many smoothing passes are applied.
More iterations create cleaner material boundaries but may remove very small color details.
Default: 2
Range: 1–10
Minimum Majority
Defines how dominant a neighboring color must be before a face is reassigned.
At the default value of 0.55, a face changes color only when more than 55% of its neighbors belong to another color group.
Higher values preserve more detail and apply conservative smoothing.
Lower values apply stronger smoothing and remove more isolated regions.
Default: 0.55
Range: 0.30–0.90
Duplicate Object
Processes a copy of the selected model and preserves the original object.
The printable conversion can modify geometry, materials, topology, and UV data, so keeping this option enabled is strongly recommended.
Default: Enabled
Note: Smooth Iterations and Minimum Majority are displayed only when Neighborhood Smoothing is enabled.
3D Printing Tools
The 3D Printing section contains preparation, repair, separation, and export tools that can be used after running MAKE PRINTABLE (AMS).
These tools can be used with both single-object and separated-part workflows.
Preparation Options
Remove Duplicates
Merges vertices that occupy the same or nearly the same position.
This helps remove duplicate geometry and weld disconnected vertices.
Default: Enabled
Fix Normals
Recalculates normals so they face outward.
Correct normals help slicers identify the inside and outside of the model correctly.
Default: Enabled
Make Manifold
Attempts to repair non-manifold geometry, close holes, and create a watertight printable object.
Default: Enabled
Add Gap
Slightly shrinks separated color parts to prevent overlapping geometry.
This can improve the fit between physically separated material regions and reduce slicer intersection warnings.
Default: Enabled
Gap Amount
Defines how much each separated part is reduced.
The value uses Blender units, which normally correspond to millimeters when the scene is configured for 3D printing.
Larger values create a more visible seam between colors.
Default: 0.10
Range: 0.0–1.0
Merge Distance
Defines the vertex-distance threshold used by Remove Duplicates.
Default: 0.001
Range: 0.0001–0.1
Action Buttons
Prepare Object
Applies the selected preparation operations to the active object without separating its materials.
Depending on the enabled options, it can:
Merge duplicate vertices
Recalculate normals
Repair manifold issues
Apply geometry cleanup
Separate & Prepare
Separates the object into individual parts based on its material regions and then applies the selected preparation settings to each part.
This option is available only when the object contains more than one material.
Use this workflow when you need one physical object for each color instead of one multi-material object.
Export GLB
Exports the processed result as a .glb file.
Materials and color assignments are preserved, making GLB a convenient format for importing the model into Bambu Studio and other compatible applications.
Clean Mats
Removes unused and empty material slots created during processing.
This keeps the final object cleaner and prevents unnecessary material entries from appearing in the slicer.
Result Information
After processing, the Result section displays the current operation status and useful information about the generated model.
Examples include:
Printable solid ready
Number of colors detected
Number of materials created
Final polygon count
Processing or validation messages
This section is informational and does not modify the object.
Recommended Bambu AMS Workflow
For the most reliable Bambu Studio workflow:
Set Number of Colors to the number of filaments you want to use.
Enable Make Printable Solid.
Enable Keep Single Object (AMS).
Enable LAB Color Space.
Enable Reduce PBR Shadows.
Keep Neighborhood Smoothing enabled.
Click MAKE PRINTABLE (AMS).
Export the result as GLB if required.
Import the model into Bambu Studio.
Assign one AMS filament to each material.
Suggested starting configuration
Number of Colors:
4Cluster Headroom:
4LAB Color Space: Enabled
Reduce PBR Shadows: Enabled
Luminance Weight:
0.55–0.65Neighborhood Smoothing: Enabled
Smooth Iterations:
2Minimum Majority:
0.55Print Detail:
256Adaptivity:
0.00Keep Single Object: Enabled
Troubleshooting
The panel displays “No UV Map!”
The selected model does not contain a UV map.
Create a UV map before processing the model. Blender’s Smart UV Project usually works well for this purpose.
Too many or unusual colors are generated
Try the following:
Reduce Number of Colors
Lower Luminance Weight
Enable LAB Color Space
Enable Reduce PBR Shadows
Make sure the Base Color texture does not contain strong baked lighting
A small colored area disappeared
Increase Cluster Headroom.
This gives the detection system more temporary clusters and improves the chance of preserving small regions such as eyes, hair, accessories, logos, and clothing details.
One color is divided into light and dark materials
Lower Luminance Weight.
A value around 0.40 is often useful for AI-generated models with strong baked shadows.
Different tones are being merged
Increase Luminance Weight to make brightness differences more important during clustering.
The remeshed model is too heavy
Lower Print Detail
Increase Adaptivity slightly
Reduce the model’s physical complexity before processing
Small geometry details disappeared
Increase Print Detail.
Remember that features thinner than approximately two voxels may be fused or removed during voxel remeshing.
The slicer reports that the model is not watertight
Enable Make Printable Solid
Run Prepare Object
Enable Make Manifold
Enable Fix Normals
Enable Remove Duplicates
The color boundaries contain speckles
Enable Neighborhood Smoothing
Increase Smooth Iterations
Slightly reduce Minimum Majority for more aggressive cleanup
Be careful with very high smoothing values because small color details may be removed.
The original model was modified
Enable Duplicate Object before running the printable pipeline.
The add-on performs destructive operations such as remeshing, topology changes, and material reassignment.
Important Notes
AMS Splitter converts texture information into a limited number of printable material regions.
The final result depends on the quality of the model, UV map, and Base Color texture.
Gradients and photographic textures must be simplified into a limited filament palette.
Very small texture details may not be printable at the selected model size.
The available physical filament colors may not exactly match the colors shown in the original texture.
Always inspect the sliced preview before printing.
For best results, choose filament colors that closely match the generated materials.
From texture to multi-color printing
AMS Splitter bridges the gap between textured digital models and physical multi-color 3D printing.
Instead of manually painting material regions face by face, you can automatically detect the dominant texture colors, rebuild problematic AI meshes, generate printable material assignments, and prepare the result for an AMS-compatible slicer—all directly inside Blender.
 Included
Includes 12 months of
- Support from Imaginacreative
- Product updates
Extend this product’s Support Period +12 months: 25% of product price
Have questions before purchasing?
Login to message
| Published | about 2 months ago |
| Blender Version | 4.0 - 5.2 |
| Extension Type | N/A |
| Render Engine Used | Arnold, Blender-Internal, Blender-Game-Engine, Cycles, Eevee, Freestyle, Luxrender, Mental-Ray, Octane, Vray, Yafaray |
| License | Mit |

Discover more products like this
PBR 3d printing Bambu Lab filament meshy multimaterial color separation multicolor AMS bambu studio