Anynode Preview – Geometry Nodes & Shader Preview
 Unik Studio


AnyNode Preview V1.0 Documentation & User Guide
Install AnyNode Preview, create your first Geometry Nodes, Shader or World preview, then use this guide to learn viewport overlays, field inspection, material controls, performance settings and troubleshooting.
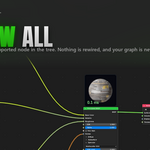
Nothing is rewired. Previews are evaluated against a temporary copy of the tree or object, so your graph is exactly as you left it.
Edition scope: this guide documents the complete Full edition included with Personal, Team and Studio. Lite includes Selected Preview for Geometry, Shader and World nodes, card controls, timing, Refresh and cache.
Requirements
- Blender 4.5 or newer. Verified against 4.5 LTS, 5.1 and 5.2.
- Geometry Nodes, Shader/Material and World node trees.
- Local Blender execution only. The add-on requests no network permissions and bundles no binaries — it is pure Python. Its background workers are additional Blender processes on your own machine.
- Customer-facing release V1.0. Blender displays semantic build
1.0.0for Lite and1.0.23for Personal, Team and Studio. - GPL-3.0-or-later license.
Install, Update & Uninstall
Install from Disk
- Download the ZIP attached to your Superhive edition. Do not extract it.
- Open Blender.
- Go to
Edit > Preferences > Get Extensions. - Choose
Install from Disk. - Select
AnyNode_Preview_V1.0_LITE.zip,AnyNode_Preview_V1.0_PERSONAL.zip,AnyNode_Preview_V1.0_TEAM.ziporAnyNode_Preview_V1.0_STUDIO.zip. - Enable
AnyNode Preview.
You can also drag and drop the extension zip onto the Blender window.
Update or Move from Lite to Full
Download the newer or Full edition ZIP and install it through Install from Disk. Lite and Full share the extension ID anynode_preview, so install the Full ZIP over Lite instead of enabling both side by side. Restart Blender if the extension manager requests it.
Uninstall
Open Edit > Preferences > Get Extensions > Installed, locate AnyNode Preview, open its menu and choose Uninstall. Save current work before changing extensions.
Where to Find the Controls
| Panel | Space | Contents |
|---|---|---|
AnyNode Preview | Node Editor sidebar (N) | Preview switches, Attribute Inspector, cards, viewport overlay, alignment and link controls |
AnyNode Preview | 3D Viewport sidebar (N) | Shared preview and hover controls, viewport display, material channels, presets |
AnyNode Preview | Image Editor sidebar | Optional image hover preview |
AnyNode Preview | Material Properties | Material thumbnail picker and optional hover preview |
Quick Start: Your First Preview
- Open a Geometry Nodes, Shader or World editor and press
N. - Turn on Preview All to card every supported node, or Selected Preview to card the node you click.
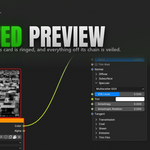
- Click a node. Its card is ringed and everything outside its chains is veiled.
- Turn on Show In Viewport when a 64 px card is not enough.
- Press
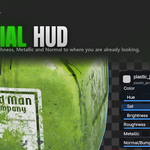
Alt+Min Object Mode to bring up the material HUD.
Preview Cards
Selected Preview and Preview All
Selected Preview enables click-driven cards. Preview All independently covers every visible supported node, including when Selected Preview is switched off — the two are separate switches, not a mode.
Cards stay attached immediately above and horizontally centred over their own node. They never reflow into a distant stack as other renders finish, so the card-to-node relationship stays stable while you navigate a dense graph. Cards too small to read are left out rather than drawn as specks.
What gets a card
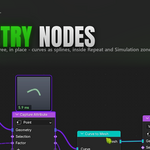
- Geometry: a clay/isometric GPU render, with instances realised for extraction. Curves are converted for display, so a curve node shows its splines instead of an empty card. Faces, loose edges and stray points are all drawn, loose edges and points in their own colours.
- Fields and textures: flat edge-to-edge 2D cards, badged with the value range the heatmap is normalised against.
- Shaders and materials: rendered on a hidden EEVEE material-preview scene.
- Image Texture: displayed directly.
- Color Ramp, RGB and Value: computed cards.
- Normal Map and Bump: preview their useful upstream map.
- Volume/SDF grids: contoured to a surface through a temporary Grid to Mesh.
What deliberately gets nothing
Matrix, String, Menu, Object, Collection and Material sockets are not visualised. Nodes that cannot change a flat-shaded clay card — attribute and bundle plumbing, material and shade-smooth setters, transforms, curve radius/tilt, NURBS order/weight — show no card of their own, so the upstream node that does shape the result stays the visible one.
When the active node has no card, the sidebar names it and says why: a frame or reroute carries no result of its own, an output node shows the whole tree rather than a step in it, a passthrough leaves the card with the node that actually shapes the geometry. The explanation comes from the same call that made the decision, so the two cannot disagree.
Zones
Nodes inside Repeat, Simulation and For Each Element zones preview normally, including nested zones, zone input nodes and branches that do not feed the zone output yet. Blender forbids a link leaving a zone, so the preview leaves through the zone's own output: the card shows the value carried out of the last iteration, or the current frame for a Simulation.
Preview Output
Preview Output appears only when the active node has more than one visual output. It selects the exact Geometry, field, shader, colour, scalar or vector socket the card represents. The choice is session-only, the default keeps its existing cache key, and the source graph is never rewired.
Focus
Clicking a node previews it, rings that node's card so the click has a visible answer even when Preview All has already filled every node, and highlights the chains passing through it — in one gesture. Blender's own wires are never redrawn; only nodes outside the chain are veiled. Sibling inputs at a later Mix, Shader or Output node are not pulled in.
- Focus Opacity sets the veil over everything outside those chains. Zero turns highlighting off and leaves plain previews.
- Show Input Nodes follows a configurable number of upstream levels after a click.
Card size, timing and stats
- Selected card size grows or shrinks the cards of the selected nodes between 25% and 300%, with Reset and Reset All. It changes how large the card is drawn, never what is rendered, so it costs no render and cannot invalidate a cached thumbnail.
-
Show Timing independently controls the
msbadges. - Geometry Stats adds realised vertex, edge and face counts to compact cards and to the 3D viewport caption. Counts describe the realised mesh in the picture, since the preview path realises instances before extraction.
Framing a card
Middle-drag orbits a card, Shift+middle-drag pans and Ctrl+middle-drag zooms — the same gestures as the 3D view. Escape puts it back and Reset Card Angle restores all three. Nothing is re-evaluated, only the camera over buffers already held, and a framed card is never written to the shared thumbnail cache.
Keyboard shortcuts
In the Node Editor: Ctrl+Shift+P toggles Preview All, Ctrl+Shift+V toggles the 3D viewport overlay, Ctrl+Shift+R refreshes. All three are ordinary keymap entries, so they can be rebound or removed in Preferences like any other.
In the 3D Viewport: Alt+M shows or hides the material HUD in Object Mode.
3D Viewport Overlay
Show In Viewport draws the active Geometry node's evaluated output onto the object whose modifier owns the tree, at real scale and in place.
- Solid, wire or points, drawn opaque or as a ghost over the real object.
- Correctly occluded by scene geometry — the overlay sits in the scene rather than floating over it.
- Its own triangle budget, separate from the card Preview Budget, because a full-screen overlay is worth more triangles than a thumbnail.
- Independent of the card switches, so it is useful with node previews turned off.
Fields on the real mesh
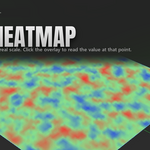
Field and attribute outputs draw as a heatmap on the real geometry, at real scale. This is where the viewport beats a 64 px card by the widest margin: a thumbnail cannot show where on a dense mesh a value falls.
A caption names the node being shown and, for a field, the value range the heatmap is normalised against — without it the same picture could mean 0..1 or 0..1000.
Click a field overlay to read its value at that point. The heatmap says where a value is high; the reading says how high, here. It is the same number the range badge is built from, formatted the same way, and it stays pinned to the point it was taken at as the view orbits. Clicking off the overlay, or any change that re-evaluates it, clears the reading. It is a plain left mouse click that is always passed through, so selection and tools are unaffected.
Before / After
Before / After wipes the node's input geometry against its output, in the same place at the same scale, so the change the node makes is one picture rather than two remembered ones. Drag the boundary to move it; Escape puts it back. A node with nothing upstream — a primitive, a Group Input — says so and keeps showing its output.
It is off by default: it costs a second evaluation per update.
Preview Selection
Preview Selection shows what the active node acts on rather than what it outputs: its incoming geometry, coloured by the node's Selection field, so selected and rejected elements read at a glance. The 3D viewport overlay shows the same mask on the real object at real scale.
It is opt-in and active-node only, and it replaces that node's ordinary card rather than costing a second evaluation. Nodes inside a Simulation or Repeat zone are not supported yet and say so.
Material Tools
Material Lens
The Material panel follows the active object instead of the selected node and shows material name, slot, shared users and compact channel groups. Base Color, Metallic and Roughness are the baseline; Normal, Bump, Displacement and any other non-Emission Principled input appear only when connected.
Every group starts collapsed with its live source or value in the header, so Color Adjust, Range Adjust, Explore and detailed values appear only for the channel you open. Linked inputs display their Image Texture, node or group source. Emission is intentionally hidden from Material Lens and the viewport HUD.
The material identity is a slot picker in both Material panels and in the floating HUD header. Switching slots keeps the HUD visible and rebuilds its controls against the new material.
Channel Board
Channel Board renders everything arriving at the surface node's inputs — Base Color, Metallic, Roughness, Normal, Alpha, Emission and any other input you have linked — side by side, instead of rewiring one socket at a time into Material Output. It follows whatever feeds Material Output, so it works for a Principled, a Diffuse, an Emission or a custom node group.
Linked channels render through their exact source socket, so a Separate Color's Blue feeding Roughness shows Blue and not Red. Unlinked channels are drawn as their constant and cost no render at all.
Visual Explorer
Visual Explorer renders the final material for one unlinked value input at eight settings at once, so a look is chosen from results instead of dragged blind. It launches from an active node or directly beside effective scalar controls in Material Lens.
- The current value always appears as a blue reference tile.
- Clicking a ready tile applies that value to the node, and one
Ctrl+Ztakes it back. - Bounded inputs sweep their own soft limits; unbounded ones sweep around the value you already have.
- Colour inputs are excluded: hue, value and saturation would be three different sweeps.
Board and sweep dock to opposite corners so both can be open together, and they share one serialised render lane rather than competing for Blender's single material-preview job.
World trees
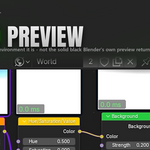
World node trees preview as the environment they are, wired through a Background so the result is the world rather than black. They render through a 3D viewport rather than Blender's ID-preview system, which renders a World to solid black. Selected Preview, Refresh and Preview All use this same path for direct Color/Value nodes and Image Textures. With no viewport open, the panel says so.
Material-only controls — Channel Board and the sweep — are hidden in a World editor.
Viewport Material HUD
Show/Hide Material in Viewport is one state-aware toggle in the Sidebar, on Alt+M in Object Mode, and at the top of the Object right-click menu.
On first show, Base Color automatically gains neutral Color Adjust controls, while linked Roughness and Metallic maps gain reversible Map Range layers. Normal, Bump and Displacement use Strength, Strength and Scale as their main HUD sliders; secondary Min, Distance and Midlevel controls remain in the expanded channel.
Layout
A compact HUD of at most eight primary rows follows from 18 px outside the active object's projected bounds, or pins to a viewport corner. Controls use the fixed hierarchy Colour with Hue/Sat/Brightness, Roughness, Metallic, Normal/Bump and connected Displacement. Bump is folded into Normal instead of competing as a top-level channel.
- Object transforms move the HUD with the object; viewport orbit and pan leave its screen position stable.
- Auto Fit to Object reduces the HUD in stable 5% steps to a readable 65% for small projected objects.
- HUD UI Scale enlarges the complete interface, including its click targets, from 55–200%.
- Background opacity runs 0–100% from the Sidebar. At zero, labels and controls stay visible.
- The HUD automatically chooses the side with room, and can be moved and collapsed.
Colour, and putting it back
Add Color Adjust inserts a reversible Hue/Saturation/Value and Tint layer before Principled Base Color. It preserves the texture or solid-colour source and the texture detail.
The HUD's Colour swatch writes a solid Base Color directly; for a linked texture it writes a white-neutral Multiply tint. Opening the native picker does not change the look, while every picker edit drives the node socket live with no separate confirmation.
- Remove Color Adjust restores the exact original socket or value. Both graph actions are undoable.
- Colour has the same compact reset affordance as the numeric material rows. It restores the solid colour captured at adjustment creation, or a white-neutral texture tint, without modifying the texture or the Hue/Sat/Brightness controls.
- FX On / FX Off bypasses or restores the complete Color Adjust layer from either the HUD or the Material panel, without clearing any adjustment value.
Geometry Nodes controls
Build Deck discovers exposed Geometry Nodes modifier inputs; material controls are discovered automatically from the active material. Float, factor, distance, angle, integer, Boolean, menu, string, vector, rotation, colour, Object, Collection, Material and Image values are supported.
Smart spatial controls map scalar distance to a linear gizmo, angle to a dial, vector/location to a move gizmo and rotation to three axis dials. Orientation switches between object-local and world space.
Bindings use modifier persistent IDs, node UUIDs and socket identifiers, so node and modifier renames survive. Missing sockets, duplicate UUIDs and ambiguous links stop in Relink instead of controlling a guessed source. Linked sockets are not overwritten; a unique source reached through Reroutes or node-group passthroughs can be pinned, and ambiguous paths are rejected.
Presets and A/B
Presets store typed deck values, name, order, notes, favourite state and an optional packed 128 px thumbnail captured from the current preview card.
- A/B compares two assigned presets. Cancel restores the exact entry state; Commit keeps the selected result as one undo step.
- Live editing is scoped to the active object. Apply Active Preset to Selected applies compatible Geometry Nodes bindings and skips incompatible objects.
- Shared materials display their user count and are never copied without the explicit Make Single User action.
Gizmo and HUD drags coalesce updates to about 30 Hz. Card jobs pause during interaction and resume once with the newest value.
Attribute Inspector
Attribute Inspector expands the active field card with its actual sample domain and data type, finite min/max, sample and missing-value counts, and a compact histogram. It is opt-in and remains hidden for Geometry and Shader cards.
Vector fields switch between Direction (XYZ-to-RGB) and Magnitude heatmaps. Both report the magnitude distribution; non-finite samples are counted as missing and marked magenta on the heatmap.
Layout & Presentation
- One Colour, with twelve presets, drives node links and the active-node outline. It is opt-in only: with it off the add-on never writes to your theme, and turning it off restores the colours you had.
- Align Nodes arranges selected nodes or the whole current tree. Connected single-consumer chains and branches snap to 20 px horizontal padding, so pairs such as Image Texture → Normal Map stay visually together.
- Identical Texture Coordinate/Mapping utilities in the same Frame can be consolidated without losing outgoing links.
- Link shape switches between Curved and Straight.
- Material slots are available as clickable thumbnail tiles.
- Optional Image Editor and Material Properties hover cards.
- Settings persist in add-on preferences.
Performance & Cache
- 64 px default quality.
- Signature-keyed memory and disk cache, invalidated by muted links as well as muted nodes. A signature hashes node properties, upstream graph shape, transforms, topology and materials, so an entry invalidates exactly when the pixels would actually change — no more, no less.
- Cards are released when an editor leaves a tree, so switching material, entering a node group or undoing does not retain the abandoned tree's GPU memory. Navigating back is a cache read.
- Change-driven, budgeted tree scanning.
- Background Blender workers for Shader compilation, with an in-process fallback — workers are an optimisation, never a hard dependency.
- Rebuild delays for related and Shader nodes; reduced Geometry triangle budget and a serialised evaluation queue.
A Status section reports the render queue, background worker readiness, and what the thumbnail cache holds on disk and in memory. It is closed by default, and every reading is cheap enough to take on each redraw.
Troubleshooting
A node has no preview card
Select the node and check the AnyNode Preview sidebar. Unsupported sockets, frames, reroutes, output nodes and deliberate passthroughs display an explanation instead of a misleading image. Use Refresh after changing external files or data that Blender has not reported as changed.
A World preview is black or unavailable
Keep at least one 3D Viewport open. World previews use a real viewport because Blender's ID-preview path returns solid black for a World.
The material HUD does not appear
Switch to Object Mode, select an object with a material and press Alt+M. If the object uses several slots, choose the intended material from the HUD header or Material panel.
Rendering feels slow
Lower preview quality or the viewport triangle budget, turn off Before / After when it is not needed, and allow the first Shader preview to finish compiling. Later identical results should come from cache. The Status section reports the queue, worker readiness and cache state.
A background worker is unavailable
Preview rendering continues through the in-process fallback. If Status repeatedly reports an error, save the file, restart Blender and try Refresh before contacting support.
Known Limitations
- Matrix, String, Menu, Object, Collection and Material sockets are not rendered. Geometry cards communicate shape and fields, not final render-engine materials.
- Vector grid outputs (Grid Gradient, Grid Curl) are skipped:
Grid to Meshcontours a scalar field and there is no equivalent for a vector grid. Grid metadata outputs — a background constant, an "Is Valid" flag — are skipped for the same reason they are not fields. - Preview Selection does not yet support nodes inside a Simulation or Repeat zone, and says so. Ordinary preview cards work inside zones.
- A World preview needs an open 3D viewport, because that is what renders it.
- Before / After costs a second evaluation per update, which is why it is off by default.
Editions & Support
- Lite: feature-limited core workflow for evaluating Selected Preview, card controls, timing, Refresh and cache.
- Personal: complete Full add-on with standard product support.
- Team: the same Full add-on with a two-business-day priority response target.
- Studio: the same Full add-on with a one-business-day priority response target, onboarding and PO/invoice handling.
Use Contact the creator on the Superhive product page. Include your Blender version, operating system, AnyNode Preview build, editor type, the exact steps that reproduce the problem and any visible error message. A small reproducible .blend file is helpful when the issue depends on a particular node tree.
Changelog
V1.0 — 2026-08-10
Initial public release of AnyNode Preview with Geometry Nodes, Shader and World preview cards; selected-chain focus; 3D viewport overlays and field readout; Material Lens and viewport HUD; Channel Board; Visual Explorer; presets and A/B comparison; Attribute Inspector; Align Nodes; link presentation controls; caching and background Shader workers.
-
$1.50 $2
Core preview workflow for testing
-
$17.25 $23
Complete add-on · Standard support
 Included
Includes 12 months of
- Support from Unik Studio
- Product updates
Extend this product’s Support Period +12 months: 25% of product price
Have questions before purchasing?
Login to message
Discover more products like this
look development node preview geometry nodes Node Editor geometry nodes debugging viewport overlay shader editor material preview world-shader preview cards node thumbnails