 Skava
Skava


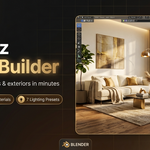
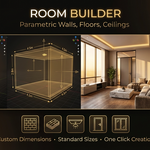
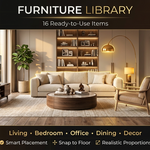
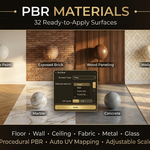
https://drive.google.com/file/d/1V0phI44tklkBqFcyanLzW5zAM8lXiqWr/view?usp=sharing
ARCHVIZ SCENE BUILDER
Complete Documentation v1.0.0
Blender 4.0+
================================================================================
SKAVA STUDIO
Complete Architectural Visualization Toolkit for Blender
================================================================================
TABLE OF CONTENTS
================================================================================
1. Installation Guide
2. Quick Start
3. Interface Overview
4. Room Builder
5. Furniture Library
6. PBR Materials
7. Lighting System
8. Camera Tools
9. Render Settings
10. Complete Workflow Example
11. Addon Preferences
12. Troubleshooting
================================================================================
1. INSTALLATION GUIDE
================================================================================
SYSTEM REQUIREMENTS
-------------------
Requirement Minimum Recommended
----------- ------- -----------
Blender Version 4.0 4.2 or newer
Operating System Windows 10/11, macOS 10.15+, Linux
RAM 8 GB 16 GB or more
Graphics Card OpenGL 4.3+ NVIDIA RTX / AMD RX
INSTALLATION STEPS
------------------
Step 1: Download the Addon
--------------------------
Download the "archviz_scene_builder.zip" file from your purchase.
Do NOT extract the ZIP file - Blender needs the compressed archive.
Step 2: Open Blender Preferences
--------------------------------
Launch Blender and go to Edit > Preferences
(or press Ctrl+, on Windows/Linux, Cmd+, on macOS)
Step 3: Navigate to Add-ons
---------------------------
In the Preferences window, click on the "Add-ons" tab in the left sidebar.
Step 4: Install the Addon
-------------------------
Click the "Install..." button in the top-right corner.
Browse to and select the downloaded ZIP file, then click "Install Add-on".
Step 5: Enable the Addon
------------------------
After installation, find "ArchViz Scene Builder" in the add-ons list
(use the search box). Check the checkbox next to the addon name to enable it.
Step 6: Access the Panel
------------------------
Press N in the 3D Viewport to open the sidebar.
Click on the "ArchViz" tab to access all tools.
TIP: Save Preferences
---------------------
Click "Save Preferences" or enable "Auto-Save Preferences" to keep the
addon enabled in future Blender sessions.
UPDATING THE ADDON
------------------
1. Go to Edit > Preferences > Add-ons
2. Find "ArchViz Scene Builder" and click the arrow to expand it
3. Click "Remove" to uninstall the old version
4. Follow the installation steps above with the new ZIP file
================================================================================
2. QUICK START
================================================================================
Get started with ArchViz Scene Builder in under 5 minutes. The addon provides
two quick setup options to create a complete scene with one click.
QUICK SETUP BUTTONS
-------------------
NEW INTERIOR
------------
Creates a complete interior scene setup:
- 6m x 6m room with 4 walls
- Floor and ceiling
- Interior lighting (sun + fill light)
- Camera positioned for interior photography
- Units set to metric (meters)
NEW EXTERIOR
------------
Creates a complete exterior scene setup:
- 50m x 50m ground plane
- Exterior sun lighting
- World environment for HDRI
- Camera positioned for architectural shots
- Units set to metric (meters)
WARNING: Scene Clear
--------------------
Quick Setup will delete ALL existing objects in the current scene.
Always save your work before using these buttons, or create a new file first.
YOUR FIRST INTERIOR SCENE
-------------------------
Step 1: Create New Interior
Press N to open the sidebar, go to the "ArchViz" tab,
and click "New Interior".
Step 2: Add Furniture
Expand the "Furniture" panel. Select "Sofa" from the dropdown
and click "Place Selected". Move it into position.
Step 3: Apply Materials
Expand the "Materials" panel. Select the floor, choose
"Oak Wood" from floor materials, and click "Apply to Selected".
Step 4: Setup Lighting
Expand the "Lighting" panel. Select "Morning" preset
and click "Apply Preset".
Step 5: Render
Expand the "Render" panel. Select "Draft" quality
and click "Render Image".
TYPICAL WORKFLOW
----------------
Quick Setup --> Build Room --> Add Furniture --> Apply Materials
|
v
Setup Lighting --> Position Camera --> Render
================================================================================
3. INTERFACE OVERVIEW
================================================================================
ACCESSING THE ADDON
-------------------
The addon is located in the 3D Viewport sidebar.
Press N to toggle the sidebar, then click on the "ArchViz" tab.
PANEL STRUCTURE
---------------
Panel Description Key Features
----- ----------- ------------
Main Panel Quick setup, scene info Interior/Exterior buttons,
scene type, units
Room Builder Architectural elements Walls, floors, ceilings,
doors, windows
Furniture Furniture placement 16 furniture types,
placement options
Materials PBR material library 32 materials, 7 surface
types, UV scaling
Lighting Scene illumination 7 presets, HDRI,
sun/exposure controls
Camera Camera configuration 6 lens presets, DOF,
composition guides
Render Output settings 4 quality presets,
resolution, denoiser
SCENE INFO SECTION
------------------
Scene Type [Enum]
-----------------
Choose between Interior or Exterior scene mode.
This affects default camera positioning and lighting.
Unit System [Enum]
------------------
Metric (meters) or Imperial (feet/inches).
Metric is recommended for architectural work.
================================================================================
4. ROOM BUILDER
================================================================================
The Room Builder allows you to create architectural elements with precise
dimensions. All measurements are in meters (metric) or feet (imperial)
based on your unit setting.
WALL SETTINGS
-------------
Wall Height [Float] - Default: 2.8m
-----------
The height of walls from floor to ceiling.
Standard residential is 2.4-2.7m, commercial spaces often use 3.0m+.
Range: 2.0m - 10.0m
Wall Thickness [Float] - Default: 0.15m
--------------
The thickness of walls.
Standard interior walls are 0.10-0.15m, exterior walls 0.20-0.30m.
Range: 0.05m - 0.5m
WALL OPERATORS
--------------
Button Function Description
------ -------- -----------
Draw Wall Add single wall Creates a 4m wide wall segment at
cursor location with current settings
Create Room Add complete room Creates a rectangular room with 4 walls,
organized in a "Room" collection
FLOOR & CEILING
---------------
Floor Thickness [Float] - Default: 0.1m
---------------
Thickness of the floor slab. Set to 0 for a simple plane,
or add thickness for realistic floor structure.
Range: 0.05m - 0.3m
Auto Ceiling [Boolean] - Default: On
------------
When enabled, automatically creates a ceiling when using Create Room.
Disable for scenes where you don't want a ceiling visible.
DOOR SETTINGS
-------------
Door Width [Float] - Default: 0.9m
----------
Width of door opening.
Standard interior doors are 0.76-0.9m, double doors 1.2-1.8m.
Range: 0.6m - 2.0m
Door Height [Float] - Default: 2.1m
-----------
Height of door opening.
Standard is 2.0-2.1m, tall doors can be 2.4m+.
Range: 1.8m - 3.0m
WINDOW SETTINGS
---------------
Window Width [Float] - Default: 1.0m
------------
Width of window opening.
Small windows 0.6m, standard 1.0-1.2m, large panoramic 2.0m+.
Range: 0.3m - 4.0m
Window Height [Float] - Default: 1.2m
-------------
Height of window opening.
Standard 1.0-1.2m, floor-to-ceiling can be 2.0m+.
Range: 0.5m - 3.0m
Sill Height [Float] - Default: 0.9m
-----------
Height from floor to bottom of window.
Standard is 0.85-0.95m, floor-to-ceiling windows use 0m.
Range: 0.0m - 2.0m
TIP: Architectural Standards
----------------------------
- Standard door: 0.9m x 2.1m
- Standard window: 1.0m x 1.2m at 0.9m sill height
- Residential ceiling: 2.4m - 2.7m
- Commercial ceiling: 3.0m+
================================================================================
5. FURNITURE LIBRARY
================================================================================
The Furniture system includes 16 pre-built furniture items with realistic
proportions and details. Each piece is created with beveled edges and
smooth shading for professional results.
AVAILABLE FURNITURE (16 Items)
------------------------------
LIVING ROOM
-----------
Item Description Size (approx)
---- ----------- -------------
Sofa 3-seater with cushions & pillows 2.2m x 0.95m x 0.8m
Armchair Comfortable armchair with armrests 0.85m x 0.85m x 0.8m
Coffee Table Modern table with lower shelf 1.3m x 0.8m x 0.45m
TV Stand TV cabinet with 55" TV & soundbar 1.8m x 0.45m x 1.3m
BEDROOM
-------
Bed King-size with mattress & bedding 2.1m x 2.3m x 1.15m
Nightstand Bedside table with 2 drawers 0.5m x 0.4m x 0.55m
Wardrobe Tall wardrobe with sliding doors 1.4m x 0.65m x 2.15m
DINING
------
Dining Table 6-person dining table 1.9m x 1.0m x 0.78m
Dining Chair Modern chair with cushion 0.45m x 0.45m x 0.95m
OFFICE
------
Desk Work desk with drawers 1.5m x 0.75m x 0.78m
Office Chair Ergonomic chair with wheels 0.65m x 0.65m x 1.1m
Bookshelf 6-shelf bookcase with books 0.85m x 0.35m x 1.9m
DECOR
-----
Floor Lamp Arc floor lamp with drum shade 0.6m x 0.6m x 1.65m
Table Lamp Modern lamp with tapered shade 0.16m x 0.16m x 0.45m
Plant Potted plant with leaves 0.25m x 0.25m x 0.55m
Rug Floor rug with subtle texture 2.8m x 1.8m x 0.02m
PLACEMENT OPTIONS
-----------------
Snap to Floor [Boolean] - Default: On
-------------
When enabled, furniture is automatically positioned at floor level (Z=0).
Disable for wall-mounted items.
Align to Wall [Boolean] - Default: Off
-------------
When enabled, rotates furniture to align its back to the nearest wall.
Useful for sofas and beds.
Random Rotation [Float] - Default: 0.0
---------------
Adds random rotation variation for a more natural look.
Value is maximum degrees of variation.
Range: 0.0 - 15.0 degrees
Random Scale [Float] - Default: 0.0
------------
Adds random scale variation.
0.05 = 5% variation for subtle differences between repeated items.
Range: 0.0 - 0.1 (0-10%)
HOW TO PLACE FURNITURE
----------------------
Step 1: Select Furniture Type
Expand the Furniture panel and select the item type
from the dropdown menu.
Step 2: Configure Placement Options
Enable/disable Snap to Floor, Align to Wall,
and set any random variation desired.
Step 3: Place the Item
Click "Place Selected" to create the furniture
at the 3D cursor location.
Step 4: Position and Rotate
Use G to move and R to rotate the furniture into position.
TIP: Duplicating Furniture
--------------------------
After placing furniture, select it and press Shift+D to duplicate.
This is faster than placing multiple times from the panel.
================================================================================
6. PBR MATERIALS
================================================================================
ArchViz Scene Builder includes a library of 32 physically-based rendering (PBR)
materials organized by surface type. All materials are procedural and can be
applied with adjustable UV scaling.
MATERIAL CATEGORIES (7 Types, 32 Materials)
-------------------------------------------
FLOOR MATERIALS (7)
-------------------
Key Name Description
--- ---- -----------
WOOD_OAK Oak Wood Light oak parquet with realistic grain
WOOD_WALNUT Walnut Wood Dark walnut wood flooring
WOOD_PARQUET Parquet Herringbone pattern parquet
TILE_WHITE White Tile Ceramic white tiles with grout lines
TILE_MARBLE Marble White marble with veining
CONCRETE Concrete Polished concrete floor
CARPET_BEIGE Beige Carpet Soft beige carpet texture
WALL MATERIALS (7)
------------------
Key Name Description
--- ---- -----------
PAINT_WHITE White Paint Matte white wall paint
PAINT_GRAY Gray Paint Light gray wall paint
PAINT_BEIGE Beige Paint Warm beige wall paint
WALLPAPER Wallpaper Textured wallpaper
BRICK Brick Exposed red brick wall
CONCRETE Concrete Raw concrete wall
WOOD_PANEL Wood Panel Wood paneling
CEILING MATERIALS (3)
---------------------
White Ceiling | Textured Ceiling | Wood Beam
COUNTERTOP MATERIALS (4)
------------------------
Black Granite | White Quartz | Calacatta Marble | Butcher Block
FABRIC MATERIALS (4)
--------------------
Natural Linen | Blue Velvet | Brown Leather | White Cotton
METAL MATERIALS (4)
-------------------
Brushed Steel | Chrome | Antique Brass | Copper
GLASS MATERIALS (3)
-------------------
Clear Glass | Frosted Glass | Tinted Glass
MATERIAL SETTINGS
-----------------
Surface Type [Enum]
------------
Select the type of surface to filter available materials:
Floor, Wall, Ceiling, Countertop, Fabric, Metal, or Glass.
UV Scale [Float] - Default: 1.0
--------
Controls the tiling scale of the material texture.
Higher values = smaller tiles, lower values = larger tiles.
Range: 0.1 - 10.0
Auto UV [Boolean] - Default: On
-------
When enabled, automatically adjusts UV mapping for proper
material scaling based on object size.
APPLYING MATERIALS
------------------
To Selected Object:
-------------------
1. Select the object in the 3D viewport
2. In the Materials panel, choose the Surface Type
3. Select the specific material from the dropdown
4. Adjust UV Scale if needed
5. Click "Apply to Selected"
Quick Apply to Room:
--------------------
1. Check which elements to apply: Floor, Walls, Ceiling
2. Select materials for each surface type above
3. Click "Apply to Room"
UTILITY FUNCTIONS
-----------------
Pre-create All Materials
------------------------
Creates all 32 materials in the .blend file for easy access
in the Shader Editor.
Show Material List
------------------
Prints a complete list of all available materials to the System Console.
NOTE: Material Naming
---------------------
Materials are automatically named with the "AV_" prefix
(e.g., "AV_Oak_Wood") to distinguish them from other materials.
================================================================================
7. LIGHTING SYSTEM
================================================================================
The Lighting system provides professional presets for interior and exterior
architectural visualization. Each preset configures sun angle, intensity,
color temperature, and optional HDRI environments.
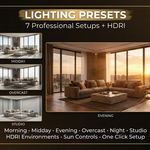
LIGHTING PRESETS (7)
--------------------
Preset Description Color Temp Best For
------ ----------- ---------- --------
Morning Warm morning light, ~4000K Cozy interiors,
soft shadows, low sun (warm) east-facing rooms
Midday Bright neutral daylight, ~5500K Clean modern spaces,
strong shadows (neutral) accurate colors
Evening Golden hour warm lighting, ~3500K Romantic atmosphere,
dramatic shadows (warm) west-facing rooms
Overcast Soft diffuse lighting, ~6500K Even illumination,
no harsh shadows (cool) product photography
Night Warm Warm interior lamp lighting ~2700K Evening scenes,
(warm) residential interiors
Night Cool Cool ambient night lighting ~5000K Modern night scenes,
(cool) urban views
Studio Even neutral studio lighting ~5000K Product shots,
(neutral) accurate materials
HDRI ENVIRONMENT
----------------
Use HDRI [Boolean] - Default: On
--------
Enable HDRI environment lighting for realistic reflections
and ambient light through windows.
HDRI Preset [Enum]
-----------
Choose from 6 HDRI environments:
- Urban Day - City skyline during daytime
- Urban Night - City lights at night
- Clear Sky - Blue sky with white clouds
- Sunset - Orange sunset sky
- Nature - Forest/park environment
- Studio Soft - Soft gradient studio background
HDRI Rotation [Float] - Default: 0.0
-------------
Rotate the HDRI environment to position the sun/sky as needed.
Range: 0 - 360 degrees
HDRI Intensity [Float] - Default: 1.0
--------------
Environment light intensity.
Lower for darker interiors, higher for bright open spaces.
Range: 0.0 - 5.0
LIGHT ADJUSTMENTS
-----------------
Sun Intensity [Float] - Default: 3.0
-------------
Main sun light strength.
Use higher values for bright daylight, lower for overcast
or interior-only lighting.
Range: 0.0 - 10.0
Exposure [Float] - Default: 0.0
--------
Global scene exposure adjustment.
Positive values brighten, negative values darken.
Use to fine-tune overall brightness.
Range: -5.0 to 5.0
TIP: Interior Lighting
----------------------
For interior scenes, use Morning or Evening presets with HDRI enabled
for realistic window light. Combine with area lights inside for fill.
================================================================================
8. CAMERA TOOLS
================================================================================
Professional camera settings optimized for architectural visualization.
Includes lens presets, vertical perspective correction, composition guides,
and depth of field controls.
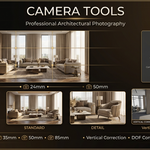
LENS PRESETS (6)
----------------
Preset Focal FOV Best For
------ ----- --- --------
14mm Ultra Wide 14mm ~114 deg Very small rooms, dramatic
perspectives, real estate
18mm Wide 18mm ~100 deg Small to medium rooms,
architectural interiors
24mm Standard Wide 24mm ~84 deg Most interior photography,
balanced perspective (recommended)
35mm Standard 35mm ~63 deg Natural perspective, larger rooms,
exterior architecture
50mm Detail 50mm ~47 deg Detail shots, vignettes,
furniture focus
85mm Telephoto 85mm ~28 deg Compressed perspective,
exterior details, distant subjects
CAMERA SETTINGS
---------------
Camera Height [Float] - Default: 1.5m
-------------
Height of camera from floor.
Standard eye level is 1.5-1.7m.
Use 1.2m for a seated view, 0.8m for ground-level shots.
Range: 0.5m - 5.0m
Vertical Correction [Boolean] - Default: On
-------------------
Applies shift to correct vertical perspective distortion
(two-point perspective). Keeps vertical lines parallel like
in professional architectural photography.
COMPOSITION GUIDES (5)
----------------------
Guide Description When to Use
----- ----------- -----------
None No overlay Final rendering
Rule of Thirds 3x3 grid dividing frame General composition,
into 9 parts place subjects at intersections
Golden Ratio Golden spiral overlay Artistic composition,
natural flow
Center Center crosshairs Symmetrical shots,
centered subjects
Diagonal Diagonal lines across frame Dynamic composition,
leading lines
DEPTH OF FIELD (DOF)
--------------------
DOF Enabled [Boolean] - Default: Off
-----------
Enable depth of field blur effect.
Creates professional focus falloff in renders.
Focus Distance [Float] - Default: 5.0m
--------------
Distance to the sharp focus point.
Objects at this distance will be in perfect focus.
Range: 0.1m - 100m
F-Stop [Float] - Default: 2.8
------
Aperture setting controlling depth of field strength.
Lower = more blur (shallow DOF), Higher = less blur (deep DOF).
Range: f/0.5 - f/22
F-STOP GUIDE FOR ARCHITECTURE
-----------------------------
f/2.8 - f/4 Artistic blur, focus on specific objects
f/5.6 - f/8 Slight blur, separates foreground/background
f/8 - f/11 Sharp throughout, professional standard
f/16 - f/22 Maximum sharpness, technical documentation
================================================================================
9. RENDER SETTINGS
================================================================================
Professional render presets for quick setup with options for quality,
resolution, and output settings.
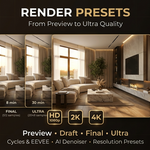
QUALITY PRESETS (4)
-------------------
Preset Cycles Samples Render Time* Use Case
------ -------------- ------------ --------
Preview 32 ~30 seconds Quick layout checks,
testing camera angles
Draft 128 ~2 minutes Client previews,
work-in-progress reviews
Final 512 ~8 minutes Final delivery renders,
portfolio
Ultra 2048 ~30+ minutes Maximum quality,
print, competitions
*Approximate times for 1080p on mid-range GPU with denoising
RENDER ENGINE
-------------
CYCLES
------
Path tracing renderer
- Physically accurate lighting
- Real reflections and refractions
- Best for final quality renders
- GPU acceleration supported
EEVEE
-----
Real-time renderer
- Very fast render times
- Good for quick previews
- Viewport rendering possible
- Some visual compromises
RESOLUTION PRESETS (5)
----------------------
Preset Resolution Aspect Ratio Use Case
------ ---------- ------------ --------
HD 1920 x 1080 16:9 Web, presentations, video
2K 2560 x 1440 16:9 High-quality web, large displays
4K 3840 x 2160 16:9 Print, 4K displays, zooming
Square 2048 x 2048 1:1 Instagram, social media
Custom User defined Any Specific requirements
OUTPUT OPTIONS
--------------
Denoiser [Boolean] - Default: On
--------
Enable AI denoising (OpenImageDenoise) to remove render noise
with fewer samples. Highly recommended for faster, cleaner results.
Transparent Background [Boolean] - Default: Off
----------------------
Render with transparent background (alpha channel) for
compositing in Photoshop or other software.
RENDER BUTTONS
--------------
Button Function Output
------ -------- ------
Render Image Render single still image Opens render window with result
Render Animation Render animation sequence Outputs to configured output path
TIP: Optimal Render Settings
----------------------------
For best quality/time balance:
- Use Cycles with GPU rendering
- Enable Denoiser
- Use "Final" preset (512 samples)
- 2K resolution for most purposes
================================================================================
10. COMPLETE WORKFLOW EXAMPLE
================================================================================
This section walks through creating a complete living room visualization
from start to finish.
PROJECT: MODERN LIVING ROOM
---------------------------
Step 1: Setup the Scene
-----------------------
- Open a new Blender file
- Press N > ArchViz tab
- Click "New Interior"
- A 6x6m room is created with walls, floor, ceiling, lighting, and camera
Step 2: Adjust Room Dimensions
------------------------------
- Select walls and scale to desired room size (e.g., 5m x 7m)
- Adjust floor and ceiling to match
- Or delete and use Room Builder with custom dimensions
Step 3: Add Windows and Doors
-----------------------------
- In Room Builder, set Window: 2.0m x 1.5m, Sill: 0.7m
- Click "Add Window" - position on desired wall
- Set Door: 0.9m x 2.1m
- Click "Add Door" - position at entrance
Step 4: Place Furniture
-----------------------
- Furniture panel: Select "Sofa" > Place Selected > Position against wall
- Add "Coffee Table" > Place in front of sofa
- Add "Armchair" x2 > Position at angles
- Add "TV Stand" > Opposite the sofa
- Add "Floor Lamp" > Corner near seating
- Add "Plant" x2 > Near window and corner
- Add "Rug" > Under coffee table
Step 5: Apply Materials
-----------------------
- Materials panel: Surface = Floor, Material = Oak Wood, UV Scale = 1.0
- Select floor > "Apply to Selected"
- Surface = Wall, Material = White Paint
- Select walls > "Apply to Selected"
- Or use Quick Apply > Check Floor + Walls + Ceiling > "Apply to Room"
Step 6: Setup Lighting
----------------------
- Lighting panel: Preset = "Morning"
- Click "Apply Preset"
- Enable "Use HDRI", select "Clear Sky"
- Adjust HDRI Rotation so light comes through window
- Sun Intensity = 4.0, Exposure = 0.5
Step 7: Position Camera
-----------------------
- Camera panel: Lens = "24mm Standard Wide"
- Enable "Vertical Correction"
- Camera Height = 1.5m
- Position camera in corner looking at seating area
- Press Numpad 0 to view through camera
- Enable Composition Guide = "Rule of Thirds"
Step 8: Test Render
-------------------
- Render panel: Preset = "Preview", Engine = "Cycles"
- Click "Render Image"
- Review composition and lighting
- Adjust as needed
Step 9: Final Render
--------------------
- Preset = "Final", Resolution = "2K"
- Enable "Denoiser"
- Click "Render Image"
- Save result: Image > Save As
PRO TIPS
--------
- Save your file frequently with Ctrl+S
- Use viewport shading "Rendered" to preview lighting in real-time
- Duplicate furniture with Shift+D for faster placement
- Use G, G, Z, 0 to snap objects to floor
================================================================================
11. ADDON PREFERENCES
================================================================================
Access addon preferences via:
Edit > Preferences > Add-ons > find "ArchViz Scene Builder" and expand it.
AVAILABLE SETTINGS
------------------
Asset Library Path [String]
------------------
Path to external furniture and asset library folder.
Set this if you have additional asset packs.
Default Units [Enum]
-------------
Choose default unit system for new scenes:
Metric (meters) or Imperial (feet/inches).
Default Render Engine [Enum]
---------------------
Default render engine for Quick Setup: Cycles or EEVEE.
Show Tips [Boolean]
---------
Show helpful tips and info boxes in panels.
Auto Save Presets [Boolean]
-----------------
Automatically save custom lighting and render presets.
Thumbnail Size [Integer]
--------------
Size of asset thumbnails in the furniture browser (64-256 pixels).
================================================================================
12. TROUBLESHOOTING
================================================================================
COMMON ISSUES AND SOLUTIONS
---------------------------
PANEL NOT APPEARING
-------------------
Symptoms: Can't find the ArchViz tab in the sidebar.
Solutions:
- Press N to toggle the sidebar visibility
- Check that you're in the 3D Viewport (not UV Editor, etc.)
- Verify the addon is enabled in Preferences > Add-ons
- Search for "ArchViz" in the addon search box
- Try disabling and re-enabling the addon
MATERIALS NOT APPLYING
----------------------
Symptoms: Clicking "Apply to Selected" does nothing.
Solutions:
- Ensure an object is selected (orange outline)
- Object must be a Mesh type (not Empty, Light, etc.)
- Check if the object has UV coordinates
- Try adding a UV Map: Tab into Edit Mode > U > Smart UV Project
LIGHTING TOO BRIGHT OR TOO DARK
-------------------------------
Symptoms: Scene is overexposed (white) or underexposed (black).
Solutions:
- Adjust the Exposure value in Lighting panel (-5 to +5)
- Lower/raise Sun Intensity
- Try a different lighting preset
- If using HDRI, adjust HDRI Intensity
- Check Color Management: View Transform should be "Filmic"
RENDER IS NOISY/GRAINY
----------------------
Symptoms: Final render has visible grain/noise.
Solutions:
- Enable Denoiser option
- Increase render preset (Draft > Final)
- Check light intensities - very bright spots cause noise
- Avoid light leaks through walls
- In Cycles settings, increase Light Paths bounces if needed
CAMERA PERSPECTIVE LOOKS WRONG
------------------------------
Symptoms: Walls appear to lean in/out, distorted perspective.
Solutions:
- Enable "Vertical Correction" in Camera panel
- Keep camera level (rotation X close to 90 degrees)
- Try a different lens preset (24mm is most natural)
- Adjust camera height to eye level (1.5-1.7m)
- Ultra-wide lenses (14mm) will have more distortion
FURNITURE FLOATING OR UNDERGROUND
---------------------------------
Symptoms: Placed furniture is not on the floor.
Solutions:
- Enable "Snap to Floor" in Furniture panel
- Manually position: G, Z, 0, Enter
- Check that floor is at Z=0
- Set object origin to bottom: Object > Set Origin > Origin to Geometry
SLOW VIEWPORT PERFORMANCE
-------------------------
Symptoms: Blender lags when navigating the scene.
Solutions:
- Switch viewport shading to Solid mode instead of Rendered
- Reduce subdivision on furniture (if applied)
- Hide high-poly objects while working
- Reduce EEVEE samples in viewport
- Consider upgrading GPU or RAM
GETTING HELP
------------
If you encounter issues not covered here:
- Check the Blender System Console for error messages
(Window > Toggle System Console)
- Ensure you're using Blender 4.0 or newer
- Try the addon in a fresh Blender file
- Contact support at: [email protected]
================================================================================
KEYBOARD SHORTCUTS
================================================================================
Key Function
--- --------
N Toggle sidebar (access ArchViz panel)
Ctrl + , Open Preferences (Windows/Linux)
Cmd + , Open Preferences (macOS)
Ctrl + S Save file
Shift + D Duplicate selected object
G Move/Grab object
R Rotate object
S Scale object
G, Z, 0 Move object to Z=0 (floor level)
Numpad 0 View through active camera
Tab Toggle Edit Mode
U UV Mapping menu (in Edit Mode)
================================================================================
CREDITS
================================================================================
ArchViz Scene Builder v1.0.0
Developed by: Skava Studio
License: Commercial
Blender Compatibility: 4.0+
Copyright (c) 2024 Skava Studio
All rights reserved.
Support: [email protected]
Website: www.skava-studio.com
================================================================================
END OF DOCUMENTATION
================================================================================
Have questions about this product?
Login to message
| Sales | 20+ |
| Published | 9 months ago |
| Blender Version | 4.0 - 5.0 |
| Extension Type | N/A |
| Render Engine Used | Cycles, Eevee |
| License | Mit |
Discover more products like this
real estate exterior Render furniture Visualization presets 3d architecture architecture parametric Interior Design materials Interior