 one99addons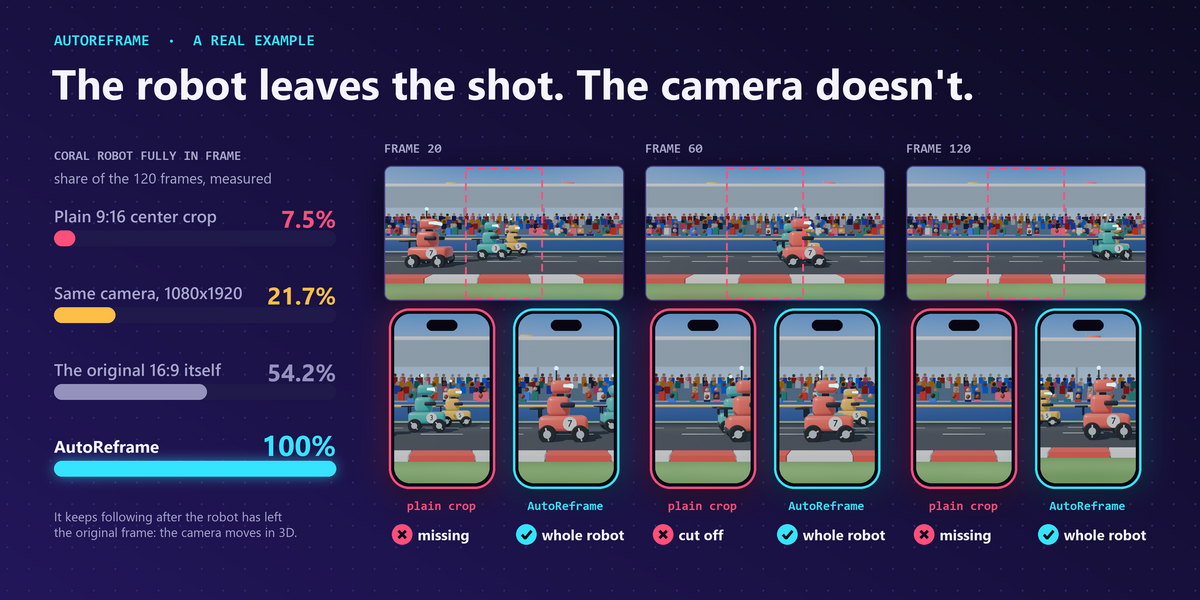
📱 AutoReframe
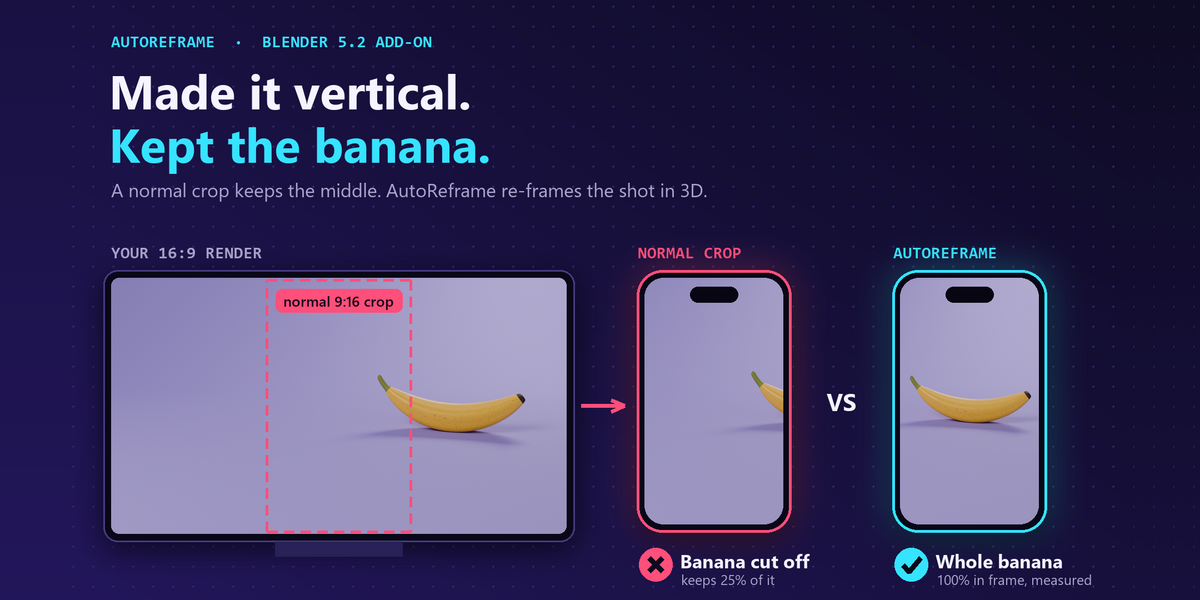
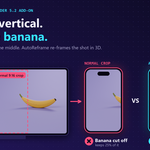
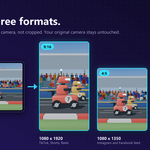
Turn a 16:9 shot into 9:16, 1:1 or 4:5 that keeps your subject in frame. Re-rendered, not cropped.
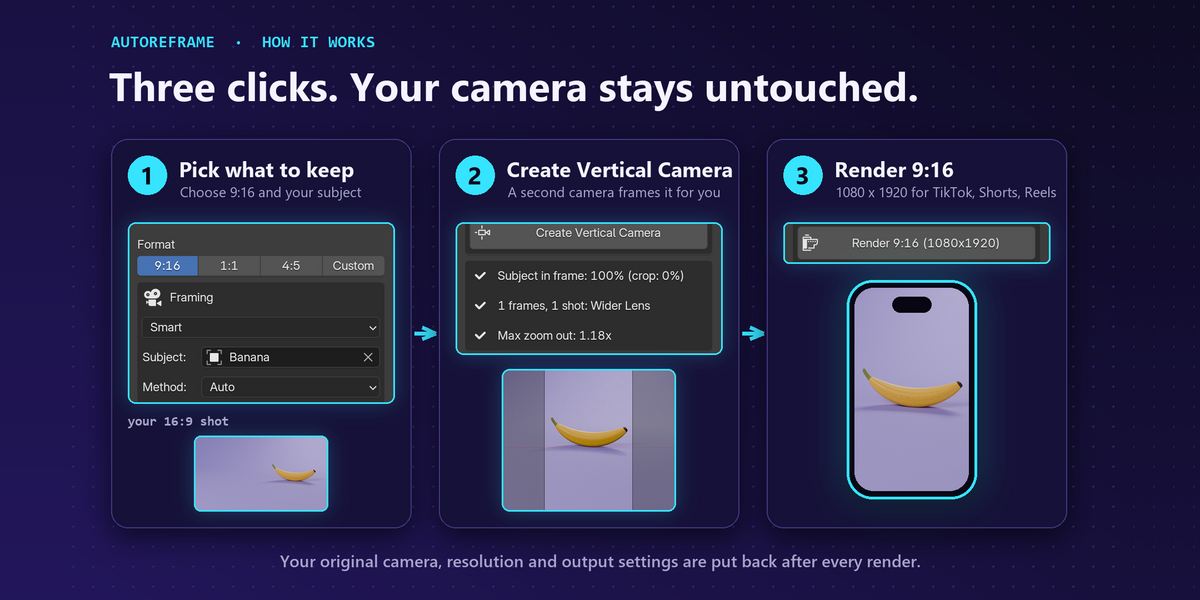
AutoReframe adds a second camera made for the new format. It follows your subject (or fits all the action), smooths the move and renders a clean 1080 x 1920 version for TikTok, Shorts and Reels, while your original camera and render settings stay exactly as they were.
The problem
You finished a nice 16:9 animation and now need a vertical version. Cropping the video keeps only the middle third, so your subject is often cut. Switching the resolution to 1080 x 1920 gives the same camera a narrow slice. Animating a vertical camera by hand is slow, and you redo it every time the animation changes.
What it does
- Analyses the shot. Frame by frame, it finds what must stay in view: a subject you pick, the objects you choose, or the moving action it detects by itself. Floors, walls and skies are ignored.
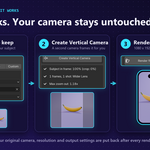
- Builds a new camera. "AutoReframe_9x16" follows your camera's move, then pans, zooms out or steps back just enough to keep the subject in frame, with a margin.
- Smooths the move. Smoothing is set in seconds, and each camera cut is handled on its own.
- Tells you how it went. A result box shows the % of frames with the subject fully in frame, next to the number for a plain crop, plus the method used and any warnings.
- Renders and restores. Render 9:16 switches resolution, camera and output only for the render, writes yourfile_9x16.mp4 in its own folder and puts everything back afterwards.
A real example
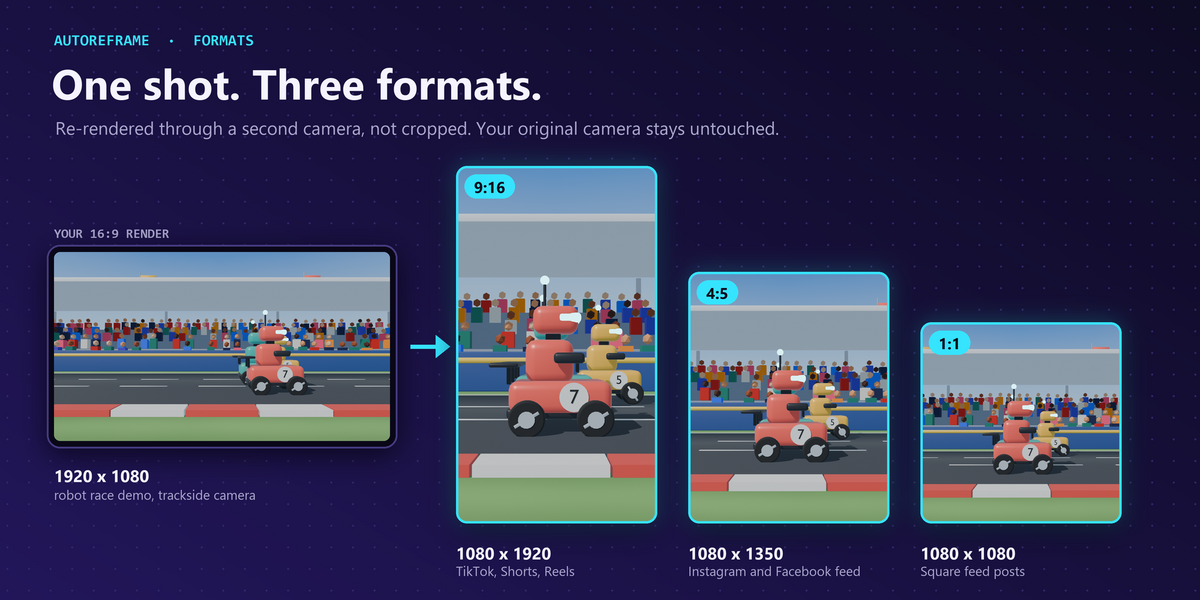
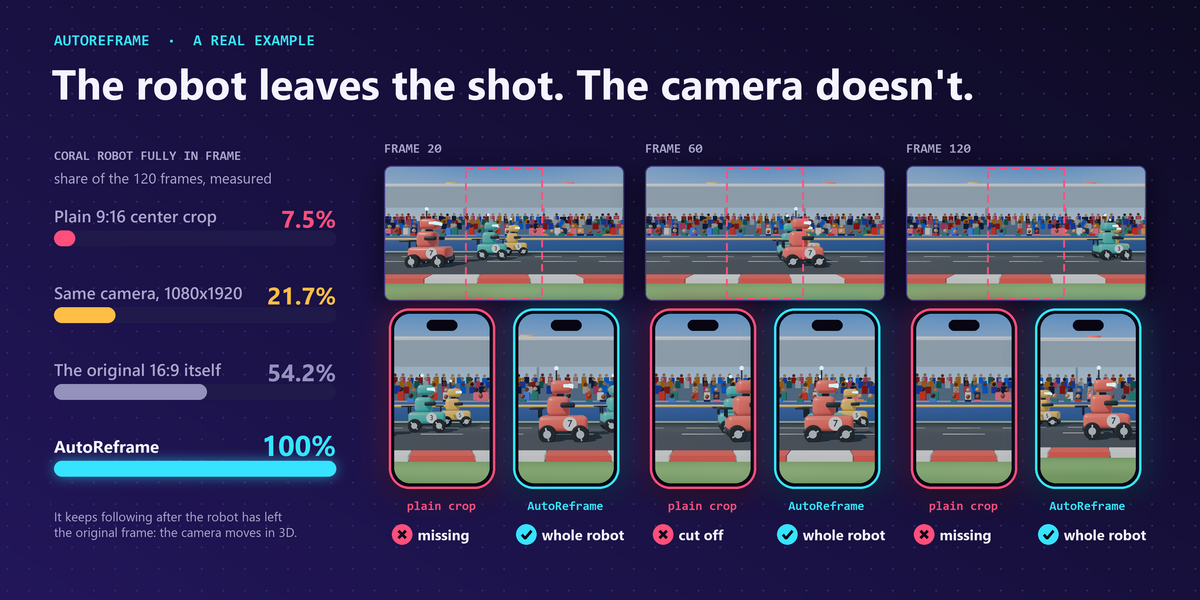
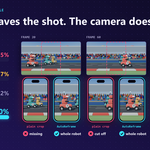
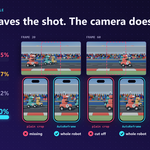
Our robot race demo, trackside camera, 24 mm, 1920 x 1080, measured on every frame.
- The overtake (120 frames): the robot drives out of the 16:9 frame. Fully in frame with a 9:16 center crop: 7.5% of frames. Same camera at 1080 x 1920: 21.7%. The original 16:9 itself: 54.2%. AutoReframe (Follow, Move Back): 100%.
- The lineup (72 frames): three robots across the whole width. A center crop never shows all three. AutoReframe (Show All): 100%, stepping back 3.07x.
- Analysis took 1.1 s and 1.9 s for these two shots.
Settings
Everything is in 3D Viewport > Sidebar (N) > AutoReframe tab. Also in Render > Render Vertical (AutoReframe), View > AutoReframe Preview and Sequencer > Sidebar > AutoReframe.
- Format: 9:16 (1080 x 1920), 1:1 (1080 x 1080), 4:5 (1080 x 1350) or Custom.
- Mode: Smart (subject first, then the rest of the action if it fits), Follow (one object), Show All (visible objects, selection or a collection), Fixed (one framing for the whole shot).
- Subject: any object. A rig or an empty counts its child meshes. Empty = picked for you.
- Method: Auto, Move Back (same lens look), Wider Lens (same point of view) or Shift Only (never zooms out).
- Margin / Smoothing / Max Zoom Out / Allow Zoom In: default 8%, 0.6 s, 3.5x, off (up to 2x closer when on).
- Range: the whole animation or the current frame.
- Preview + Guides: look through the new camera at the new format, with TikTok, Reels, Shorts or All safe zones (viewport only, never rendered).
- Render: MP4 (H.264 with the scene audio) or PNG, into an "AutoReframe" folder next to your .blend. Files are never overwritten (_2, _3...).
- 2D Video (Sequencer): for an MP4 that is already rendered. Fill + Blur (whole video in the middle, blurred copy above and below) or Follow Zone (a zone you animate or tie to a tracking point).
Good to know
- Works with still, animated and constraint-driven cameras (PathCam moves too), orthographic cameras, an animated lens and depth of field.
- Several cameras switched with timeline markers get one AutoReframe camera each, and smoothing never crosses a cut.
- It only adds a camera and changes the resolution during its own render, so it works with Cycles and EEVEE.
- Your camera, resolution, output path, file format and markers are left as they were.
Tips
- Pick a Subject when you know what matters. Smart mode adds the rest of the action only if it fits.
- Move Back can put the camera behind a wall in a closed room. Use Wider Lens there, or lower Max Zoom Out.
- Use Preview with the safe zone guides before you render, and keep faces and text out of the red zones.
Requirements and install
Blender 5.2 or newer (tested on 5.2, Windows). No internet, no external libraries.
- Download autoreframe_v1.0.0.zip (do not unzip it).
- In Blender: Edit > Preferences > Add-ons, open the drop-down arrow at the top right, choose Install from Disk... and pick the zip.
- Tick AutoReframe - 16:9 to Vertical. That's it.
Limits
It moves or re-lenses a camera, it does not invent content: if your set ends just outside the original view, the vertical camera may show it when it zooms out or steps back. One mode and one set of settings per run. Subjects wider than the frame even at Max Zoom Out are centred and reported. Panoramic cameras are not supported. For 2D video there is no automatic subject detection. Safe zone sizes follow the apps' published 2026 guidelines and are approximate.
Made by one99addons.