Blender To Resolve Bridge
 Limitless Creative


- In Blender: Edit, Preferences, Add-ons, Install from Disk, pick the downloaded zip, enable Resolve Bridge.
- Open the addon's preferences (expand its row) and press Install Resolve Scripts +LUTs. This copies the importer and the Blender Bridge browser into Resolve's Scripts menu, the color cubes into Resolve's LUT folder, and the Blender Bridge panel (Studio) into Workflow Integrations.
- Restart DaVinci Resolve once so it picks up the new scripts and panel.
- Studio only: the one click push from Blender uses Resolve's external scripting, which needs a normal Python 3.11 or 3.12 installed on the system (python.org, default settings). The free tierneeds no Python at all.
With Resolve Studio running:
- Open the Resolve Bridge panel (Properties, Output tab, or the Resolve tab in the 3D viewport sidebar).
- Fill in Project, Shot Name, and Delivery Folder, pick a preset, press Apply Output Settings.
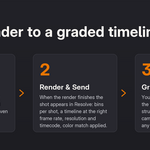
- Press Render & Send to Resolve. When the render finishes, the shot is in Resolve with the color match applied.
On free Resolve:
- Same setup in Blender, then Render Only.
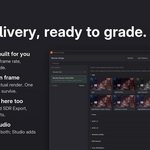
- In Resolve: Workspace, Scripts, BlenderBridge_Browser. Your deliveries are listed newest first; select one and press Import selected. Everything else (color, looks, mixers) is identical from here.
- Project creates a folder inside the Delivery Folder; the Resolve panel groups deliveries by it. Leave it empty for a flat layout.
- Shot Name defaults to the blend file's name. Each shot is a folder holding itsframes and manifest. The + button bumps a trailing number (Shot1 becomes Shot2) so the next render lands in its own folder; this is how you keep versions.
- Use Last Settings (the arrow icon) fills Project, Shot, and Delivery Folder from your previous session; the fields also show the last values as placeholders.
- Send Render To chooses where a pushed shot lands: its own new timeline (default, enables grade relink), or the current timeline on the same or a new track. The current timeline modes skip relink and automatic markers; Sync Markers still works afterwards.
- Presets: Edit & Grade writes single layer EXR, DWAB, half float, the fast playbackchoice. Composite writes multilayer EXR, ZIP, with every enabled view layer pass for Fusionwork. The Format, Codec, and Depth dropdowns always show the real values and can be changed freely; presets are just shortcuts.
- Cryptomatte safety: with cryptomatte enabled, lossy codecs and half float would corrupt the mattes, so the bridge quietly uses ZIP and 32 bit instead and tells you.
- Non EXR formats (PNG, JPEG, TIFF, DPX, Targa, WebP, BMP) are display referred: Blender bakes the view transform into the pixels and the importer skips the color match on purpose.
- Passes box: with the Composite preset, all view layer pass toggles (Data, Light,Denoising, Cryptomatte) live right in the panel so the delivery is configured in one place.
- Status box: shows the applied format, the target folder, and warns if you changed render settings since Apply or if the folder already holds rendered frames. Rendering overframes stays allowed; the render buttons ask first.
- Light Groups (Tools section, Cycles): Group Selected Lights, One Group per SelectedLight, and Ungroup manage light groups without a trip to View Layer properties. Groups becomerelight controls in Resolve; see the mixers section below.
- Sync Markers exchanges timeline markers with Resolve; see the markers section.
- Bins: Blender/your shot in the media pool; the clip imports as one image sequence.
- A timeline named after the shot (a number is added if the name is taken). Frame rate,resolution, and start timecode all match the Blender scene, even in a project whose defaults disagree.
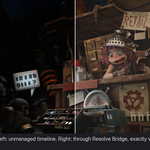
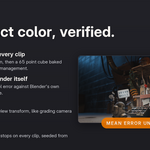
- The color match on the clip: a log shaper in the clip's Fusion comp plus the matching lookcube on the clip node's LUT slot. The timeline shows exactly Blender's picture; verified against Blender's own output with a mean error under 0.2 of a 255 step.
- If your project still uses Resolve's default Sharper resize filter, the importer sets it to Bilinear once (Sharper halos CG edges whenever any scaling happens). A deliberate non default choice is left alone.
The chain on every bridge clip is: EXR (scene linear) > log shaper > clip node 1[your grade > look cube] > screen. A node's LUT applies after that node's grading controls, so everything you do on node 1 grades log footage under the view transform, exactly the camera log plus show LUT structure colorists work in. Nothing is baked into the pixels.
- Grade on node 1, or add serial nodes before it. Nodes after the LUT see display video; keep those to small trims.
- The Offset wheel on node 1 is mathematically a linear exposure change. Ride it freely.
- For true exposure in stops, select the shaper in the clip's Fusion comp: its Exposure(stops) slider multiplies linear light before the log encode; one stop doubles the light. It is seeded from Blender's Color Management exposure so a non-zero Blender exposure still matches,and it survives look switches. Leave the shaper's other controls alone; look switching rewritesits expressions.
- The Fusion page viewers automatically preview through the clip's look instead of washed outlog. One caveat: that viewer LUT is a single global state, so with mixed look timelines the lastapplied look wins in the Fusion viewer. The render path is always per clip and correct.
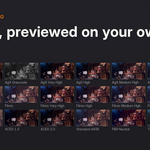
23 looks ship as baked cubes: the full AgX family (10), the full Filmic family (8), ACES 1.3, ACES 2.0, Standard (sRGB), Khronos PBR Neutral, and Tony McMapface. Every delivery includespreview thumbnails rendered from your actual frame.
- The default look follows your Blender view transform and look; the import applies it automatically.
- Switching: in the panel, click a look card (they show your frame through each look). In the browser, pick Type and Variation and press Apply to current timeline. Grades survive because they live before the cube.
- Clicking a look on a delivery you have not imported yet remembers the choice and applies it at import time.
- The None option removes the shaper and cube entirely, leaving raw scene linear.
- Custom: the browser's Custom button puts any .cube of your own on the clip node. It replaces the view transform, and the input it sees is the bridge's log encode, not display video.
Render with the Composite preset, import, then press Break Out Passes (in the panel's looks header or the entry menu, or the browser button). The bridge reads what is actually inside your EXR and builds exactly that in the clip's Fusion comp. Everything happens in scene linear, before the view transform, which is why the controls behave like changing the lights and materials themselves.
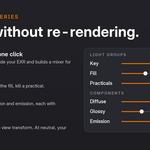
Light group mixer (Cycles): every light group in the delivery gets its own branch: a Gain slider (0 turns the group off, 2 doubles it, exactly like light intensity in Blender) and a ColorCorrector for hue and saturation relighting. Ungrouped light and emission pass through untouched.
Component mixer (Cycles for exact math): every light pass whose color partner is also in the EXR gets a branch with the same Gain and color controls: Diffuse Direct and Indirect withDiffuse Color, Glossy with Glossy Color, Transmission likewise; Emission and Environment standalone. Tame speculars, lift bounce light, push emission, without re-rendering.
- Exact at neutral, always. The mixers subtract the neutral contributions from your real rendered picture once and add the adjusted versions back. At neutral gains the output is your Combined render, pixel exact. Anything you did not break out rides through untouched, so partial pass sets are fine by design.
- Data passes (Depth, Mist, Normal, Position, Vector, AO, Shadow) never enter the mix; they stay as plain source nodes for effects work. Depth also loads into the main chain's Z channel automatically, ready for Depth Blur and Fog.
- Both mixers can coexist: light groups mix first, components mix the result.
- Compositing your own? Work in the section before the BlenderBridgeShaper and feed your result into it. The shaper stays the last tool before MediaOut; that is also the mathematically correct place, since passes are scene linear.
- EEVEE writes only a subset of the component passes; the bridge builds controls for whatever is really in the file and logs what it skipped.
- Storage tip: for relighting work without cryptomatte, DWAB at 16 bit keeps multilayer filesclose to single layer size. Enable only the passes you need.
- Re-rendering a shot carries everything: the grade, the look, and every adjusted mixer control transplant onto the new version automatically. Custom Fusion tools you added yourself are not carried; the log lists them by name.
- Known Resolve quirk: the media pool thumbnail of a multilayer EXR shows the file's alphabetically first layer (often Ambient Occlusion) and cannot be changed. Cosmetic only; everytime line the bridge builds is pinned to the real picture.
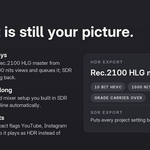
Your EXRs already hold unclamped linear light; an SDR master simply clips it. HDRExport builds a Rec.2100 HLG master where the picture is Blender's own HDR 1000 nits view ofyour scene, so highlights keep graduated detail and the file switches YouTube, Instagram, and HDRTVs into HDR mode. HLG was chosen over PQ because platforms ingest it directly and it degrades gracefully on SDR screens.
- HDR Export builds a separate _HDR timeline, carries your SDR grade and mixer settings onto it, queues the render job (10 bit HEVC, correctly tagged), and leaves you on the Edit page. You press Start Render on the Deliver page.
- The panel asks which transform to use: Match the current look (recommended; AgX deliveries export through AgX HDR, ACES through their ACES HDR views), or force AgX, ACES 1.3, or ACES 2.0. Looks without a Blender HDR sibling (Filmic, Standard, PBR Neutral, Tony McMapface) export through AgX HDR. The browser always matches the applied look.
- SDR Export is the other half of the pair: it restores all project settings, removes the HDR job, and queues a normal H.264 master. Always finish an HDR session with SDR Export.
- Grading HDR: the _HDR timeline grades on the clip node in log, exactly like SDR. Your SDR timeline is never touched, so switching back always shows the original grade. A serious HDR gradewants an HDR display; on SDR monitors the viewer shows the raw flat HLG signal.
- Judging the result: Resolve's viewer cannot preview HLG without HDR monitoring hardware. Watch the exported file in an HDR aware player (Windows HDR enabled, Movies & TV or VLC) or upload to YouTube and wait for HDR processing.
- Any bridge delivery can become an HDR master later: import it, then press HDR Export.
- Blender markers inside the frame range travel with every delivery and appear on the Resolve timeline (cyan) at import.
- Sync Markers in Blender pushes new markers to Resolve and pulls Resolve's markers and notes back into Blender (notes merge into the marker name). Nothing is ever deleted on eitherside.
- On free Resolve, press Sync Markers in the browser first, then Sync Markers in Blender; the exchange runs through files in the delivery folder, no scripting connection needed.
Rendering every n'th frame for fast previews? The delivery imports as one compact clip instead of a pile of stills. The bridge tells you the exact speed to set (for step 2, slow the clip to 50percent) and offers to preset Optical Flow retiming on the clip so Resolve invents the in betweenframes; on Studio it presets the Speed Warp quality mode. The one manual step is the speed change itself, which Resolve does not expose to scripts. Markers apply afterwards via Sync Markers.
- Import Sequence (panel and browser) imports any numbered frame sequence or single media file: pick one frame, the bridge finds the rest. If a bridge manifest sits next to thefile, the full delivery import runs instead.
- Manual imports appear in the panel under their own Manual Imports project and can take looks like any delivery.
- Each delivery row's menu (Studio panel): Reload, Browse on Disk, Break Out Passes, Removefrom Blender Bridge (hides the entry, files stay on disk; a Restore row brings hidden entriesback), and Delete Renders from Disk (permanent, with a confirmation).
- Everything suddenly looks dark or desaturated: HDR export mode is still active. Press SDR Export. This is the single most common confusion; see the HDR section.
- The Scripts menu has no BlenderBridge entries, or the panel is missing: run the installer in Blender's addon preferences, then restart Resolve. The panel additionally requires Resolve Studio.
- Render & Send says no compatible Python was found: Install Python 3.11 or 3.12 from python.org (Studio auto push only). Alternatively import through the browser like the freetier.
- Break Out Passes refuses a multi part EXR: That delivery was rendered before bridge 0.7. Re-render it with the Composite preset; the bridge now writes single part files that Resolve can address.
- A clip shows a render pass instead of the picture: run Break Out Passes again; the bridge re-pins the Combined pass. This can happen after Resolve restores a project from a crash.
- Antivirus software: some antivirus tools are suspicious of one program controlling another, which is exactly what the push does. If pushes fail with Resolve running, add an exception for Resolve and Python, or use the browser import instead.
- Resolve Bridge is licensed GPL 3, like Blender itself.
- The Tony McMapface display transform is by Tomasz Stachowiak, licensed MIT or Apache 2.0,and was baked through the author's own OCIO configuration.
- AgX and Filmic looks are baked from Blender's own color management; ACES looks from theAcademy's transforms as shipped in Blender.
- Blender is a trademark of the Blender Foundation. DaVinci Resolve is a trademark of Blackmagic Design. Resolve Bridge is an independent product and is not affiliated with either.
-
$59
For solo creators, hobbyists, including paid client work.
-
$129
For up to 5 seats within one company or team
-
$349
Studios and companies of any size and revenue. Includes expedited support.
 Included
Includes 12 months of
- Support from Limitless Creative
- Product updates
Extend this product’s Support Period +12 months: 50% of product price
Have questions before purchasing?
Login to message
| Blender Extension Compatible | Yes |
| Published | about 2 months ago |
| Blender Version | 4.2 - 5.2 |
| Extension Type | Add-on |
| Render Engine Used | Cycles, Eevee |
| License | GPL |
Discover more products like this
color management agx exr Compositing davinci resolve Render blender to resolve video editing Lighting VFX hdr color grading