 za studio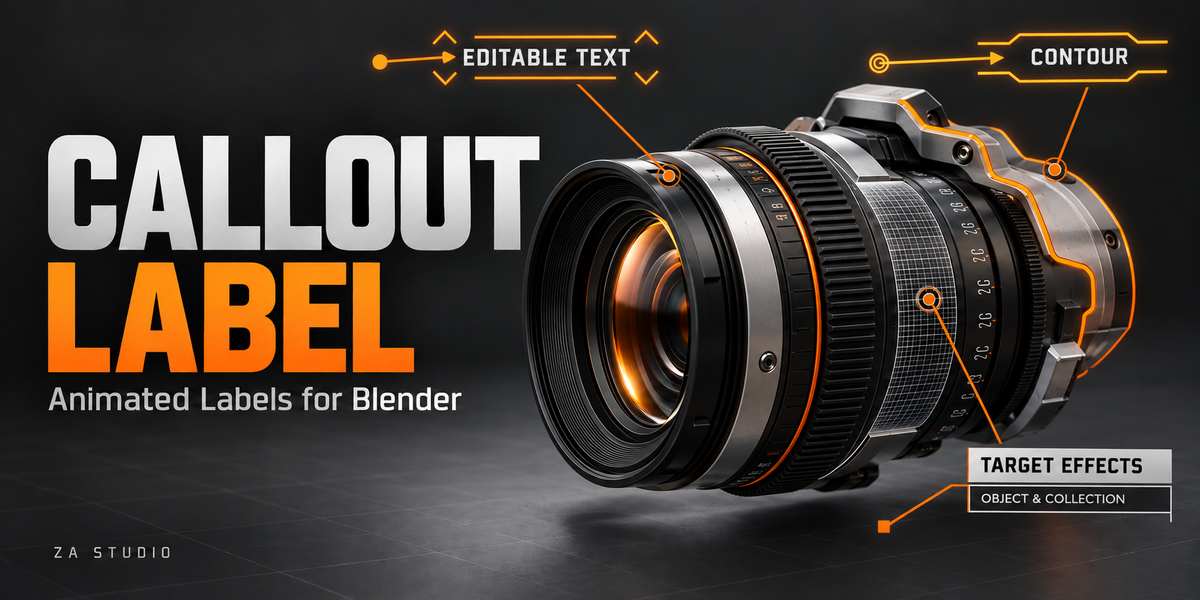
CALLOUT LABELS
Complete user guide for camera-facing callouts in Blender
Create, position, style, animate and render product labels with editable text, leader lines and optional target effects.
Version 1.0.75 | Blender 4.5+ | Updated 13 October 2026
Quick start
Install the ZIP, open 3D View > N > Callout, select a preset card, click Add, replace the sample text, then save your .blend file. Add a target or animation only when the shot needs one.
01. Install and open the add-on
Callout Labels is a Blender extension. The packaged ZIP contains the add-on and its bundled visual presets; no third-party Python package is required inside Blender.
Requirements
- Blender: version 4.5.0 or newer. The release is designed for Blender 4.5 and Blender 5.x.
- Viewport: use the 3D View and a scene camera for effects that derive a camera-based silhouette.
- Files: allow Blender to read linked fonts, images, preset assets and playback caches used by the project.
Install from the supplied ZIP
1
Open Edit > Preferences > Extensions in Blender.
2
Use the extension menu and choose Install from Disk. Select the supplied Callout Labels ZIP.
3
Enable Callout Labels. If it was already installed, restart Blender after updating.
4
In any 3D View press N, then select the Callout tab.
Your first look at the panel
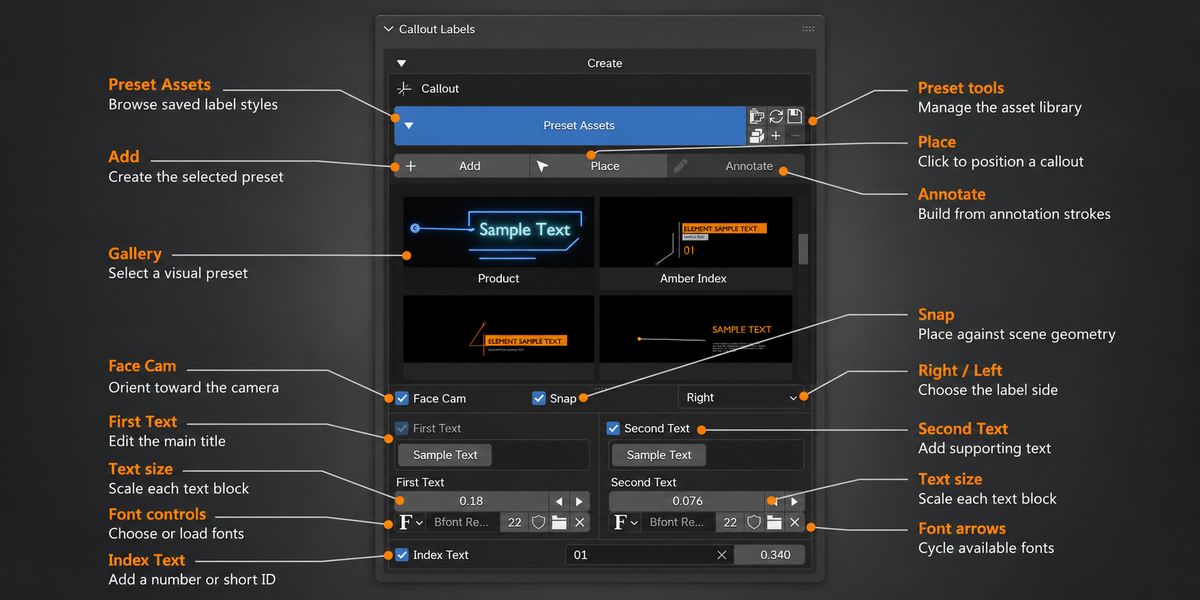
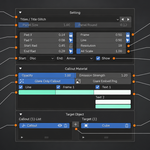
The Create section contains the preset gallery, creation buttons and text fields. Below it are Setting, Callout Material, Target Object, Effects, Animation and Preset. Each heading can be collapsed to make room for the current task.
Updating an existing project
Keep a copy of the .blend file before a major add-on update. Open the project with the new version enabled so saved callouts and preset references can be upgraded in Blender.
02. Build a first callout
A callout is a group of text, a leader line, optional frame or image panel, and controller objects. Its root keeps the group together.
Choose a visual preset
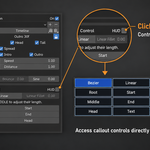
Open Create > Preset Assets and click a thumbnail. The highlighted card is the preset that Add or Place will create. This includes saved frame geometry and controller positions. Preview another card before creating the next callout; the gallery selection is authoritative in version 1.0.75.
Add
Create the selected preset in the scene immediately. Use it when you want to reposition the callout after creation.
Place
Create the selected preset by clicking a position in the 3D View. This is useful for arranging a label beside a product.
Annotate
Create callouts from viewport annotation strokes when a hand-drawn placement is faster than positioning controllers.
A reliable first pass
- Select the product object in the viewport, choose a preset card, then click Add or Place.
- Replace the sample First Text. Enable and edit Second Text if the label needs a smaller description.
- Adjust the leader line and frame in Setting, then set colors in Callout Material.
- If the label must follow a product, add that object or its collection in Target Object.
Face Cam, Snap and Side
The controls under the gallery affect the creation and placement of new callouts. Face Cam orients a callout toward the camera, Snap helps place it against scene geometry, and Right/Left chooses the label side. Verify these choices before Add or Place when building a row of matching callouts.
Preset selection behavior
Click the card you want immediately before Add or Place. If you use a different workflow to apply a style to an existing callout, check whether that action replaces the selected callout or creates a new one.
03. Edit text and fonts
First Text, Second Text and optional Index Text are separate parts of a callout. Their visibility, size and appearance can be adjusted independently.
First and Second Text
Enable the text blocks you need in Create. Click inside a text field to place a blinking caret at the clicked character, type normally, and use Backspace to delete. Enter inserts a new line. This works in both First and Second Text.
Use First Text for a title or headline and Second Text for the description, specification or supporting label. Their font-size controls sit below their respective fields. The previous/next font arrows beside each size move through available loaded and system fonts; the two text blocks keep independent font choices.
Multiline labels and panel growth
Presets with a backing panel or framed text area expand their first panel as First Text gains lines. When there is a second panel, the second text and panel move downward to preserve space. The same layout behavior applies to supported wire-frame-style labels. After changing the wording, inspect the result in the viewport because font metrics and manual transforms can affect the final composition.
Index Text
Turn on Index Text for numbers such as 01 or a short identifier. Set its text and size in Create. In animated layouts, the index accompanies the secondary text motion when the preset uses that relationship.
Alignment and manual placement
Blender text alignment can be set on the text object with left, center or right alignment. You may move or keyframe text objects and their controller empties in the viewport. The add-on preserves manually authored positions and native transform keys during playback. Make text changes first, then refine manual positions, especially where automatic panel reflow is active.
A longer title
Insert line breaks in First Text; inspect the panel and secondary text after reflow.
A new font
Use the font selector or previous/next arrows for the relevant text block.
A clean two-level label
Keep First Text short and use Second Text for detail.
A fixed custom position
Move the text object or controller, then keyframe it if the shot needs motion.
04. Shape and position
The visible leader line and frame are editable, while controller empties provide direct viewport handles.
Setting: frame and line
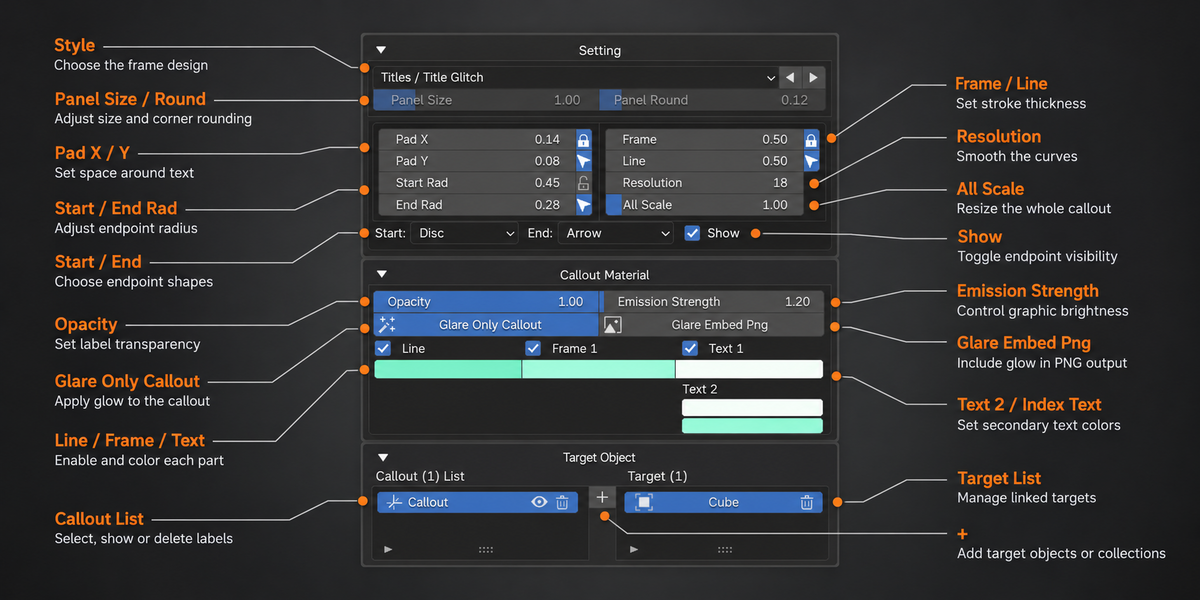
The Setting section includes frame style, panel size and rounding, padding, line and frame thickness, curve resolution, endpoint appearance, and global scale. Preset styles provide a starting point; refine these settings after you have final text because a longer label changes the balance of the layout.
- Panel Size / Panel Round: change backing panel dimensions and corner shape where the selected style supports them.
- Pad X / Pad Y: control the space around text. Increase these values when glyphs feel cramped in a panel.
- Frame / Line thickness: tune the visual weight for your final image resolution.
- All Scale: scale the complete callout as a group after its proportions are settled.
Controllers and parenting
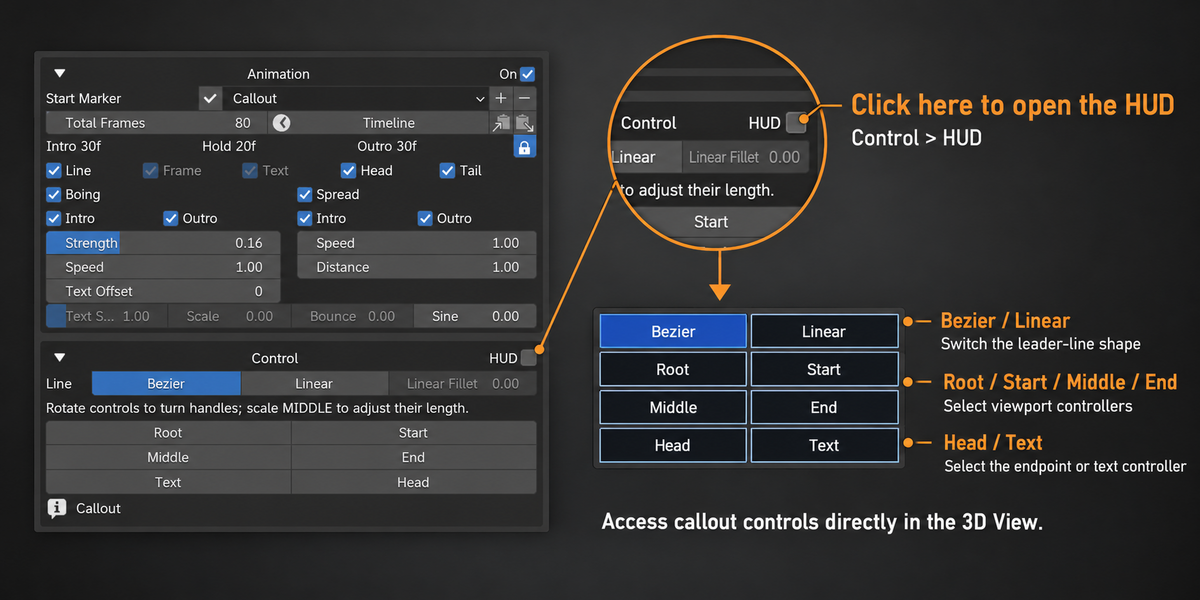
Select a callout root or one of its empties in the viewport to identify the group. Move the start and end controllers to change where the leader line begins and where the label sits. The root can be parented to a moving product so the overall callout follows it. You can also animate controller empties directly for a designed motion path.
The add-on evaluates manually moved and keyed controllers as authored positions. When combining parenting with animation, key the positions you want and scrub several frames to confirm that the leader line, panel and text remain aligned.
Camera-facing composition
For product shots, set the scene camera before final placement. Use Face Cam where the label should stay readable to the camera, and use Snap when its anchor must sit on the product surface. Recheck text and line spacing at the delivery resolution rather than only in a zoomed-in viewport.
Manual transforms
If an automatic layout moves a secondary block after you change First Text, finish the wording and then adjust the secondary block's final position. Native transform keyframes are respected during animation.
05. Callout Material and media
The Callout Material heading controls the callout's own appearance. It is separate from a target object's material.
Color, opacity and emission
Choose colors for the visible parts of the callout and adjust opacity and emission to suit the background. A bright emissive color can make thin labels readable against a dark scene; a restrained setting is often better on a bright product. The material controls are for the graphic callout, not for shading the target mesh.
The add-on exposes a Glare Only Callout option for compositing-oriented glow and a glare-embed control for output workflows that require the graphic effect in the result. Check a rendered frame when using strong emission or transparency; viewport preview and the final compositor can have different apparent contrast.
Media cards and images
Several built-in layouts use an image panel or media card. Choose the image in the relevant frame or material controls, then confirm that the image path remains accessible when you move the .blend file. If you are preparing a portable project, pack or copy linked media together with the project before sending it to another machine.
Preset examples
Examples from the included gallery: a technical callout, a media card and a wide price label.
Opacity versus line art
A transparent callout surface can still show Collection Line Art. Use the Line Art enable control for the line itself; opacity controls should be judged in the context of the chosen callout component.
06. Targets and callout list
A target associates a callout with a scene object or collection. The left list manages callout groups; the right list manages the active callout's targets.
Add an object or collection
In Target Object, select the intended callout, click the target-side +, then add selected viewport objects or choose Collection. The collection chooser lists collections linked to the current scene, including nested collections. Select a target row to highlight its object in the viewport and confirm the relationship visually.
If an object is already assigned to another callout, assigning it to the selected callout transfers that relationship. A target collection can be more convenient than adding many product parts one at a time, especially for effect coverage.
Manage the two lists
Callout List
Select a callout; double-click its name to rename. Use the eye to hide/show the whole callout and the row's trash icon to remove it from the scene.
Target List
Select a target to find it in the viewport. Use the remove control to detach an object or collection from this callout.
Selection for batch operations
Many Assign actions apply to selected callout roots or any selected member of a callout. When nothing relevant is selected in the viewport, the active Callout List row is used. Confirm the highlighted row before assigning an effect or animation preset to several groups.
Removing versus deleting
Removing a target relationship leaves the scene object in place. Deleting a callout from the Callout List removes that callout's generated group from the viewport and Outliner.
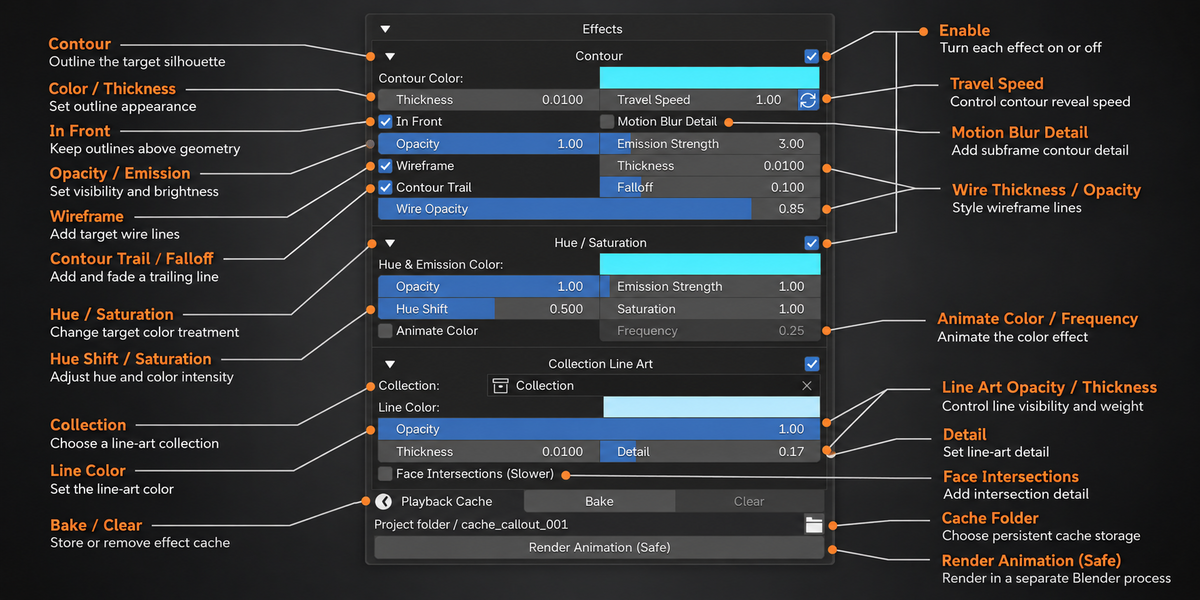
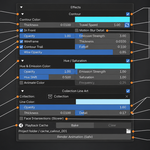
07. Contour effect
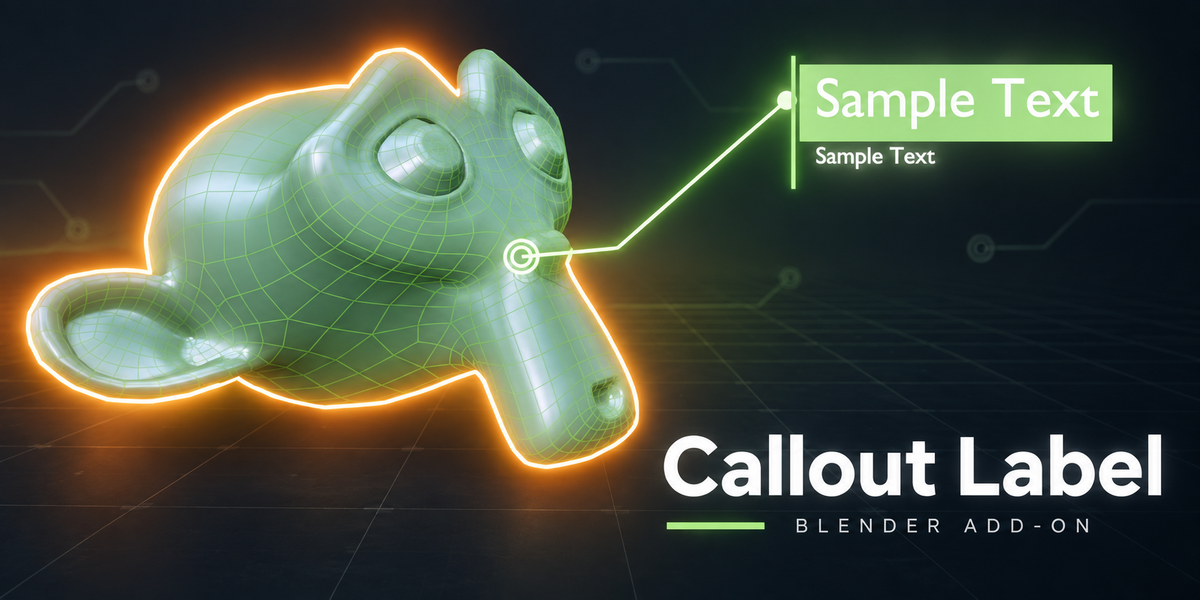
Contour draws a camera-dependent outline around target geometry. It is designed to reveal the outer silhouette of the selected subject rather than every interior model edge.
Set it up
- Set a Scene Camera and add the appropriate target object or collection.
- Open Effects > Contour and enable it for the active callout.
- Choose the contour color, thickness, opacity, emission and travel speed.
- Scrub a few frames to judge how the outline follows both camera and target motion.
In Front and depth
In Front keeps the contour visible above foreground objects in the viewport and final render. Turn it off when the outline should obey normal 3D occlusion. This is useful for comparing a clean graphic overlay with a more physically integrated effect. In Front is stored per callout and can be included in effect presets.
Contour animation options
Travel Speed affects the line's reveal. Wireframe, Wire Opacity and Contour Trail add alternative or trailing line treatments where the shot calls for them. If several disconnected or mirrored parts belong to a target, their outlines reveal in parallel so one part does not have to finish before the next begins.
Moving subjects and render detail
A silhouette can change naturally when a product rotates or leaves the camera frame. The drawing path uses an ordered outline to reduce sudden jumps in the animation tip, but a genuine change in visible geometry can still change the path. For motion-blurred shots, Motion Blur Detail can evaluate more contour detail at subframes; it costs more render time. Test a short range before committing to a full sequence.
Camera dependency
Contour is evaluated from the active scene camera for final output. If the scene has no camera, or the wrong camera is active, correct that first before troubleshooting the outline itself.
08. Hue and Collection Line Art
The remaining two target effects live beside Contour under the top-level Effects section. They can be combined, but each has its own enable state and settings.
Hue / Saturation
Use Hue / Saturation to shift the target's color treatment and emission. Start with a small hue change, then adjust saturation and opacity until the effect reads clearly without obscuring product details. Optional color animation can create a pulse or scan treatment; preview it at normal playback speed.
Collection Line Art
Choose a scene collection, enable Collection Line Art, then set its line color, opacity, thickness and detail. The Enable checkbox controls whether line art is active. Opacity controls transparency and may be zero while the line remains enabled. Face-intersection detail can improve complex cases at added calculation cost.
When several effects are active
Contour is drawn above Collection Line Art when both are enabled. Keep line colors distinct if they overlap. Reduce effect complexity when the viewport becomes slow: use a narrower target collection, lower detail, disable optional face intersections, and bake the Playback Cache for animated shots.
Scene camera and orbiting
Collection Line Art and Contour can depend on the active camera or current view. A baked Collection Line Art result is reused while you orbit outside the scene camera, avoiding unnecessary recalculation. Return to camera view to inspect the final composition.
Effect isolation
If a line looks wrong, temporarily disable the other effect headings and inspect Contour and Collection Line Art one at a time. This is usually faster than changing many settings at once.
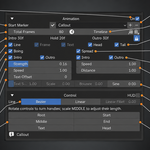
09. Animate each callout
Animation is controlled per callout, so multiple labels can begin at different points on the same timeline.
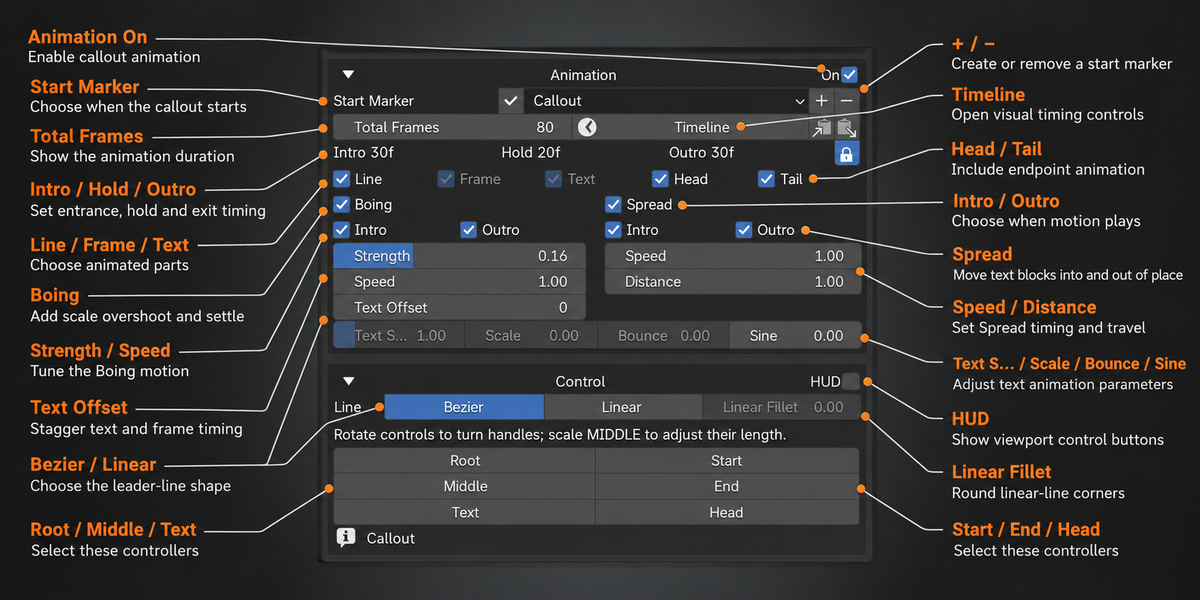
Start Marker and timing
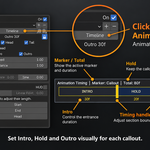
Select a callout, turn Animation on, then choose or create its Start Marker. The + button creates a timeline marker for the selected callout; the - button removes the displayed marker and clears its assignments. Assign Selected applies the displayed marker to selected callouts. Move markers in Blender's Timeline to shift when the associated callout starts.
Set Intro, Hold and Outro durations. A line, frame, text, head and tail may each be included or excluded. The callout's total span reflects these timing sections. Scrub from before the start marker through the end to check both entrance and exit.
Boing, Spread and typewriter text
Boing
A brief scale overshoot and settle for frame and text. Set Strength and Speed. Separate Intro and Outro switches determine when it plays.
Spread
First Text and its panel arrive from above; Second Text, its panel and an index arrive from below. Speed controls duration, Distance controls travel, and Intro/Outro switches control direction phases.
Text reveal
Adjust text animation speed and the text/frame offset for a staggered entrance. Use it for a typed or paced presentation.
At the end of a Spread outro, elements leave rather than lingering at an intermediate position. Test both halves when an animation preset combines Boing and Spread.
Keyframes and moving products
You can parent the callout root to a moving object and keyframe control empties or text objects. The add-on preserves authored transform positions, including keyed text positions, while applying its own reveal motions. For complicated shots, test the parented callout across the exact frame range before baking.
Independent timing
Each callout needs the intended marker assignment. If several callouts animate together unexpectedly, select each one in Callout List and inspect its Start Marker.
10. Use and save presets
The add-on includes 52 visual presets, plus separate target-effect and animation preset systems. These serve different purposes.
Visual preset assets
A visual preset stores a callout look and layout. Browse its thumbnail in Create > Preset Assets, click to select it, and use Add or Place. The gallery includes technical labels, product cards, editorial panels, price labels, image cards and compact HUD treatments. A visual preset can still be edited after creation.
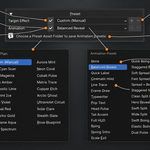
Target Effect and Animation presets
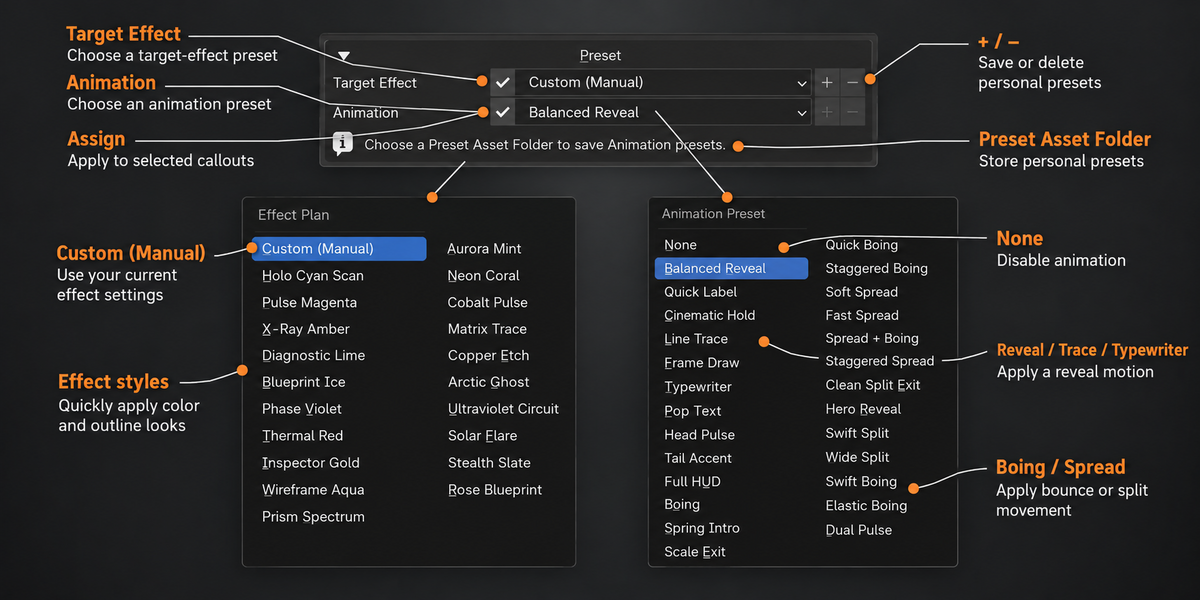
The Preset section provides a Target Effect choice and an Animation choice. Use each row's Assign button to apply the displayed choice to selected callouts in one action. The adjacent + and - controls save or delete personal presets where available.
Built-in animation profiles include Balanced Reveal, Quick Label, Cinematic Hold, Line Trace, Typewriter and faster Boing/Spread combinations. None turns animation off while retaining the callout's marker, which makes it useful for temporarily removing motion from a selected group.
Personal asset folder
In Edit > Preferences > Extensions > Callout Labels, choose a Preset Asset Folder. This folder stores personal visual presets, thumbnails, animation presets and related files. Back it up with your projects if you rely on custom styles. Asset images and fonts referenced by presets still need valid paths on another computer.
Batch assignment
Selecting a member of a callout is enough for Assign to find its root. When no callout is selected in the viewport, the active list row is the fallback target.
11. Bake the Playback Cache
The Playback Cache stores computed target-effect results for a frame range so viewport playback can stay responsive in a complex animated scene.
Bake and reuse
1
Save the .blend project and confirm the scene camera and targets.
2
Open Effects > Playback Cache and choose the relevant frame range or use the project range.
3
Click Bake. Let the bake finish before evaluating playback speed.
4
Save the project again. Reopen it to confirm the cache folder is found and reused.
By default, the cache is stored beside the saved project in a numbered cache_callout_001 folder. The browse control lets you choose another location. Keep the folder with the .blend when moving the project. A marker shift can reuse or extend cached source frames, so shifting timing does not inherently require a full rebake.
When to update or clear
Rebake or update when target geometry, the scene camera, relevant effect settings or the required frame range changes. Use Update if only missing frames need calculation; use Clear when the cache is obsolete or you need disk space. After a major add-on revision that changes Contour geometry, one fresh bake may be required.
What the cache does not replace
A playback cache accelerates effect evaluation. It does not replace image/video output or prevent all render-side work. Before final delivery, render sample frames and inspect text, images and outlines in the output, especially when the project uses a different computer or Blender installation.
Performance workflow
Build with effects off, enable them one at a time, then bake after camera and target motion are stable. This avoids repeatedly baking during layout changes.
12. Render and deliver
Use Blender's normal Render Animation when it is stable for the project. The add-on also provides a background-process option for difficult interactive renders.
Before rendering
- Set the final scene camera, frame range, output resolution, render engine and output path.
- Check one frame near the beginning, middle and end for First/Second Text, index text, image cards and Contour.
- Keep linked fonts, images and cache files accessible to the rendering process.
- For Grease Pencil effects, ensure the required Combined and Depth render passes are available; the add-on prepares them for affected scenes.
Render Animation (Safe)
The Effects section in the N-panel contains Render Animation (Safe). It prepares a temporary scene copy and renders in a separate background Blender process while the editing window remains open. Unsaved edits are included in the temporary render snapshot; relative assets and caches are based on the saved project location.
Progress is displayed as completed-frame percentage in Blender's bottom status bar and the Effects panel. A successful run shows a completion popup with Open Folder. A failure leaves a render log for diagnosis. The temporary scene snapshot is cleaned up after the job. The button also offers cancellation while a job is active.
Standard versus Safe rendering
Render > Render Animation
Normal Blender workflow; use when the project renders reliably and you want interactive Render Result feedback.
Effects > Render Animation (Safe)
Separate process; use when the interactive render window or complex animated effects cause instability or you want the editing window available.
Final check
A background render can finish successfully while a missing font, image path or disabled effect changes the result. Inspect the rendered media, not only the completion message.
13. Production workflows
These examples combine the main controls into repeatable production sequences.
A. Static product feature label
- Set the camera and select the featured part. Choose a clean visual preset and click Place.
- Write a concise First Text title and a one-line Second Text description. Adjust font size, panel padding and material color.
- Add the part as a target. Move the leader start to the specific feature and use Face Cam if readability requires it.
- Render a still frame at final resolution and adjust thickness if the line looks too thin.
B. Several staggered labels on an animated product
- Create one callout per feature, using a shared style for visual consistency. Give each callout a distinct name.
- Attach each callout root to the moving product or keyframe its controller positions as needed.
- Enable Animation on each callout. Create a separate Start Marker for each and move markers to stagger the reveal.
- Assign one animation preset to selected groups, then adjust individual Intro/Hold/Outro and Boing/Spread values.
- Bake the effect cache for the shot range, inspect playback and render a short test range before the full sequence.
C. Technical scan with collections
- Put related product parts in a scene collection and choose that collection as the target.
- Enable Contour and choose In Front if the outline must stay visible through foreground geometry.
- Add Collection Line Art for supporting detail or Hue / Saturation for emphasis, keeping the effect colors distinct.
- Use a darker or simpler background so the graphic reads; bake after the camera move is final.
Order of work
Final wording and camera framing should be decided before detailed controller keyframes and the final cache bake. This reduces reflow and re-baking.
14. Troubleshooting
Work from the visible symptom to the smallest likely dependency: selection, camera, path, marker or cache.
Add or Place creates the wrong look
Click the desired gallery card first. Version 1.0.75 makes that selected card the source for Add and Place.
Target collection list is empty
Confirm that the collection is linked to the current scene. Nested linked collections are supported.
A target cannot be added
Confirm the intended callout is active. An object already assigned elsewhere is moved to the selected callout when reassigned.
Several labels animate together
Inspect each callout's Start Marker and assign distinct markers where needed.
Secondary text is missing
Check its enable state, text content, material visibility and current animation phase; inspect a render sample frame.
Image card is blank
Confirm the image path exists and is accessible to the render process; package the image with the project.
Contour is absent
Set the correct scene camera, target and Contour enable state. Check the rendered frame range and effect opacity.
Contour is hidden behind geometry
Turn on Contour In Front for an overlay, or leave it off for normal depth.
Playback becomes slow
Use a tighter target collection, lower optional detail and bake or update the Playback Cache.
Cache does not reopen
Save the .blend, check the chosen cache folder and keep it with the project.
Interactive render crashes
Try a short Safe Render range. Inspect its log and the produced frames; native Blender/driver crashes may still require scene-specific diagnosis.
Useful issue report
Record the Blender version, Callout Labels version, render engine, the frame at which the problem occurs, the affected .blend file if shareable, and the exact steps that reproduce it. For a render failure, include the Safe Render log or Blender crash report. A short frame range is easier to investigate than a full project render.
15. Reference
This page summarizes the interface and the release-specific behavior described in the guide.
Create
Choose a visual preset; Add, Place or Annotate; edit First, Second and Index Text; choose fonts.
Setting
Choose frame style, line and panel geometry, padding, endpoints and overall scale.
Callout Material
Set graphic colors, opacity, emission, glow-related options and media appearance.
Target Object
Manage the callout list and target object/collection assignments.
Effects
Contour, Hue / Saturation, Collection Line Art, Playback Cache and Safe Render.
Animation
Per-callout marker, Intro/Hold/Outro, reveal toggles, Boing and Spread.
Preset
Assign or save target-effect and animation presets.
Version 1.0.75 highlights
- Add and Place create the currently selected gallery asset, including its saved layout and controller positions.
- The preset gallery has additional space above Face Cam, Snap and Side for a clearer Create panel.
- Safe Render runs in a separate Blender process and reports completed-frame progress in the status bar and Effects panel.
- Batch preset assignment, per-callout animation markers, persistent cache folders and Contour In Front are included in the current release.
Callout Labels 1.0.75 | User guide | Blender 4.5+
Have questions about this product?
Login to message
| Blender Extension Compatible | Yes |
| Published | 5 days ago |
| Blender Version | 4.5 - 5.2 |
| Extension Type | Add-on |
| Render Engine Used | Blender-Internal |
| License | GPL |
Discover more products like this
3D Labels infographics product-visualization technical illustration annotation badges presentation Callout Label motion graphics text tooltip typography