Crumble — Complete Damage & Weathering Toolkit
 Strates Digitales Labs


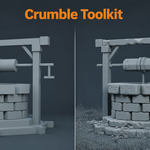
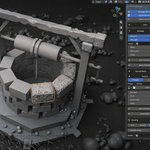
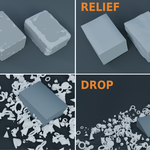
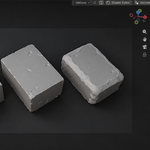
Installation
1. Download the .zip file from your Superhive Downloads page.
2. In Blender, go to Edit > Preferences > Get Extensions, open the ⌄ menu (top-right) and choose Install from Disk (also available from the Add-ons tab).
3. Select the downloaded .zip file and make sure the "Crumble Toolkit" checkbox is enabled.
4. The Crumble panel appears in the 3D Viewport sidebar (press N), under the Crumble tab.
Getting Started
Select one or more mesh objects in Object Mode — every button works on the whole selection. Open the Crumble tab: the panel shows three toggles, Damage ON-OFF, Relief ON-OFF and Debris ON-OFF. Use any stage alone or combine them; only the active stages show their controls, and each stage box is collapsible.
Each stage title carries outliner-style icons: the eye shows/hides the effect in the viewport only, the camera includes/excludes it from renders only. Turning a stage OFF resets its settings — a confirmation popup asks first (with a "Don't ask again" option in the add-on preferences).
Damage
Amount (0–100) is the one damage slider: it drives bite depth, coverage and pre-smoothing together. Strength fades the whole effect in or out (0 = object untouched, 1 = full damage) and is animatable. Seed picks another random pattern, Resolution sets the voxel density across the object (default 45 — higher is finer but slower), Scale resizes the pattern.
A Vertex Group selector limits where the damage happens: weight 1 = full strength, weight 0 = fully protected. Leave it empty to damage everywhere.
Add Controller creates an Empty parented to the object: move it and the pattern follows, rotate it and the pattern turns — live and animatable. Apply Controller bakes its position into the pattern and removes it; Reset and Remove Controller cancels its effect.
Relief
Relief is an independent embossing stage — enable it alone for weathering without any destruction. The Texture menu picks the source:
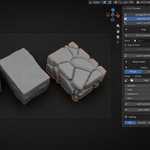
- Presets — Clouds (organic bumps), Cracks (thin grooves), Bricks (recessed mortar, uses the UV map), Waves (corrugated bands), Craters (round pits).
- Custom — Blender's classic procedural texture system, right in the panel: pick the Type (Clouds, Marble, Musgrave, Voronoi, Wood…), watch the live preview, tweak every native setting and save your own presets, reusable in every file. Sampled tri-planar in 3D — no UVs needed.
- Image height map — through the UV map: mid-grey = flat, white = out, black = in.
Controls: Strength, tiling Scale, Subdivision (up to 10) and a Seed that randomizes the selected pattern. Relief has its own Controller. With Damage on, the damage carves through the embossed surface and fresh cuts stay bare.
Debris
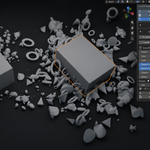
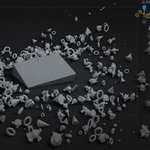
Two modes: On Object scatters shards on the object's surface; Around Object lays rubble on the ground around the base, clustered against the object and thinning out with distance. Debris is generated in a dedicated "<Object> Debris" collection and parented to your object, so it follows it.
Sliders: Amount (density), Seed, Scale, Random Scale, Random Rotation, Distance (off the surface / gap before the ring), Spread (how far they are generated), Lateral Spread (On Object: slides each chunk sideways along the surface) and Subdivisions (angular low-poly shards to smooth high-poly debris).
The chunks get a ready-made procedural Rock Material, added as an editable slot on your object — edit it or swap it for any material from the selector. The Chunks / Collection switch scatters the objects of your own collection instead, picked at random per point. A Texture Map (full settings in the panel) can drive the Density and/or the Scale of the debris: dark areas = fewer / smaller.
In Around Object mode, the Ground field snaps every chunk straight down onto the surface you pick — they follow uneven terrain, each chunk lifted by its own size — and a Sink slider pushes them into or off that ground. While procedural, the debris is not selectable so a stray click can't land on it.
Apply (1 Mesh) bakes all the debris as one object; Apply and Divide bakes one object per chunk, each with its own origin, with an optional "Run Drop It on the pieces" checkbox if that add-on is installed.
Drop to Floor
An always-available utility for any selected objects. Put on the Floor drops them straight down onto whatever surface is below — a popup asks whether to also adapt the orientation to the slope. Or pick a Floor object and Link to the Floor: a Plain Axes controller is created and snapped to the floor; slide the controller to travel along the terrain and nudge or rotate the object itself freely on top — your tweaks are offsets, the attachment never breaks. Live and animatable. Align to Floor tilts the linked object to the slope; Unlink from the Floor removes the link and keeps the object exactly where it is.
Shading
Pick Flat (faceted), Smooth (smooth by angle — everything smooth except edges sharper than the Smooth Angle, default 30°) or Smooth+Sharp (hard-surface mode with built-in weighted normals, so big flat faces dominate the shading). A Vertex Group selector can limit where the smooth shading applies.
Copy to Selected
With several objects selected, Copy to Selected copies the active object's full Crumble set-up (Damage + Relief settings) to the others, adding the modifier where it is missing. Each object keeps its own independent node tree, so per-object settings never collide.
Shader-ready damage mask
The modifier writes a damage attribute on the output mesh (0 = untouched surface, 1 = fully carved). In any material, add an Attribute node named damage and plug it into a Mix: dirt, rust or an exposed inner material appears exactly where the object is damaged, follows along when you change the Seed or move the controller, and survives Apply.
Applying Changes
Each stage (Damage, Relief, Debris) has its own independent Apply button. Applying one stage bakes only that stage into the mesh — the others remain live and fully adjustable on the baked result.
Notes & Limits
- The object needs real volume (a closed surface) — give open or flat shapes some thickness first (Solidify).
- Apply your object scale (Ctrl+A) for the most predictable results.
- Everything is standard geometry: once applied, it exports to any engine or format.
Support
Questions or issues? Contact the creator through the "Have questions about this product?" link on this page.
Have questions about this product?
Login to message
| Blender Extension Compatible | Yes |
| Published | about 2 months ago |
| Blender Version | 5.0 - 5.2 |
| Extension Type | Add-on |
| Render Engine Used | Cycles, Eevee |
| License | GPL |
Discover more products like this
decay modifier Rust destruction geometry nodes weathering cracks VFX non-destructive procedural Damage debris