Decimate Pro
 Impression Sunrise


Where it is
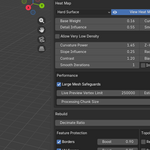
3D Viewport → Sidebar (N) → Decimate Pro
Quick workflow
-
Select a mesh object (Object Mode).
-
In Heat Map, pick a Preset (optional).
-
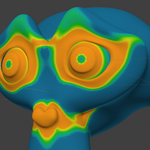
Click View Heat Map to preview (switches to Weight Paint view).
-
Adjust heat-map sliders until the preview looks right.
-
(Optional) Click Estimate Face Count.
-
In Rebuild, set Decimate Ratio and options.
-
Click Rebuild Mesh.
Tip: Rebuild Mesh changes your mesh (it applies modifiers). Use Undo or duplicate the object first if you want a backup.
Heat Map basics
-
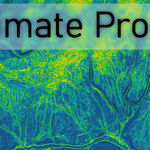
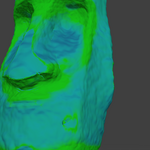
The add-on writes weights into a vertex group named DECIMATEPRO_Density_Map.
-
Think of the heat map like this:
-
Higher weight = more protected = keeps more polygons
-
Lower weight = less protected = simplifies more
-
Heat Map controls
Preset + preview
-
Preset
-
Loads a ready-made set of heat-map settings for a goal (hard surface, organic, silhouette, etc.).
-
Choosing a preset overwrites the sliders; changing any slider switches you to “Custom”.
-
-
View Heat Map
-
Turns live preview on/off.
-
When on: updates the map as you change sliders and shows it in Weight Paint mode.
-
-
Advanced Controls
-
Shows/hides the full set of heat-map and cleanup options (basic mode shows only the essentials).
-
Core heat-map sliders
-
Base Weight
-
Raises or lowers the starting density everywhere.
-
Higher = overall more protected (less reduction overall).
-
-
Curvature Influence
-
Adds density on edges, corners, and high curvature areas.
-
Higher = sharper features keep more polygons.
-
-
Curvature Power
-
Shapes how strongly curvature “kicks in”.
-
Higher = focuses protection more on the sharpest features; lower = spreads it more gently.
-
-
Detail Influence
-
Adds density where local faces are already small (areas that look “detailed”).
-
Higher = preserves fine surface detail more aggressively.
-
-
Z-Height Influence
-
Adds density toward the top of the mesh (based on local Z).
-
Higher = top keeps more polygons.
-
-
Slope Influence
-
Adds density on steeper surfaces (based on the surface normal).
-
Higher = steeper areas keep more polygons.
-
-
Radial Influence
-
Adds density farther from the mesh center.
-
Higher = preserves silhouette/outside regions more.
-
-
Contrast
-
Expands or compresses differences in the heat map.
-
Higher = more extreme “protected vs simplified” zones; lower = more even distribution.
-
-
Bias
-
Shifts the entire map up or down.
-
Positive = more protection everywhere; negative = less protection everywhere.
-
-
Invert Weights
-
Flips the map.
-
Use when the result looks “backwards” (protected areas become simplified, and vice versa).
-
Smoothing
-
Smooth Iterations
-
How many smoothing passes to run.
-
More iterations = broader, softer transitions between dense/sparse areas.
-
-
Smooth Strength
-
How strongly each smoothing pass blends with neighbors.
-
Higher = smoother gradients; lower = keeps sharper changes in density.
-
Very low density (extra reduction)
-
Allow Very Low Density
-
Allows the map to go into very low weights in sparse zones.
-
Useful for extreme reduction, but can increase collapse/artifacts in thin areas.
-
-
Low Density Floor
-
The minimum weight allowed when “Allow Very Low Density” is on.
-
Lower floor = more aggressive simplification in low-priority zones.
-
Performance controls (Advanced → Heat Map → Performance)
-
Large Mesh Safeguards
-
Prevents heavy live preview work on very dense meshes.
-
-
Live Preview Vertex Limit
-
Live heat-map preview pauses if the mesh vertex count is above this value (when safeguards are enabled).
-
-
Estimate Vertex Limit
-
A threshold intended for estimation safeguards.
-
Note: in this build, estimation does not meaningfully change behavior based on this value.
-
-
Processing Chunk Size
-
Controls how much work is done per update during Rebuild Mesh.
-
Higher = faster rebuild but more UI hitching; lower = smoother UI but slower rebuild.
-
-
Tick Time Budget (ms)
-
Caps how long each rebuild “tick” can run.
-
Higher = faster rebuild but can make Blender less responsive; lower = more responsive UI.
-
Rebuild controls
Main rebuild target
-
Decimate Ratio
-
The overall reduction target.
-
Lower = fewer polygons; higher = closer to the original.
-
The heat map redistributes this so important areas lose less detail.
-
Feature protection (helps preserve key structure)
-
Protect Borders
-
Preserves open boundaries (holes, open edges) more.
-
-
Border Boost
-
Strength of border protection.
-
-
Protect UV Seams
-
Preserves geometry along UV seams more.
-
-
Seam Boost
-
Strength of seam protection.
-
-
Protect Sharp Edges
-
Preserves sharp edge regions more.
-
-
Sharp Boost
-
Strength of sharp-edge protection.
-
-
Sharp Angle
-
Face-angle threshold for what counts as “sharp”.
-
Lower angle = more edges treated as sharp; higher angle = fewer edges treated as sharp.
-
Shading cleanup (optional)
-
Add Weighted Normals
-
Adds a Weighted Normal modifier after rebuild to make shading look cleaner (especially on hard-surface meshes).
-
-
Weighted Normal Weight
-
Strength of the weighted normal effect.
-
Higher = stronger “flat/clean” shading influence.
-
-
Keep Sharp
-
Keeps sharp edges respected when computing weighted normals.
-
-
Face Influence
-
Uses face influence data (if present) to guide the weighted normals result.
-
Topology cleanup (optional)
-
Resolve Self Intersections
-
Attempts to fix geometry where the mesh intersects itself (can be heavy and can alter topology).
-
-
Intersection Threshold
-
Precision/tolerance for the intersection cleanup.
-
Smaller = more precise; larger = more tolerant.
-
-
Remove Interior Faces
-
Deletes faces detected inside the mesh shell (common scan cleanup step).
-
-
Remove Spikes
-
Removes “spike-like” artifacts by dissolving spike vertices.
-
-
Spike Cone Angle
-
Controls how aggressively spikes are detected.
-
Higher angle = more aggressive spike removal.
-
-
Recalculate Normals
-
Rebuilds normals to point consistently outward after cleanup.
-
-
Tri to Quad Cleanup
-
Converts suitable triangles into quads after cleanup (when possible).
-
-
Quad Face Angle
-
Controls how similar adjacent face angles must be to convert tris to quads.
-
Lower = stricter (fewer conversions); higher = more conversions.
-
-
Quad Shape Angle
-
Controls shape tolerance for tri-to-quad conversion.
-
Lower = stricter; higher = more permissive.
-
Mirror output (optional)
-
Mirror Output
-
Mirrors the rebuilt result around the mesh’s geometric center in local space.
-
-
Mirror X / Mirror Y / Mirror Z
-
Chooses which local axes to mirror across.
-
Use for symmetrical objects; make sure the symmetry plane runs through the mesh center.
-
Running and cancelling
-
Rebuild Mesh
-
Runs heat-map generation + decimation + cleanup (with progress).
-
-
Cancel Rebuild / ESC
-
Stops a running rebuild job.
-
Face Count Estimate
-
Estimate Face Count
-
Predicts the approximate face count after rebuild without changing the mesh.
-
Best used after you’ve set your heat map and Decimate Ratio.
-
That’s everything you need: preview the heat map, tune the sliders, estimate, then rebuild.
Discover more products like this
hard surface remesh Polygon Reduction Decimate Modifier LOD retopology scan cleanup blender mesh cleanup LOD optimization mesh optimization decimate decimation