 Achat
Achat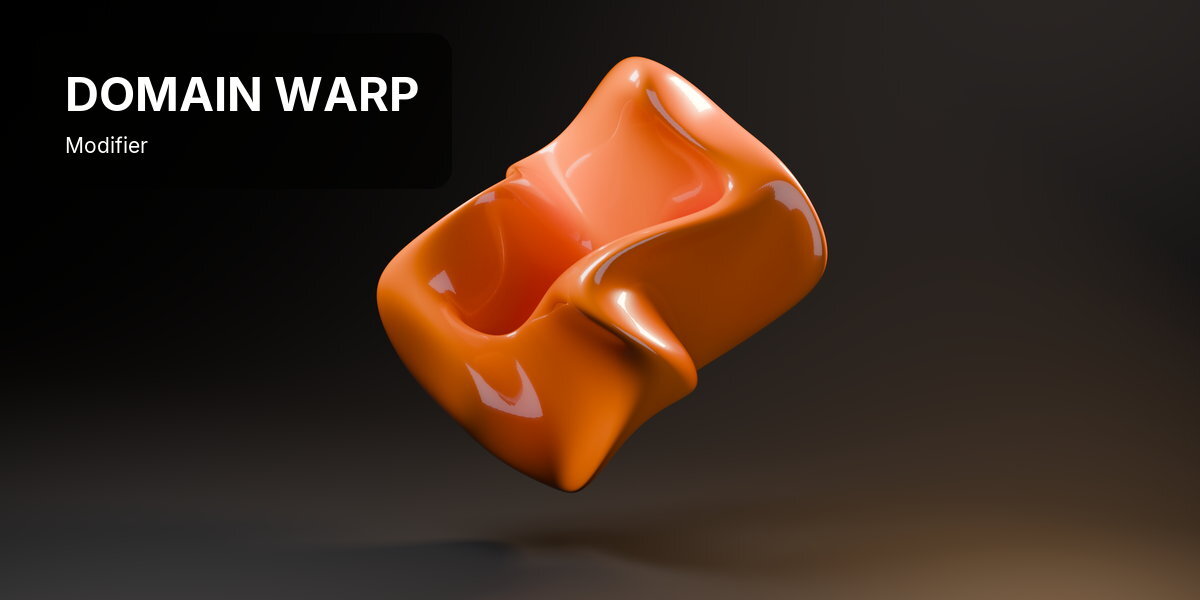

FOLD ANY SHAPE INTO SOMETHING GROWN. LOOP IT IN ONE CLICK.
Domain Warp is a Blender add-on that folds any shape into something that looks grown, not modelled. Add one modifier, pick a preset, and a torus, a logo or a cable tangles into an organic sculpture. One more click loops it seamlessly.
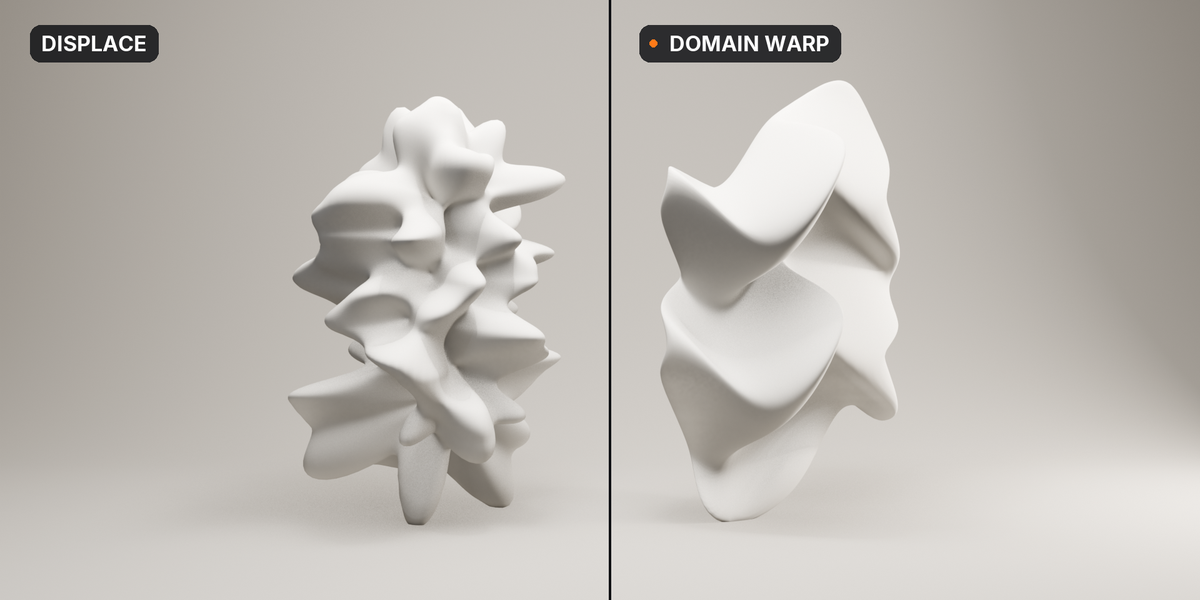
Organic forms are slow to make. Sculpting takes hours and does not move. Stacking Displace modifiers pushes each point only once, so the silhouette stays the same with bumps on top. Building a real iterated warp in Geometry Nodes means a repeat zone, per-pass maths and safety clamps before you see a single fold, and making it loop cleanly is another job again.
WHAT IT IS
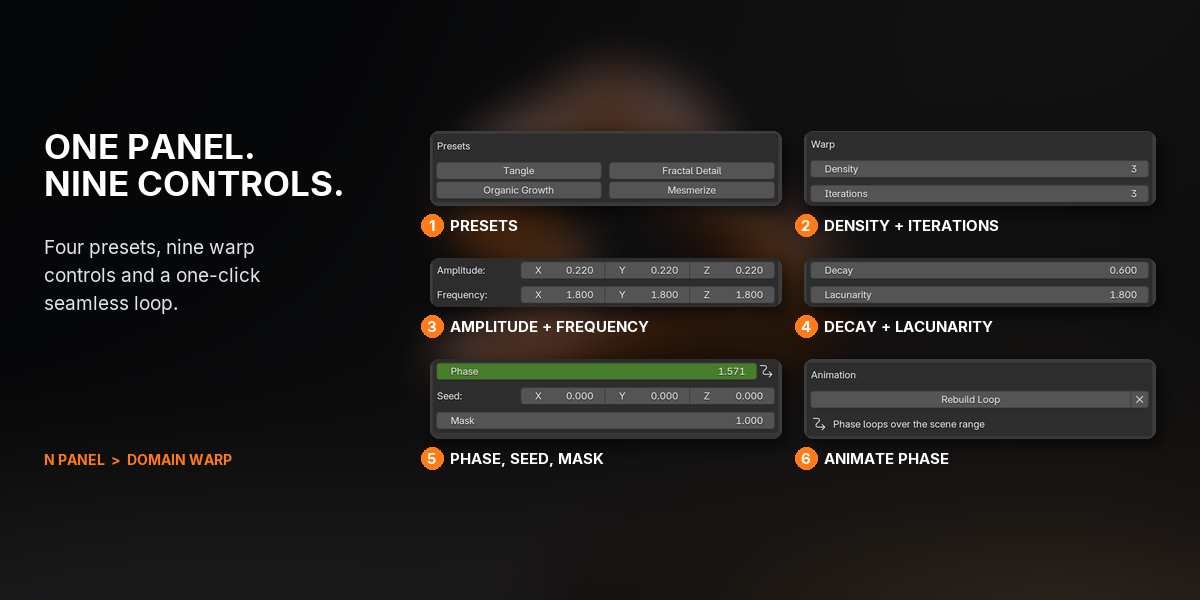

Select a mesh, curve, text or point cloud and press Add Domain Warp in the sidebar. The shape changes at once. Every point is pushed along a sine wave, then the result is warped again, each pass feeding one axis into the next, so the surface folds over itself instead of rippling. You choose how many passes there are, how far and how tightly they fold, and how much smaller and finer each pass gets. Mask the warp to part of the object with a vertex group, give every copy its own Seed, and press Animate Phase for a loop with no seam. It stays a normal modifier the whole time: stack it, apply it, or render the file on a machine that has never seen the add-on.
WHAT THIS DOES THAT BLENDER DOES NOT
Blender can displace a surface. Domain Warp folds it, and loops the result.
| TASK | STOCK BLENDER | WITH DOMAIN WARP |
|---|---|---|
| Make a shape look grown, not modelled | Sculpt it by hand, or displace it and keep the same silhouette with bumps on top | One modifier folds the surface over itself, pass after pass |
| Coarse form with fine detail on top | Several Displace modifiers with different textures, tuned one by one | Decay and Lacunarity turn the passes into octaves, tuned together, live |
| An animation that loops perfectly | Keyframe a texture offset and match the ends by eye | Animate Phase: the frame after the last is exactly the first, 1 to 64 cycles |
| Five objects, five different shapes | A separate texture or offset for every object | One setting, a different Seed on each |
| Build an iterated warp yourself | A repeat zone, an axis swizzle, per-pass maths and clamps in Geometry Nodes | Built, tested and one click away, with presets and a panel |
| Fine random surface grain, like pores or grit | Displace with a noise texture does this | Not what it's for: Domain Warp bends the whole form |
COMPATIBILITY
| Blender | 5.2 and newer |
| Operating System | Windows, macOS, Linux |
| Render Engines | Any (the result is ordinary geometry) |
FEATURES

1GROWN, NOT MODELLED
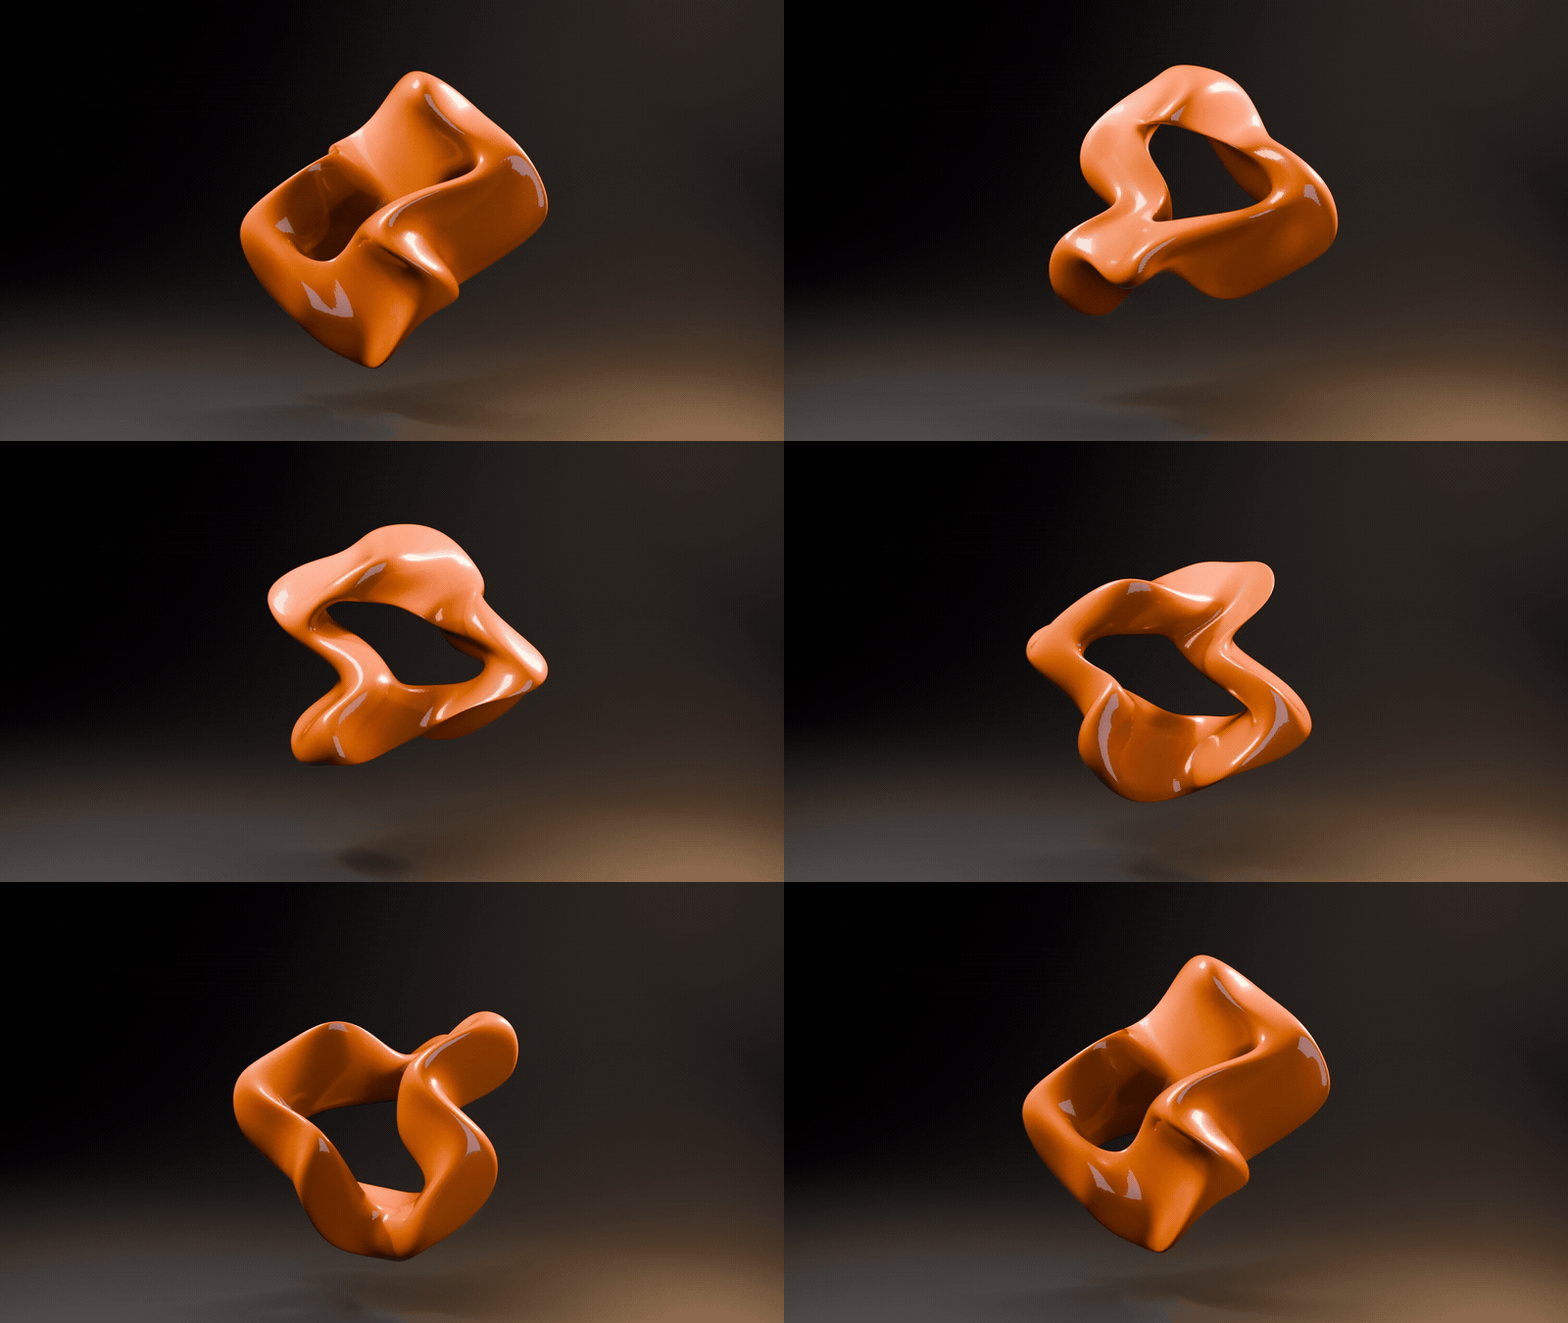
Domain Warp pushes every point along a sine wave, then warps the result again, each pass feeding one axis into the next. A plain torus folds into a sculpture that looks grown, and it keeps moving.

2A SEAMLESS LOOP IN ONE CLICK
Press Animate Phase and the warp travels one full cycle across your frame range. The frame after the last is exactly the first, so it loops with no seam, for GIFs, social posts and VJ sets.


3COARSE FORM, FINE DETAIL
Each pass can be smaller and finer than the last. Decay and Lacunarity turn repeats into octaves: the first pass shapes the form, the later ones add crisp detail on top.

4WARP ONLY WHERE YOU WANT
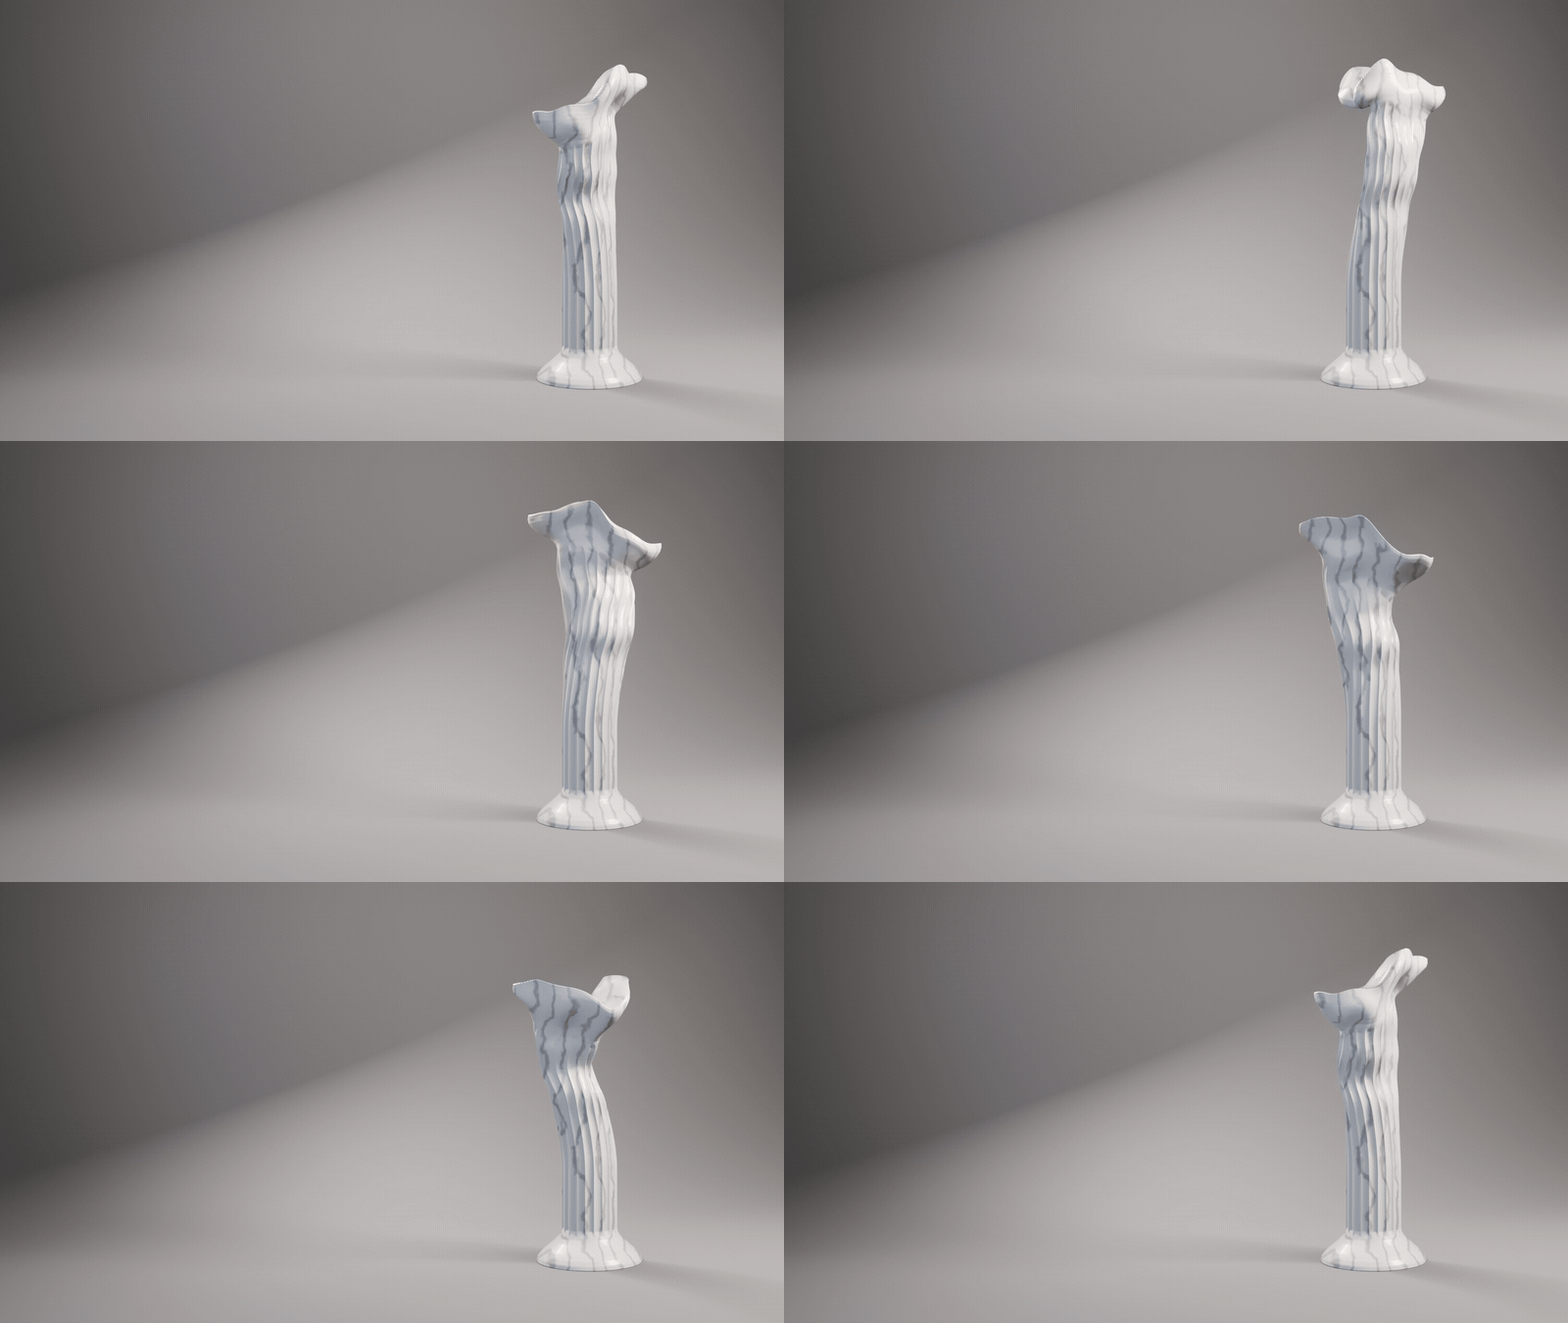
Point Mask at a vertex group and only that part warps; in-between weights fade the warp in gradually. The base of a column stays machined while the capital grows like coral.

5FOUR PRESETS, TUNED BY RENDERING
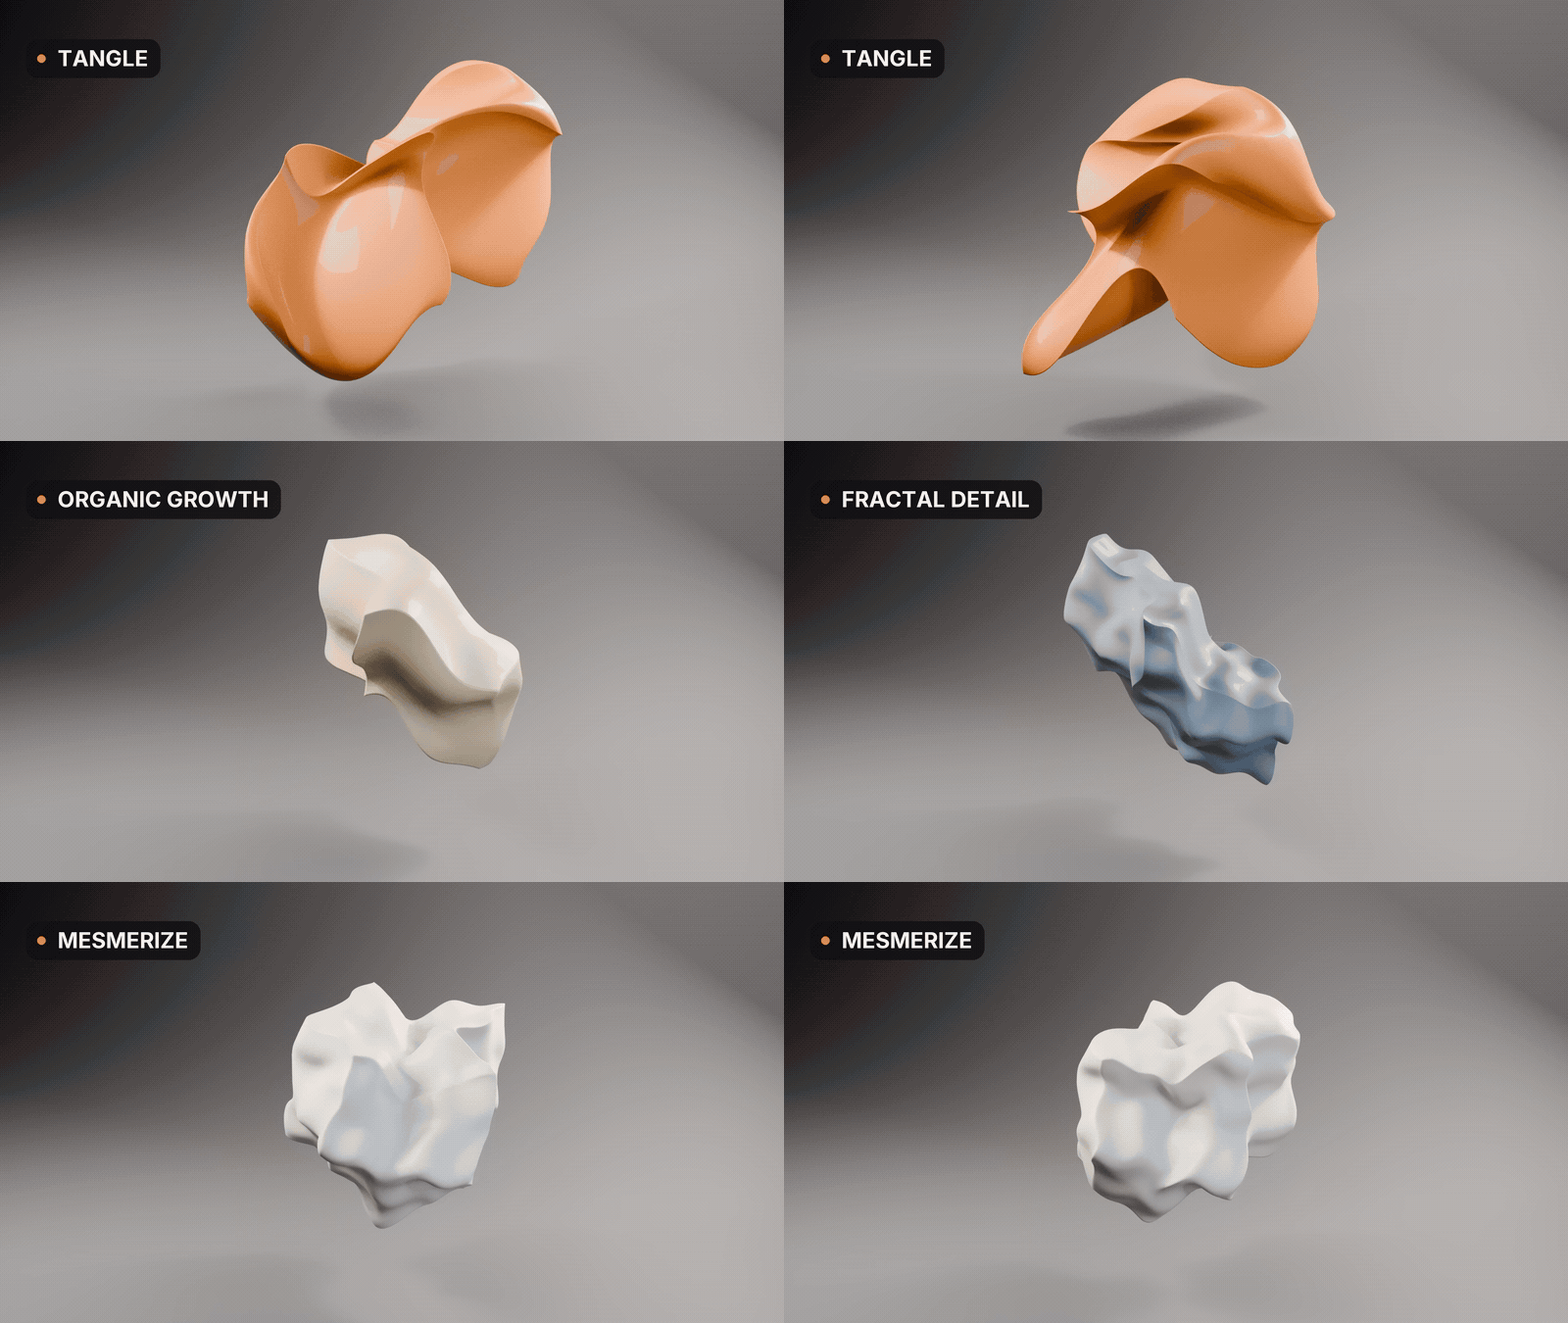
Start from Tangle, Organic Growth, Fractal Detail or Mesmerize. Each was tuned by rendering to stay clear of the two ways a warp looks broken: sheared into a lozenge, or crosshatched.
6MESHES, CURVES, TEXT AND POINT CLOUDS
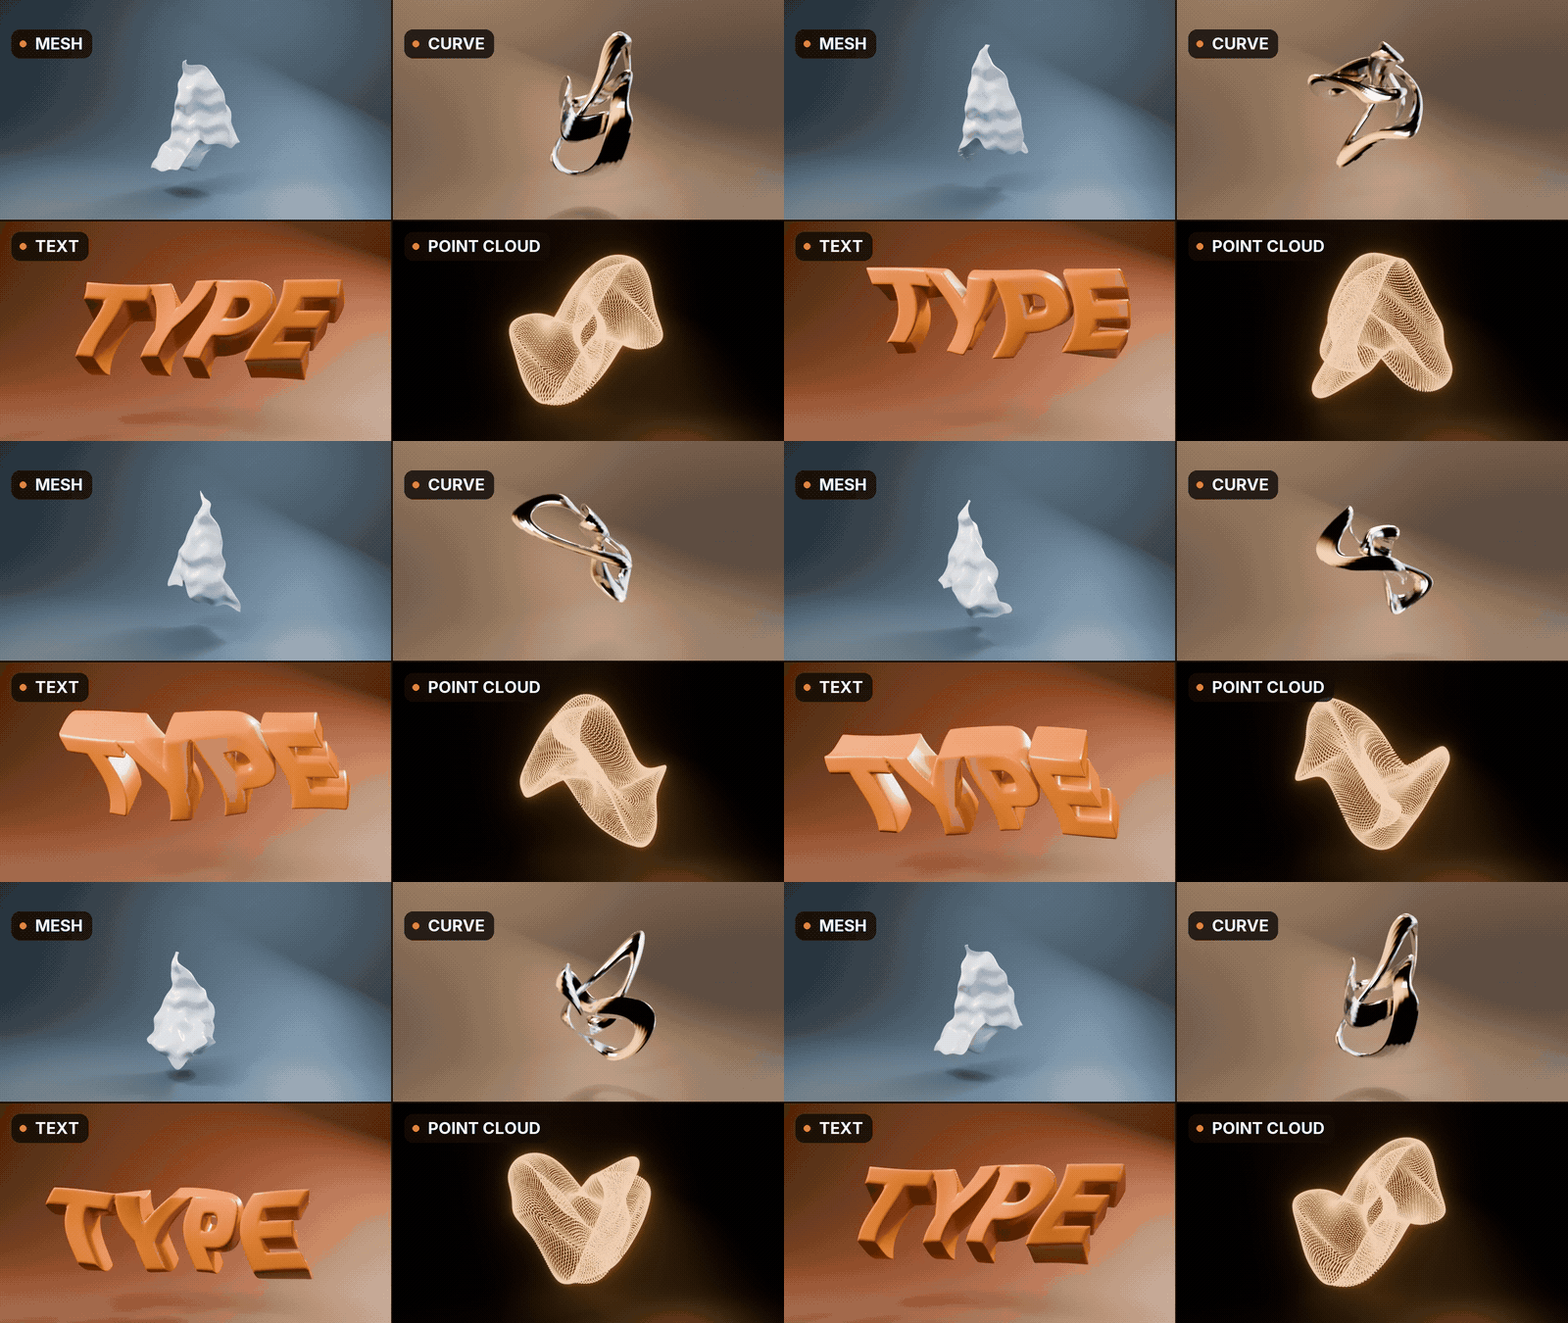
Warp a mesh, a curve with a bevel, a line of text or a point cloud with the same controls. Density subdivides meshes first, so even a low-poly shape has points to fold.
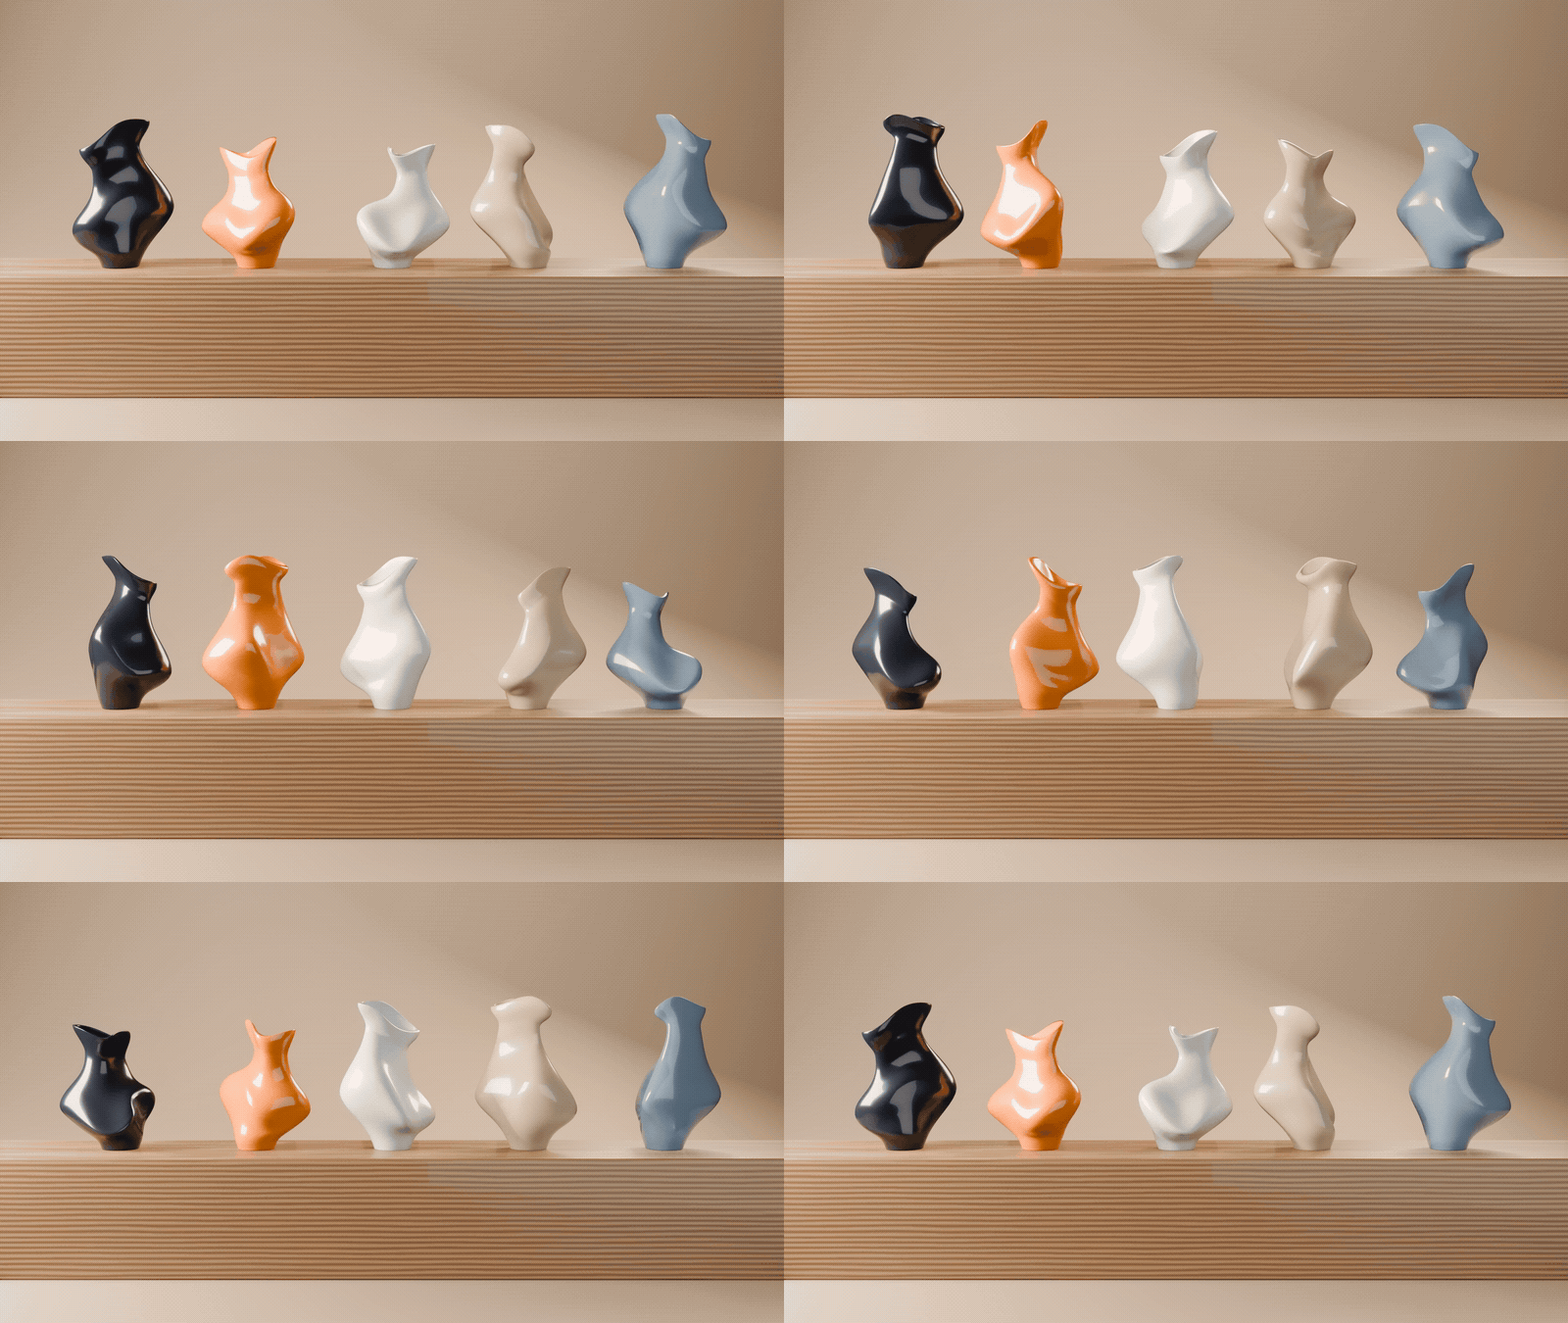
7ONE SETTING, A DIFFERENT SHAPE PER OBJECT
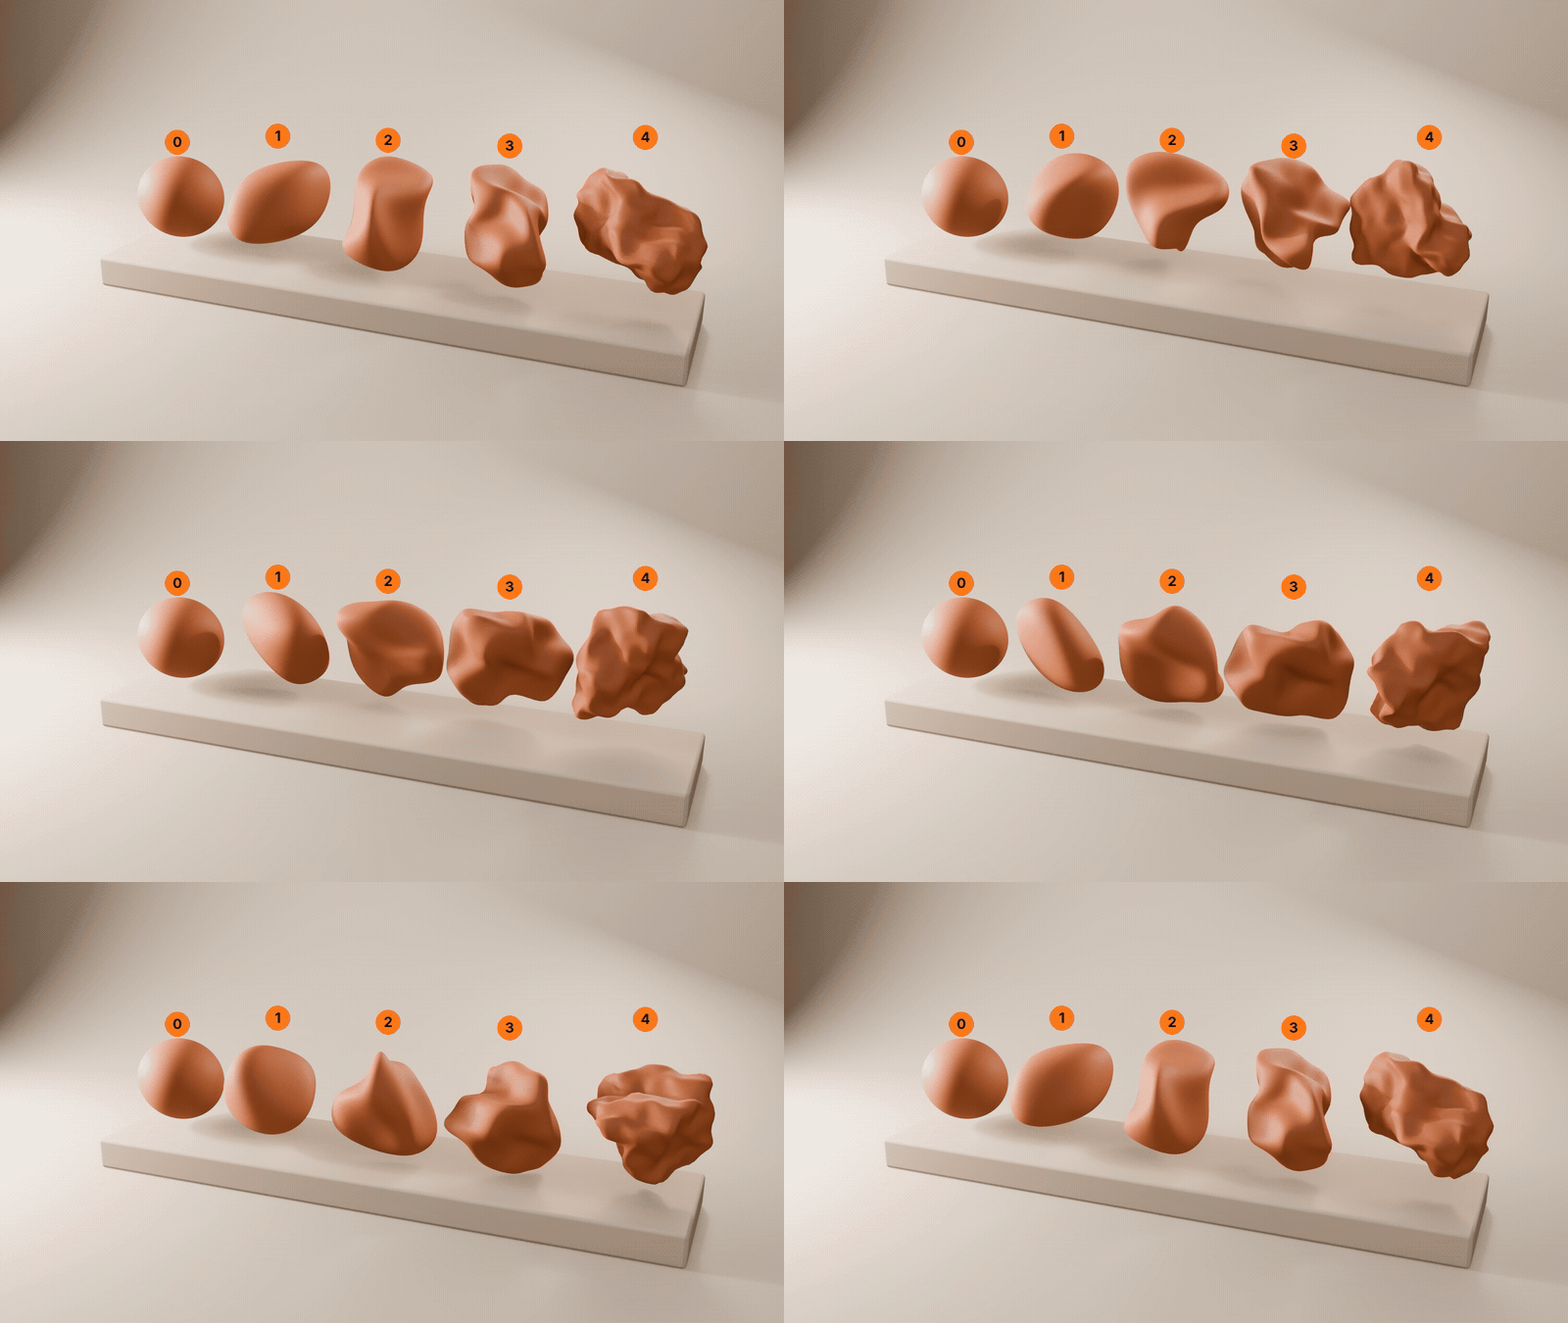
Give each object its own Seed and the same settings grow a different shape on every copy. A shelf of vases, a field of pebbles, all from one look.
8A NORMAL MODIFIER, STACKS AND APPLIES
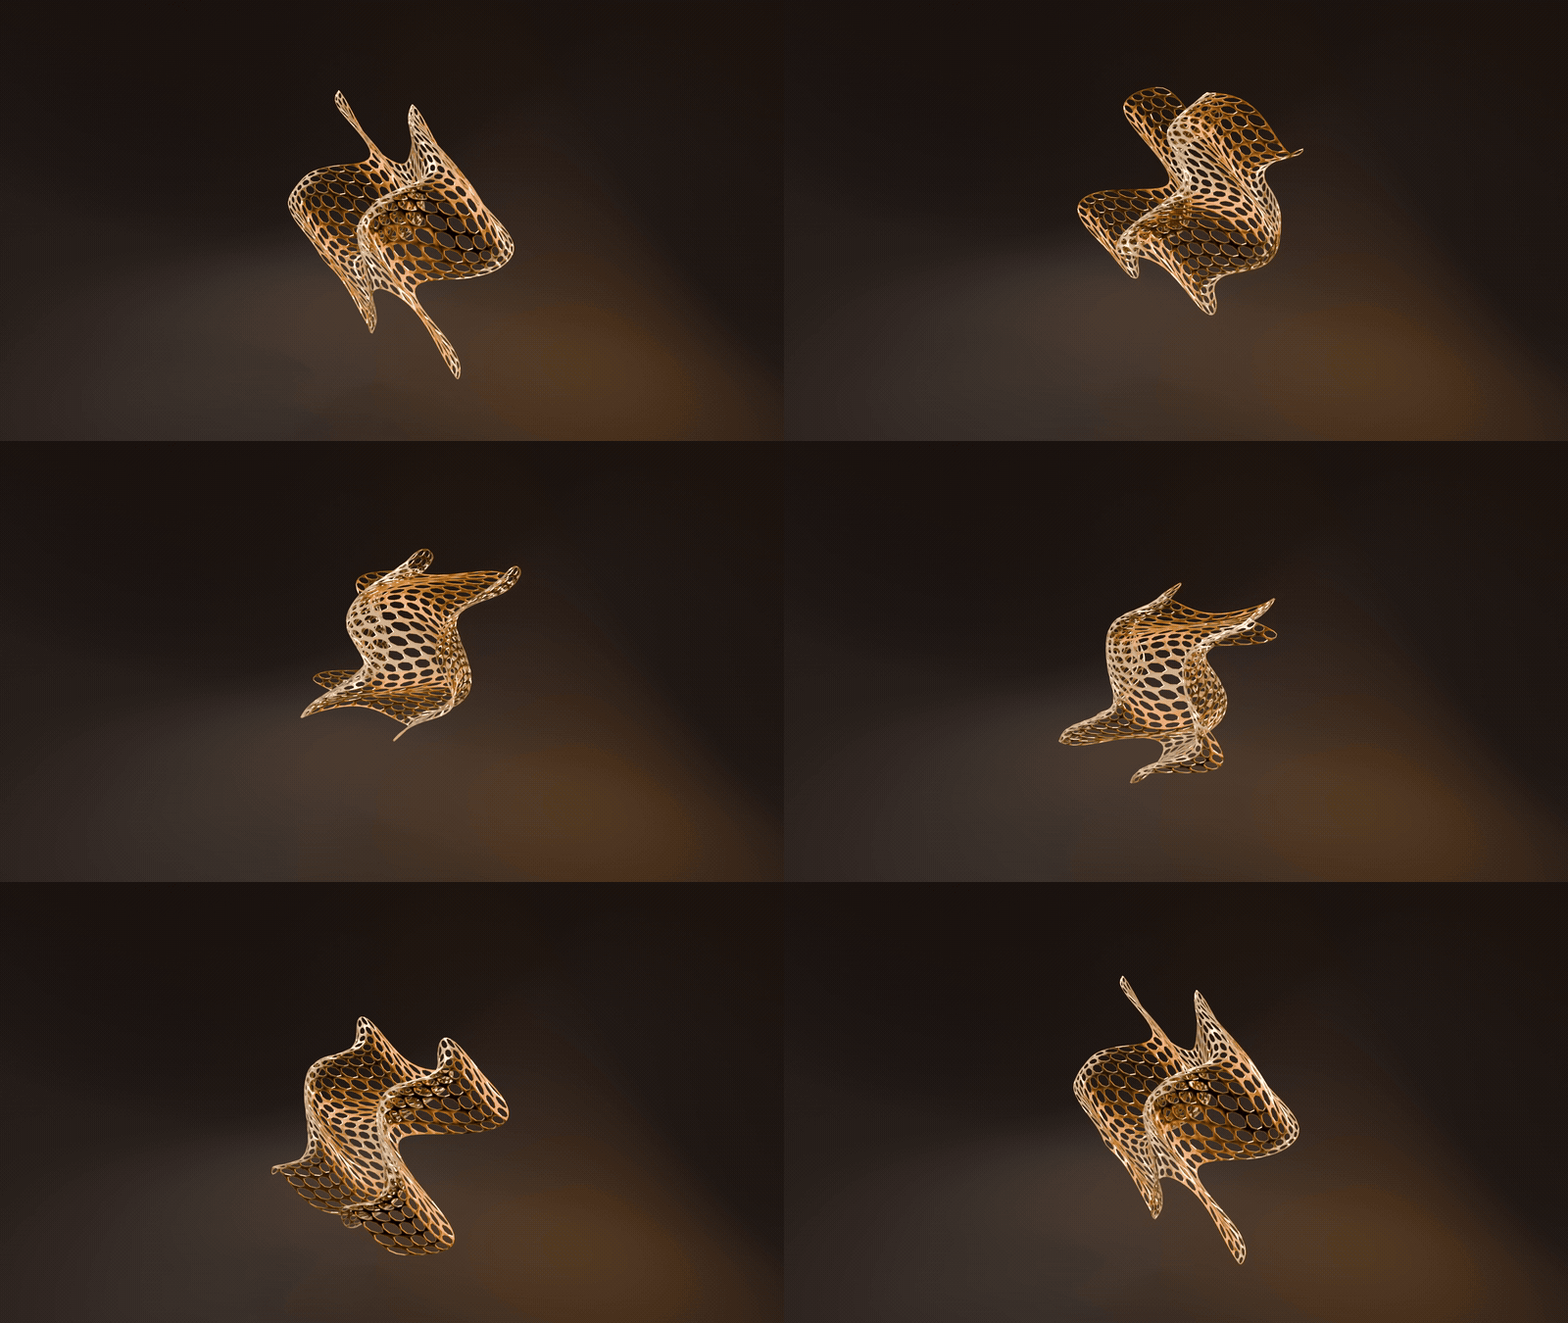
It is an ordinary geometry nodes modifier: stack it with Array or Wireframe, apply it for real geometry, or drop the Domain Warp node into your own tree. The file renders without the add-on, in any engine.
WHAT YOU GET
- Domain Warp 1.0.2 as a Blender extension: drag the .zip into Blender to install
- 1 geometry nodes modifier with 9 controls: Density, Iterations, Amplitude, Frequency, Decay, Lacunarity, Phase, Seed and Mask
- 4 presets: Tangle, Organic Growth, Fractal Detail and Mesmerize
- Animate Phase: a seamless loop across your frame range, 1 to 64 cycles, rebuilt or cleared in one click
- 4 object types: meshes, curves, text and point clouds
- Vertex-group masking and a per-object Seed
- The Domain Warp node in the Geometry Node editor's Add menu, for your own trees
- Full documentation and a quick-start guide
- Direct email support from the developer
UPDATES AND SUPPORT
Updates install with one click inside Blender through Superhive's extension repository, and every update is free.
- Questions or problems: [email protected]
- Licence: GPL, source included. Use it on anything, commercial or not.
CHANGELOG
| 1.0.2 (2026-10-13) | Density subdivides smoothly, so coarse meshes no longer show facets after the warp. Presets update the viewport the moment you click them. |
| 1.0.1 | First release: the Domain Warp modifier with 9 controls and 4 presets, Animate Phase seamless loops, vertex-group masking, and the node in the Geometry Node editor's Add menu. |
BUY ONCE, DRAG THE .ZIP INTO BLENDER, AND HAVE YOUR FIRST ORGANIC SHAPE IN THREE CLICKS: SELECT AN OBJECT, OPEN THE DOMAIN WARP TAB, PRESS ADD DOMAIN WARP.