 DejaVu


Documentation
FDM Print Animator
Everything the add-on does, panel by panel — plus the four steps that get you a finished animation, and what to do when a mesh misbehaves.
The full manual ships inside the download in English (MANUAL_EN.md) and Spanish (MANUAL_ES.md), together with a changelog that records what changed in every release and what was measured to prove it.
Requirements
| Blender | 5.2 LTS or newer. |
| Platforms | Windows, macOS and Linux. Pure Python — no compiled parts, nothing platform-specific. |
| Dependencies | None. Uses only bpy, bmesh and mathutils. No internet connection, no account, no API key, no licence server, no telemetry, no pip install. Nothing is downloaded at runtime. |
| Source | Readable Python, GPL v3 or later. No obfuscation, no compiled-only files. |
Installing
As an extension (recommended). Edit > Preferences > Get Extensions > Install from Disk, and pick the fdm_print-1.16.2.zip file. Enable it if it is not enabled already.
As a classic add-on. Edit > Preferences > Add-ons > Install from Disk with the same zip also works.
Where the interface is
3D Viewport > Sidebar (press N) > the FDM Print Animator tab.
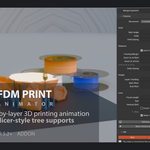
One main panel and seven sub-panels — Timing, Nozzle, Materials, Supports, Camera, Set and Maintenance. Materials has three of its own: Model Look, Support Look and Hot Band. They all start collapsed on every file open, so opening the sidebar shows the model slot and Prepare Print rather than every control at once. The button next to the Model field folds and unfolds every section at once.
Quick start
| 1 | Add any mesh — the default cube, a Suzanne, your own model. |
| 2 | Open the sidebar with N, go to the FDM Print Animator tab, and set Model — or select the object and click the eyedropper. |
| 3 | Set the layer height and the frame range in Timing. Defaults: 6.29 mm layers, frames 1 to 600. |
| 4 | Press Prepare Print, then play the animation. |
That is the whole flow. Preparing builds the Geometry Nodes modifier (always first in the stack), the drivers, the nozzle, the supports, and — if the boxes in Set are ticked — a bed, lights and an orbiting camera framed around your part. Everything it creates lives in the FDM Print collection.
With Apply Range to Scene ticked — it is by default — preparing also sets the scene's frame range to match the print, and jumps to the first frame if the playhead was outside it. Every number stays editable afterwards: change a colour, a support angle or a camera move and the animation updates. You are not rebuilding anything.
The panel, section by section
Timing
Layer Height is the thickness of one layer, shared by every model being printed. Layers is the count across the height of the model in the Model field; editing it sets the layer height for everything, so you can work from either end. The panel shows the duration in seconds and the frames per layer — useful for tuning a 15-second reel against a 2-minute hero shot. If the scene range and the print's range drift apart, an Apply Range to Scene button appears to line them up.
Nozzle
Assign your own nozzle object, or leave it empty and a default one is built. Nozzle Scale multiplies the size the add-on fitted to the part, Nozzle Lift raises it above the layer being printed, and Show Nozzle hides it in the viewport and in renders without removing it. All three are drivers, so they are live in both nozzle modes.
With more than one model on the bed, One Nozzle for Everything (on by default) drives a real nozzle object along a path baked from the actual cross-section of every model, layer by layer. Path Detail is how many points of real contour are sampled per layer (default 12): higher follows the outline more closely and weighs more, since the file gets layers × detail keyframes on each axis. Bake Nozzle Path redoes it without a full Prepare. Raising Path Detail past the frames per layer shown in Timing does not help — the extra keyframes land inside a single frame.
Print / Travel Split is the fraction of each island's time spent extruding — the rest is a travel move, an arc with a Z hop — and Infill Passes adds extra passes inside the perimeter. Both are node group inputs and only affect the in-graph nozzle, so with one nozzle for everything they are greyed out with a note rather than left there doing nothing.
Materials, and the hot band
Model Material is applied to the part and to the extrusion bead; Support Material to the supports. Leave either empty and the add-on's own procedural FDM material is used, which draws the layer lines. Changing a material applies it immediately.
Model Look and Support Look expose the controls of whichever material is actually in use — Filament Color, Roughness, Gloss Variation, Anisotropy, Layer Depth, Layer Sharpness, Top Infill Width and Bump Strength. The Surface Detail toggle opens the finer ones: Stair Stepping, Step Blend, Nozzle Wobble, Wobble Scale, Extrusion Noise, Drag Marks, Speckle and Color Variation.
Hot Band adds the incandescent layer, and it does not depend on the material: the add-on injects its nodes into whichever material you assigned, interleaving a Mix Shader between what was connected to the output and an emission. The factor comes from the absolute distance to the cut plane in world Z, so one shared material reads correctly on every part on the bed whatever its local origin or scale. Hot Band controls the height over which the glow fades — it scales with the layer height, so the glow always covers about the same number of layers whatever the model's size — and Band Glow its strength. The band's colour ramp is in the panel, and Copy Band to Support Material gives the supports the same colours. Unticking the box removes the nodes and reconnects the material exactly as it was.
Supports
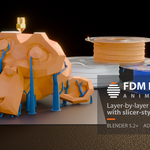
Three modes. Tree — branches are seeded on the overhangs, descend in steps, are attracted to their neighbours and merge into tapered trunks with a flared foot; when the descending path would hit the part they dodge horizontally. Normal — a grid of square-section towers, also down to the plate. No Supports.
Scale to Model is on by default and matters more than it looks: the support settings are lengths in metres and the defaults suit a model about 1.8 m tall, so on a 160 mm print they would come out almost as thick as the part. With it on, preparing rescales them to the model.
Shared by both modes: Overhang Angle, Seed Spacing (the finer it is, the more branches), Clearance and Layer Bead (how far each layer's bead sticks out; 0 is a smooth stack). Normal adds Grid Cell. Tree adds Tip Radius, Maximum Trunk Radius, Growth per Meter, Foot Flare, Maximum Tilt, Attraction Reach, Maximum Drift, Descent Step, Merge Distance and Merge Exponent.
Attraction Reach is the delicate one: raising it too much pulls every branch into a single central trunk that runs through the part.
Supports are pre-computed geometry, not a live node graph, and their settings are shared — so changing one marks every mounted model out of date. The panel turns red and offers Regenerate Supports for the current model, a refresh button next to each stale model in the list, and Rebuild Every Support for all of them. Each takes a fraction of a second.
Camera
The camera is a rig of its own. Its mode is in the panel header: Built-in (the add-on's orbital camera), My Camera (drives your own object with the same rig, keeping its lens and settings), Target Only (builds just an empty that rises with the layer being printed, for you to constrain your own camera to), or None.
Movement offers seven ready-made moves — Half Orbit, Full Orbit, Turntable, Static Front, Top Reveal, Pull Back and Hero — plus Custom. Picking one fills in the ten controls that define it and leaves framing, lens and depth of field as you had them. Everything stays editable: a preset is a starting point, not a mode.
- Auto Framing solves the distances from your lens and render aspect ratio so the whole print stays in frame — including vertical video — with a Framing Margin and Zoom In at Start / at End to tighten either end.
- Layer Tracking goes from framing the whole printed part to riding along with the layer being printed. Start Pitch and End Pitch let the camera descend from overhead as the part grows.
- Depth of Field focuses on the layer being printed, with an F-Stop.
- Bake Camera to Keyframes writes the move onto a new free-standing camera. From there it is an ordinary animated camera — edit it in the Graph Editor, retime it, add your own moves. The rig is left intact, so you can keep tweaking and bake again.
Reframe Now recomputes the distances without rebuilding the rig — though every control that affects framing already does this on its own when you move it.
Set
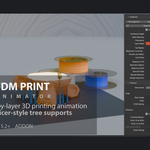
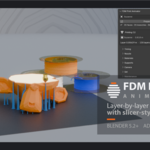
Bed and Lights build the surrounding set. The plate is sized from the combined footprint of everything being printed — not from one model, which would leave the other parts hanging off it — and the lights scale with it, so a low wide print gets a plate that contains it and a key light that is not standing inside it.
Maintenance
Shows the version and the mesh repair and solver controls. Both dropdowns are overrides: on Automatic the add-on decides, so the panel always reports what it actually applied — the repair, the solver, and your mesh's diagnosis in open edges, pieces and crossing faces.
Reset Settings to Defaults puts every setting back to its factory value, with the option to keep your object and material choices, restore the add-on's own materials, and rebuild the rig afterwards. Rebuild Node Group and Materials recreates the add-on's datablocks from scratch. Remove Rig removes the modifier and its drivers, optionally deleting the whole set as well.
Several models, one print
A printer has one head at one height, so every part on the bed grows through the same plane. The cut plane is a single global sweep in world Z, shared by everything being printed: a short part finishes early and sits there while a tall one keeps growing. That is not a bug — it is a printer.
The layer height and the layer count are both shared, computed from the global sweep. Each model's own measurements are that sweep expressed in its local space, so objects at different heights and scales still line up.
Drift is checked on every redraw. Moving a part, or preparing another one later, leaves the rest on the old sweep — and the panel offers Re-sync the Print when that happens, which also rebuilds their supports and re-applies the materials.
Dirty meshes: the repair and the solver
The layer-by-layer cut is a boolean, and real production meshes are not clean. Counting open edges is not enough: a mesh can be several closed pieces that interpenetrate, which is what most character kitbashes are. So three things are measured at Prepare time — open edges, pieces and crossing faces — and the print is taken from a repaired hidden copy. Your original mesh is never modified.
| Automatic | Closes the mesh if it has open edges, then resolves overlaps if it still crosses itself. Does nothing if there is nothing to fix — and never remeshes, because that changes your topology. |
| Clean | Welds vertices, dissolves degenerate faces, fills holes, recalculates normals. Keeps the shape. |
| Resolve Overlaps | Unions the mesh with itself so interpenetrating pieces become one surface. Keeps the topology — and this is where the speed is: self-intersection is a property of the source mesh, so resolving it once takes it off the per-frame bill. |
| Remesh | Voxel remesh: always comes out closed, but changes the topology. |
| Do Not Repair | Prints the mesh as it is. |
The repair is verified rather than trusted — if it does not come out as one piece without crossings, the result is discarded. The solver is then chosen from the diagnosis of the mesh that is actually cut, and the cut is checked over seven frames spread across the range for all three ways a boolean can fail. If one fires, the other viable solvers are tried and a warning says which frame failed and with what.
Troubleshooting
I pressed Prepare Print and nothing happens.
Check that Model points at a mesh. The button reports the error in the status bar if it does not.
The model disappears halfway through the animation.
The mesh is not closed and the solver stopped cutting. Set Maintenance > Repair Mesh to Automatic or Clean and prepare again.
The part looks finished long before the animation ends.
The boolean is not subtracting anything, which is what a self-crossing mesh does. Maintenance will be reporting more than one piece or some crossing faces; set Repair Mesh to Automatic or Resolve Overlaps and prepare again.
Why is my scene slow all of a sudden?
If Maintenance reports crossing faces or more than one piece, your mesh self-intersects, and unless the repair resolved it the cut is paying for it on every frame. The box in Maintenance tells you which of the two you are in: a checkmark means the repair resolved the overlaps and the cut runs at full speed, an error means Self Intersection is on.
The part comes out white, or a support branch's layers look tilted.
Both mean the node group or materials are out of date or have been edited: Maintenance > Rebuild Node Group and Materials.
The glowing hot layer is missing.
The band's nodes live in the material, and the material is shared, so its values are read from the scene by pointer. If that scene was deleted — or the material was appended from another file — the pointer goes dead and the band evaluates to zero. From v1.16.2 this is repaired automatically when the file opens and when you prepare; on an older file, pressing Prepare Print once restores it.
Can I use my own material, my own nozzle, my own camera?
All three. The hot band is injected into your material and removed again cleanly, leaving your node tree as it was; the Nozzle field drives whatever object you point it at; and My Camera drives your camera with the rig, keeping its lens.
Does it export G-code or slice for a real printer?
No. This is an animation and rendering tool. It reproduces the look of slicer output; it is not a slicer, and pointing it at a file tells you nothing about how that file will actually print.
Known limits
- Infill Passes moves the nozzle but does not deposit a bead, and is not clipped against the contour. It only affects the in-graph nozzle.
- Support parameters are scene-wide: changing one marks every mounted model out of date, not just the one in the panel.
- With supports visible the scene goes past 100k vertices. Support geometry itself is close to free, so if Cycles is slow the cost is almost certainly the cut, not the supports.
- A baked nozzle path weighs layers × Path Detail keyframes per axis. On a long print at high detail that is a lot of keyframes in the file.
- It is not a slicer: no G-code, no real print times, no machine profiles.
Interface language
English, with a full Spanish translation registered through Blender's own translation system — enable it in Preferences > Interface > Translation by choosing Spanish. Panels, parameters, tooltips and operator messages are all covered.
One thing that catches people out: choosing Spanish is not enough on its own. In that same panel, Affect has separate checkboxes for Interface, Tooltips and New Data. With Interface unticked the language is set but every label still draws in English.
Support
Questions, bug reports and feature requests through the message system on this product page, in English or Spanish.
To get a useful answer on the first reply, please include your Blender version, your operating system, what you pressed and what happened — and, if you can, the .blend file or a screenshot of the panel with the version number visible in its header.
The add-on is free software under the GNU GPL v3 or later. The name FDM Print Animator, the studio name DejaVu and the branding are not licensed with the code — see NOTICE.md in the download.
 Included
Includes 12 months of
- Support from DejaVu
- Product updates
Extend this product’s Support Period +12 months: 50% of product price
Have questions before purchasing?
Login to message
| Blender Extension Compatible | Yes |
| Dev Fund Contributor | |
| Published | about 2 months ago |
| Blender Version | 5.2 |
| Extension Type | Add-on |
| Render Engine Used | Cycles, Eevee |
| License | GPL |

Discover more products like this
print reveal timelapse reels · marketing procedural material supports STL slicer product-visualization product animation social-media