FormArmorPro
 SeongminBjorkArt


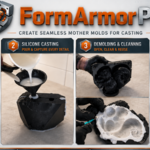
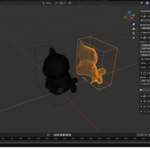
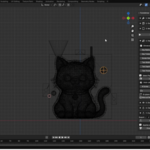
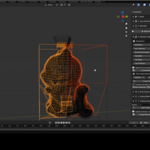
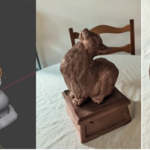
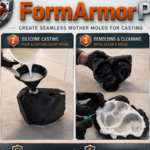
FormArmor Pro is a Blender add-on for automated mold generation workflows, including shell creation, mold splitting, hardware placement, draft analysis, casting helpers, and batch STL export.
Version: 5.0.0
Compatibility:
- Blender 4.2.0 and newer for extension packaging
- Legacy add-on install remains supported through bl_info in __init__.py
Installation:
1. Open Blender.
2. Go to Get Extensions.
3. Choose Install from Disk.
4. Select the packaged ZIP file.
5. Enable FormArmor Pro.
License:
GPL-3.0-or-later
_________________
FormArmor Pro Documentation
Overview
FormArmor Pro is a Blender add-on for automated mold generation workflows. It includes tools for shell creation, mold splitting, hardware placement, draft analysis, casting helpers, silicone volume estimation, and batch STL export.
The add-on is designed to help prepare mold parts directly inside Blender for workflows such as silicone casting, 3D printed mold forms, prop making, sculpture, product prototyping, and small-scale production.
Version
5.0.0
Compatibility
- Blender 4.2.0 or newer
-
Extension packaging support through
blender_manifest.toml -
Legacy add-on information is also included through
bl_infoin__init__.py
Installation
- Open Blender.
- Go to Get Extensions.
- Choose Install from Disk.
- Select the packaged ZIP file.
- Enable FormArmor Pro.
- Open the 3D Viewport.
- Press N to open the side panel.
- Go to the FormArmor tab.
The add-on is located at:
View3D → N-Panel → FormArmor
Main Workflow
1. Prepare Your Model
Before using FormArmor Pro, select the mesh object you want to create a mold from.
For best results:
- Apply scale and rotation.
- Use clean mesh geometry when possible.
- Remove unnecessary loose geometry.
- Check that the object has a reasonable real-world scale.
- Save your Blender file before running mold generation tools.
Complex, non-manifold, or very high-poly meshes may require cleanup before mold generation.
2. Setup & Control
Use the setup tools before building the mold.
Available tools include:
- Run Preflight Check
- Mesh optimization options
- Scan cleanup options
- Cleanup resolution controls
The preflight check helps identify potential problems before generating the mold.
3. Outer Shell & Dimensions
This section controls the generated mold shell.
Available settings include:
- Outer shell type
- Clearance
- Wall thickness
- Open base option
- Bottom trim
- Boolean solver settings
Clearance controls the space between the original object and the mold shell.
Wall Thickness controls the thickness of the generated mold body.
Adjust these values depending on the size of your model, the intended material, and the strength needed for the final mold.
4. Mold Split
FormArmor Pro supports different mold split workflows.
Available options include:
- No split
- Automatic split
- Manual split using cut planes
For automatic splitting, you can define the number of parts on the X, Y, and Z axes.
For manual splitting:
- Click Add Cut Plane.
- Position the cut plane where you want the mold to separate.
- Build the mold.
Additional post-editing tools include:
- Split Selected Part
- Merge Selected Parts
These tools can be used to refine mold parts after the initial generation.
5. Build Mold
After setting up the shell and split options, click:
BUILD MOLD
The add-on will generate the mold geometry based on the selected object and the chosen settings.
Processing time depends on model complexity, mesh density, and boolean settings.
6. Hardware: Tabs & Keys
This section helps create alignment and assembly features for the mold.
Available features include:
- Registration keys
- Screw tabs
- Automatic hardware placement
- Manual placement using the 3D cursor
Adjustable settings include:
- Key size
- Key tolerance
- Hole diameter
- Tab size
- Tab depth
- Tab thickness
- Automatic tab count
- Automatic key count
Recommended workflow:
- Select the mold parts.
- Use Close Mold Parts.
- Use Auto-Place Hardware.
- Manually add keys or screw tabs if needed.
Registration keys help mold parts align correctly. Screw tabs can help with assembly and clamping.
7. Draft Angle Analysis
The draft analysis tool helps identify areas that may be difficult to release from the mold.
Available settings include:
- Pull axis
- Draft angle limit
- Intelligent analysis
- Silicone flexibility bonus
Click:
Draft Angle Analysis
The analysis uses a color guide:
- Red: undercut or high-risk area
- Yellow: borderline area
- Green: safer draft angle
Use Clear Draft Analysis to remove the analysis display.
Draft analysis is intended as a visual guide. Always review the model manually before real-world production.
8. Casting: Pouring Basin & Vents
This section adds basic casting helper geometry.
Available tools include:
- Pouring basin
- Smart vents
- Silicone volume calculation
Adjustable pouring basin settings include:
- Top radius
- Bottom radius
- Depth
- Embed amount
Adjustable vent settings include:
- Vent count
- Vent diameter
- Vent depth
- Vent embed
- Vent margin
Click:
Add Pouring Basin & Vents
to add the casting helper geometry.
Click:
Calculate Silicone Volume
to estimate the silicone volume.
The silicone volume estimate is only an approximation. Always allow extra material when preparing real casting work.
9. Finalize & Export
This section is used to prepare and export the generated mold parts.
Available tools include:
- Export directory selection
- Batch STL export
- Finalize mold
Choose an export folder, then click:
Batch Export STL
to export the generated mold parts as STL files.
Use:
Finalize Mold
only when you are ready to permanently apply and lock the boolean operations.
Finalizing is destructive. Save a backup of your Blender file before using this command.
Important Notes
FormArmor Pro relies on Blender’s native geometry and boolean systems. Because of this, results can vary depending on the input model.
The developer cannot guarantee that every 3D model will generate a perfect mold without artifacts, errors, or crashes. Complex, non-manifold, or excessively high-poly meshes may cause unexpected behavior.
Users should always verify:
- Scale
- Draft angles
- Wall thickness
- Hardware placement
- Split lines
- Venting
- Estimated silicone volume
- Exported STL files
before 3D printing, casting, or using physical materials.
Troubleshooting
The add-on does not appear
Make sure FormArmor Pro is enabled in Blender. Open the 3D Viewport, press N, and look for the FormArmor tab.
The mold does not build correctly
Try the following:
- Apply scale and rotation.
- Clean the mesh.
- Reduce mesh density.
- Increase clearance.
- Increase wall thickness.
- Try another boolean solver.
- Run the preflight check before building.
Boolean operations fail
Boolean operations may fail on complex, messy, non-manifold, or extremely dense meshes. Clean or simplify the model and try again.
Hardware placement does not work as expected
Check that the correct mold parts are selected. You can also place registration keys and screw tabs manually using the 3D cursor.
Export does not work
Make sure an export directory is selected and that Blender has permission to write files to that location.
License
FormArmor Pro is licensed under:
GPL-3.0-or-later
The full license text is included in the package.
Disclaimer
This software is provided as is, without warranty of any kind.
The user is responsible for verifying the generated mold design before physical manufacturing. This includes checking scale, printability, draft angles, hardware placement, material volume, and suitability for the intended casting process.
Have questions about this product?
Login to message
| Blender Extension Compatible | Yes |
| Sales | 10+ |
| Dev Fund Contributor | |
| Published | 5 months ago |
| Blender Version | 4.2 - 5.1 |
| Extension Type | Add-on |
| Render Engine Used | Blender-Internal, Cycles, Eevee |
| License | GPL |

Discover more products like this
silicone 3dprinting prototyping STLExport generative 3dprint casting 3DPrintingProjects mold making #propmodeling ProductDesign Sculpture