Hide & Seek V2.0
 CreateVisions


Hide & Seek 2.0 Documentation
Overview
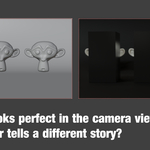
Hide & Seek 2.0 is a completely redesigned add-on that gives artists precise control over object visibility in complex scenes. It moves beyond simply finding hidden objects by introducing a powerful filtering system that lets you see exactly why an object is hidden. Streamline your workflow for finding, previewing, and managing object visibility—without ever getting lost in the Outliner.
Version 2.0 is a major upgrade focused on precision, workflow, and scene management.
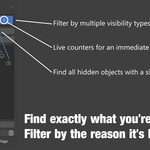
- Powerful Filter Engine: Filter hidden objects separately by Viewport Visibility, Viewport Disabling, and Render Visibility.
- Live Counters: The UI now shows live counts for each category, giving you an immediate overview of your scene.
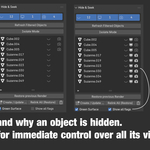
- Direct Toggles: Instead of a single "unhide" button, you can now toggle each visibility state individually for every object in the list.
- WYSIWYG Rendering: A new "Match Render to Viewport" button syncs your render visibility to match exactly what you see, with a one-click restore function.
- Standalone Collections (Unlink & Relink): A new workflow to create a collection of filtered objects and then temporarily isolate it from the rest of the scene structure for ultimate focus.
- Show All Flags Option: A new toggle to display all visibility icons for every item in the list, giving you maximum control at a glance.
Installation
- Download the
.zipfile of the add-on. - Open (version 4.4 or newer).
- Go to Edit → Preferences → Add-ons.
- Click Install..., select the
.zipfile, and confirm. - Enable the add-on by checking the box next to Hide & Seek.
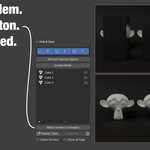
You can find the add-on in the 3D Viewport's side panel (press N to open) under the "Hide & Seek" tab. The top of the panel features the new filter controls:
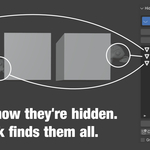
- Eye Icon: Toggles the filter for objects hidden in the viewport (standard hide).
- Monitor Icon: Toggles the filter for objects disabled in the viewport (excluded from selections/simulations).
- Camera Icon: Toggles the filter for objects disabled in renders.
Each button displays a live count of objects in that category. Below these filters is the Refresh Filtered Objects button, which updates the list based on your current filter selection.
The list gives you several ways to interact with objects:
- Temporary Preview (Click the Name): Clicking an object's name temporarily inverts its hidden flags, making it visible for inspection. Clicking the name again hides it. This is perfect for quickly checking an object without permanently changing its status.
- Permanent Change (Click an Icon): To permanently change an object's visibility, click one of the icons (Eye, Monitor, or Camera) next to its name. This will toggle only that specific flag.
- Show All Flags (Checkbox): By default, the list keeps a clean look by only showing the icons relevant to why an object is hidden. If you need full control, enable the "Show all flags" checkbox at the bottom of the panel. This will display all three icons for every object in the list, allowing you to edit any visibility state at any time.
Using Isolate Mode
Isolate Mode allows you to focus on a single object by hiding everything else. The workflow is simple:
- Click the main "Isolate Mode" button. The button will gain a visual highlight, indicating the mode is active.
- Now, simply click the name of any object in the list to make it the only visible object in the scene.
- Click on another object's name to switch the isolation to that object.
- Click the "Isolate Mode (ON)" button again to exit and restore the previous visibility state of your scene.
WYSIWYG Rendering: Match Render to Viewport
This powerful feature solves the common problem of your final render not matching what you see in the viewport.
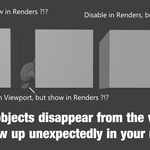
- The Problem: Objects can be disabled in the viewport (Monitor icon) but still be enabled for rendering. This leads to unexpected objects appearing in your final image.
- Match render to Viewport: Click this button to instantly sync the render visibility of all objects to their current viewport status. If an object is invisible in your viewport (for any reason), it will now be disabled in the render.
- Restore previous Render: After clicking the button, its label changes. Clicking it again will revert all render visibility settings to the state they were in before you clicked "Match." It is a completely safe, non-destructive operation.
Advanced Collection Management
This feature set provides a complete workflow for organizing and isolating groups of objects without permanently altering your scene structure.
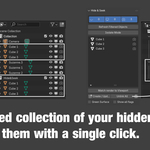
- Create / Update Collection: This button creates a new collection named "Hide&Seek" containing all objects currently shown in the list. If you change your filters and press the button again, the collection's contents will be updated to match.
-
Unlink All / Relink All (Toggle): This is the second step for advanced organization.
- After creating the collection, clicking "Unlink All" will temporarily remove the objects from all their original collections. They will now exist only in the "Hide&Seek" collection, giving you a perfectly clean Outliner to work in.
- Clicking the button again (now labeled "Relink All (Restore)") will restore all the original collection links, putting everything back exactly where it was.
- Delete Collection (Trash Icon): Removes the "Hide&Seek" collection from your scene.
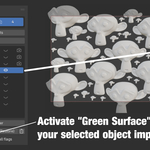
- Green Surface (Checkbox): Highlights any previewed or isolated object with a bright green material, making it easy to spot in dense scenes.
Best Practices
- Before starting a final render, click the "Match render to Viewport" button to guarantee that what you see is what you get. If you need to revert the changes, simply click "Restore previous Render."
- Use the "Create/Update Collection" feature to apply modifiers or materials to multiple hidden objects at once.
- For maximum focus in a complex scene, use the Unlink All feature after creating a collection. This lets you work on a specific set of assets (e.g., all characters, all lights) in a completely clean Outliner without affecting your main scene organization.
- Use Isolate Mode for performance-intensive tasks like sculpting or texture painting on a single asset within a large scene.
- The temporary preview (clicking the name) is ideal for quickly identifying which object is which without committing to any changes.
Support & Contact
For help, suggestions, or feature requests, please get in touch:
or reach out via the Superhive Marketplace.
Have questions about this product?
Login to message
| Blender Extension Compatible | Yes |
| Sales | 10 |
| Dev Fund Contributor | |
| Published | about 1 year ago |
| Blender Version | 4.4 - 5.2 |
| Extension Type | Add-on |
| Render Engine Used | Cycles, Eevee, Octane |
| License | GPL |
Discover more products like this
Hide&Seek hide HideandSeek Workflow outliner visibility render visibility blender addon Scene Management Seek organization Isolate