Light It Up Pro – Blender Lighting Presets & Studio Suite: 39 Rigs, Backdrops, Gobos, IES, Fog & Light Beams
 Rasheed's Edit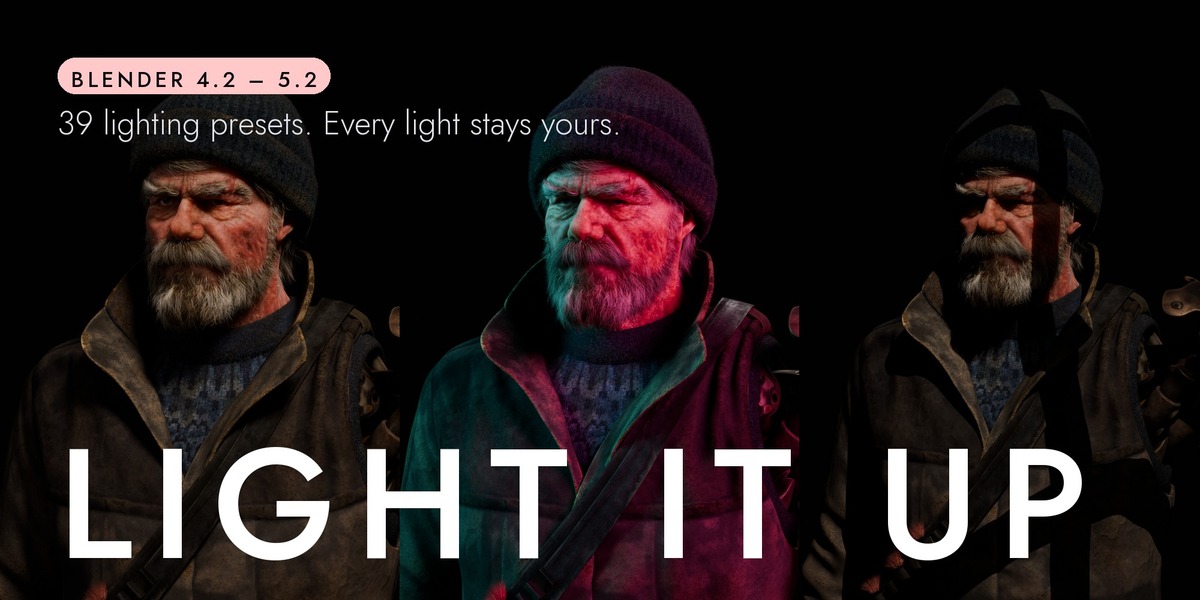

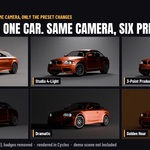
Where to find it
After installing, the panel lives in the Properties editor → Render tab → Light It Up. It is a normal Blender panel, so it sits with your render settings rather than in a floating window or a separate workspace. It is not in the 3D viewport's N panel.
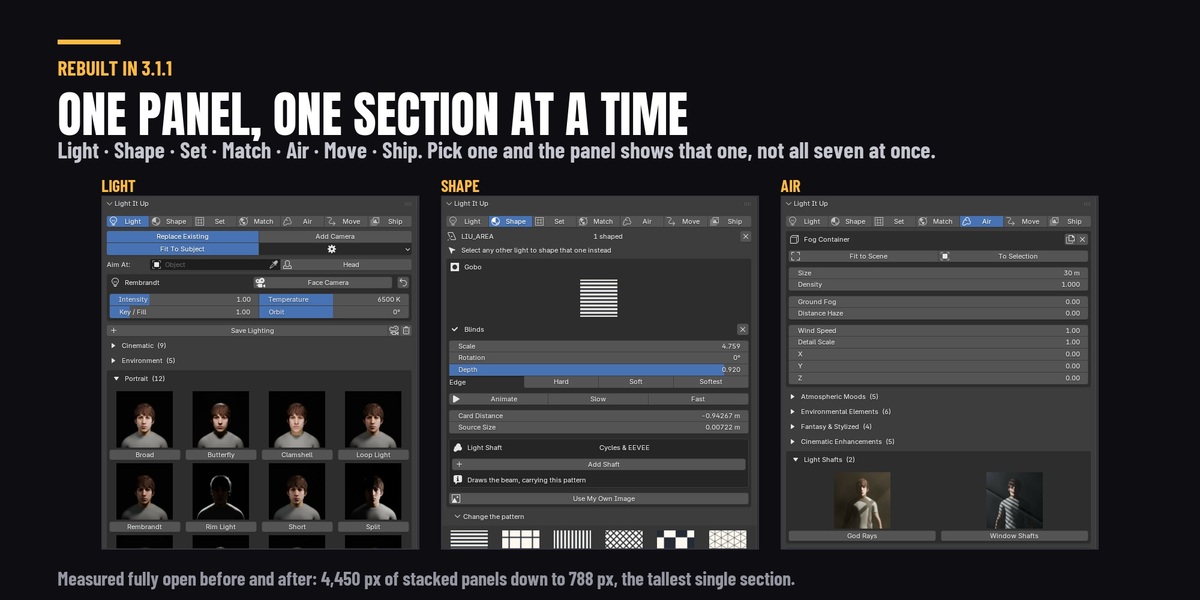
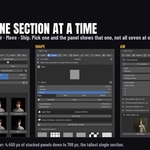
The panel shows one section at a time. Across the top is a row of seven: Light, Shape, Set, Match, Air, Move, Ship. Click a name and the panel below becomes that section. They are the order you would actually work in — light it, shape it, stand it on something, match a look, fill the air, move it, ship it.
This replaced a stack of seven panels that were all in the same tab at once. Fully open with thumbnails that stack measured 4,450 pixels tall; the tallest single section is 788.
Installing
If you are upgrading from version 2, remove it first. Blender identifies an add-on by its internal module name, and version 3's name is different — so installing version 3 puts a second add-on beside the old one rather than replacing it. If version 2 is still switched on, you will keep seeing the old panel and reasonably conclude the update did nothing.
- Go to Edit → Preferences → Add-ons.
- Search for Light It Up. If an older Light It Up Pro is listed, expand it, untick it, and press Remove.
- Install the version 3 zip with Install from Disk, then enable it.
- Restart Blender.
Version 3 also checks for you. If it finds the old one still enabled it says so at the top of the panel and offers a one-click button to switch it off.
Your first rig, in about thirty seconds
- Select the object you want lit.
- Open Properties → Render → Light It Up, on the Light section.
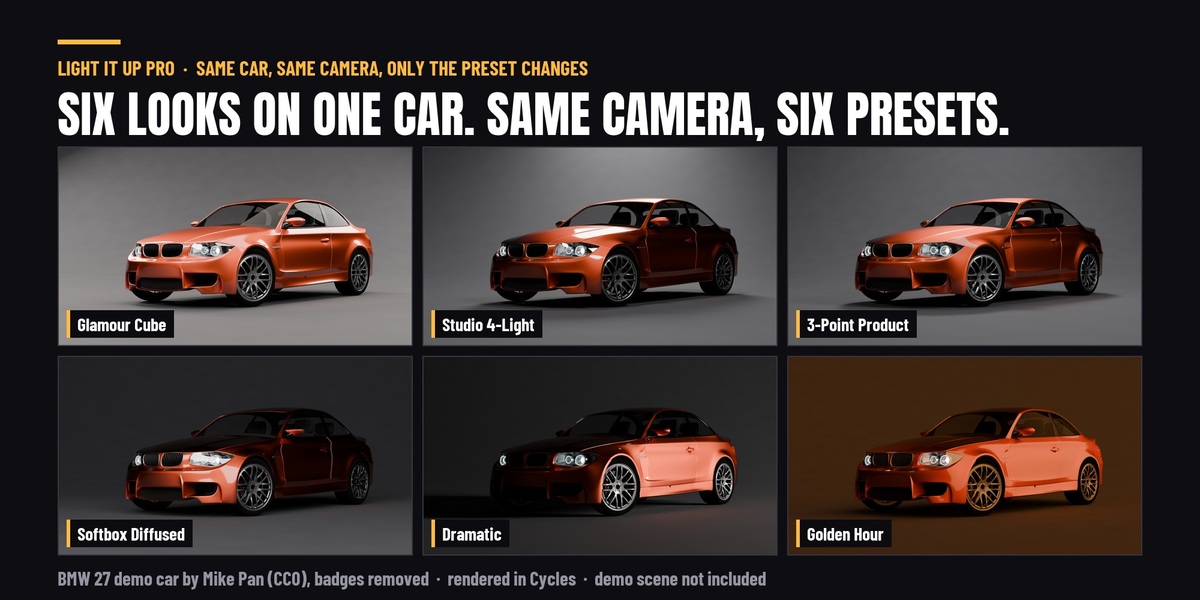
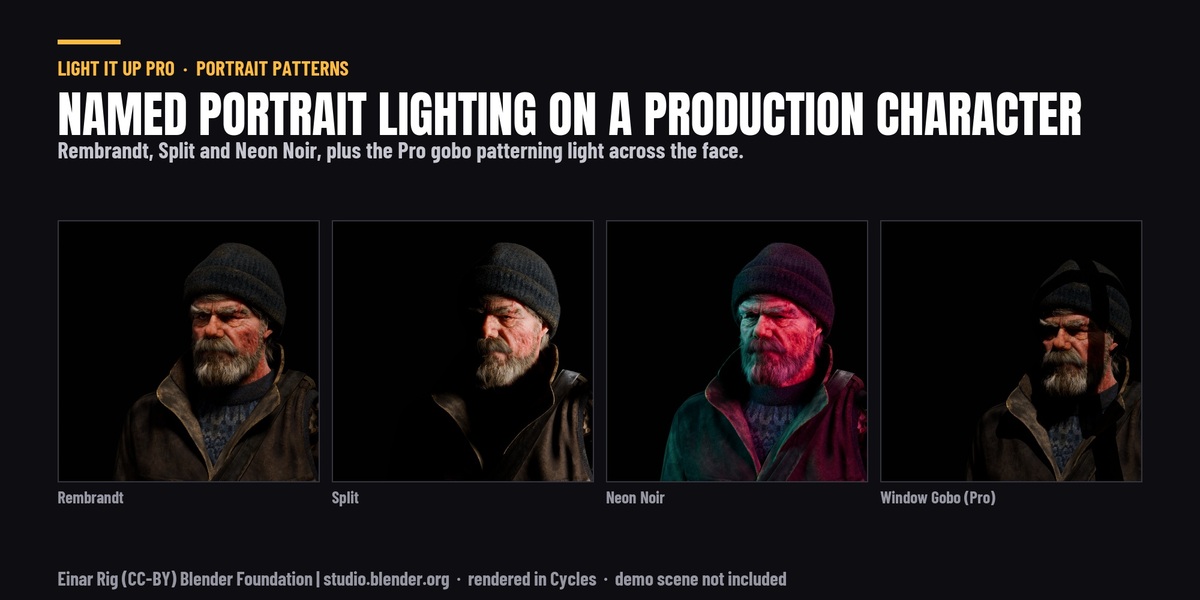
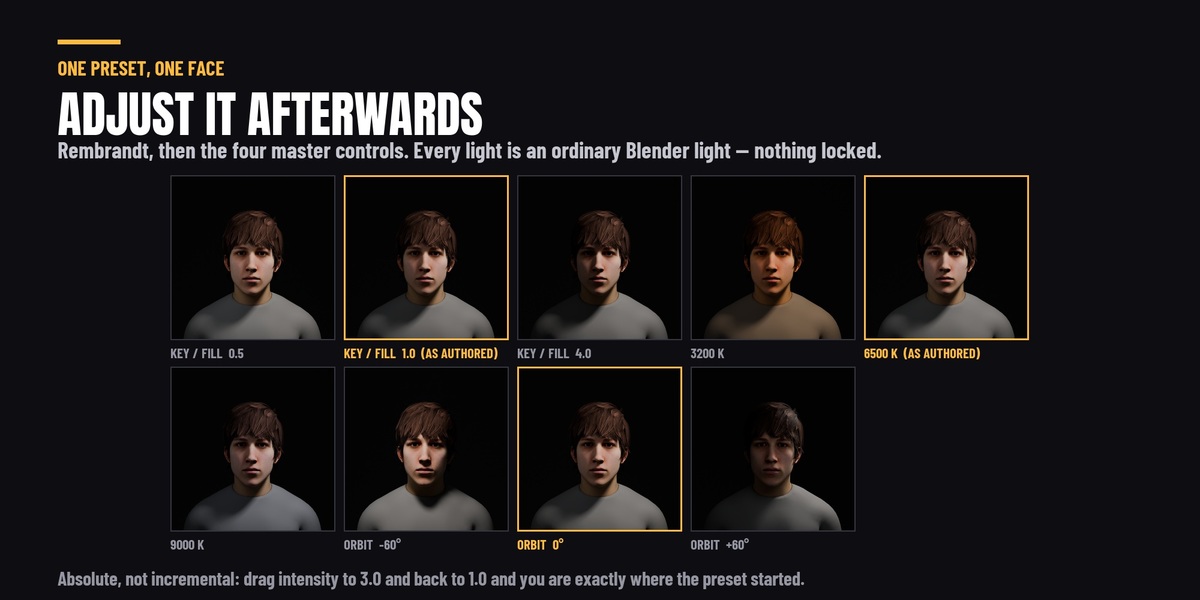
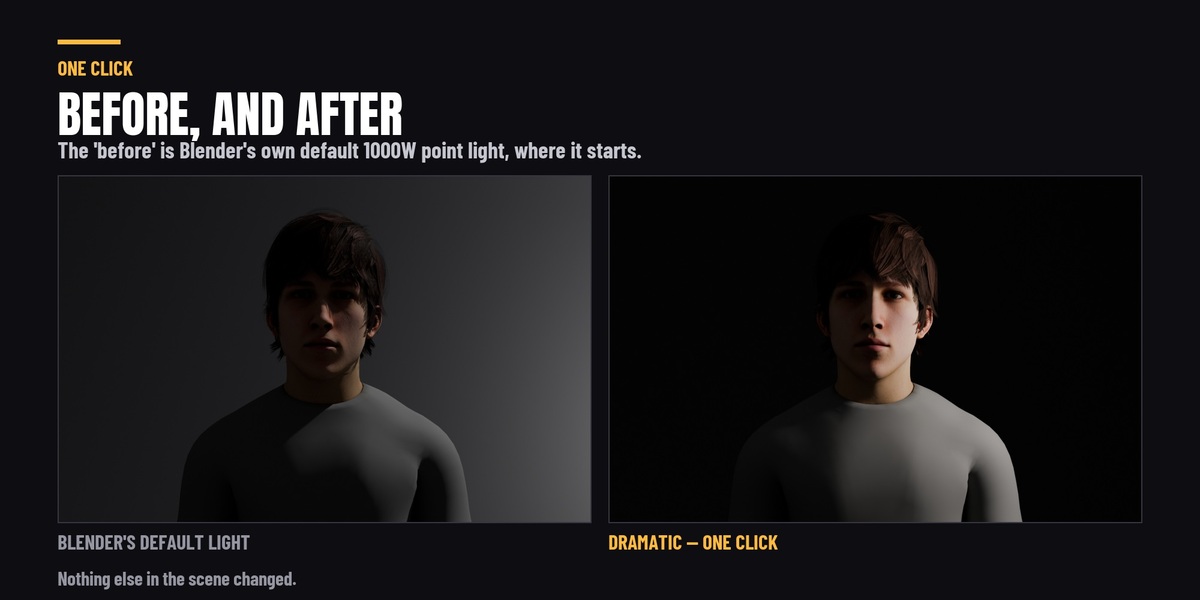
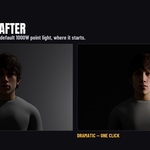
- Open a category and click a preset — try Rembrandt under Portrait.
- Look through your camera. Then drag Key / Fill to taste.
That is the whole loop. Everything else in the add-on is a variation on it.
The four options at the top of Light
These decide what happens the next time you click a preset.
- Replace Existing: on by default. Click through the presets and each one swaps out the last. Turn it off and presets stack instead: a key rig and a rim rig become two separate rigs in one scene, each with its own controls.
- Add Camera — off by default. A lighting tool has no business taking over a shot you have already framed, so it only creates a camera if you ask.
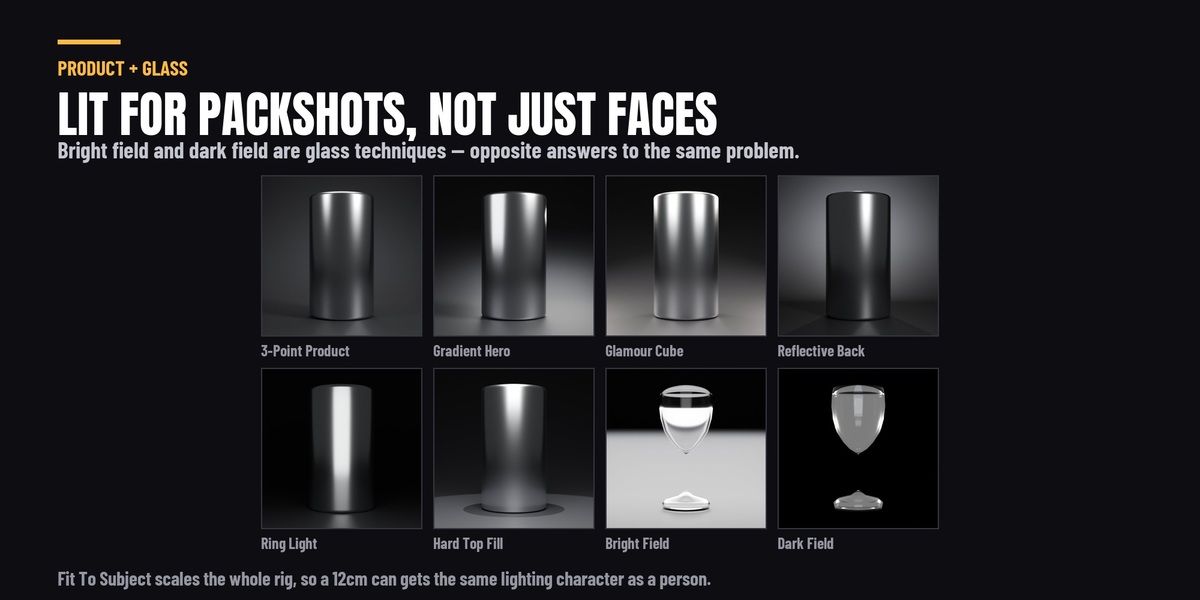
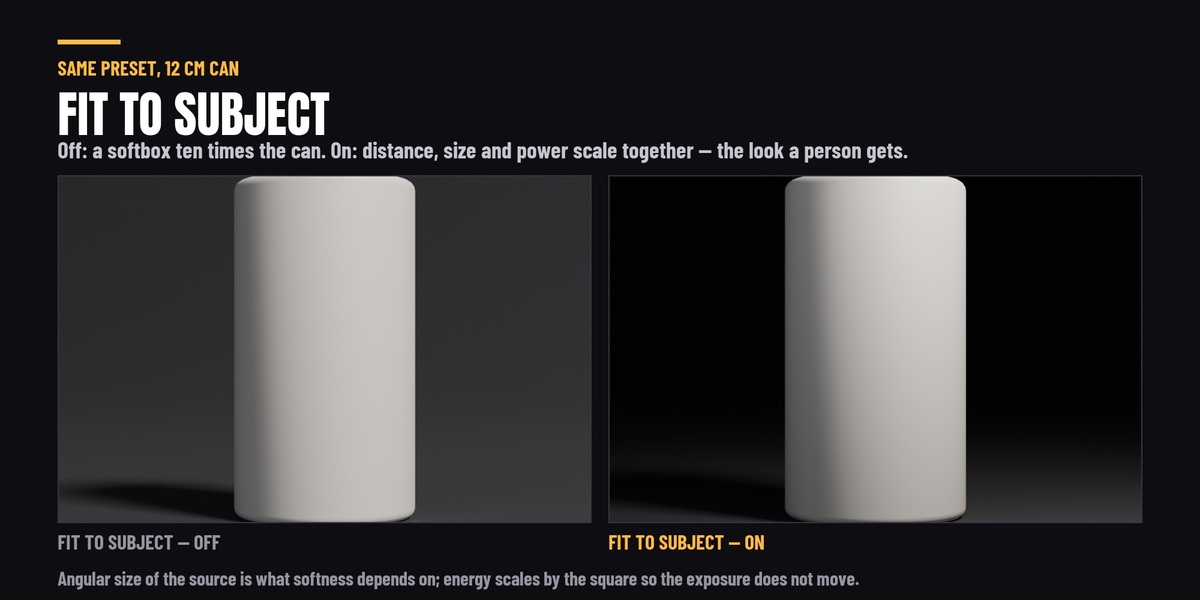
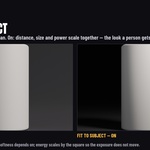
- Fit To Subject — on by default. Scales the whole rig to the size of the thing you selected. Preset distances are authored for a human-sized subject, so without this a 12 cm product is lit by a softbox ten times its own size and comes out flat. Turn it off when lighting a whole environment, or when you want one rig to serve several objects at once.
- Show Thumbnails — on by default, in the gear popover beside the options, and it governs both the lighting and the volumetric libraries. Turn it off for a compact list of names once you know the presets.
Pointing the lights at a face
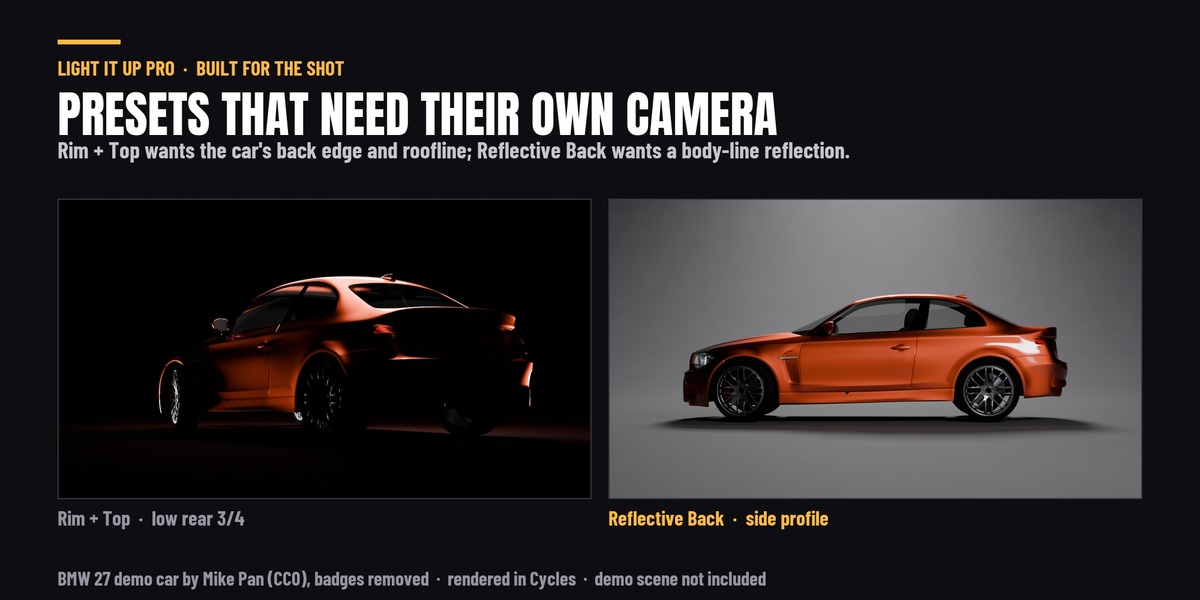
A rig centres on the middle of whatever you selected, which is right for a product and wrong for a person: the centre of a standing character is its chest, so a portrait pattern lights the torso rather than the face.
Select your character and press Aim At Head, next to the Aim At field. It finds the armature, finds the head bone and drops a small target there, and every rig you build afterwards points at it. It works whether you select the armature or any mesh belonging to the character.
The target is an ordinary empty — move it wherever you actually want the light to fall. You can also skip the button entirely and put any object in the Aim At field. Clear the field with the X to go back to aiming at the centre of the selection.
The master controls
Select any light in a rig, or the rig's root empty, and four sliders appear for that rig:
- Intensity — the whole rig up or down, holding the ratio between lights.
- Temperature — Kelvin. 6500 K is neutral and leaves the preset's own colours untouched; lower is warmer, higher is cooler.
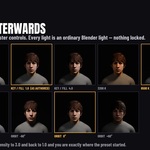
- Key / Fill — the contrast dial. 1.0 is the preset as authored; higher darkens the fills and deepens the shadows.
- Orbit — swings the whole rig around the subject.
They are absolute, not incremental. Every light remembers the values the preset gave it, and each slider recomputes from those. Take Intensity to 3.0 and back to 1.0 and you are exactly where you started — no drift, however many times you go round. The circular arrow beside the rig's name resets all four.
Two rigs in one scene are independent. Select a light from either to edit that one.
Saving your own presets
Light something, adjust it however you like, then press Save Lighting and give it a name. It appears in the panel under Your Presets, alongside the shipped ones, and applies to any object the same way. The same works for fog, from the Air section.
Hidden lights are left out. Hide a few lights, look at what is left, and save that — what you can see is what gets saved, and the add-on tells you how many it skipped. Lighting snapshots work the other way round on purpose: they remember which lights were hidden rather than dropping them, so switching between versions never loses a light you might want back.
Where they are kept, and the one setting worth changing. Saved presets are stored outside the add-on folder, so an update cannot delete them. By default that is Blender's own writable folder for this extension, which is per Blender version — so a preset saved in 4.5 is not visible in 5.2.
If you want them to follow you across versions, set Presets Folder in the add-on preferences to a folder of your own. It is a plain JSON file — back it up, or copy it to another machine, like any other file. The add-on defaults to Blender's location because an add-on choosing a spot on your disk by itself is not something the extensions platform permits; writing where you pointed is a different thing.
Shape — gobos, light shafts, IES profiles and softbox modifiers
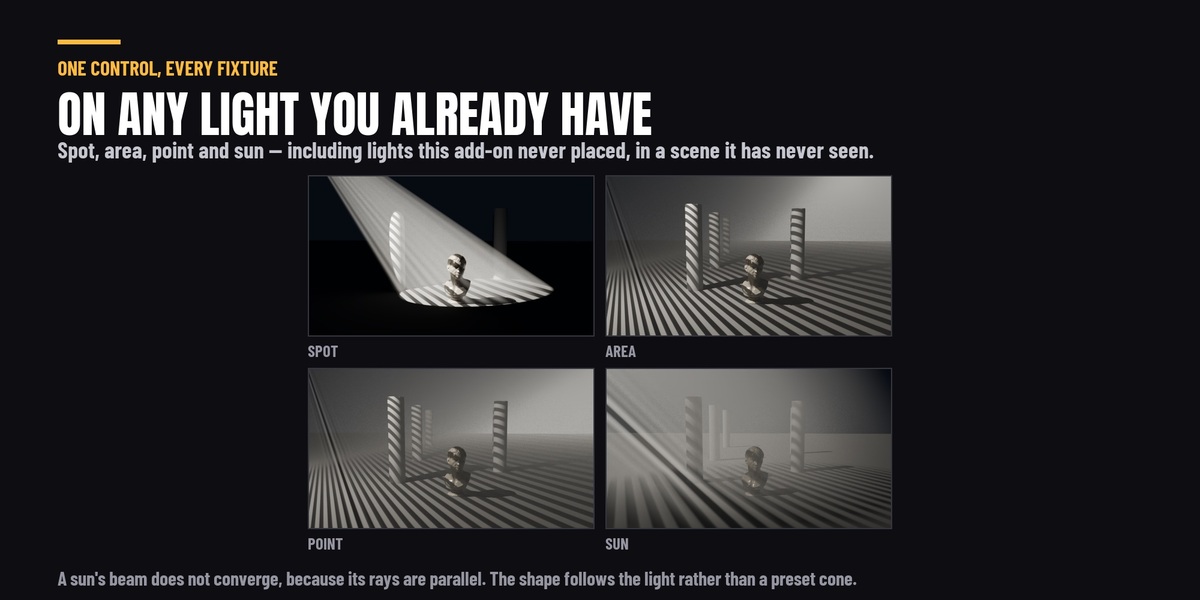
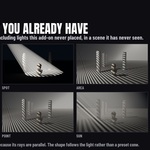
The Shape section acts on one light at a time: the light you have selected, or the active rig's key light if you have not selected one. It works on any light in your scene — one this add-on placed, or one you added by hand in a file that has never seen it. The panel names the light it is about to change, so select a different light to shape that one instead.
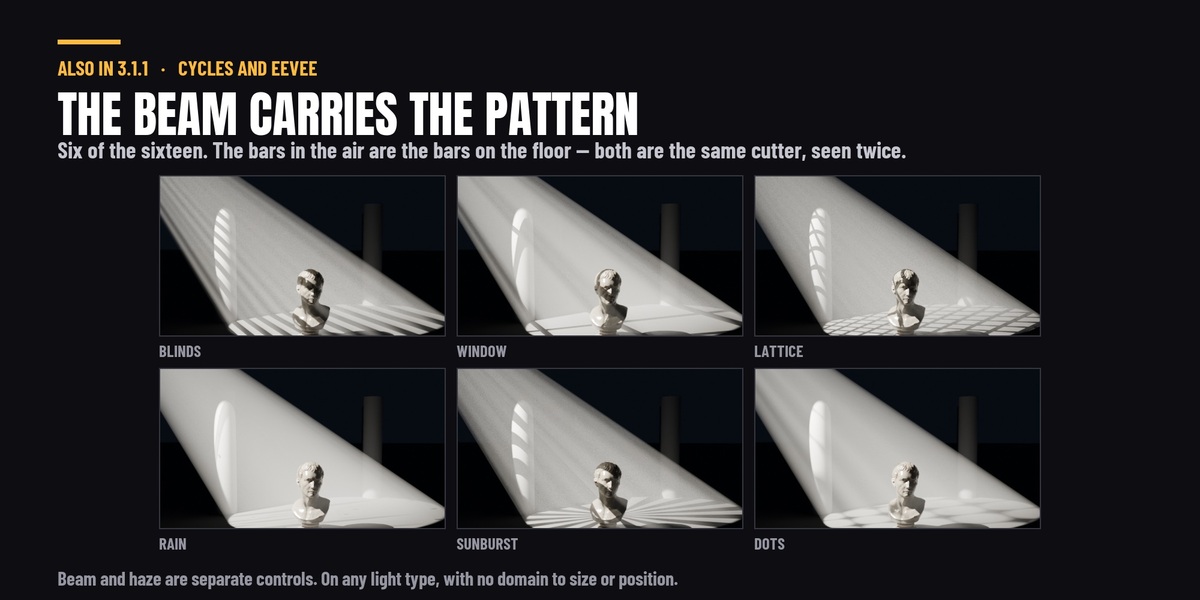
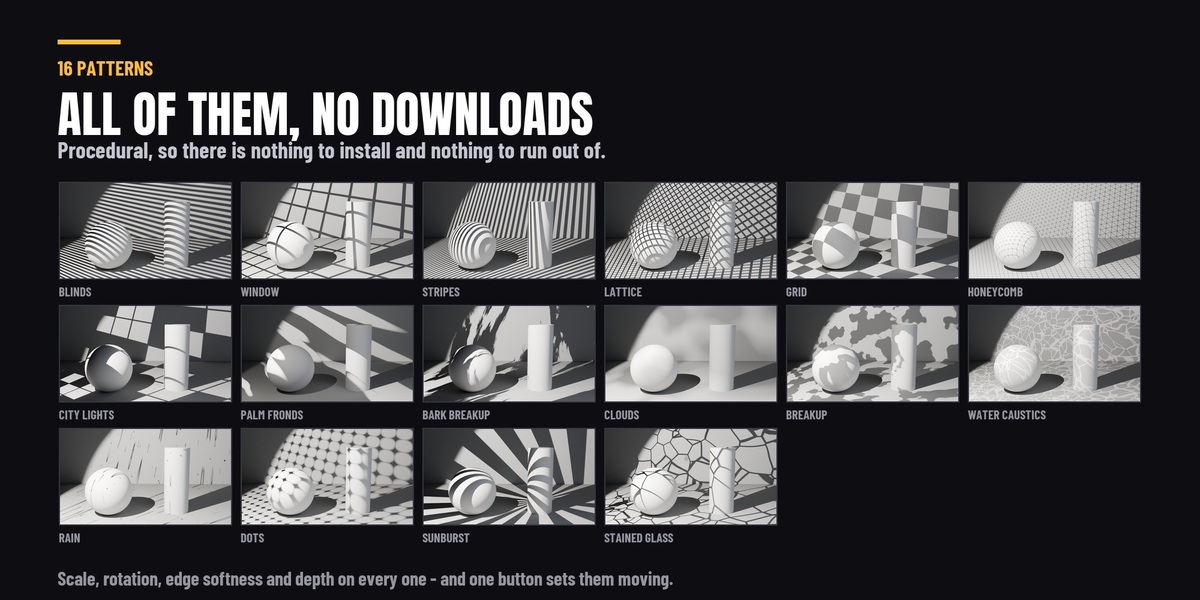
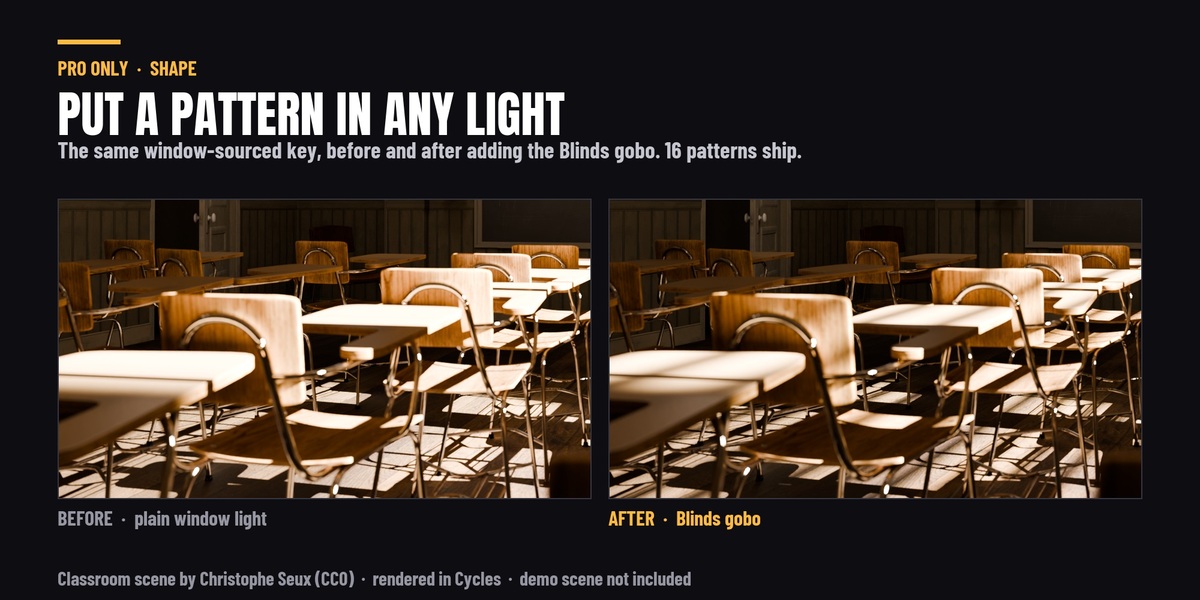
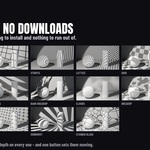
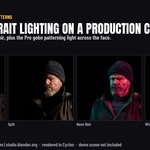
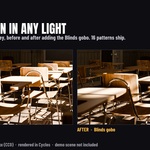
Gobos. Press Add Gobo and pick one of the sixteen patterns; it is projected from that light. They work in EEVEE as well as Cycles, which is worth explaining because most gobo tools do not: EEVEE cannot read a texture wired into a light at all. So instead of a light texture, the add-on places a real cutter in front of the lamp and hides it from the camera — the same trick a film crew uses with a piece of black card. Both renderers understand a shadow.
Adding a gobo makes the light harder, on purpose. A cookie's shadow is only ever as sharp as the source behind it is small, so a wide softbox blurs any pattern into nothing no matter where you put the cutter. The add-on shrinks the source so the pattern reads, and tells you it did. Remove the gobo and your original size comes back — unless you have adjusted it yourself in the meantime, in which case your number is left alone.
The controls under the pattern:
- Scale and Rotation — the size and angle of the pattern where it lands.
- Depth — how dark the blocked parts go. At 1.0 the pattern blocks completely; turn it down for a gentle break-up that takes the flatness off a wall without reading as a shadow.
- Edge — Hard, Soft or Softest.
- Animate, with Slow and Fast beside it.
- Card Distance and Source Size — the cutter's position and the lamp's softness, if you want to set the falloff by hand.
The card is sized from the light's own throw — the distance to what it is aimed at — and capped at a fraction of it, so the pattern lands at the scale of your scene rather than at whatever size the texture happened to be. On a light with no parent the add-on works the throw out from a tracking constraint, or by casting a ray down the light's own axis, rather than assuming a number.
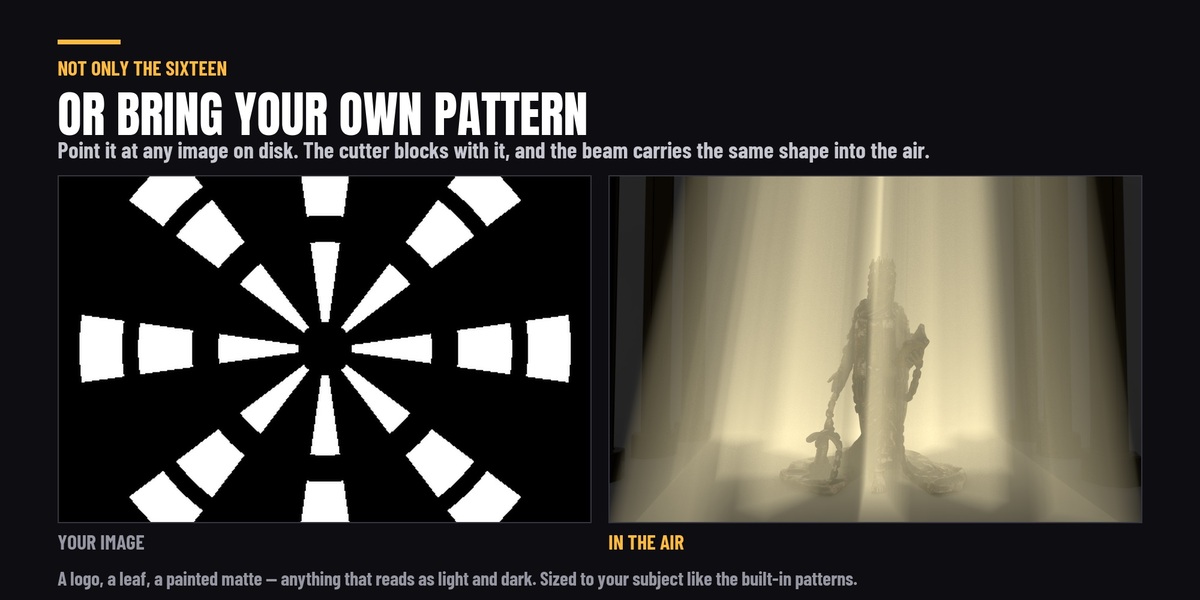
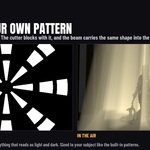
Use My Own Image. Any image on disk can be the pattern — a logo, a leaf, a painted matte, anything that reads as light and dark. It is sized to your subject the same way the built-in patterns are. If it comes out as its own negative, Flip swaps which part blocks the light; the panel names the file rather than calling it "custom".
Animate. Press Animate and the pattern moves — rain falls, palm fronds sway, cloud changes shape as if in wind, water caustics ripple. Press the pause button to hold it still again.
It is built on drivers, not keyframes. So there is no frame range to author, it runs for as long as your scene does at any frame you jump to, and stopping it removes every channel it added rather than leaving F-curves in your file for you to hunt down.
Each pattern also arrives with its own softness and depth, because one setting cannot serve all sixteen — cloud shadow is enormous and soft and only dims what it crosses, while a window mullion is hard and blocks outright. Change pattern and your placement is kept, but the new pattern's own look is applied; carrying a mullion's hard edge onto cloud shadow would hand you a cloud with a cut edge.
The cutter is a real object in your outliner, parented to its light. You can move, rotate and scale it like anything else, and switching to another pattern keeps wherever you put it.
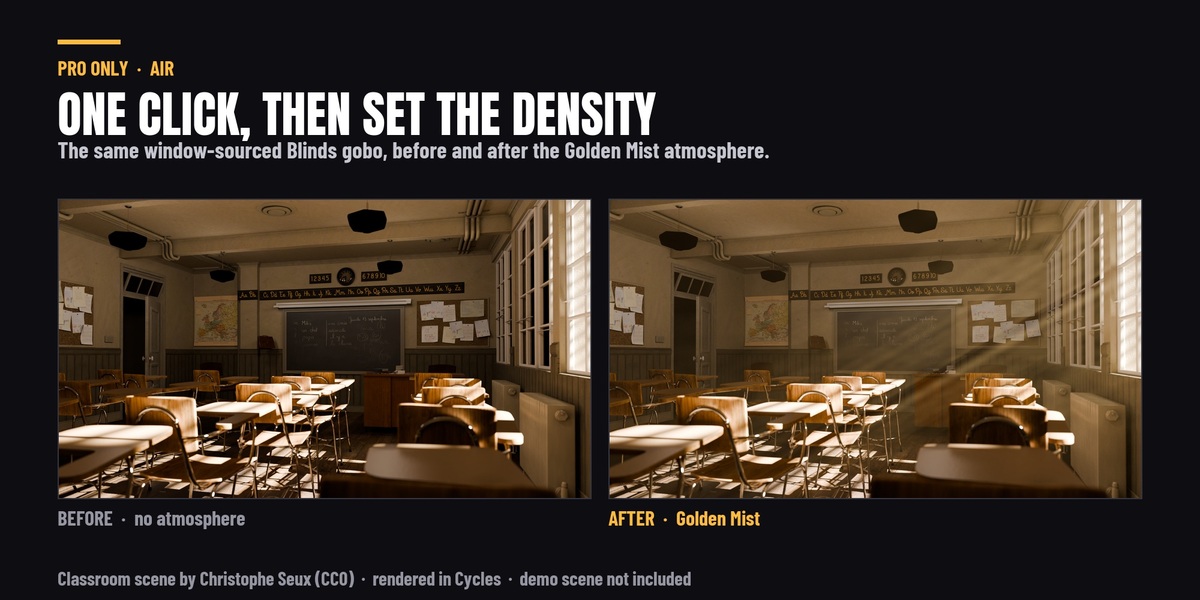
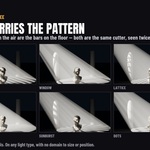
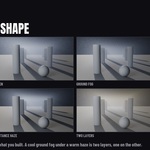
Light Shaft — the beam itself. With a gobo on the light, press Add Shaft and the beam becomes visible in the air, carrying that same pattern: the bars in the air line up with the bars on the floor, because both are the same cutter seen twice. There is no volumetric domain to size, position or keep the camera out of — the beam is drawn on the light and moves with it.
It renders in Cycles and EEVEE. Cycles resolves finer detail inside the beam; EEVEE's volumetrics are grid-based, so the beam is softer there. What lands on your surfaces is identical in both.
- Strength — how bright the beam is. This is emission per unit of length along the ray rather than a surface brightness, so the useful numbers are small: the default 0.1 is a clear beam that leaves the rest of the shot alone, and past about 0.3 the haze starts washing the pattern off your floor.
- Spread, Length and Far End — how wide it opens, how far it carries, and how it ends.
- Edge Fade and Haze — the softness of the beam's sides, and the wash around it.
- Colour — independent of the light's own.
- Shape — Cone or Rectangle. On a sun these read Cylinder and Box, and the panel says why: a sun's rays are parallel, so its beam runs straight instead of spreading. Whether a beam converges is a fact about the light; only its cross-section is yours to pick.
- Match Gobo — rebuilds the beam from the card as it is now. The beam is a copy of the card's material, so edits made directly to the card need this to carry over.
What it is not. It is not faster than volumetric fog — measured at matched beam brightness it is about 16% slower — and it is not more physically accurate. Fog is the simulation; this is art direction. What it gives you is that beam and haze are separate controls: with fog they are one knob, and making the beam brighter takes brightness off everything else in the frame.
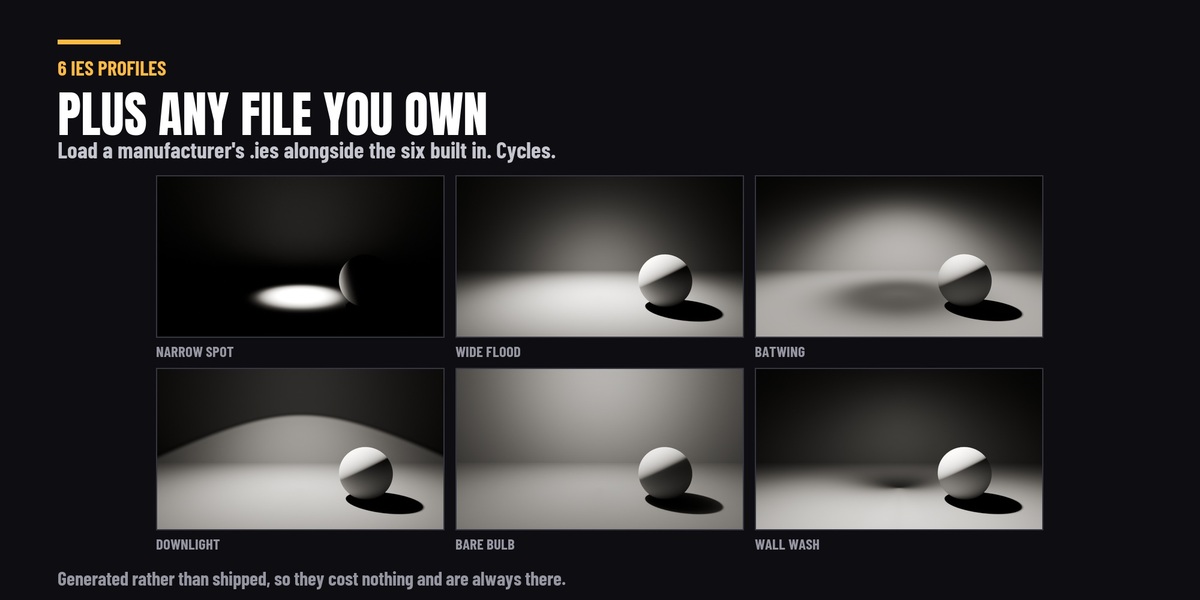
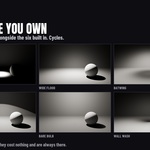
IES profiles. On a point or spot light you get six real photometric distributions — narrow spot, wide flood, batwing, downlight, bare bulb and wall wash — plus Load .ies File for anything from a manufacturer or a library. The six are generated rather than shipped, so there is nothing to download and nothing to lose.
These are Cycles only, and the panel says so beside the control rather than after you have pressed it. EEVEE has no light node trees, which is the same limitation the gobos are built to route around — but a photometric distribution has no equivalent trick available, so it is labelled instead of faked. Your light's colour and power still work exactly as before with a profile applied, so the master controls carry on driving it.
If you put a wide profile on a narrow spot, the add-on tells you the cone is what you will see. That is the usual cause of "the profile did nothing".
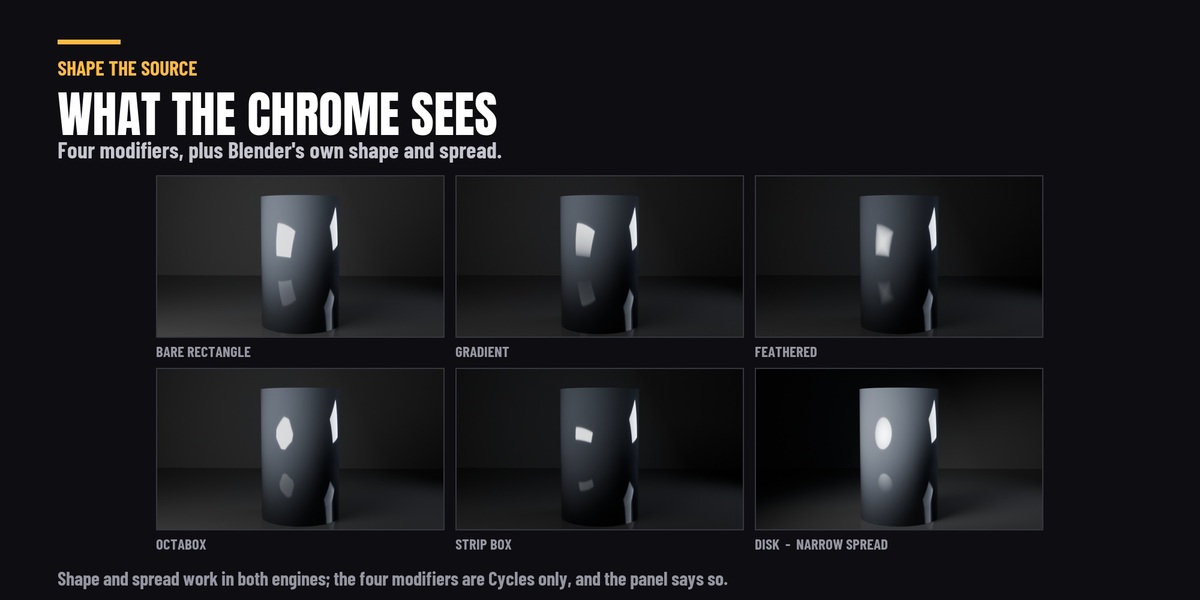
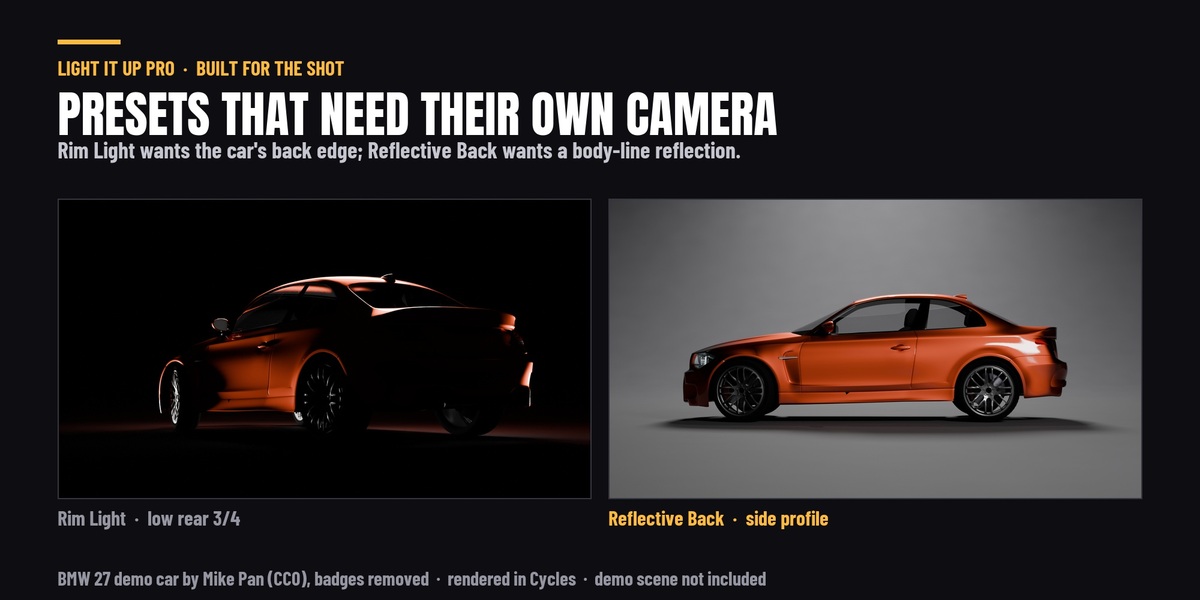
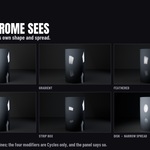
Softbox modifiers. On an area light, the top of the section is Blender's own Shape, Size and Spread — those work in both renderers. Underneath are four Cycles-only modifiers that change the shape of the source itself: Gradient, Feathered, Octabox and Strip Box.
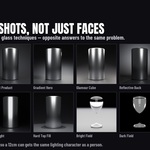
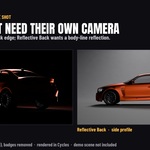
Look for these in a reflection rather than on a wall. What they change is the shape a glossy surface mirrors back — on a shiny product a plain rectangular highlight is one of the things that reads as CG, and this is what fixes it. On a matte wall you will see almost nothing, because a large soft source blurs any pattern on its own face long before the light lands.
A light can carry a profile or a modifier, not both — they are the same node tree underneath. In practice they never compete, since profiles describe a fixture and belong on point and spot lights, and modifiers describe a panel and belong on area lights. The add-on will say so rather than silently swapping one for the other.
Clear All Shaping in the header takes every gobo, shaft, profile and modifier off the whole rig at once. Lighting snapshots record shaping too, so switching between saved versions brings the whole look back and not just the lights.
Set — the studio backdrop
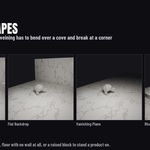
Select your subject and press Build Set. Pick a Shape and a Surface from the two tile galleries; clicking a tile applies it immediately rather than selecting it for a second button press.
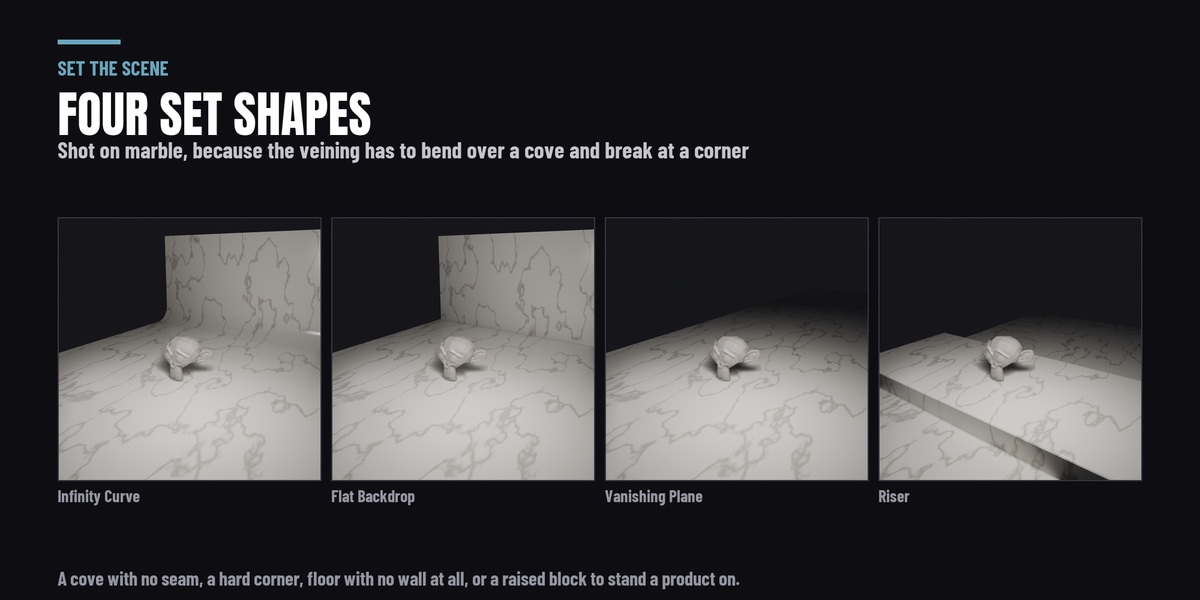
Four shapes — Infinity Curve, the seamless cyclorama with floor curving into wall and no horizon line; Flat Backdrop, floor and wall meeting at a real corner; Vanishing Plane, floor only; and Riser, a raised block to stand a product on.
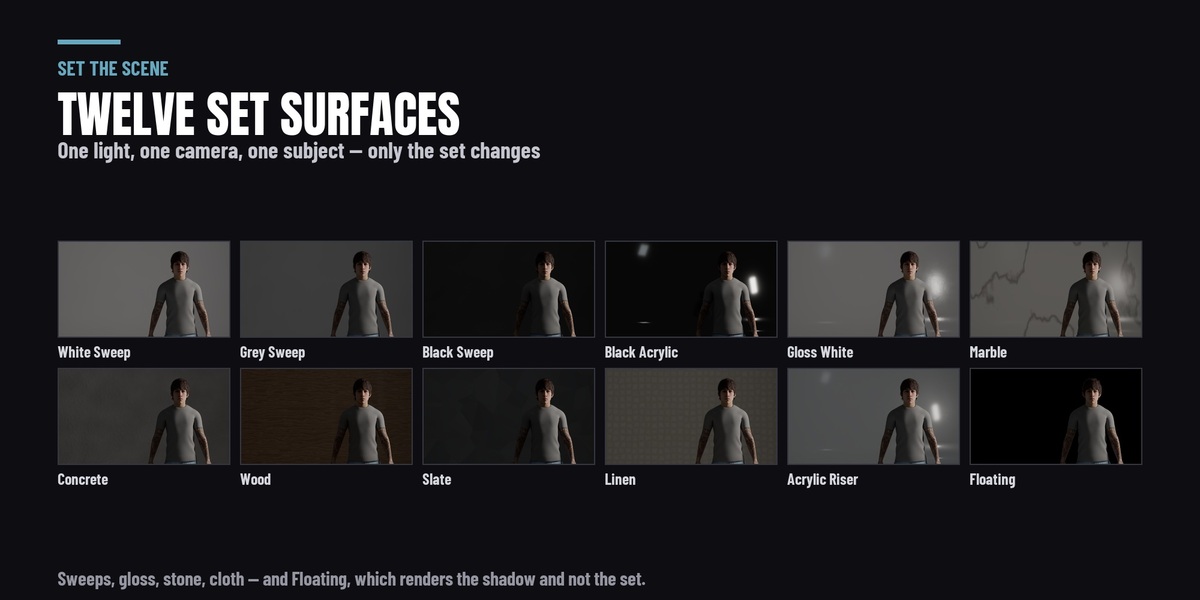
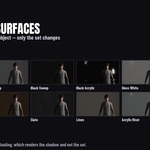
Twelve procedural surfaces — White, Grey and Black Sweep, Gloss White, Black Acrylic, Acrylic Riser, Marble Slab, Slate, Concrete, Butcher’s Block, Linen Drape, and Floating (Shadow Only). Nothing is downloaded and nothing lands in your project folder. The set is unwrapped in metres, so a texture scale means repeats per metre and survives the set being rebuilt at another size.
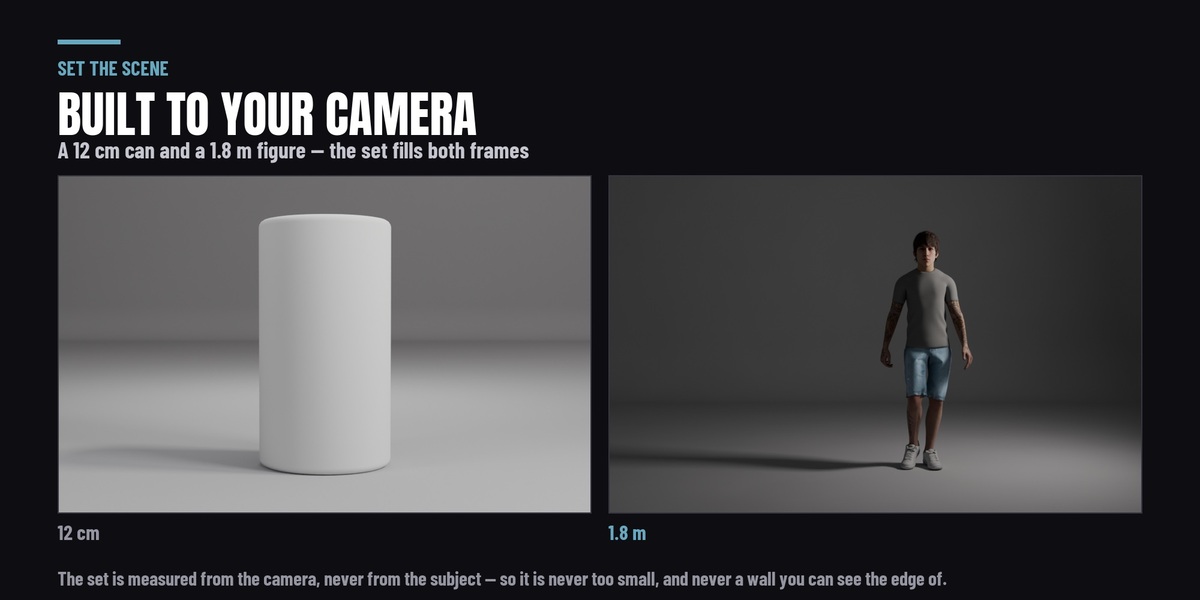
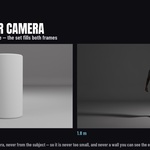
The set is sized from your camera’s frustum, not from your object’s bounding box. A backdrop measured off the subject is wrong by roughly fifteen times across the range from a 12 cm bottle to a 1.8 m figure. Measured off the frustum there is no visible background edge at either end, and the wall sits far enough back that a backlight is still behind the subject. With no camera in the scene it falls back to sizing from the subject and says so, in the same line that reports the dimensions it used.
Six controls sit under Customise Surface — pattern, roughness, relief, texture scale, rotation and tint. Each recomputes from the values the material was authored with rather than from whatever is currently in the node, so a round trip returns the original exactly and Reset puts everything back to the shipped defaults. Tint is a multiply, so white is the identity. On the four gloss surfaces roughness and pattern are clamped, because past a certain roughness EEVEE switches the reflection off entirely and the reflection is the whole reason those four exist.
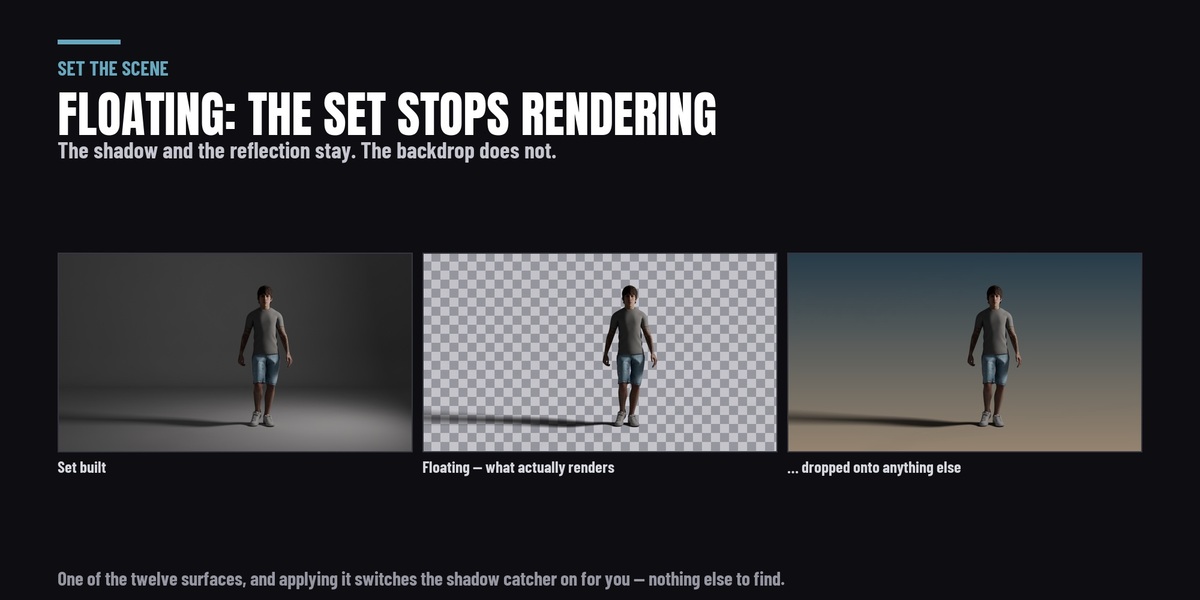
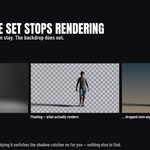
Floating, and the shadow catcher — Cycles only. The Floating surface takes the set out of the render and keeps the shadow and the reflection, leaving your subject on transparent. There is also a Shadow Only checkbox for the same thing without changing surface. Blender has no EEVEE implementation of the shadow catcher at all, so the panel names the engine you are in and says what that means rather than leaving a checkbox that quietly does nothing.
Light Passes Through, on by default, stops the set blocking light — two of the 39 rigs place a light below the floor on purpose, Uplight and Clamshell. The set is one mesh, so this covers the floor and the backdrop together. A preset that places a backlight further away than the wall is handled the other way round: the wall moves back and the set grows to suit, because a backlight in front of the wall would be in shot.
Reflections — EEVEE only. The gloss surfaces take a planar reflection probe in EEVEE, which is what makes a reflection on a flat floor sharp rather than approximate. In Cycles the reflection is traced directly and no probe is added, because it would do nothing. Build in Cycles and switch to EEVEE and a line in the panel says a probe is missing and offers a button to add one — an empty reflection looks exactly like a correct matte floor.
Remove Set deletes what was built and restores the render settings it changed, including the transparent film if that was switched on for you.
Match — world lighting and the HDRI library
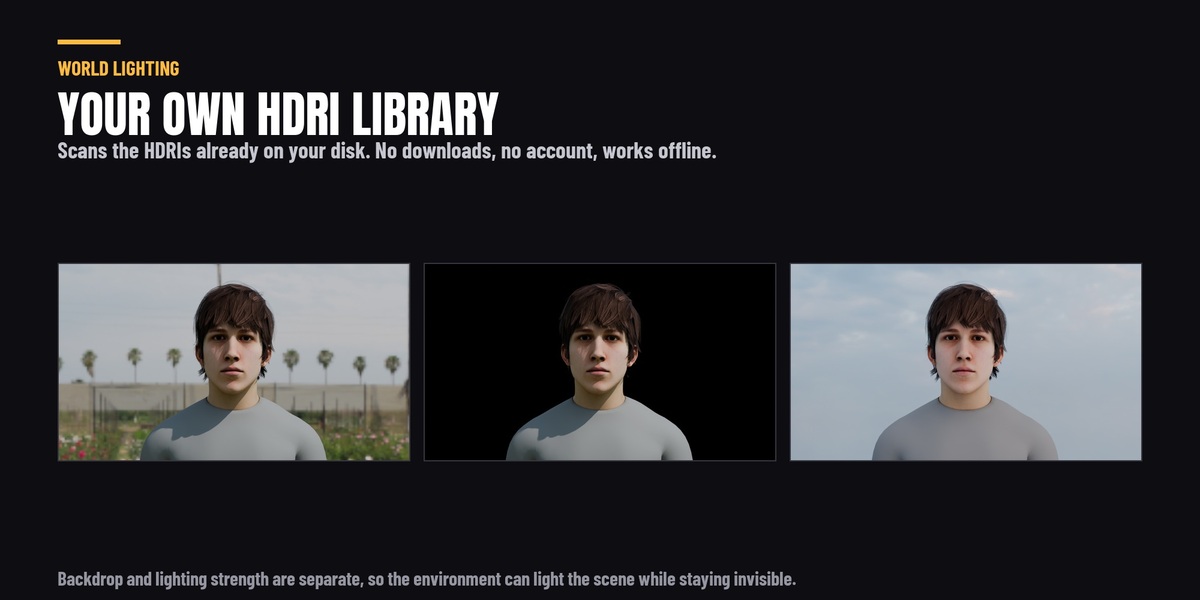
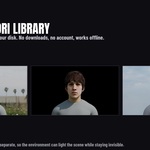
Press Find My HDRIs and the add-on scans the HDRIs already on your drives and shows them as a grid of thumbnails. Click one to light the scene with it. Nothing is downloaded and no account is needed.
It searches Documents, Downloads, Desktop, Pictures and a few other sensible places, six folders deep, and caches the result so the second launch is instant. Add Folder points it anywhere else. There is an Include All Drives option for people with a dedicated asset drive; it is off by default because a full sweep of a system drive takes minutes and would make Blender look frozen while it ran.
EXR is a container format rather than a content type, so a folder of PBR textures is full of files that are technically valid EXRs and are not HDRIs. The scan separates them by reading each file's header — shape, name and format — and sets aside the normal and roughness maps. It tells you how many it set aside, and Show Everything reveals them if it has been too keen.
Once an HDRI is applied you get two separate strengths: Lighting and Backdrop. Turn the backdrop down to zero and the HDRI still lights your scene at full strength while the background goes black — which is the most common thing anyone wants from an HDRI, and something a single Background node cannot express.
Lighting from a reference image — experimental. Choose a photograph and the add-on measures four things from the pixels — the direction of the key light, the contrast ratio, the colour temperature and how soft the light is — then builds a rig from them. It tells you in plain language what it read, for example "key from the left above, 4.3:1 contrast, 3100K, hard".
Treat the result as a starting point, not an answer. A photograph is a flat projection of geometry and materials the software cannot see, and anyone claiming otherwise is overselling. What you get is a rig in roughly the right place, with the contrast and colour already written into the master controls so you can carry on adjusting.
It reads a lit subject against a background — a portrait, a product shot, a character render. That is what it was built and calibrated for. Wide establishing shots and backlit silhouettes are outside what it can read, and the panel says so rather than pretending.
Air — volumetrics
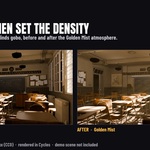
Click any of the 22 fog presets to fill the scene with atmosphere. They work in EEVEE and Cycles. Five categories: Atmospheric Moods (5), Environmental Elements (6), Fantasy & Stylized (4), Cinematic Enhancements (5) and Light Shafts (2).
Light Shafts is its own row for a reason: God Rays and Window Shafts are the only two presets that place a light as well as a volume, so they arrive as a finished shot rather than as an atmosphere you then have to light.
Density scales to your scene automatically. Volumetric density in Blender is measured per unit of distance, so a value tuned in a small test file is invisible around a life-sized character. The add-on measures your scene and scales the authored density to match.
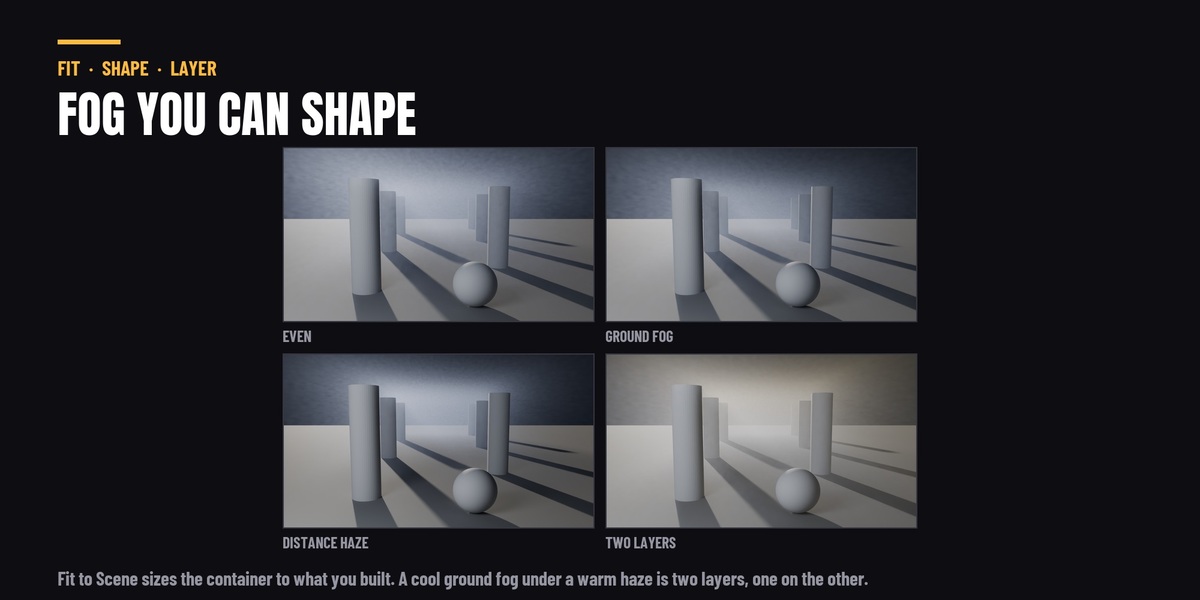
The container panel sits above the presets. Fit to Scene sizes the container to everything that renders, and To Selection to only what you have selected, with a margin; the panel then reports the fitted size, and the fit is remembered when you switch presets. The fog fades out across that margin rather than stopping at the container's faces, so a snug fit never shows its box — if you can see an edge, the fit is too tight for the camera and a larger Size gives it room. Below it, Size and Density: size belongs to your scene and is kept across presets, density is read from each preset, because that is what makes one fog different from another.
Ground Fog settles the density towards the floor across the whole height of the container — at 0 the fog is even, at 1 the top is clear. Distance Haze holds the fog back near the camera and lets it build with distance, over the depth the camera actually sees; it re-measures that depth when you move the camera. Both are no-ops until moved, so a preset looks exactly as it always did until you shape it.
Wind is the drift the presets always had, now on sliders: speed 1.0 is the authored speed and 0 holds the fog still, which is what you want for a still frame; give it a direction and the whole field drifts that way. Detail Scale makes the clumps broader or wispier.
Add as Layer (the duplicate icon in the panel header) keeps the fog that is already there and puts the next preset in a second container. Select a container to edit that layer's sliders.
The X button removes the fog properly: the container, the dust particle rig, the force field and any shaft light, rather than leaving pieces behind in your outliner. It takes every container, or only the selected ones — so removing one layer is select it, then Remove.
Move — animation
Thirteen effects: flicker, pulse, strobe, RGB cycle, colour fade, noise flicker, intensity bounce, orbital movement, follow target, area sweep, breathing, swarm and fade.
They work on any light. Select one light and the effect applies to that light; select several and it applies to those; select a light that belongs to a rig and it applies to the whole rig, because the master controls hold a key-to-fill ratio across the set that animating one lamp would break silently. With nothing selected it falls back to the most recently built rig. The panel names what it is about to animate before you press the button.
Each one writes ordinary Blender keyframes you can open in the Graph Editor and edit like any other animation, and your selection is put back afterwards. One button clears the animation off again.
Ship — the pipeline layer
Nothing in here is needed to light a scene; it is for lighting that has to survive into a render pipeline.
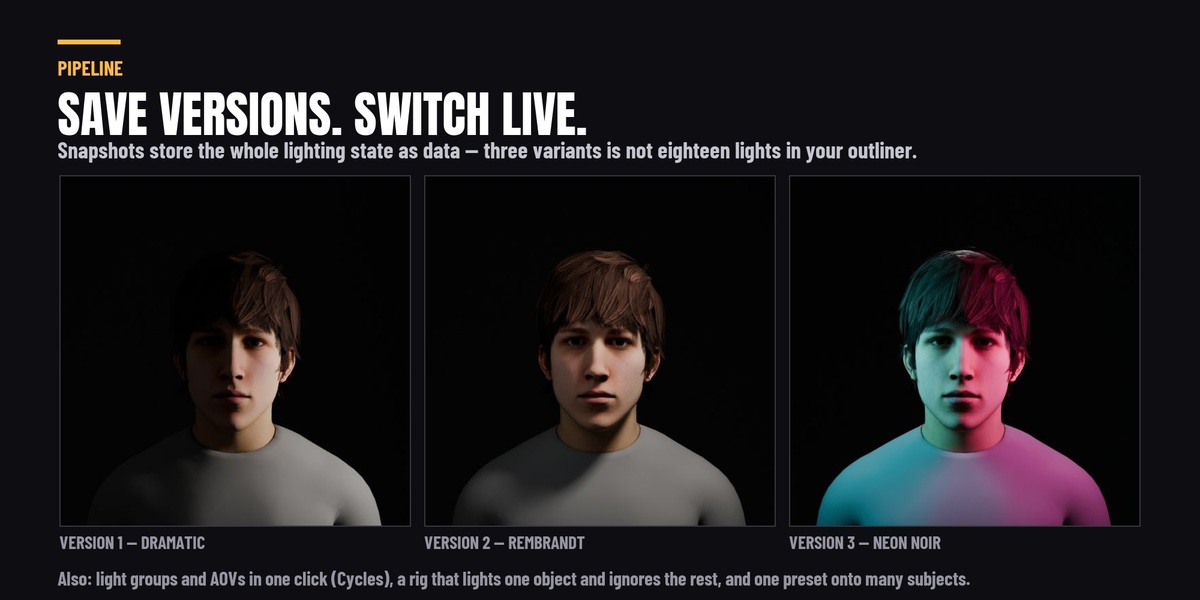
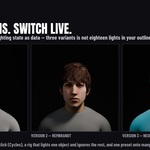
- Lighting snapshots — save the current lighting as a named version and switch between versions live. Stored as data rather than duplicated rigs, so three variants of a six-light setup is not eighteen lights in your outliner. Restoring replaces the live rigs — that is what switching means — and a snapshot captures your rigs, not your whole scene, so it will not revert a world or a material.
- Batch apply — one preset onto many objects at once, either the selection or a collection. Each rig is built around its own object's bounds and orientation, and the dialog tells you how many objects will be lit before it commits.
- Light linking — make a whole rig light one object and ignore everything else, as a single control instead of one collection per lamp. Works in EEVEE and Cycles.
- Light groups and AOV export — one button gives every rig its own light group and wires each to a multilayer EXR output, so you can rebalance lighting in comp instead of re-rendering. Cycles only, and the panel says so before you press it. A light group's pass does not exist until the scene has been rendered once, so on a fresh scene: render, then press it again.
What the rigs actually are
A preset creates a collection named after it, containing an empty (the rig's handle) with the lights parented to it. The lights are ordinary Blender lights — nothing locked, nothing driven, no custom node groups. Move them, delete them, change their colour, add your own. The add-on stores the values it authored as custom properties so the master controls can recompute, and ignores anything it does not recognise.
This matters more than it sounds: because everything is native Blender data, a .blend lit with this add-on renders on any machine or render farm that does not have the add-on installed. The same is true of the fog, the gobo cards, the shafts and the animation.
Requirements
Blender 4.2 LTS or newer. Windows, macOS and Linux. No network access, no account and no licence key — it works offline.
This release was tested on Blender 4.2 LTS, 4.5 LTS, 5.1 and 5.2.
Support
Questions, bug reports and feature requests through the Superhive message system on this page. If something does not work the way this page says it does, that is worth reporting — a lot of what is written above exists because somebody said so.
-
$49
For one person. Every feature on this page, no exceptions — 39 lighting rigs, the shaping layer with gobos and light shafts, 22 atmospheres, the animation, the HDRI library and the pipeline layer.
-
$149
The same add-on, covering up to five people at one studio - so a team can install it on everyone's machine from a single purchase instead of buying five copies or quietly sharing one. Identical files. There is no separate build, no seat server, no activation and no key: the add-on never checks anything, and this variant does not change what it does. What you are buying is the licence to run it across a small team, and a single invoice for it. Need more than five seats? Message me on this page and we'll sort it out.
 Included
Includes 12 months of
- Support from Rasheed's Edit
- Product updates
Extend this product’s Support Period +12 months: 50% of product price
Have questions before purchasing?
Login to message
Discover more products like this
presets cinematic-lighting gobo loveblender volumetric no-AI product lighting softbox animated-gobos ies lights Studio Lighting volumetric fog