Meshcloud
 Shahzaib A.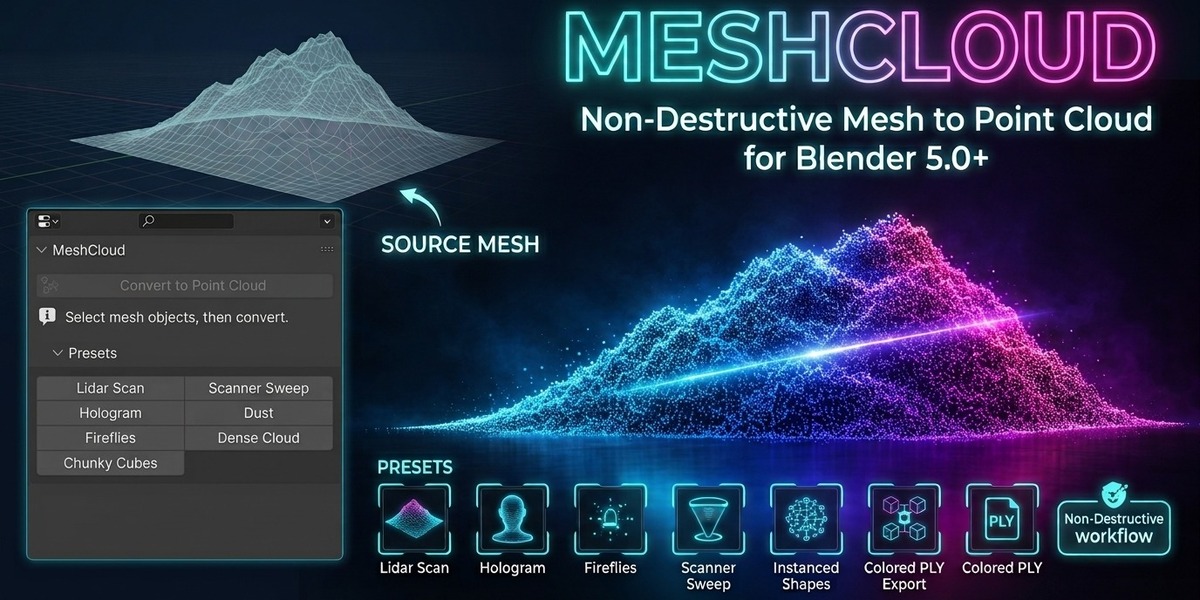
MeshCloud — User Documentation
Overview
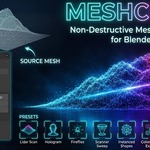
MeshCloud is a non-destructive Blender add-on for converting mesh objects into customizable point-based effects.
It uses a Geometry Nodes modifier to generate controllable points, animated motion, reveals, colors, glow, and instanced geometry while keeping the original mesh available.
MeshCloud is designed for workflows such as:
- LiDAR-style visualizations
- Scanner and scanning effects
- Holograms
- Procedural particles
- Dust and fireflies
- Stylized point-based renders
- Animated point-cloud reveals
- Procedural point motion
- Instanced shape effects
- Colored point-cloud export
After installation, MeshCloud is available in:
3D Viewport → Sidebar (N) → MeshCloud
Getting Started
1. Select a Mesh
Select one or more mesh objects in the Blender viewport.
Open the Sidebar with N, then open the MeshCloud tab.
2. Convert the Mesh
Click:
Convert to Point Cloud
MeshCloud adds a Geometry Nodes modifier to the selected mesh.
The conversion is non-destructive. Your original mesh remains available until you explicitly remove, apply, or otherwise modify the result.
When MeshCloud is first added, automatic fitting can calculate suitable point settings for the object when Auto Fit on Convert is enabled in the add-on preferences.
3. Choose a Preset
The fastest way to create a look is to choose one of the built-in presets:
- Lidar Scan
- Scanner Sweep
- Hologram
- Dust
- Fireflies
- Dense Cloud
- Chunky Cubes
Presets include their own sampling, color, point, glow, reveal, or output settings as appropriate. Preset sizing is automatically adapted to the source mesh.
Main Panel
The main MeshCloud panel provides the primary workflow controls.
It includes:
- Convert to Point Cloud
- Estimated render point count
- Estimated viewport point count
- Remove
- Reset Settings
- Upgrade Modifier when an older MeshCloud setup is detected
MeshCloud also displays warnings when a setup becomes very dense or when instanced shapes may become expensive.
Sampling
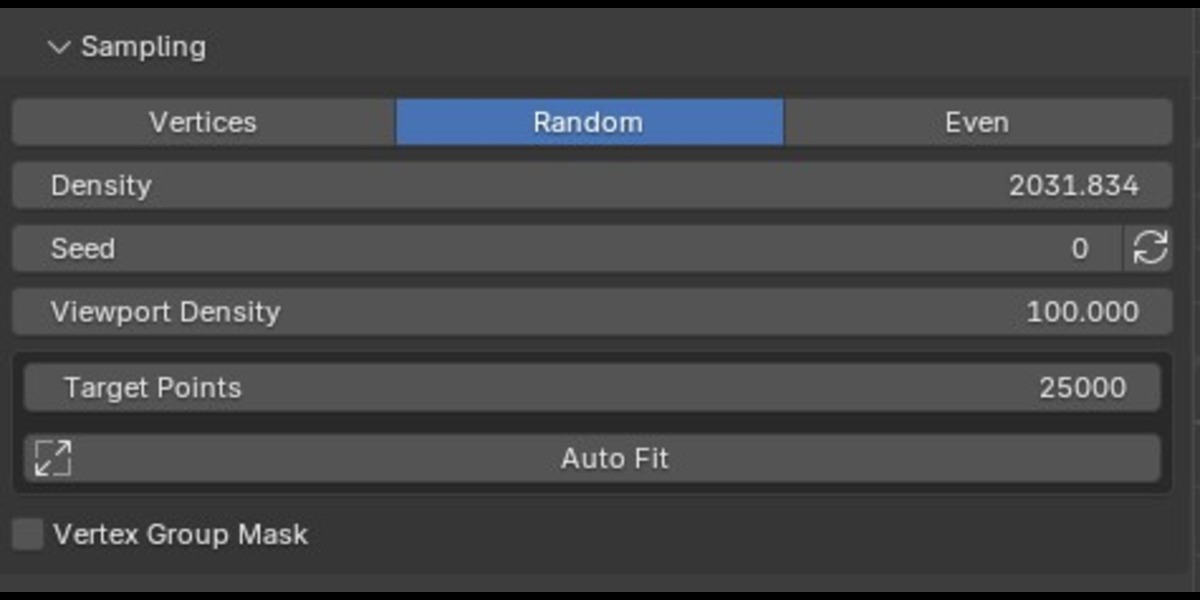
The Sampling panel controls how MeshCloud generates points.
Vertices
Uses the vertices of the source mesh directly as point locations.
This mode is useful when you want the point cloud to follow the existing topology of the mesh.
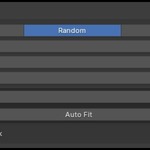
Random
Distributes points randomly across the mesh surface.
The number of candidate points is controlled by Density.
Even
Uses Poisson-style surface distribution to create a more evenly spaced point arrangement.
Use Min Distance to control the minimum spacing between points.
Density
Controls the number of points generated per surface area for the Random and Even sampling modes.
It does not affect Vertex sampling.
Min Distance
Controls the minimum spacing used by Even sampling.
Increasing the value generally produces a more widely spaced point distribution.
Seed
Controls the randomization used by MeshCloud.
Changing the seed can produce a different point arrangement while leaving the other settings unchanged.
Use the randomize button beside Seed to generate a new seed automatically.
Viewport Density
Controls the percentage of the calculated density displayed in the viewport.
The viewport can therefore use fewer points for better performance while renders continue to use the full density.
Target Points
Target Points defines the approximate point count that Auto Fit and the built-in presets aim for.
The default target is 50,000 points, with a supported range of 100 to 5,000,000.
Auto Fit
Click:
Auto Fit
MeshCloud estimates the point spacing from the mesh size and target count, then adjusts the relevant point settings.
For surface-based sampling, Auto Fit calculates:
- Density
- Min Distance
- Radius
For vertex sampling, the target is based on the number of source vertices.
Vertex Group Mask
Enable:
Vertex Group Mask
to use a Blender vertex group as a density mask.
Only areas with a positive vertex-group influence are used for the point distribution.
Select the desired group from the Group field.
Points
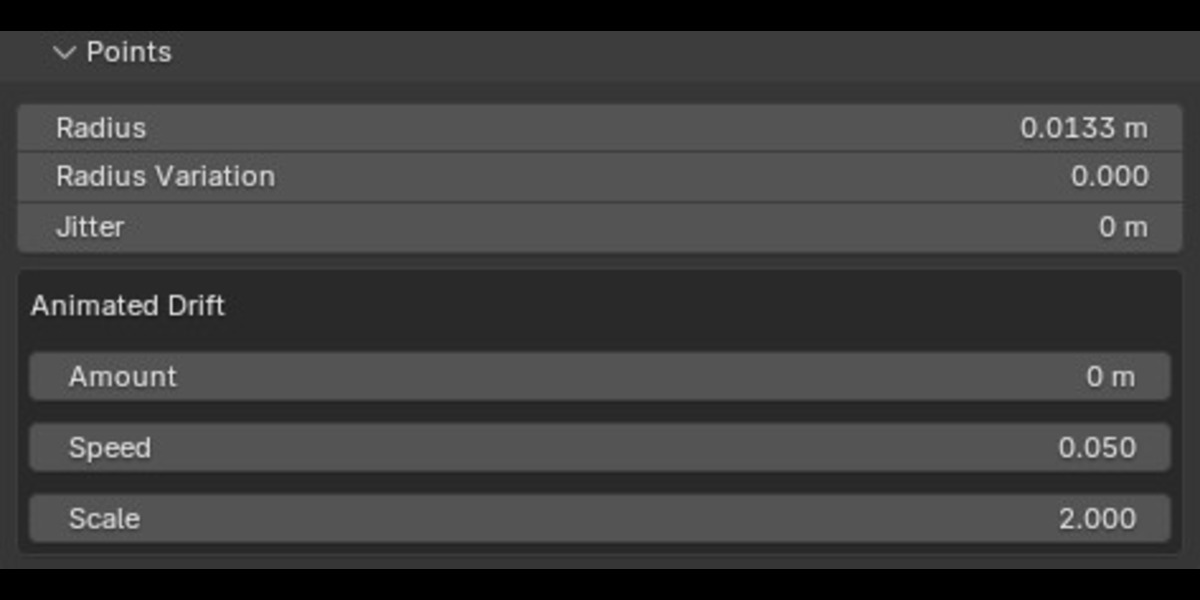
The Points panel controls the size and movement of the generated points.
Radius
Sets the base point radius.
MeshCloud keeps the point radius within its supported range of 0.005 to 0.25 Blender units.
Radius Variation
Adds randomized size variation between points.
A value of 0 produces a consistent radius, while higher values create more variation.
Jitter
Applies a static random positional offset to the generated points.
This can break up an overly uniform distribution.
Animated Drift
Animated Drift adds procedural noise-based movement to the points.
Amount
Controls how far points move from their base positions.
Speed
Controls how quickly the procedural noise changes over time.
Scale
Controls the scale of the noise pattern.
These controls can be combined to create subtle floating motion, drifting particles, or more energetic point-cloud movement.
Color
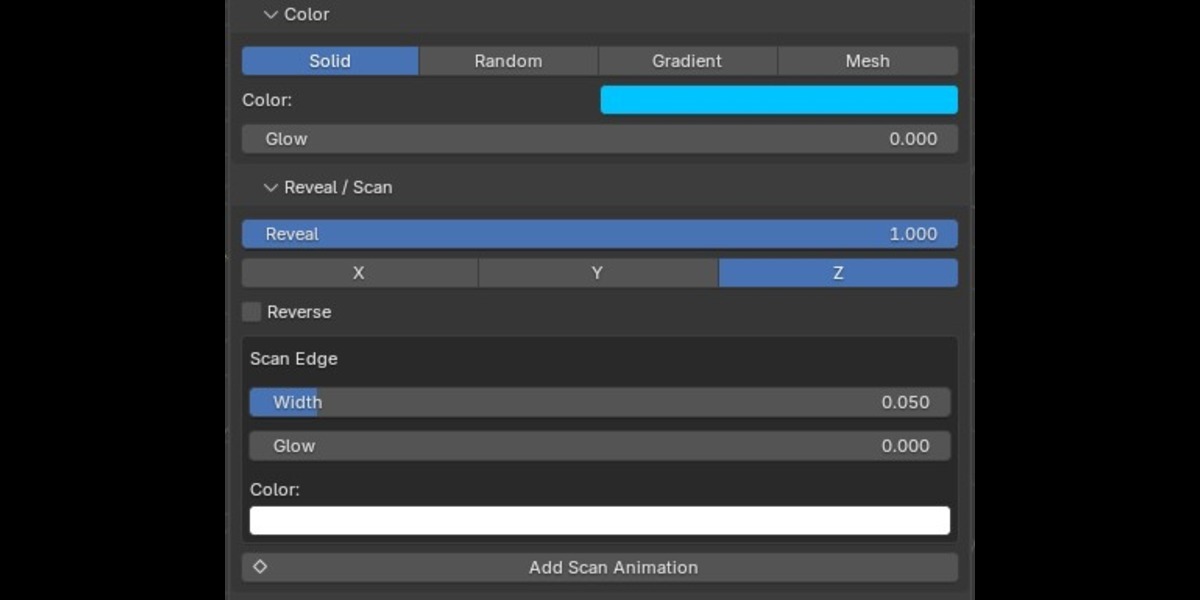
MeshCloud supports four color modes.
Solid
Uses Color A for the entire point cloud.
Random
Randomly blends between Color A and Color B.
Each point receives its own randomized color value.
Gradient
Blends Color A and Color B according to the point's position along the selected Axis.
The gradient axis is controlled from the Reveal / Scan panel.
Mesh
Uses a color attribute from the source mesh.
Choose the desired attribute from the Attribute field.
Glow
Controls the emission strength stored with the generated points.
Increase Glow to create brighter luminous, holographic, scanner, or sci-fi effects.
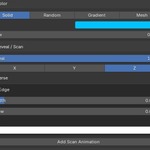
Reveal / Scan
The Reveal / Scan panel provides progressive point visibility and scanning controls.
Reveal
Controls how much of the cloud is revealed.
- 0 hides the point cloud.
- 1 shows the complete point cloud.
Values between 0 and 1 progressively reveal points along the selected axis.
Axis
Select the reveal direction:
- X
- Y
- Z
The same axis is also used by the gradient color mode.
Reverse
Reverses the direction of the reveal.
Scan Edge
The active reveal boundary can be enhanced with a scan-edge effect.
Edge Width
Controls the width of the active scan region.
Edge Glow
Adds additional emission to points near the scan edge.
Edge Color
Sets the color of the scan edge.
Add Scan Animation
Click:
Add Scan Animation
to automatically create Reveal keyframes from 0 to 1 over a selected frame range.
This is useful for:
- Scanner sweeps
- Progressive object reveals
- Holographic builds
- Technical visualizations
- LiDAR-style scans
Animation
MeshCloud includes a separate procedural point-animation system.
The animation system controls how points enter the scene, move into position, or continuously oscillate.
Motion Types
MeshCloud provides seven motion types:
Pop
Points scale into place with the selected easing behavior.
Drop
Points travel into position along the selected axis.
Smear
Points move into position while generating a temporary trail of duplicated point copies.
Scatter
Points start displaced in randomized directions and settle into their final positions.
Swirl
Points rotate around the selected axis as they move into place.
Wave
Creates continuous wave motion driven by scene time.
Pulse
Creates continuous pulsing motion driven by scene time.
Easing
Keyframed animation types support:
- Linear
- Smooth
- Overshoot
- Elastic
- Bounce
The easing is calculated by MeshCloud's Geometry Nodes animation system.
Anim Progress
Controls the progress of keyframed animations.
- 0 represents the starting state.
- 1 represents the settled point cloud.
For keyframed motions, animate this value directly or use the built-in animation buttons.
Stagger
Controls how much individual points begin their animation at different times.
Higher values produce a more spread-out arrival rather than having every point move simultaneously.
Randomness
Controls how much the animation order is randomized.
Lower values favor the point position along the selected axis, while higher values create a more randomized order.
Distance
Controls the travel distance for motion types that use displacement-based animation.
The distance is calculated relative to the overall size of the object.
Trail Samples
For Smear, controls how many point copies are used to construct the temporary trail.
Higher values create a longer and denser smear effect.
Turns
For Swirl, controls the number of rotational turns used during the animation.
Looping Motion
Wave and Pulse are time-driven animations and do not require keyframes.
They use:
- Speed
- Amount
- Waves / Pulse Spread
These effects automatically loop with scene time.
The Animation panel indicates that looping motions do not require keyframes.
Animation Quick Start Presets
MeshCloud includes built-in motion presets:
- Bouncy Pop
- Rain Drop
- Smear In
- Scatter In
- Swirl In
- Ripple
- Breathe
These presets configure the animation controls without replacing your existing color and sampling setup.
Animate In
For keyframed animation types, use:
Animate In
to create keyframes that move Anim Progress from 0 to 1.
Animate Out
Use:
Animate Out
to create keyframes that move Anim Progress from 1 to 0.
Choose the start frame and duration when running the animation command.
Output
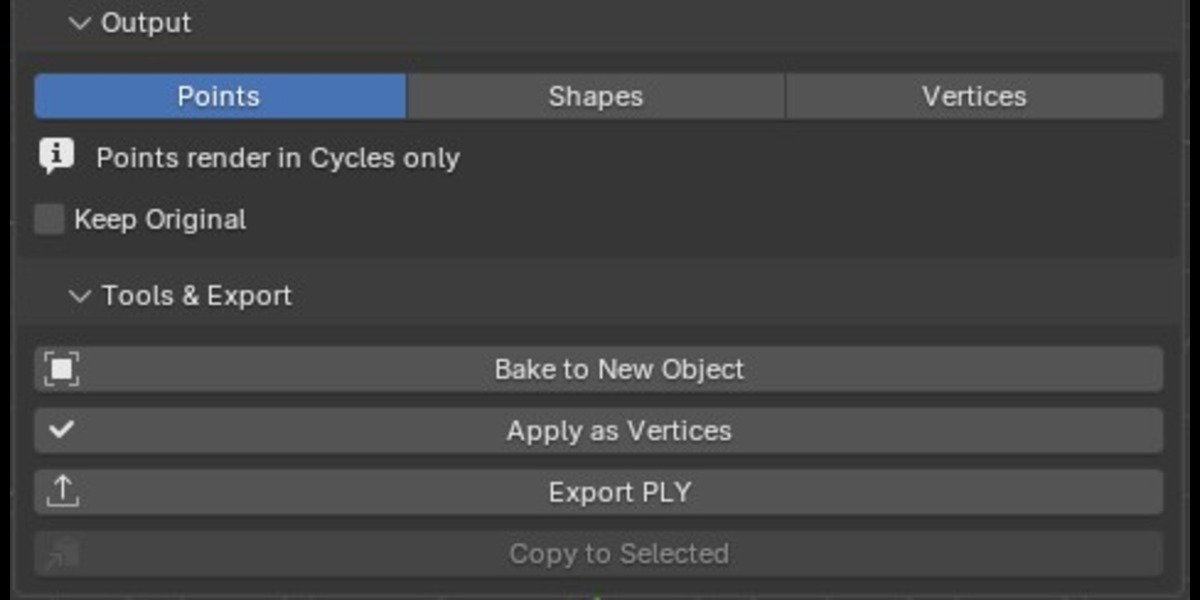
MeshCloud provides three output modes.
Points
Outputs the generated point geometry.
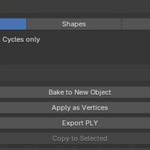
The MeshCloud interface notes that this point output renders in Cycles only.
Shapes
Instances geometry on every generated point.
Available shape options:
- Sphere
- Cube
- Custom Object
Sphere Detail
Controls the subdivision/detail level of the generated sphere.
Random Rotation
Assigns a randomized rotation to each instance.
Vertices
Converts the generated points into real mesh vertices.
This mode is used by the bake and apply workflows to create an actual vertex-based mesh representation.
Keep Original
When enabled, MeshCloud joins the generated result with the original input mesh so the source remains visible together with the point-based output.
Custom Object Instancing
MeshCloud can use another Blender object as the geometry instanced on every point.
To use a custom object:
- Select the object you want to instance.
- Keep that object selected.
- Select the MeshCloud object last so it becomes the active object.
- Use Use Selected Object.
MeshCloud assigns the other selected object as the custom instance and switches the output to Shapes → Object.
Built-In Style Presets
MeshCloud includes seven visual presets.
Lidar Scan
Uses Even surface sampling with a target of approximately 40,000 points.
It uses a blue-to-orange gradient and emission for a LiDAR-style visualization.
Scanner Sweep
Uses Even sampling with a scanner-oriented color setup.
It starts with a partial Reveal value and includes a bright configurable scan edge.
Hologram
Uses Even surface sampling with approximately 30,000 target points.
It combines cyan coloring, point-size variation, and strong glow for a holographic appearance.
Dust
Uses Random surface sampling with approximately 8,000 target points.
It uses strong radius variation, static jitter, and animated drift to create a loose particle-like appearance.
Fireflies
Uses Random surface sampling with approximately 1,500 target points.
It combines strong glow, point-size variation, and animated drift for a sparse firefly effect.
Dense Cloud
Uses Random surface sampling with a target of approximately 150,000 points for a dense point distribution.
Chunky Cubes
Uses source mesh vertices with cube instances.
It includes point-size variation, random color blending, and randomized rotation.
User Presets
MeshCloud allows you to save your current settings as reusable presets.
Use:
Save Preset
Enter a preset name and save it.
Saved presets appear under:
My Presets
From there you can:
- Load a preset
- Delete a preset
User presets store MeshCloud's supported non-object settings. Blender object references, such as a custom instanced object, are not stored in the JSON preset.
Bake to New Object
Use:
Bake to New Object
to create a separate mesh object from the current MeshCloud result.
The new object contains real vertices corresponding to the generated points and carries the generated MeshCloud color data.
The original source object remains intact.
An add-on preference called Hide Source When Baking can optionally hide the original source object after baking.
This is the recommended workflow when you want to preserve the original model while creating a committed point-based mesh.
Apply as Vertices
Use:
Apply as Vertices
to apply the MeshCloud modifier directly to the active object.
The resulting object contains real vertices generated from the MeshCloud point cloud.
This operation is destructive because the modifier is applied and the original mesh geometry is replaced by the generated result.
For a non-destructive workflow, use Bake to New Object instead.
MeshCloud also prevents this operation when the source mesh data is shared by multiple objects; make the mesh data single-user first.
PLY Export
MeshCloud includes a built-in:
Export PLY
tool for exporting generated point clouds.
The exporter writes:
- X position
- Y position
- Z position
- Red
- Green
- Blue
Binary
Binary PLY is enabled by default.
It produces a compact file and is intended to be faster and smaller than ASCII output.
ASCII
Disable Binary to export an ASCII PLY file.
World Space
When World Space is enabled, the object's world transform is applied to the exported coordinates.
When disabled, the point coordinates remain in the object's local space.
MeshCloud can export the generated point clouds from the selected MeshCloud mesh objects into a single PLY file.
Copy Settings
Use:
Copy to Selected
to copy the active MeshCloud object's settings to the other selected mesh objects.
Objects that do not already have MeshCloud can receive the modifier automatically as part of the operation.
This is useful for applying a consistent point treatment across multiple meshes.
The custom object reference is not copied.
Randomize Seed
Use:
Randomize Seed
to generate a new random Seed value for the selected MeshCloud objects.
The other MeshCloud settings remain unchanged.
This provides a quick way to explore different random surface distributions, colors, jitter patterns, and other seed-driven variations.
Reset Settings
Use:
Reset Settings
to restore the active MeshCloud modifier to its default settings.
After resetting, MeshCloud also reapplies Auto Fit using the scene's current Target Points value.
Upgrade Older MeshCloud Setups
MeshCloud uses versioned Geometry Nodes groups.
When an older MeshCloud setup is detected, the interface displays an upgrade option.
Click:
Upgrade Modifier
MeshCloud migrates the modifier to the current node setup and preserves compatible settings.
Older animation-type values are also remapped where required by the current version.
Performance Tips
Point-based effects can become expensive at high densities.
MeshCloud displays estimated:
- Render point count
- Viewport point count
The panel can also display warnings for particularly heavy setups.
Improve Viewport Performance
Lower:
Viewport Density
This reduces the number of points displayed in the viewport while leaving render density at 100%.
Dense Point Clouds
For extremely dense effects, lower:
Density
or adjust:
Target Points
and run:
Auto Fit
again.
Instanced Shapes
Instanced spheres, cubes, and custom objects can become significantly heavier than the basic point output.
MeshCloud displays an additional warning when instanced shapes exceed approximately 200,000 viewport points.
Recommended Workflows
Quick Visual Effect
1. Select mesh → 2. Convert to Point Cloud → 3. Choose a preset → 4. Adjust Sampling → 5. Tune Points → 6. Adjust Color/Glow
Scanner Effect
1. Convert → 2. Choose Scanner Sweep → 3. Set Axis → 4. Tune Scan Edge → 5. Add Scan Animation
Animated Point Build
1. Convert → 2. Choose an Animation Quick Start preset → 3. Adjust Easing/Stagger → 4. Use Animate In
Continuous Motion
1. Convert → 2. Select Wave or Pulse → 3. Adjust Speed, Amount, and Frequency
No keyframes are required for these looping modes.
Preserve the Original Mesh
Keep the MeshCloud modifier active for a completely procedural workflow, or use:
Bake to New Object
when you need a separate committed vertex mesh.
External Point-Cloud Workflow
Use:
Export PLY
to create a colored PLY containing XYZ coordinates and RGB color data.
Troubleshooting
I Don't See MeshCloud
Make sure the add-on is enabled and that you are looking in:
3D Viewport → Sidebar (N) → MeshCloud
Convert to Point Cloud Does Nothing
Make sure at least one selected object is a mesh.
MeshCloud operates on mesh objects.
The Viewport Is Too Slow
Lower:
Viewport Density
You can also reduce overall Density or use Auto Fit with a lower Target Points value.
The Point Count Is Higher Than Expected
Check:
- Sampling Mode
- Density
- Min Distance
- Target Points
- Viewport Density
- Animation type
The MeshCloud panel shows estimated render and viewport point counts.
For Smear, the estimated count can temporarily increase because the animation creates duplicate point samples for the trail.
My Points Are Too Large or Too Small
Adjust:
Radius
For automated sizing, use:
Auto Fit
I Need More Random Variation
Try increasing:
Radius Variation
or:
Jitter
You can also use:
Randomize Seed
to generate a different arrangement.
I Need to Keep My Original Model
Use:
Bake to New Object
instead of Apply as Vertices.
My Scan Is Moving in the Wrong Direction
Check:
Axis
and:
Reverse
in the Reveal / Scan panel.
My Gradient Runs in the Wrong Direction
The Gradient mode follows the selected Axis. Adjust the Axis used by the Reveal / Scan controls.
My Animation Does Not Move
For keyframed animation types, make sure Anim Type is not None, then use:
Animate In
or:
Animate Out
For Wave and Pulse, no keyframes are required because they are driven by scene time.
My Custom Object Is Not Being Used
Select the object you want to instance first, then select the MeshCloud object last.
Use:
Use Selected Object
MeshCloud will assign the other selected object as the custom instance.
My Older MeshCloud Setup Is Outdated
Select the affected MeshCloud object and use:
Upgrade Modifier
when the upgrade option appears in the main panel.
Apply as Vertices Is Blocked
If the mesh data is shared by multiple objects, MeshCloud requires the mesh to be made single-user before applying the modifier.
Support
MeshCloud is built around Blender's Geometry Nodes system and provides a procedural workflow for generating, styling, animating, instancing, baking, and exporting point-based effects.
The core workflow remains non-destructive until you explicitly choose to apply the modifier.
Have questions about this product?
Login to message
| Blender Extension Compatible | Yes |
| Published | 2 days ago |
| Blender Version | 5.0 - 5.2 |
| Extension Type | Add-on |
| Render Engine Used | Cycles, Eevee |
| License | GPL |
Discover more products like this
PLY export sci fi geometry nodes lidar Point Cloud Generator visual effects Blender Add-on blender Mesh to Point Cloud procedural VFX point cloud