Readymesh
 Bonaventure Labs



READYMESH — DOCUMENTATION
1. WHAT IS READYMESH?
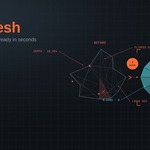
ReadyMesh is a Blender add-on that turns any mesh into a production-ready
asset in seconds. It bundles the repetitive finishing pass every 3D artist
runs before an asset ships, applying transforms, setting a sane origin,
cleaning up geometry, fixing shading, and naming objects consistently
into a single panel and a single button.
It's built for game artists, archviz/product-viz artists, asset-pack
creators, and studio pipelines where dozens or hundreds of meshes need to
be brought to the same baseline before export, publishing, or handoff.
2. INSTALLATION
Requirements: Blender 4.2 or newer.
- Download ReadyMesh-1_0_0.zip from your purchase page. Do not unzip it.
- In Blender, open Edit > Preferences > Get Extensions (the Add-ons tab
on older 4.2 builds).
- Click the dropdown arrow in the top-right corner and choose
"Install from Disk…"
- Select ReadyMesh-1_0_0.zip and confirm.
- Enable the checkbox next to ReadyMesh if it isn't already active.
Once enabled, ReadyMesh lives in the 3D Viewport sidebar (press N to open
it) under its own ReadyMesh tab.
3. QUICK START > MAKE PRODUCTION READY
Select one or more mesh objects, open the ReadyMesh tab, and click
"Make Production Ready." This runs, in order:
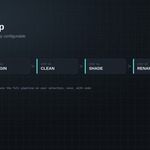
1. Transform: apply location, rotation and scale (if enabled)
2. Origin: set the origin using your chosen mode (if enabled)
3. Clean: merge doubles, dissolve degenerate geometry, delete loose
geometry, recalculate normals, clear custom split normals (if enabled)
4. Shade: apply smooth-by-angle shading using your Smooth Angle setting
(if enabled)
5. Rename: sequentially rename the selection using your Naming settings
(off by default)
Each step has its own checkbox beneath the button, so you can skip any
stage you don't need. The whole operation is a single undo step, press
Ctrl+Z once to revert everything it did.
Tip: you can select many objects at once and run Make Production Ready
across the whole batch, each object is processed independently, keeping
its own origin and geometry intact.
4. THE READYMESH PANEL
The panel is organized top-to-bottom in the order you'd normally work:
the one-click action first, then the individual tools it's built from, in
case you want to run any of them on their own.
- One-Click Prep: the Make Production Ready button and its five step
toggles
- Origin: four one click origin placements
- Cleanup: the Clean Mesh button plus its five options
- Transforms & Shading: Apply All Transforms and Smooth by Angle
- Quick Modifiers: Mirror X/Y/Z and Add Bevel
- Naming: batch rename controls
Advanced numeric fields (merge distance, bevel width/segments, etc.) can
be hidden from the panel for a cleaner view: see the Preferences section
below.
5. FEATURE REFERENCE
5.1 Origin
Sets the origin point of every selected mesh object. Useful before
exporting to a game engine, which typically expects a bottom-center or
geometry-based pivot.
- Bottom: places the origin at the bottom-center of the object's
world-space bounding box
- Center: places the origin at the center of the bounding box
- Geometry: places the origin at the median point of the mesh's geometry
- Cursor: places the origin at the current 3D cursor position
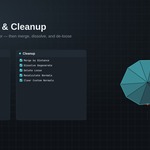
5.2 Cleanup
Runs a configurable geometry cleanup pass on the selected meshes. Each
stage can be toggled independently; the merge/dissolve distance is shared
between the two distance-based operations.
- Clean Mesh: runs all enabled cleanup stages below on the selection
- Merge by Distance: welds vertices closer together than the Merge
Distance value
- Dissolve Degenerate: removes zero-area faces and zero-length edges
below the same distance threshold
- Delete Loose: deletes vertices with no connected edges
- Recalculate Normals: recomputes face normals so they point outward
consistently
- Clear Custom Normals: removes custom split normal data that can cause
shading artifacts
5.3 Transforms & Shading
- Apply All Transforms: applies location, rotation and scale, resetting
them to their defaults while preserving visual placement
- Smooth by Angle: applies angle-based smooth shading using the Angle
value; automatically clears conflicting custom normals first
On Blender versions where the modern smooth-by-angle operator isn't
available, ReadyMesh automatically falls back to classic smooth shading
plus auto-smooth so results stay consistent.
5.4 Quick Modifiers
- Mirror X / Y / Z: adds a Mirror modifier on the chosen axis with
Clipping enabled, so mirrored halves weld cleanly at the seam
- Add Bevel: adds a Bevel modifier using the current Width and Segments
values, limited by angle
5.5 Naming
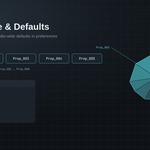
Renames every selected object sequentially: Base Name + an incrementing,
zero-padded number. For example, base "Prop," start 1, padding 3 produces
Prop_001, Prop_002, Prop_003, and so on, in the order the objects were
selected.
6. PREFERENCES
Open Edit > Preferences > Add-ons, find ReadyMesh, and expand it to set
studio-wide defaults. These values pre-fill the panel's fields every time
you start a new file.
- Default Merge Distance (0.0001): starting value for Merge Distance in
Cleanup
- Default Smooth Angle (30°): starting value for the smooth-by-angle
threshold
- Default Bevel Width (0.02): starting width for the Quick Bevel
modifier
- Default Bevel Segments (3): starting segment count for the Quick
Bevel modifier
- Show Advanced Options in Panel (on): toggles whether numeric
cleanup/bevel fields are shown in the panel, or hidden for a
simplified view
7. RECOMMENDED WORKFLOW
For a single hero asset:
- Finish modeling and check your normals visually first
- Select the object, set your preferred Origin mode
- Click Make Production Ready
- Spot-check shading in the viewport; adjust Smooth Angle and re-run if
needed
For a batch of props / an asset pack:
- Set your studio defaults once in Preferences
- Select every object in the batch
- Enable the Rename step and set Base Name before running Make
Production Ready, so cleanup and naming happen in one pass
- Run Make Production Ready once for the whole selection
8. LICENSE & SUPPORT
ReadyMesh is licensed under the GNU General Public License v3.0 or later
(GPL-3.0-or-later), in line with Blender's own add-on licensing
requirements.
Questions, bug reports, or feature requests: [email protected],
or through this product's inbox. Please include your Blender version and,
if reporting a bug, the steps to reproduce it.
 Included
Includes 12 months of
- Support from Bonaventure Labs
- Product updates
Extend this product’s Support Period +12 months: 50% of product price
Have questions before purchasing?
Login to message
| Blender Extension Compatible | Yes |
| Published | about 2 months ago |
| Blender Version | 4.2 - 5.2 |
| Extension Type | Add-on |
| Render Engine Used | Eevee |
| License | GPL |
Discover more products like this
origin optimization Production Pipeline pipeline low poly mesh cleanup game assets batch-rename Workflow modeling