SceneHelm - Production Control Toolkit for Blender
 Diego Contreras

SceneHelm 1.0.0 - Installation and tool reference
SceneHelm brings scene diagnostics, organization, modeling utilities, material workflows, animation, rendering and export into Blender. This reference covers the 65 documented panels and workflows in version 1.0.0. It includes a settings reference and explains the actions that change scene data or write files.
Supported Blender line: 5.2 LTS, beginning with 5.2.0. The extension manifest declares a minimum of 5.2.0; this is not a promise of compatibility with every later Blender release. SceneHelm runs locally, with no account, activation, telemetry or dependency on another add-on. Rendering and export use Blender's native operators.
Install the extension
- Download scenehelm-1.0.0.zip. Keep this installer compressed. If you downloaded the documentation archive or seller publication kit, extract that outer archive first and locate the installer.
- Open Blender > Edit > Preferences > Extensions. In the upper-right menu, choose Install from Disk and select scenehelm-1.0.0.zip. Enable SceneHelm if necessary.
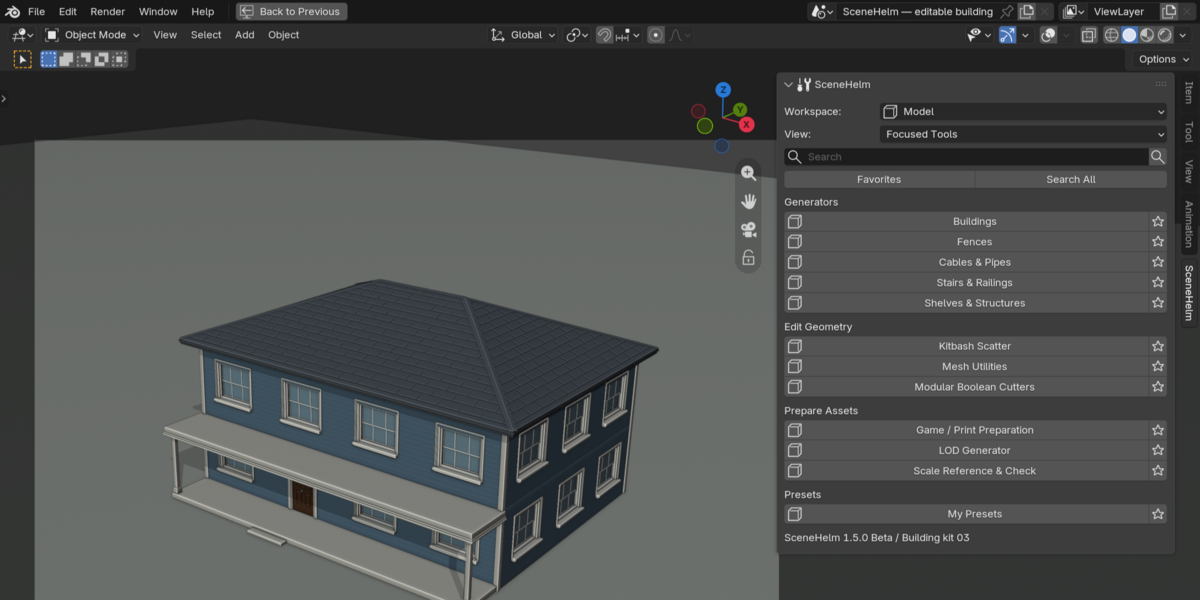
- In the 3D Viewport, press N and open the SceneHelm tab.
- Choose Doctor > Extension Health & Support > Run Extension Health. The expected result is 8/8 checks passed.
- Save a test .blend, restart Blender and check that the panel is available again.
Update or remove
The documented direct migration is from 0.95.0 to 1.0.0. Save a backup before updating and restart Blender afterward. For older Beta builds or packages with a different extension identifier, disable or uninstall the older package, restart Blender, then install 1.0.0. If Blender reports an already-registered RNA class, disable SceneHelm, restart, enable it again and rerun Extension Health. Disable or uninstall it from Preferences when no longer needed.
Find the tools
The six top-level buttons are Doctor, Model, Material, Animate, Render and Export. Scene Tools, snapshots, collection variants, selection sets and scene budgets are inside Doctor. The numbered sections below follow the Spanish manual's numbering so the two references can be used together.
Scope and data
Selected uses the current selection; Active uses the active object or material where offered; Collection uses the tool's chosen or active collection; Scene uses the current scene. Choose scope before running an action. Linked data comes from another .blend; shared data can affect more than one object. SceneHelm skips or blocks unsupported read-only or shared cases instead of assuming they can be edited safely.
Paths and undo
A path beginning with // is relative to the saved .blend. Save the project before using relative paths. Read-only scans can create diagnostic text reports but do not repair or alter production assets. Blender Undo applies to the scene changes documented by each operator. It does not remove renders, exports, checkpoints, manifests, generated textures or support archives from disk. Check the output folder and overwrite options before writing files. Purge and replacement actions require particular care.
First workflow
Save a copy, run SCAN SCENE, then Run Production Readiness. Read the blockers and warnings, select affected objects and decide which changes are appropriate. Make a Versioned Project Checkpoint before significant edits. After the changes, repeat the audit. Run CHECK RENDER SETUP or CHECK EXPORT SETUP before delivering. A readiness score is an aid to review, not a guarantee that an artistic or technical brief has been met.
Reading the settings tables
Defaults refer to a fresh SceneHelm 1.0.0 state; saved scenes can retain different values. Distances follow Blender's scene units and unit scale. Table labels and enum options use the extension's own English names. A setting that chooses a mode prepares an operation; it does not by itself run a render, export or generator.
Tool index
- 4.1 Scene Doctor
- 4.2 Production Readiness
- 4.3 External Dependency Portability
- 4.4 Versioned Project Checkpoints
- 4.5 Persistent Selection Sets
- 4.6 Extension Health & Support
- 5.1 Scene Tools
- 5.2 Scene Snapshots
- 5.3 Collection Variant View Layers
- 5.4 Scene Budget Analyzer
- 5.5 Safe Orphan Data Cleanup
- 6.1 Model Tools
- 6.2 Model Generators
- 6.3 Fence Generator
- 6.4 Cable / Pipe Generator
- 6.5 Shelf / Modular Structure
- 6.6 LOD Generator
- 6.7 Modular Building Generator
- 6.8 Modular Boolean Cutters
- 6.9 Kitbash Scatter
- 6.10 Scale Reference & Check
- 6.11 Game / 3D Print Preparation
- 7.1 Material Tools
- 7.2 Triplanar Mapping
- 7.3 ORM Channel Packing
- 7.4 Texel Density
- 7.5 Texture Relinker
- 7.6 Material Audit & Safe Repair
- 7.7 Reversible PBR Tuning
- 7.8 Editable Material Variants
- 7.9 Exact Material Consolidation
- 7.10 UDIM Set Audit & Loader
- 8.1 Animate Tools
- 8.2 Motion Presets
- 8.3 Action Loops
- 8.4 Retime & Reverse
- 8.5 Secondary Motion
- 8.6 Follow Path Rig
- 8.7 Tempo & Beat Markers
- 8.8 Camera Shot Manager
- 8.9 Advanced Easing Profiles
- 8.10 NLA Clip Builder
- 8.11 Animation Range Tools
- 9.1 Render Tools
- 9.2 Camera Framing & Focus
- 9.3 Three Point Studio Rig
- 9.4 Camera Turntable
- 9.5 Output Profiles
- 9.6 Multi-Camera Batch Render
- 9.7 Managed Shot Render Queue
- 9.8 View Layer Pass Profiles
- 9.9 Selection Render Region
- 9.10 Reversible Camera Overscan
- 9.11 View Layer Variant Render
- 10.1 Export Tools
- 10.2 Pipeline Profiles
- 10.3 Temporary Export Pivot
- 10.4 Format Options
- 10.5 Collection Batch Export
- 10.6 Export Manifest
- 10.7 Asset Package Builder
- 10.8 LOD Set Export
- 10.9 Collision Set Export
- 10.10 Animation Clip Delivery
- 10.11 Incremental Collection Export
4.1 Scene Doctor
Inspect unapplied object rotation/scale, non-manifold mesh edges and missing external image files.
How to use it
- Open Doctor and press SCAN SCENE; no selection is required.
- Expand Details and use Select or Select All Problem Objects to locate an issue.
- Use Apply R&S only when applying transforms is appropriate for the selected object, rig and instance workflow. Correct non-manifold geometry manually in Edit Mode.
- Use Find Missing Files to locate moved textures, then scan again. Create a Text Report when you need a record.
Limits and behavior
Scanning does not fix geometry. Open boundaries can be intentional. The missing-file search needs the original texture filenames; moving a file while preserving its name is a valid test, renaming it is not an equivalent test. Apply R&S skips linked and shared geometry cases. Results describe the last scan.
4.2 Production Readiness
Run a cross-module audit of the saved project, Blender compatibility, transforms, topology, dependencies, materials, camera, resolution and frame range.
How to use it
- Save the .blend and configure the camera, frame range and output for the intended delivery.
- Press Run Production Readiness.
- Read Blockers, then Warnings and Passes. Use Select Problem Objects where available.
- Open the named Text Report in Blender's Text Editor and review the evidence for each check.
Limits and behavior
This is a read-only audit. A warning may describe an intentional choice; a blocker needs resolution before the corresponding workflow. The score does not replace review of the report.
4.3 External Dependency Portability
Audit images, linked libraries, fonts, sounds, movie clips, caches and volumes for missing, absolute, relative and packed paths.
How to use it
- Save the project and press Audit.
- Resolve Missing entries first; converting a path cannot recover an absent file.
- Use Make Relative... and confirm to convert existing, editable local absolute paths.
- Audit again and retain the intended folder structure when transferring the project.
Limits and behavior
Make Relative does not move or package files. It leaves missing, packed, linked and already-relative entries unchanged. A relative path is portable only when its referenced folder structure travels with the .blend.
4.4 Versioned Project Checkpoints
Write the next numbered .blend copy without changing the active working file.
How to use it
- Save the main project, then set Checkpoint Folder. //checkpoints/ is relative to it.
- Optionally set Project Name; leave it empty to reuse the .blend name.
- Choose Write JSON Manifest and Compress .blend Copy as needed.
- Press Create Next Checkpoint and check the created path.
Limits and behavior
SceneHelm finds an unused _v001, _v002 and later suffix. The optional JSON records the version, scene, object count and dependency summary. The files persist independently of Undo; a checkpoint is not an off-device backup.
Settings reference
| Setting | Fresh default | Options and notes |
|---|---|---|
| Checkpoint Folder | //checkpoints/ | A // prefix is relative to the saved .blend. |
| Project Name | Empty | Leave empty to use the current .blend filename. |
| Write JSON Manifest | On | Adjust this setting before running the action described above. |
| Compress .blend Copy | Off | Adjust this setting before running the action described above. |
4.5 Persistent Selection Sets
Store named selections and their active object inside the .blend.
How to use it
- Select the objects, leave the desired active object active, enter Set Name and use + to capture.
- Select the saved record and press Recall.
- Use Update to replace the record with the current selection; edit its name when required.
- Use the trash control to delete the record.
Limits and behavior
Sets retain references rather than copies. Recall skips deleted, unavailable or hidden objects. Deleting a set does not delete its objects; renaming a referenced object does not require rebuilding the set while its datablock remains available.
Settings reference
| Setting | Fresh default | Options and notes |
|---|---|---|
| Set Name | Selection Set | Adjust this setting before running the action described above. |
4.6 Extension Health & Support
Check the installation, module files, registration, persistent load handler and scene data schema; prepare diagnostics when needed.
How to use it
- Press Run Extension Health after installing, updating or reopening a project.
- Expect 8/8 checks passed. Inspect the Text Report if a check fails.
- Set Support Folder, then use Create Support ZIP when a support request needs diagnostics.
- Inspect the ZIP before sharing it through the product's support channel.
Limits and behavior
The support archive contains scenehelm_support.json, production_readiness.txt, extension_health.txt and dependencies.txt. It excludes the .blend and project assets. Paths are redacted, but scene and datablock names can still disclose project information. Restart after an interrupted update before generating a fresh report.
Settings reference
| Setting | Fresh default | Options and notes |
|---|---|---|
| Support Folder | //support/ | A // prefix is relative to the saved .blend. |
5.1 Scene Tools
Batch rename, organize objects by type, select matching object types and remove empty local collections.
How to use it
- For renaming, choose Scope, Base Name or Use Object Type, Prefix, Suffix, Start and Digits; review the pattern and use Rename Objects....
- Choose Add Links to retain existing collection memberships, or Move to remove previous local memberships; press Organize Objects.
- For selection, choose Scope, Object Type and Extend Selection, then Select Matching Objects.
- Review the collection tree before Remove Empty Collections....
Limits and behavior
Add Links is the less disruptive organization mode. Move changes collection membership. Empty-collection removal targets empty local collections in the scene tree; it is not an object-deletion operation.
Settings reference
| Setting | Fresh default | Options and notes |
|---|---|---|
| Scope | Selected | Options: Selected — Use selected objects; Collection — Use objects in the active collection; Scene — Use every object in the current scene. |
| Use Object Type | Off | Use Mesh, Camera, Light and similar labels as the base name. |
| Base Name | Object | Adjust this setting before running the action described above. |
| Prefix | Empty | Adjust this setting before running the action described above. |
| Suffix | Empty | Adjust this setting before running the action described above. |
| Start | 1 | Adjust this setting before running the action described above. |
| Digits | 3 | Adjust this setting before running the action described above. |
| Scope | Selected | Options: Selected — Use selected objects; Collection — Use objects in the active collection; Scene — Use every object in the current scene. |
| Mode | Add Links | Options: Add Links — Add category links and preserve current collections; Move — Move objects out of their current local collections. |
| Root Collection | SH_Organized | Adjust this setting before running the action described above. |
| Scope | Scene | Options: Selected — Use selected objects; Collection — Use objects in the active collection; Scene — Use every object in the current scene. |
| Object Type | Mesh | Options: Mesh — Mesh objects; Curve — Curve objects; Text — Text objects; Camera — Camera objects; Light — Light objects; Armature — Armature objects; Empty — Empty objects; Other — Objects not covered by the main categories. |
| Extend Selection | Off | Adjust this setting before running the action described above. |
5.2 Scene Snapshots
Retain high-level scene states: camera, world, frame/range, resolution, engine, units, visibility, selection and active object.
How to use it
- Prepare the state to preserve and enter Snapshot Name.
- Press Capture New Snapshot, then select the saved record.
- Use Restore to recall it or Update to overwrite the record with the current state.
- Use the trash control to remove a snapshot record.
Limits and behavior
Snapshots live in the .blend and do not duplicate geometry, materials or animation. Missing and read-only datablocks are skipped. Use a checkpoint when the complete project, including geometry and shader changes, must be preserved.
Settings reference
| Setting | Fresh default | Options and notes |
|---|---|---|
| Snapshot Name | Scene State | Adjust this setting before running the action described above. |
5.3 Collection Variant View Layers
Create a managed view layer for each direct child of a parent collection, displaying one alternative per layer.
How to use it
- Place alternatives as direct children of one parent collection. Keep shared scene content outside the alternatives.
- Choose Variant Parent and Layer Prefix.
- Press Create / Update and inspect every resulting view layer.
- Use Remove to delete only the view layers recorded as owned by this system.
Limits and behavior
Nested structure belongs inside an alternative. Unrelated collections and manually created view layers are preserved. The resulting records can drive View Layer Variant Render.
Settings reference
| Setting | Fresh default | Options and notes |
|---|---|---|
| Variant Parent | Not assigned | Collection whose direct children represent alternatives. Choose the relevant Blender data in this field. |
| Layer Prefix | SH_Variant | Adjust this setting before running the action described above. |
5.4 Scene Budget Analyzer
Measure object/modifier counts, evaluated triangles, unique materials, referenced images and aggregate texture megapixels.
How to use it
- Choose Scope and set Object Limit, Triangle Limit and Texture MP Limit for your target.
- Press Analyze Budget and inspect totals and the heaviest meshes.
- Use Create Text Report to retain the analysis.
- Analyze again after changing LODs, subdivision or textures.
Limits and behavior
The tool does not optimize the scene automatically. Triangle counts reflect evaluated geometry after modifiers. Exceeding a user-defined budget calls for review and does not necessarily indicate an error.
Settings reference
| Setting | Fresh default | Options and notes |
|---|---|---|
| Scope | Scene | Options: Selected — Use selected objects; Collection — Use objects in the active collection; Scene — Use every object in the current scene. |
| Object Limit | 500 | Adjust this setting before running the action described above. |
| Triangle Limit | 1000000 | Adjust this setting before running the action described above. |
| Texture MP Limit | 500 | Adjust this setting before running the action described above. |
5.5 Safe Orphan Data Cleanup
Audit and optionally purge unprotected local datablocks with zero users.
How to use it
- Save the project and make a checkpoint.
- Choose Recursive Cleanup, then press Audit Only.
- Read the candidate list immediately before Purge Audited Orphans... and confirm only the intended cleanup.
- If the state changed and the audit refreshes without deletion, review the new list before trying again.
Limits and behavior
Linked data, assets, embedded/runtime data and Fake User-protected datablocks are excluded. Recursive cleanup can expose new orphans after earlier dependencies are removed. The purge changes the Blender project.
Settings reference
| Setting | Fresh default | Options and notes |
|---|---|---|
| Recursive Cleanup | On | Continue until removing one orphan no longer reveals another. |
6.1 Model Tools
Place object origins, add modifiers in a batch and perform confirmed mesh cleanup.
How to use it
- Select editable local objects. Use Origin to Base or Origin to Center for the intended local bounds position.
- Choose Bevel, Solidify or Subdivision in Batch Modifier, set its parameters and Skip Existing Type, then Add to Selected.
- Choose Merge by Distance and/or Recalculate Face Normals.
- Use Clean Selected Meshes... and inspect the resulting topology and silhouette.
Limits and behavior
Modifiers remain editable; cleanup changes mesh data. Unsupported linked/shared data and shape-key cases are skipped where geometry changes would be unsafe. A large merge distance can remove useful detail.
Settings reference
| Setting | Fresh default | Options and notes |
|---|---|---|
| Modifier | Bevel | Options: Bevel — Add a Bevel modifier; Solidify — Add a Solidify modifier; Subdivision — Add a Subdivision Surface modifier. |
| Skip Existing Type | On | Do not add a second modifier of the same type. |
| Merge by Distance | On | Adjust this setting before running the action described above. |
| Distance | 0.0001 | Distance follows scene units. |
| Recalculate Face Normals | On | Adjust this setting before running the action described above. |
| Width | 0.02 | Distance follows scene units. |
| Segments | 3 | Adjust this setting before running the action described above. |
| Limit | Angle | Options: Angle — Bevel edges based on their angle; None — Bevel every edge. |
| Angle | 30° | Angles are shown in degrees here. |
| Thickness | 0.02 | Distance follows scene units. |
| Offset | 0 | Adjust this setting before running the action described above. |
| Viewport | 2 | Adjust this setting before running the action described above. |
| Render | 2 | Adjust this setting before running the action described above. |
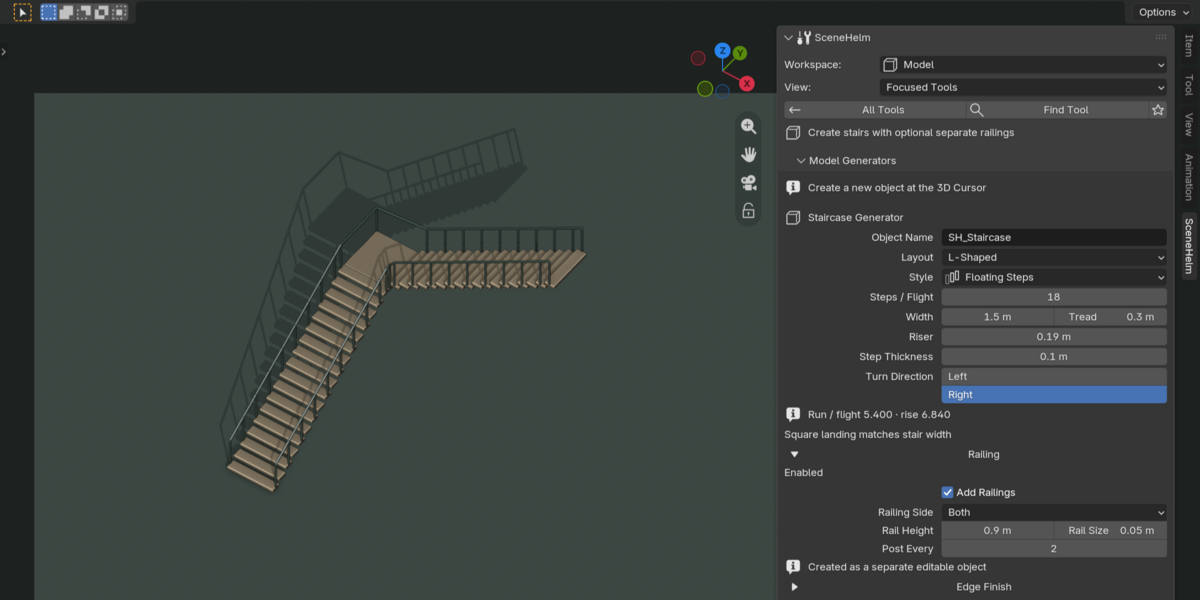
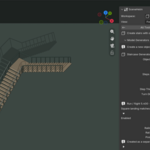
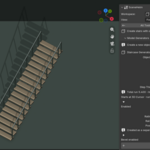
6.2 Model Generators
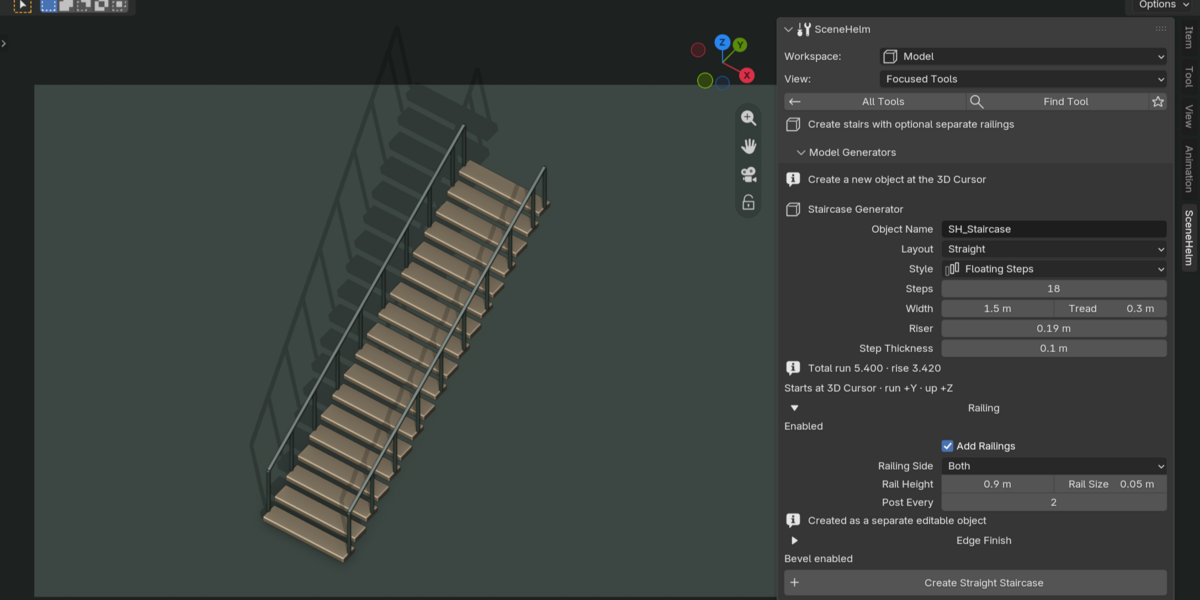
Create straight, L-shaped, U-shaped or spiral stairs, with optional separate railings.
How to use it
- Place the 3D Cursor, choose Layout and a non-spiral Style where applicable.
- Set Steps, Width, Tread and Riser. L/U steps are per flight; configure the landing and flight gap where shown.
- For Spiral, set inner/outer radii, Turns, Direction, Arc Segments, Step Thickness and the central column.
- Choose railing sides, height, section, post frequency and optional bevel; press the Create button for that layout.
Limits and behavior
Straight stairs advance along +Y and rise along +Z. Outer Radius must exceed Inner Radius; Turns must be less than Steps. Spiral/floating step thickness cannot exceed the rise. The output is a new editable mesh; major design changes usually call for regeneration. Optional railings are a separate _Railing mesh.
Settings reference
| Setting | Fresh default | Options and notes |
|---|---|---|
| Object Name | SH_Staircase | Adjust this setting before running the action described above. |
| Layout | Straight | Options: Straight — One straight flight; L-Shaped — Two flights with a 90-degree turn; U-Shaped — Two parallel flights with a 180-degree turn; Spiral — Circular staircase around a central axis. |
| Add Railings | Off | Adjust this setting before running the action described above. |
| Rail Height | 0.9 | Distance follows scene units. |
| Rail Size | 0.05 | Distance follows scene units. |
| Post Every | 2 | Place a post every this many steps, always including both ends. |
| Add Bevel Modifier | On | Adjust this setting before running the action described above. |
| Bevel | 0.01 | Distance follows scene units. |
| Segments | 2 | Adjust this setting before running the action described above. |
| Steps | 10 | Adjust this setting before running the action described above. |
| Inner Radius | 0.3 | Distance follows scene units. |
| Outer Radius | 1.5 | Distance follows scene units. |
| Riser | 0.18 | Distance follows scene units. |
| Step Thickness | 0.08 | Must not exceed the riser height. Distance follows scene units. |
| Turns | 1 | Adjust this setting before running the action described above. |
| Arc Segments | 3 | Curved-edge subdivisions per step. |
| Direction | Counterclockwise | Direction while walking up. Options: Counterclockwise — Turn counterclockwise while walking up; Clockwise — Turn clockwise while walking up. |
| Add Center Column | On | Adjust this setting before running the action described above. |
| Column Radius | 0.18 | Distance follows scene units. |
| Style | Solid | Options: Solid — Create closed supported stair bodies; Floating Steps — Create separate closed tread slabs in one mesh object. |
| Width | 2 | Distance follows scene units. |
| Tread | 0.3 | Distance follows scene units. |
| Railing Side | Outer | Options: Inner — Add a railing along the inner radius; Outer — Add a railing along the outer radius; Both — Add railings along both radii. |
| Railing Side | Both | Options: Left — Add a railing to the left while walking up; Right — Add a railing to the right while walking up; Both — Add railings to both sides. |
| Turn Direction | Right | Direction of the turn while walking up. Options: Left — Turn left while walking up; Right — Turn right while walking up. |
| Landing Depth | 2 | Distance follows scene units. |
| Flight Gap | 0.2 | Clear distance between the two parallel flights. Distance follows scene units. |
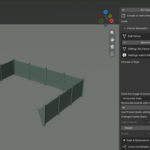
6.3 Fence Generator
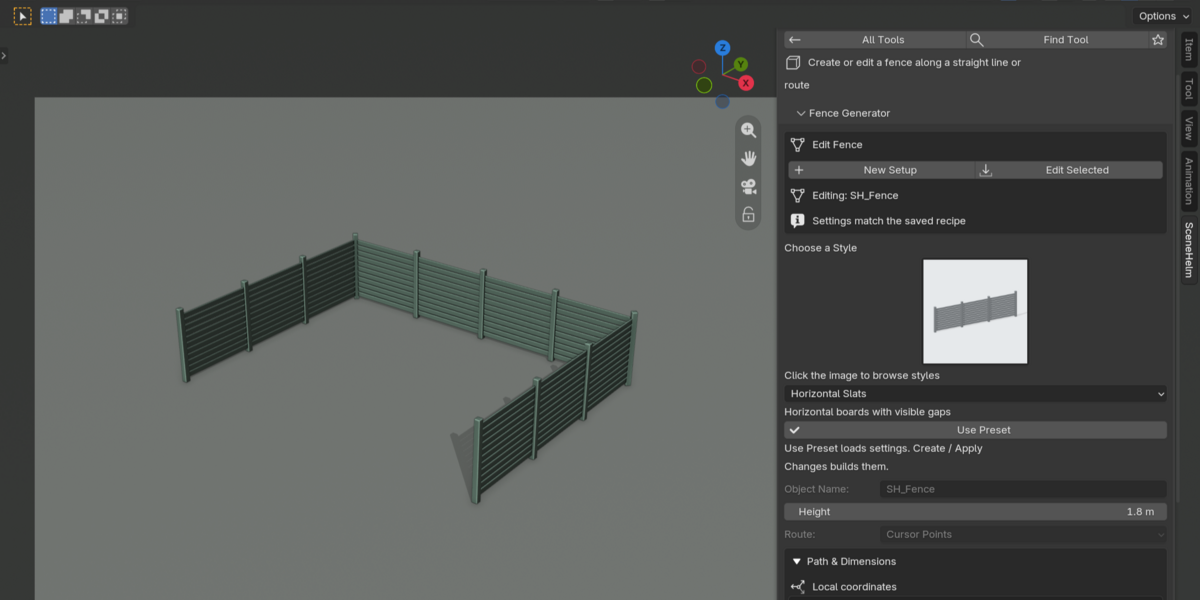
Create one straight fence mesh with evenly distributed posts, horizontal rails and optional pickets.
How to use it
- Place the 3D Cursor and set Object Name, Length and Height.
- Set Post Spacing/Size and the rail count and dimensions.
- Enable Add Pickets when required and choose their spacing and section.
- Set optional Bevel and press Create Fence.
Limits and behavior
Post and picket spacing are maximum intervals used for even distribution. The generator creates a straight mesh, not a curve-following fence. Check thin sections for bevel overlap; use sections or edit the mesh for a curved route.
Settings reference
| Setting | Fresh default | Options and notes |
|---|---|---|
| Object Name | SH_Fence | Adjust this setting before running the action described above. |
| Length | 6 | Distance follows scene units. |
| Height | 1.2 | Distance follows scene units. |
| Post Spacing | 2 | Maximum distance between evenly distributed posts. Distance follows scene units. |
| Post Size | 0.12 | Distance follows scene units. |
| Rails | 2 | Adjust this setting before running the action described above. |
| Rail Size | 0.08 | Distance follows scene units. |
| Add Pickets | Off | Adjust this setting before running the action described above. |
| Picket Spacing | 0.2 | Maximum distance between pickets inside each post section. Distance follows scene units. |
| Picket Size | 0.04 | Distance follows scene units. |
| Add Bevel Modifier | On | Adjust this setting before running the action described above. |
| Bevel | 0.01 | Distance follows scene units. |
| Segments | 2 | Adjust this setting before running the action described above. |
6.4 Cable / Pipe Generator
Create a circular-profile curve or copy selected curves and add a cable/pipe profile.
How to use it
- Choose New Straight Path or Selected Curves.
- Set Diameter, Path Resolution, Roundness and Fill End Caps.
- For a new path, set its name and length at the 3D Cursor; for selected curves, set Name Suffix.
- Press Create Cable / Pipe and edit the resulting curve points to refine the route.
Limits and behavior
Selected-curve mode preserves source curves and works on duplicates. Higher resolution increases viewport/render cost. Check physical diameter before converting the curve to a mesh.
Settings reference
| Setting | Fresh default | Options and notes |
|---|---|---|
| Source | New Straight Path | Options: New Straight Path — Create a new editable straight Curve at the 3D Cursor; Selected Curves — Duplicate selected Curve objects and add a round profile. |
| Diameter | 0.05 | Distance follows scene units. |
| Path Resolution | 12 | Adjust this setting before running the action described above. |
| Roundness | 4 | Adjust this setting before running the action described above. |
| Fill End Caps | On | Adjust this setting before running the action described above. |
| Object Name | SH_Cable | Adjust this setting before running the action described above. |
| Length | 2 | Distance follows scene units. |
| Name Suffix | _Cable | Adjust this setting before running the action described above. |
6.5 Shelf / Modular Structure
Build a new shelf/grid mesh from overall dimensions and compartment counts.
How to use it
- Place the 3D Cursor and set overall Width, Height and Depth.
- Choose Rows and Bays.
- Set Panel Thickness and optional Back Panel/Back Thickness.
- Choose Bevel and press Create Shelf Unit.
Limits and behavior
Dimensions describe the overall structure, not each opening. Many divisions combined with thick panels leave small openings. Inspect the back panel and final depth when the structure must fit a specific space.
Settings reference
| Setting | Fresh default | Options and notes |
|---|---|---|
| Object Name | SH_Shelf | Adjust this setting before running the action described above. |
| Width | 2 | Distance follows scene units. |
| Height | 2.4 | Distance follows scene units. |
| Depth | 0.4 | Distance follows scene units. |
| Rows | 4 | Number of vertical compartments. |
| Bays | 2 | Number of horizontal compartments. |
| Panel Thickness | 0.04 | Distance follows scene units. |
| Add Back Panel | On | Adjust this setting before running the action described above. |
| Back Thickness | 0.02 | Distance follows scene units. |
| Add Bevel Modifier | On | Adjust this setting before running the action described above. |
| Bevel | 0.005 | Distance follows scene units. |
| Segments | 2 | Adjust this setting before running the action described above. |
6.6 LOD Generator
Create independent LOD0, LOD1 and LOD2 mesh copies, with Decimate Collapse modifiers on the reduced levels.
How to use it
- Select the source meshes and choose Collection Name.
- Set LOD1 Ratio and LOD2 Ratio, retaining less detail in LOD2.
- Optionally enable Arrange Side by Side and set Preview Spacing.
- Press Generate LOD0 / LOD1 / LOD2; inspect silhouettes, UVs, normals and deformation before export.
Limits and behavior
Sources remain unchanged. Ratios describe approximate retained geometry, not fixed triangle counts. The generated naming is suitable for LOD Set Export. Side-by-side placement is for comparison: inspect final transforms and the chosen export pivot before delivery.
Settings reference
| Setting | Fresh default | Options and notes |
|---|---|---|
| Collection Name | SH_LODs | Adjust this setting before running the action described above. |
| LOD1 Ratio | 0.5 | Decimate ratio for the medium-detail duplicate. |
| LOD2 Ratio | 0.2 | Decimate ratio for the low-detail duplicate. |
| Arrange Side by Side | Off | Offset generated LODs on world X for visual comparison. |
| Preview Spacing | 2.5 | Distance follows scene units. |
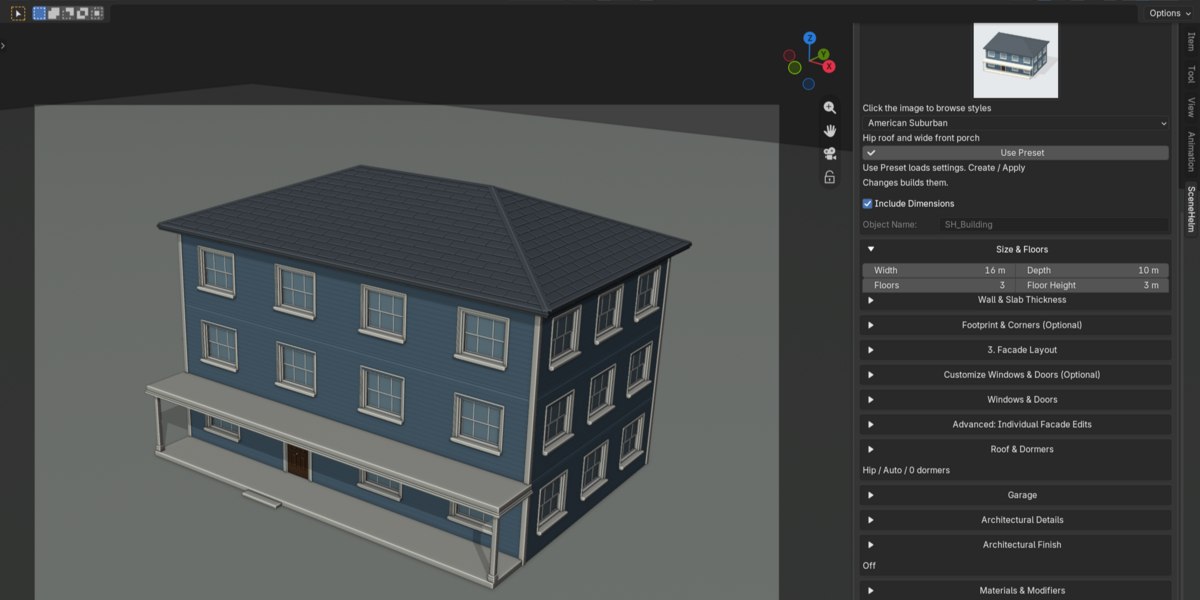
6.7 Modular Building Generator
Create a multi-floor building mesh with wall/slab thickness, geometric window and door openings, optional roof and editable bevel.
How to use it
- Place the 3D Cursor and set the footprint, Floors and Floor Height.
- Set Wall Thickness, Slab Thickness and Facade Bays.
- Fit windows, Sill Height and the ground-floor door within the available bays and floor height.
- Choose Roof Slab and Bevel, then Create Modular Building.
Limits and behavior
Openings are geometry rather than painted textures. Impossible dimensions are blocked or reported. Treat the output as a modeling base; separate or refine elements when materials or per-floor variation require it.
Settings reference
| Setting | Fresh default | Options and notes |
|---|---|---|
| Object Name | SH_Building | Adjust this setting before running the action described above. |
| Width | 12 | Distance follows scene units. |
| Depth | 8 | Distance follows scene units. |
| Floors | 3 | Adjust this setting before running the action described above. |
| Floor Height | 3 | Distance follows scene units. |
| Wall Thickness | 0.2 | Distance follows scene units. |
| Slab Thickness | 0.2 | Distance follows scene units. |
| Facade Bays | 4 | Adjust this setting before running the action described above. |
| Window Width | 1.8 | Distance follows scene units. |
| Window Height | 1.4 | Distance follows scene units. |
| Sill Height | 0.9 | Distance follows scene units. |
| Add Ground Door | On | Adjust this setting before running the action described above. |
| Door Width | 1.2 | Distance follows scene units. |
| Door Height | 2.2 | Distance follows scene units. |
| Add Roof Slab | On | Adjust this setting before running the action described above. |
| Add Bevel Modifier | On | Adjust this setting before running the action described above. |
| Bevel | 0.02 | Distance follows scene units. |
| Segments | 2 | Adjust this setting before running the action described above. |
6.8 Modular Boolean Cutters
Create an editable grid of cutters and optionally add an Exact Boolean Difference modifier to the active mesh.
How to use it
- Make the target mesh active and set the cutter name, dimensions, rows, columns and gaps.
- Enable Add Boolean to Active Mesh if the modifier should be created automatically.
- Keep Hide Cutters in Render enabled unless the cutter volumes should be visible.
- Press Create Modular Cutters, then refine the cutter object or its placement.
Limits and behavior
The modifier remains unapplied. Render-hidden cutters still need to exist for the Boolean to work. Review coplanar intersections, normals and scale if the result contains artifacts.
Settings reference
| Setting | Fresh default | Options and notes |
|---|---|---|
| Object Name | SH_Cutters | Adjust this setting before running the action described above. |
| Width | 1.2 | Distance follows scene units. |
| Height | 1.4 | Distance follows scene units. |
| Depth | 1 | Distance follows scene units. |
| Columns | 3 | Adjust this setting before running the action described above. |
| Rows | 2 | Adjust this setting before running the action described above. |
| Horizontal Gap | 0.6 | Distance follows scene units. |
| Vertical Gap | 0.6 | Distance follows scene units. |
| Add Boolean to Active Mesh | On | Add a non-destructive Difference modifier using the cutter object. |
| Hide Cutters in Render | On | Adjust this setting before running the action described above. |
6.9 Kitbash Scatter
Distribute copies of selected source objects in an area around the 3D Cursor using a repeatable seed.
How to use it
- Select the local source objects and place the 3D Cursor at the area center.
- Set the destination collection name, Instances and area dimensions.
- Choose Seed, Minimum/Maximum Scale and Maximum Z Rotation.
- Choose Linked Geometry, then press Scatter Selected Kitbash.
Limits and behavior
Source objects are preserved. Linked Geometry shares mesh data, so editing one linked mesh can affect other copies. The tool does not prevent intersections; inspect placement and collisions yourself.
Settings reference
| Setting | Fresh default | Options and notes |
|---|---|---|
| Collection Name | SH_Kitbash | Adjust this setting before running the action described above. |
| Instances | 20 | Adjust this setting before running the action described above. |
| Area Width | 10 | Distance follows scene units. |
| Area Depth | 10 | Distance follows scene units. |
| Seed | 0 | Adjust this setting before running the action described above. |
| Minimum Scale | 0.8 | Adjust this setting before running the action described above. |
| Maximum Scale | 1.2 | Adjust this setting before running the action described above. |
| Maximum Z Rotation | 180° | Angles are shown in degrees here. |
| Linked Geometry | On | Share source geometry for lighter, editable instances. |
6.10 Scale Reference & Check
Create non-rendering size references and compare selected objects with human, door, chair or custom dimensions.
How to use it
- Confirm the scene Unit System and Unit Scale.
- Choose Reference, set custom dimensions if applicable and press Create Reference at 3D Cursor.
- Select the objects to assess; choose Height Only or Full Bounds and Tolerance %.
- Enable Select Mismatches if useful, then Check Selected Scale.
Limits and behavior
This reports differences; it does not automatically resize models. Full Bounds is sensitive to orientation and transforms. The reference is a guide and is not intended to appear in renders.
Settings reference
| Setting | Fresh default | Options and notes |
|---|---|---|
| Reference | Human 1.8 m | Options: Human 1.8 m — 0.5 × 0.3 × 1.8 meters; Door 2.1 m — 0.9 × 0.15 × 2.1 meters; Chair 0.9 m — 0.5 × 0.5 × 0.9 meters; Custom — Use custom dimensions. |
| Check Mode | Height Only | Options: Height Only — Compare world-space Z height; Full Bounds — Compare width, depth and height. |
| Tolerance % | 5 | Adjust this setting before running the action described above. |
| Select Mismatches | On | Adjust this setting before running the action described above. |
| Width | 1 | Distance follows scene units. |
| Depth | 1 | Distance follows scene units. |
| Height | 1 | Distance follows scene units. |
6.11 Game / 3D Print Preparation
Create prepared mesh copies for games or 3D printing while preserving source objects.
How to use it
- Select the source meshes and choose Game Asset or 3D Print and a destination collection.
- Choose Bake Evaluated Modifiers and Bake World Transforms for the intended pipeline.
- Set Triangulate Copies and Merge Distance.
- Press Create Prepared Copies and inspect the report and resulting meshes.
Limits and behavior
Baked modifiers lose editability in the copies, not in the sources. For printing, review scale, thickness, units and manifold results; a failed manifold check needs manual correction. Preparation does not guarantee printability or engine readiness.
Settings reference
| Setting | Fresh default | Options and notes |
|---|---|---|
| Target | Game Asset | Options: Game Asset — Create optimized game-ready copies; 3D Print — Create cleaned print-preparation copies. |
| Collection Name | SH_Prepared | Adjust this setting before running the action described above. |
| Bake Evaluated Modifiers | On | Adjust this setting before running the action described above. |
| Bake World Transforms | On | Adjust this setting before running the action described above. |
| Triangulate Copies | On | Adjust this setting before running the action described above. |
| Merge Distance | 0.0001 | Distance follows scene units. |
7.1 Material Tools
Import PBR texture folders, batch-assign materials, make active materials unique and clean unused slots.
How to use it
- Prepare recognizable Base Color, Roughness, Metallic, OpenGL Normal, Height and AO filenames; select destination objects if assigning on import.
- Set Material Name, Assign to Selected and Bump settings, then Choose PBR Folder....
- For an existing material, choose Target Material and Assign Mode, then Assign to Selected.
- Use Make Active Materials Unique before per-object edits; use Remove Unused Slots... only after reviewing the intended cleanup.
Limits and behavior
The importer creates a Principled material. AO is loaded and labeled for manual connection; ambiguous packed maps and DirectX normal maps are not automatically wired. Replace All Slots is broader than changing an active slot and requires confirmation. Inspect shading and normal orientation.
Settings reference
| Setting | Fresh default | Options and notes |
|---|---|---|
| Material Name | Empty | Leave empty to use the texture folder name. |
| Assign to Selected | On | Adjust this setting before running the action described above. |
| Bump Strength | 1 | Adjust this setting before running the action described above. |
| Bump Distance | 0.1 | Distance follows scene units. |
| Material | Not assigned | Choose the relevant Blender data in this field. |
| Assign Mode | Active Slot | Options: Active Slot — Replace the active slot or create the first slot; Replace All — Remove every slot and assign only this material. |
7.2 Triplanar Mapping
Apply reversible Box projection to suitable Image Texture nodes using managed Generated and Mapping nodes.
How to use it
- Choose the active-material or selected-material scope.
- Set Scale and Blend, then Apply / Update.
- Inspect texture scale and transitions in Material Preview or Rendered mode.
- Use Remove to remove owned nodes/links and restore the previous projection settings.
Limits and behavior
Custom Vector links and Normal/Height maps are skipped. Do not insert unrelated nodes inside the managed setup if you need clean automatic removal. Box projection is not a replacement for directional artwork that needs a specific UV unwrap.
Settings reference
| Setting | Fresh default | Options and notes |
|---|---|---|
| Materials | Active Material | Options: Active Material — Update only the active object's active material; Selected Active Materials — Update each unique active material on selected objects. |
| Scale | 1 | Generated-coordinate scale; larger values tile more often. |
| Blend | 0.2 | Blend between box-projection sides. |
7.3 ORM Channel Packing
Write one PNG with R=Ambient Occlusion, G=Roughness and B=Metallic.
How to use it
- Choose Source Folder... or assign the loaded AO, Roughness and Metallic images manually. Inputs must share the same resolution.
- Set default values for omitted channels, Output Folder, Output Name and Overwrite.
- Choose Assign to Active Material and use Replace Existing Links only when replacing connections is intended.
- Press Pack ORM Texture and inspect the output channels and material connections.
Limits and behavior
The output is a disk file and is not removed by Undo. Existing names receive a safe suffix unless overwrite is enabled. Principled has no dedicated standard AO input; the AO channel is normally used in the destination pipeline or combined with Base Color as appropriate. Keep the source maps.
Settings reference
| Setting | Fresh default | Options and notes |
|---|---|---|
| AO | Not assigned | Choose the relevant Blender data in this field. |
| Roughness | Not assigned | Choose the relevant Blender data in this field. |
| Metallic | Not assigned | Choose the relevant Blender data in this field. |
| Output Folder | //textures/ | A // prefix is relative to the saved .blend. |
| Filename | SH_ORM | Adjust this setting before running the action described above. |
| Overwrite Existing | Off | Adjust this setting before running the action described above. |
| Connect to Active Material | On | Adjust this setting before running the action described above. |
| Default AO | 1 | Adjust this setting before running the action described above. |
| Default Roughness | 0.5 | Adjust this setting before running the action described above. |
| Default Metallic | 0 | Adjust this setting before running the action described above. |
| Replace Existing Roughness / Metallic Links | Off | Adjust this setting before running the action described above. |
7.4 Texel Density
Measure and normalize active UV texel density in pixels per scene unit, using world-space area.
How to use it
- Select local mesh objects with active UV maps.
- Set a reference Image or manual resolution and Target Density.
- Press Analyze, inspect the values, then Set Target when uniform UV rescaling is intended.
- Analyze again and inspect UV tile boundaries.
Limits and behavior
Geometry is unchanged. Linked data, unsafe multi-user meshes and meshes without UVs are skipped during modification. UV rescaling can move islands outside 0-1; repack afterward if a conventional atlas is required.
Settings reference
| Setting | Fresh default | Options and notes |
|---|---|---|
| Reference Image | Not assigned | Use this image's dimensions instead of manual resolution. Choose the relevant Blender data in this field. |
| Target Density | 512 | Target pixels per Blender world unit. |
| Width | 2048 | Adjust this setting before running the action described above. |
| Height | 2048 | Adjust this setting before running the action described above. |
7.5 Texture Relinker
Find missing image files by exact filename, accepting only one unambiguous match.
How to use it
- Keep the original image filenames and choose Scope.
- Enable Recursive for subfolders; save the .blend before choosing Make Relative.
- Press Choose Search Folder & Relink... and select the search root.
- Review the found, ambiguous and unresolved counts, then repeat the relevant material or dependency audit.
Limits and behavior
Two matching filenames remain ambiguous and are left unchanged. The tool does not guess renamed files. Move textures without renaming them when testing this workflow; reorganize duplicate matches or relink manually.
Settings reference
| Setting | Fresh default | Options and notes |
|---|---|---|
| Images | Selected Materials | Options: Selected Materials — Search images used by materials on selected objects; All Images — Search every image datablock in the current file. |
| Include Subfolders | On | Adjust this setting before running the action described above. |
| Make Paths Relative | On | Adjust this setting before running the action described above. |
7.6 Material Audit & Safe Repair
Find missing outputs/images, unsuitable PBR color spaces and image nodes connected directly to Principled Normal.
How to use it
- Choose Active, Selected or Scene scope and make a checkpoint before broad repairs.
- Press Audit and read the per-material text report.
- Review custom or ambiguous shader networks manually.
- Use Safe Repair... for unambiguous corrections, confirm, then Audit again.
Limits and behavior
Safe Repair preserves custom Surface topology and reports changed/skipped cases. Missing textures cannot be reconstructed by this tool; use Texture Relinker or Find Missing Files. A custom non-PBR shader may be valid despite a conventional PBR warning.
Settings reference
| Setting | Fresh default | Options and notes |
|---|---|---|
| Materials | Selected Objects | Options: Active Material — Audit the active object's active material; Selected Objects — Audit every material used by selected objects; Whole Scene — Audit every material used in the current scene. |
7.7 Reversible PBR Tuning
Add editable tint, roughness, metallic and normal-strength adjustments while retaining original links and defaults.
How to use it
- Choose Scope and check whether objects share their material.
- Set Tint, Tint Strength, roughness/metallic multipliers and offsets, and Normal Strength.
- Press Apply / Update and inspect the result under suitable lighting.
- Use Remove to restore the retained material state.
Limits and behavior
Use local materials with a recognizable Principled setup. Upstream Normal Map strength is adjusted when available. Avoid manually deleting or renaming owned nodes. Strong offsets can produce implausible material values; review the result rather than relying on defaults.
Settings reference
| Setting | Fresh default | Options and notes |
|---|---|---|
| Materials | Active Material | Options: Active Material — Tune the active object's active material; Selected Active Materials — Tune each unique active material on selected objects. |
| Tint | 1, 1, 1, 1 | RGBA color. |
| Tint Strength | 0 | Adjust this setting before running the action described above. |
| Roughness Multiply | 1 | Adjust this setting before running the action described above. |
| Roughness Offset | 0 | Adjust this setting before running the action described above. |
| Metallic Multiply | 1 | Adjust this setting before running the action described above. |
| Metallic Offset | 0 | Adjust this setting before running the action described above. |
| Normal Strength | 1 | Adjust this setting before running the action described above. |
7.8 Editable Material Variants
Create independent Warm, Cool, Wet, Dry or Matte copies of the active material.
How to use it
- Choose a local object with an active material.
- Set Variant Preset and Variant Name, then choose Assign to Active Object if required.
- Press Create Variant and refine the editable copy.
- Use Restore Source to reassign the original material.
Limits and behavior
Restore Source keeps the variant available. Assignment is blocked for unsafe linked or shared object data. Presets are starting points, not final physical material definitions.
Settings reference
| Setting | Fresh default | Options and notes |
|---|---|---|
| Preset | Warm | Options: Warm — Warm tint with retained PBR response; Cool — Cool tint with retained PBR response; Wet — Darker tint, lower roughness, stronger normal; Dry — Warm tint, higher roughness, softer normal; Matte — High roughness and reduced metallic response. |
| Variant Name | Empty | Leave empty to derive a name from the source and preset. |
| Assign to Active Object | On | Assign only when the active object's data is local and single-user. |
7.9 Exact Material Consolidation
Remap conservative exact duplicates of local node graphs to a deterministically selected canonical material.
How to use it
- Make a checkpoint and choose Scope and Canonical preference.
- Press Scan and inspect the duplicate groups.
- Decide whether Remove Unused should delete remapped zero-user duplicates.
- Press Consolidate..., confirm, then review material slots and appearance.
Limits and behavior
Matching names alone are insufficient. Linked, animated or non-equivalent materials are skipped. Remove Unused only deletes duplicate datablocks that have no remaining users after remapping; assignments can still change across many objects.
Settings reference
| Setting | Fresh default | Options and notes |
|---|---|---|
| Materials | Selected Objects | Options: Selected Objects — Compare materials used by selected objects; Whole Scene — Compare materials used throughout the scene. |
| Keep | Most Used | Options: Most Used — Keep the most-used material, then break ties alphabetically; Alphabetical First — Keep the alphabetically first material. |
| Remove Remapped Datablocks | Off | Delete only duplicate materials whose user count reaches zero. |
7.10 UDIM Set Audit & Loader
Recognize exact sibling 1xxx tiles and load or update one Blender tiled image with a path.
How to use it
- Use a coherent channel set such as body_basecolor.1001.exr, with consistent format/resolution.
- Press Choose Any UDIM Tile... and select a tile from that set.
- Review found tiles, gaps and missing-1001 warnings; choose Add to Active Material and Target if needed.
- Press Load / Update UDIM and inspect the image and shader node.
Limits and behavior
Other version numbers in filenames must not be mistaken for tile numbers. Adding an image node does not replace occupied Principled inputs. Connect it manually when the relevant input already has a custom link.
Settings reference
| Setting | Fresh default | Options and notes |
|---|---|---|
| Add to Active Material | On | Adjust this setting before running the action described above. |
| Target | Image Node Only | Options: Image Node Only — Add or update the UDIM image node without shader connection; Base Color — Connect only when the Principled Base Color input is free; Roughness — Connect only when the Principled Roughness input is free; Metallic — Connect only when the Principled Metallic input is free. |
8.1 Animate Tools
Insert transform keys, set interpolation, offset or stagger active actions, and clear selected objects' animation data.
How to use it
- Select local objects and check their assigned Action Slots.
- Choose Location, Rotation and/or Scale, then Insert Transform Keys at the current frame.
- Choose Bezier, Linear or Constant and Apply to Active Actions. Use Frame Offset or Stagger Step for the intended timing change.
- Use Clear Animation Data... only when removing the selected objects' Action assignment, drivers and NLA is intended.
Limits and behavior
Use independent actions when objects need different timing. Stagger skips ambiguous shared-action edits. Clearing animation data does not necessarily delete the Action datablock itself. Timing offsets preserve keyframe handles.
Settings reference
| Setting | Fresh default | Options and notes |
|---|---|---|
| Location | On | Adjust this setting before running the action described above. |
| Rotation | On | Adjust this setting before running the action described above. |
| Scale | On | Adjust this setting before running the action described above. |
| Mode | Bezier | Options: Bezier — Smooth curved interpolation; Linear — Straight interpolation between keys; Constant — Hold each value until the next key. |
| Frame Offset | 10 | Adjust this setting before running the action described above. |
| Stagger Step | 5 | Adjust this setting before running the action described above. |
| Reverse Object Order | Off | Adjust this setting before running the action described above. |
8.2 Motion Presets
Create Float, Bounce, Spin or Pulse transform animation with configurable range, amplitude/axis, turns/scale and stagger.
How to use it
- Place the selected objects at their intended initial transforms.
- Choose Preset and its parameters, with Start before End.
- Set Stagger and optionally Loop Preset to create SH Loop Cycles modifiers.
- Press Create Motion Preset and inspect playback.
Limits and behavior
Presets write transform keys. Work on copies or review affected channels when preserving existing animation matters. Linked or ambiguously shared actions are not safe targets. Loop closure returns to the starting state where the preset requires it.
Settings reference
| Setting | Fresh default | Options and notes |
|---|---|---|
| Preset | Float | Options: Float — Smoothly float above and below the starting position; Bounce — Rise and return to the starting position; Spin — Rotate by a configurable number of turns; Pulse — Scale uniformly up and back down. |
| Start | 1 | Adjust this setting before running the action described above. |
| End | 49 | Adjust this setting before running the action described above. |
| Stagger | 0 | Delay each selected object by this many frames. |
| Loop Preset | Off | Add a named Cycles modifier to the generated curves. |
| Axis | Z | Options: X — Animate the X component; Y — Animate the Y component; Z — Animate the Z component. |
| Amplitude | 1 | Distance follows scene units. |
| Turns | 1 | Adjust this setting before running the action described above. |
| Scale Factor | 1.2 | Adjust this setting before running the action described above. |
8.3 Action Loops
Loop assigned Action Slot F-Curves using owned Cycles modifiers without duplicating keys.
How to use it
- Select objects with assigned animated Action Slots.
- Choose Repeat, Repeat + Offset or Mirror, Before First Key, After Last Key and Cycles.
- Press Apply / Update Loop.
- Use Remove SH Loops to remove only SceneHelm's named loop modifiers.
Limits and behavior
Cycles=0 is unlimited. Repeat + Offset accumulates the first-to-last difference for continuous travel; Mirror alternates forward and reverse. The modifiers remain editable in the Graph Editor.
Settings reference
| Setting | Fresh default | Options and notes |
|---|---|---|
| Mode | Repeat | Options: Repeat — Repeat the keyed motion as-is; Repeat + Offset — Repeat while accumulating the end offset; Mirror — Alternate forward and reverse playback. |
| Before First Key | Off | Adjust this setting before running the action described above. |
| After Last Key | On | Adjust this setting before running the action described above. |
| Cycles | 0 | Maximum cycles on each enabled side; zero means infinite. |
8.4 Retime & Reverse
Fit active action keys and handles to a new time range or reverse their timing.
How to use it
- Select objects with suitable independent actions and preserve a copy if you need the original timing.
- Set New Start and New End; choose Set Scene Range if the timeline should follow.
- Use Fit Actions to Range to scale time.
- Alternatively, use Reverse Active Actions to reverse keys within their existing action range.
Limits and behavior
This edits action keys and handles, not NLA strips. Retiming changes duration/speed. Linked or ambiguous shared-slot cases are skipped. Reversal swaps handles to preserve curve shape.
Settings reference
| Setting | Fresh default | Options and notes |
|---|---|---|
| New Start | 1 | Adjust this setting before running the action described above. |
| New End | 60 | Adjust this setting before running the action described above. |
| Set Scene Range | On | Adjust this setting before running the action described above. |
8.5 Secondary Motion
Add editable SH Noise F-Curve modifiers to existing Location, Euler Rotation or Scale channels.
How to use it
- Create base keys first if the desired channels have no F-Curves.
- Choose Channel and X/Y/Z axes, then Strength, Speed Scale, Seed/Phase and Detail.
- If Restrict Frame Range is enabled, set Start, End and Blend Frames.
- Press Add / Update Motion; use Remove SH Noise to remove the owned modifiers.
Limits and behavior
Base keyframes are retained. Rotation needs Euler mode. Higher Speed Scale produces slower noise. Different phases help prevent objects from moving identically.
Settings reference
| Setting | Fresh default | Options and notes |
|---|---|---|
| Channel | Location | Options: Location — Add secondary motion to location curves; Rotation — Add secondary motion to Euler rotation curves; Scale — Add secondary motion to scale curves. |
| X | Off | Adjust this setting before running the action described above. |
| Y | Off | Adjust this setting before running the action described above. |
| Z | On | Adjust this setting before running the action described above. |
| Strength | 0.25 | Adjust this setting before running the action described above. |
| Speed Scale | 8 | Larger values create slower noise. |
| Seed / Phase | 1 | Adjust this setting before running the action described above. |
| Detail | 1 | Adjust this setting before running the action described above. |
| Restrict Frame Range | On | Adjust this setting before running the action described above. |
| Start | 1 | Adjust this setting before running the action described above. |
| End | 49 | Adjust this setting before running the action described above. |
| Blend Frames | 4 | Adjust this setting before running the action described above. |
8.6 Follow Path Rig
Use the active curve as a route for the other selected objects, with managed constraints and linear fixed-position progress.
How to use it
- Select the followers and make the local Curve object active.
- Set Start, End, Follower Stagger and distinct Forward/Up axes.
- Choose Follow Curve Rotation, Clear Follower Location and Set Scene Range as appropriate.
- Press Set Up Follow Path. Use Remove SH Follow Path to remove the owned constraints and animation.
Limits and behavior
Clear Follower Location changes the follower location to place it on the curve. Check the Forward axis if the model faces the wrong direction. Staggered followers finish later, so inspect the complete timeline range.
Settings reference
| Setting | Fresh default | Options and notes |
|---|---|---|
| Start | 1 | Adjust this setting before running the action described above. |
| End | 120 | Adjust this setting before running the action described above. |
| Follower Stagger | 0 | Adjust this setting before running the action described above. |
| Forward | +Y | Options: +X — Point local X along the path; +Y — Point local Y along the path; +Z — Point local Z along the path; -X — Point local negative X along the path; -Y — Point local negative Y along the path; -Z — Point local negative Z along the path. |
| Up | Z | Options: X — Use local X as the up axis; Y — Use local Y as the up axis; Z — Use local Z as the up axis. |
| Follow Curve Rotation | On | Adjust this setting before running the action described above. |
| Clear Follower Location | On | Clear location so followers sit directly on the path. |
| Set Scene Range | On | Adjust this setting before running the action described above. |
8.7 Tempo & Beat Markers
Create a musical timing grid from the scene's exact FPS, BPM, bars, beats and subdivisions.
How to use it
- Set scene frame rate and time base first.
- Choose BPM, Start, Bars, Beats per Bar, Subdivisions and Prefix.
- Choose Set Scene Range, then Create / Update.
- Use Remove to delete only the markers recorded as owned by this grid.
Limits and behavior
Unrelated markers are preserved. Non-integer beat timings use frame rounding based on the real FPS. Set the tempo before building animation against the grid.
Settings reference
| Setting | Fresh default | Options and notes |
|---|---|---|
| BPM | 120 | Adjust this setting before running the action described above. |
| Start | 1 | Adjust this setting before running the action described above. |
| Bars | 4 | Adjust this setting before running the action described above. |
| Beats / Bar | 4 | Adjust this setting before running the action described above. |
| Subdivisions | 1 | Options: 1 — One marker per beat; 2 — Two markers per beat; 4 — Four markers per beat; 8 — Eight markers per beat. |
| Marker Prefix | SH Beat | Adjust this setting before running the action described above. |
| Set Scene Range | On | Adjust this setting before running the action described above. |
8.8 Camera Shot Manager
Save named shots with a camera, inclusive frame range and owned camera-bound marker.
How to use it
- Assign the scene camera, enter Shot Name and valid Start/End values.
- Press Capture New Shot.
- Select a record and use Activate to recall its camera/range, or Update to save revised values.
- Delete a shot record only when it is no longer needed.
Limits and behavior
Deleting a shot does not delete cameras or unrelated markers. Both start and end frames are included. Saved records drive Managed Shot Render Queue and persist in the .blend.
Settings reference
| Setting | Fresh default | Options and notes |
|---|---|---|
| Shot Name | Shot | Adjust this setting before running the action described above. |
| Start | 1 | Adjust this setting before running the action described above. |
| End | 75 | Adjust this setting before running the action described above. |
8.9 Advanced Easing Profiles
Apply Smooth, Ease In, Ease Out, Ease In/Out, Overshoot, Bounce or Elastic profiles to assigned Action Slot keys.
How to use it
- Select objects with active actions and choose Easing Profile.
- Set the additional Overshoot or Elastic parameters when shown.
- Choose Restrict Frame Range and Start/End if only part of the action should change.
- Press Apply Easing Profile and inspect playback and the Graph Editor.
Limits and behavior
The range is inclusive. Shared slot references are processed once. These profiles modify keyframe interpolation/easing; duplicate an action first when you need an untouched comparison. Bounce and Elastic can be unsuitable for physically neutral motion.
Settings reference
| Setting | Fresh default | Options and notes |
|---|---|---|
| Profile | Ease In / Out | Options: Smooth — Clamped automatic Bezier handles; Ease In — Accelerate smoothly from each key; Ease Out — Decelerate smoothly into the next key; Ease In / Out — Smooth acceleration and deceleration; Overshoot — Pass the target and settle back; Bounce — Bounce into the next value; Elastic — Oscillate around the next value. |
| Restrict Frame Range | Off | Adjust this setting before running the action described above. |
| Overshoot Strength | 1.70158 | Adjust this setting before running the action described above. |
| Start | 1 | Adjust this setting before running the action described above. |
| End | 75 | Adjust this setting before running the action described above. |
| Amplitude | 1 | Adjust this setting before running the action described above. |
| Period | 0.3 | Adjust this setting before running the action described above. |
8.10 NLA Clip Builder
Create an editable NLA strip from each selected object's assigned Action Slot.
How to use it
- Choose Clip Mode, Track Name and Clip Name.
- Set Start, Stagger, Scale and Repeat.
- Set Blend Type, Extrapolation and Auto Blend.
- Press Create NLA Clips and inspect tracks/strips in the NLA Editor.
Limits and behavior
Push Down transfers active playback into NLA; the non-destructive stash stays muted to avoid double playback. Scale above 1 lengthens and slows the clip; below 1 shortens it. The correct Action Slot handle is retained.
Settings reference
| Setting | Fresh default | Options and notes |
|---|---|---|
| Mode | Push Down | Options: Push Down — Move the active Action Slot into an active editable NLA strip; Stash Muted — Keep the active Action Slot and create a muted backup track. |
| Track Name | SH Clips | Adjust this setting before running the action described above. |
| Clip Name | Empty | Leave empty to use the assigned Action name. |
| Start | 1 | Adjust this setting before running the action described above. |
| Object Stagger | 0 | Adjust this setting before running the action described above. |
| Time Scale | 1 | Adjust this setting before running the action described above. |
| Repeat | 1 | Adjust this setting before running the action described above. |
| Blend | Replace | Options: Replace — Use the strip in place of lower animation; Combine — Combine transforms by channel type; Add — Add strip values to lower animation; Subtract — Subtract strip values from lower animation; Multiply — Multiply lower animation by strip values. |
| Extrapolation | Nothing | Options: Nothing — Do not hold values outside the strip; Hold Forward — Hold values after the strip; Hold — Hold values before and after the strip. |
| Auto Blend | Off | Adjust this setting before running the action described above. |
8.11 Animation Range Tools
Fit the scene range to assigned Actions, NLA strips or both, with optional handles and preview range.
How to use it
- Choose selected-object or scene Scope and Sources.
- Decide whether Include Muted NLA should contribute.
- Set Handle Before and Handle After, Set Preview Range and Move to New Start.
- Press Fit Scene to Animation and inspect the resulting range.
Limits and behavior
This does not retime or move keys. Handles add timeline margin. With no valid actions or strips, the range is left unchanged.
Settings reference
| Setting | Fresh default | Options and notes |
|---|---|---|
| Objects | Selected | Options: Selected — Measure selected objects; Whole Scene — Measure every object in the scene. |
| Sources | Actions + NLA | Options: Active Actions — Measure assigned Action Slots only; NLA Strips — Measure NLA strips only; Actions + NLA — Measure assigned Action Slots and NLA strips. |
| Handle Before | 0 | Adjust this setting before running the action described above. |
| Handle After | 0 | Adjust this setting before running the action described above. |
| Set Preview Range | On | Adjust this setting before running the action described above. |
| Move to New Start | Off | Adjust this setting before running the action described above. |
| Include Muted NLA | Off | Adjust this setting before running the action described above. |
9.1 Render Tools
Prepare the active camera, output size and quality, then run Blender image or animation rendering.
How to use it
- Assign the scene camera, or select a camera and use Use Selected Camera.
- Apply a Resolution Preset and a Draft, Preview or Final quality preset for the selected Eevee or Cycles engine.
- Set Output Format, Film Transparency and Save Rendered Image, then run Check Render Setup.
- Use Render Image for the current frame or Render Animation for the full scene range.
Limits and behavior
Resolution presets use square pixels at 100%. Quality presets do not switch render engines. With Save Rendered Image off, a still remains in Render Result; animation writes its output files. Review the output path before rendering.
Settings reference
| Setting | Fresh default | Options and notes |
|---|---|---|
| Preset | Full HD | Options: HD Landscape — 1280 × 720; Full HD — 1920 × 1080; 4K UHD — 3840 × 2160; Vertical — 1080 × 1920; Square — 1080 × 1080. |
| Quality | Preview | Options: Draft — Fast test render; Preview — Balanced preview quality; Final — Higher final-render sampling. |
| Save Rendered Image | Off | Save still renders to the configured output path. |
9.2 Camera Framing & Focus
Frame selected subjects with a managed target and optional depth of field.
How to use it
- Select the subjects to frame.
- Choose Use Existing Scene Camera or a new Camera Name, then View, Lens and Framing Margin.
- Set Composition Guides, Depth of Field and F-Stop as needed.
- Press Frame Selected with Camera, then inspect camera view and adjust the SH_CameraTarget if necessary.
Limits and behavior
The target is editable and can drive focus. Linked or shared camera data can block edits. Lens and perspective affect the result; inspect the framing rather than treating the bounds fit as a final composition.
Settings reference
| Setting | Fresh default | Options and notes |
|---|---|---|
| Use Existing Scene Camera | Off | Reposition the active scene camera instead of creating a new one. |
| View | Isometric | Options: Isometric — Three-quarter elevated view; Front — View from negative Y; Back — View from positive Y; Left — View from negative X; Right — View from positive X; Top — View from positive Z. |
| Lens | 50 | Camera focal length; inspect the camera lens value after applying. |
| Framing Margin | 1.25 | Adjust this setting before running the action described above. |
| Composition Guides | On | Adjust this setting before running the action described above. |
| Enable Depth of Field | Off | Adjust this setting before running the action described above. |
| Camera Name | SH_Camera | Adjust this setting before running the action described above. |
| F-Stop | 4 | Adjust this setting before running the action described above. |
9.3 Three Point Studio Rig
Create editable Area lights for key, fill and rim lighting around a subject.
How to use it
- Select the subject, or place the 3D Cursor where the rig should be centered.
- Choose Color Style, Rig Distance and Key Energy.
- Adjust Fill Ratio, Rim Ratio and Light Size.
- Press Create Three Point Rig and refine the separate lights and target in the scene.
Limits and behavior
Existing lights are preserved. The generated root, target and lights remain editable. Exposure, material response and scene scale still need artistic adjustment.
Settings reference
| Setting | Fresh default | Options and notes |
|---|---|---|
| Color Style | Neutral | Options: Neutral — Use neutral white lights; Warm / Cool — Use a warm key and cool fill/rim. |
| Rig Distance | 5 | Distance follows scene units. |
| Key Energy | 1000 | Adjust this setting before running the action described above. |
| Fill Ratio | 0.5 | Adjust this setting before running the action described above. |
| Rim Ratio | 0.75 | Adjust this setting before running the action described above. |
| Light Size | 3 | Distance follows scene units. |
9.4 Camera Turntable
Orbit the active camera around selected subjects or the 3D Cursor.
How to use it
- Assign an active scene camera, then select the subject or position the 3D Cursor.
- Choose Start, Unique Frames, Clockwise and Loop in Viewport.
- Choose Set Scene Range, then Create / Update the rig.
- Preview the orbit. Use Remove Rig to remove the managed orbit without deleting the camera.
Limits and behavior
The visible loop runs from Start through Start + Unique Frames - 1. A closing key sits on the next frame to avoid a duplicate rendered endpoint. Check collisions, framing and the loop before rendering.
Settings reference
| Setting | Fresh default | Options and notes |
|---|---|---|
| Start | 1 | Adjust this setting before running the action described above. |
| Unique Frames | 120 | Number of unique rendered frames in one revolution. |
| Clockwise | Off | Adjust this setting before running the action described above. |
| Loop in Viewport | On | Adjust this setting before running the action described above. |
| Set Scene Range | On | Adjust this setting before running the action described above. |
9.5 Output Profiles
Apply a coordinated file-format profile for stills, sequences, compositing or movie output.
How to use it
- Choose PNG Transparent, PNG Sequence, OpenEXR Multilayer or MP4 H.264.
- Press Apply Output Profile.
- Review the output folder, scene range and Film Transparency where relevant.
- Run Check Render Setup before starting a render.
Limits and behavior
Profiles do not change resolution or engine and do not render immediately. Multilayer EXR uses half-float (16-bit) ZIP output. PNG sequences let you recover individual frames; movie output is less convenient for interrupted jobs. Transparency also depends on the scene settings.
Settings reference
| Setting | Fresh default | Options and notes |
|---|---|---|
| Profile | PNG Transparent | Options: PNG Transparent — RGBA PNG stills with transparency; PNG Sequence — RGB PNG animation frames; EXR Multilayer — 16-bit ZIP OpenEXR multilayer output; MP4 H.264 — MPEG-4 container with H.264 video and AAC audio. |
9.6 Multi-Camera Batch Render
Render one still at the current frame for each selected camera or every scene camera.
How to use it
- Choose Selected Cameras or All Scene Cameras.
- Set Output Folder, Prefix and Overwrite Existing.
- Review camera naming and the current frame.
- Press Render Cameras and confirm the batch.
Limits and behavior
This is a still-image batch, not a frame-range render. Output names are sanitized and collisions are handled. Scene camera and output path are restored after the batch, including failures. Existing-file behavior follows Overwrite Existing.
Settings reference
| Setting | Fresh default | Options and notes |
|---|---|---|
| Cameras | Selected | Options: Selected — Render from selected camera objects; Whole Scene — Render from every camera in the scene. |
| Output Folder | //renders/cameras/ | A // prefix is relative to the saved .blend. |
| Prefix | Render | Adjust this setting before running the action described above. |
| Overwrite Existing | Off | Adjust this setting before running the action described above. |
9.7 Managed Shot Render Queue
Render the named camera shots stored by Animate > Camera Shot Manager.
How to use it
- Create and review shot records in Camera Shot Manager first.
- Choose Selected Shot or All Managed Shots.
- Set Output Folder, Prefix and Overwrite Existing; verify the output profile.
- Press Render Managed Shots and confirm the queue.
Limits and behavior
Each shot includes both Start and End. Image sequences use a folder per shot; movie output uses a file per shot. Camera, current frame, scene range, overwrite and output path are restored even after a failure. Check shot ranges to avoid unintended duplicate frames between shots.
Settings reference
| Setting | Fresh default | Options and notes |
|---|---|---|
| Shots | Selected Shot | Options: Selected Shot — Render the selected record from Camera Shot Manager; All Managed Shots — Render every valid managed camera shot. |
| Output Folder | //renders/shots/ | A // prefix is relative to the saved .blend. |
| Prefix | Shot | Adjust this setting before running the action described above. |
| Overwrite Existing | Off | Adjust this setting before running the action described above. |
9.8 View Layer Pass Profiles
Configure standard render passes for beauty, technical data, compositing or Cryptomatte.
How to use it
- Choose Beauty Only, Technical Data, Full Compositing or Cryptomatte.
- Choose the active view layer or all enabled view layers.
- Set Cryptomatte Depth where relevant.
- Press Apply Pass Profile and inspect the view layer pass settings.
Limits and behavior
The tool manages standard passes, not custom AOVs or Light Groups. Use a suitable output format, usually multilayer EXR, to retain passes in saved files. Pass availability can depend on the render engine.
Settings reference
| Setting | Fresh default | Options and notes |
|---|---|---|
| Profile | Technical Data | Options: Beauty Only — Combined RGBA without auxiliary passes; Technical Data — Depth, mist, normal, position, vector, UV, indices and AO; Full Compositing — Lighting components plus the principal data passes; Cryptomatte — Combined plus object, material and asset Cryptomatte passes. |
| View Layers | Active | Options: Active — Apply to the active View Layer only; All Enabled — Apply to every enabled View Layer. |
| Cryptomatte Depth | 6 | Adjust this setting before running the action described above. |
9.9 Selection Render Region
Set the camera render border from selected objects' projected bounds.
How to use it
- Assign the active camera and select the subjects.
- Set Margin and Crop to Region.
- Press Set from Selection and review the border and pixel estimate.
- Use Clear to return to the full frame.
Limits and behavior
World-space bounds are projected and clamped to the camera frame. Subjects behind the camera cannot define a useful region. Crop to Region changes the resulting image dimensions, so check downstream compositing requirements.
Settings reference
| Setting | Fresh default | Options and notes |
|---|---|---|
| Margin % | 10 | Adjust this setting before running the action described above. |
| Crop to Region | On | Adjust this setting before running the action described above. |
9.10 Reversible Camera Overscan
Expand camera coverage and resolution from a saved base composition.
How to use it
- Use a local, single-user perspective or orthographic scene camera.
- Set the base framing and resolution first.
- Choose Overscan and press Apply / Update.
- Use Remove to restore the saved lens or orthographic scale and resolution.
Limits and behavior
Repeated updates are calculated from the same base rather than accumulating overscan. Additional pixels increase render cost. Linked, shared or unsupported camera configurations require correction before applying the tool.
Settings reference
| Setting | Fresh default | Options and notes |
|---|---|---|
| Overscan % | 10 | Adjust this setting before running the action described above. |
9.11 View Layer Variant Render
Render still-image variants for the active layer, all enabled layers or SceneHelm collection variants.
How to use it
- Choose a still-image output format, then the view layer scope.
- For SH Collection Variants, first create variants with Doctor > Collection View Layer Variants.
- Set Output Folder, Prefix and Overwrite Existing.
- Press Render View Layers and confirm.
Limits and behavior
Movie formats are not supported for this still batch. All Enabled skips disabled layers. Filenames are collision-aware and the output path is restored. Review each layer's collection exclusions before rendering.
Settings reference
| Setting | Fresh default | Options and notes |
|---|---|---|
| View Layers | SH Collection Variants | Options: Active — Render the active View Layer; All Enabled — Render every enabled View Layer; SH Collection Variants — Render View Layers owned by Collection Variant View Layers. |
| Output Folder | //renders/view_layers/ | A // prefix is relative to the saved .blend. |
| Prefix | Variant | Adjust this setting before running the action described above. |
| Overwrite Existing | Off | Adjust this setting before running the action described above. |
10.1 Export Tools
Deliver selected objects, a collection or the scene with Blender's native exporters.
How to use it
- Choose FBX, GLB, separate glTF, OBJ or STL.
- Choose Scope and set Output Folder, File Name, Apply Modifiers, Include Animation and Overwrite Existing.
- Run Check Export Setup and resolve its findings.
- Use Export Combined for one delivery, or Export Scope Individually for a per-object batch.
Limits and behavior
Hidden or unsupported objects are skipped as applicable. Names are sanitized and collisions are handled. Temporary selection, transforms and frame changes are restored. OBJ and STL are static formats; animation requires a compatible format and setup.
Settings reference
| Setting | Fresh default | Options and notes |
|---|---|---|
| Format | glTF Binary (.glb) | Options: FBX (.fbx) — Autodesk FBX interchange format; glTF Binary (.glb) — Single-file binary glTF asset; glTF Separate (.gltf) — JSON glTF with separate binary data and textures; Wavefront OBJ (.obj) — Static geometry interchange format; STL (.stl) — Triangle mesh exchange for fabrication and 3D printing. |
| Scope | Selected | Options: Selected — Use selected objects; Collection — Use objects in the active collection; Scene — Use every object in the current scene. |
| Output Folder | //exports/ | A // prefix is relative to the saved .blend. |
| Filename | SceneHelm_Export | Adjust this setting before running the action described above. |
| Apply Modifiers in Export | On | Export evaluated modifier results without changing scene objects. |
| Include Animation | Off | Include supported Actions and animation in FBX or glTF exports. |
| Overwrite Existing | Off | Allow existing export files to be replaced after confirmation. |
10.2 Pipeline Profiles
Start from coordinated export settings for a common delivery target.
How to use it
- Choose Unity FBX, Unreal FBX, Godot GLB, Web GLB or 3D Print STL.
- Press Apply Pipeline Profile.
- Review format, axes, pivot, modifiers and the format-specific options.
- Run export preflight and inspect a sample file in the destination application.
Limits and behavior
Applying a profile changes settings but does not export. Web GLB compression needs Draco support in the receiving viewer. A preset cannot guarantee that every project-specific shader, rig or engine convention will transfer unchanged.
Settings reference
| Setting | Fresh default | Options and notes |
|---|---|---|
| Pipeline Profile | Godot GLB | Options: Unity FBX — Static FBX preset for Unity; Unreal FBX — Static FBX preset for Unreal Engine; Godot GLB — Compact glTF Binary preset for Godot; Web GLB — Draco-compressed glTF Binary for web delivery; 3D Print STL — Binary STL using scene units. |
10.3 Temporary Export Pivot
Temporarily offset static delivery geometry without permanently moving the Blender scene.
How to use it
- Choose Keep World, Bounds Center, Bounds Base, Active Object or 3D Cursor.
- Set the active object or cursor position when that mode needs it.
- Run Check Export Setup.
- Export and inspect the origin in the destination application.
Limits and behavior
Temporary offsets are restored after export. Animated exports must use Keep World to avoid mismatched animation coordinates. Pivot choices affect delivery coordinates, not the permanent source-scene origin.
Settings reference
| Setting | Fresh default | Options and notes |
|---|---|---|
| Temporary Export Pivot | Keep World | Shift export roots temporarily and restore the scene afterward. Options: Keep World — Preserve existing world coordinates; Bounds Center — Place the combined bounds center at origin; Bounds Base — Place the bottom-center of combined bounds at origin; Active Object — Place the active object's origin at export origin; 3D Cursor — Place the 3D Cursor position at export origin. |
10.4 Format Options
Tune the native exporter options exposed for the selected format.
How to use it
- Choose valid Forward and Up axes where available.
- For FBX, review Add Leaf Bones; for glTF, review Draco Compression and its level.
- For STL, review Use Scene Unit and ASCII.
- Run preflight, then export a representative sample.
Limits and behavior
Forward and Up must not be the same or opposite axis. Draco requires compatible consumers. Binary STL is generally smaller than ASCII. These controls configure the next export; they do not create a file on their own.
Settings reference
| Setting | Fresh default | Options and notes |
|---|---|---|
| Forward | -Z | Options: +X — Positive X; +Y — Positive Y; +Z — Positive Z; -X — Negative X; -Y — Negative Y; -Z — Negative Z. |
| Up | +Y | Options: +X — Positive X; +Y — Positive Y; +Z — Positive Z; -X — Negative X; -Y — Negative Y; -Z — Negative Z. |
| Add Leaf Bones | Off | Adjust this setting before running the action described above. |
| Draco Mesh Compression | Off | Compress glTF mesh data using Draco. |
| Draco Level | 6 | Adjust this setting before running the action described above. |
| Use Scene Unit | On | Adjust this setting before running the action described above. |
| ASCII STL | Off | Write readable ASCII STL instead of smaller binary STL. |
10.5 Collection Batch Export
Export direct asset collections as separate delivery files.
How to use it
- Choose the active collection's direct children or scene top-level collections.
- Set output location and Overwrite Existing.
- Optionally enable Write JSON Manifest and set Manifest Name.
- Press Export Collections and inspect the generated files.
Limits and behavior
Each collection export includes its nested descendants; hidden or excluded contents are omitted as applicable. Source selection is restored. Organize asset boundaries before running the batch, especially when objects belong to more than one collection.
Settings reference
| Setting | Fresh default | Options and notes |
|---|---|---|
| Collections | Scene Top-Level | Options: Children of Active — Export each direct child of the active collection; Scene Top-Level — Export each direct child collection of the scene. |
| Output Folder | //exports/ | A // prefix is relative to the saved .blend. |
| Overwrite Existing | Off | Allow existing export files to be replaced after confirmation. |
| Write JSON Manifest | Off | Write objects, outputs and referenced texture status to JSON. |
| Manifest Name | SceneHelm_Export_Manifest | Adjust this setting before running the action described above. |
10.6 Export Manifest
Describe the current delivery scope and its dependencies in a JSON manifest.
How to use it
- Choose export Scope, format and output location.
- Set Manifest Name and the manifest option as needed.
- Use Create Scope Manifest.
- Review objects, materials, actions, statistics, texture paths and planned output files.
Limits and behavior
A scope manifest does not export geometry. Regenerate it after relevant scene changes. It can contain local file paths; review the information before sharing it outside the project. Packed and missing textures are identified.
Settings reference
| Setting | Fresh default | Options and notes |
|---|---|---|
| Write JSON Manifest | Off | Write objects, outputs and referenced texture status to JSON. |
| Manifest Name | SceneHelm_Export_Manifest | Adjust this setting before running the action described above. |
10.7 Asset Package Builder
Build an asset-delivery folder with export files, optional textures and a portable manifest.
How to use it
- Run export preflight on the intended asset scope.
- Set Package Name and Output Folder.
- Choose Copy External Textures and Block Missing Textures.
- Press Build Asset Package and inspect the package in the target application.
Limits and behavior
The builder uses a collision-safe folder and records SHA-256 file checksums. Texture name collisions receive distinct names. It does not permanently relink image paths in the source .blend. Inspect packed-image handling and missing dependencies before handing off the package.
Settings reference
| Setting | Fresh default | Options and notes |
|---|---|---|
| Package Name | SceneHelm_Asset | Adjust this setting before running the action described above. |
| Copy External Textures | On | Copy referenced external texture files without relinking scene images. |
| Block Missing Textures | Off | Cancel package creation when a referenced external texture is missing. |
10.8 LOD Set Export
Validate and export mesh level-of-detail sets using Asset_LOD0, Asset_LOD1 and similar names.
How to use it
- Name the objects consistently and choose One File per Set or One File per Level.
- Set Require LOD0 and Continuous Levels as required by the pipeline.
- Run Scan and correct duplicate levels or gaps.
- Press Export LOD Sets and inspect the result.
Limits and behavior
Recognized Blender duplicate suffixes are handled during name parsing. This tool organizes existing LOD meshes; it does not generate or decimate them. Source geometry is retained.
Settings reference
| Setting | Fresh default | Options and notes |
|---|---|---|
| Output | One File per Set | Options: One File per Set — Export every level of a named LOD set into one asset file; One File per Level — Export every LOD level as an independent asset file. |
| Require LOD0 | On | Adjust this setting before running the action described above. |
| Require Continuous Levels | On | Adjust this setting before running the action described above. |
10.9 Collision Set Export
Pair render meshes with named collision helpers for organized delivery.
How to use it
- Use supported UCX, UBX, UCP, USP or COL/COLLIDER/COLLISION naming tied to the exact render-mesh name.
- Keep the required meshes visible and choose Block Unpaired Colliders.
- Run Scan, review pairings and correct mismatches.
- Press Export Collision Sets to export each render mesh with its helpers.
Limits and behavior
The scan checks supported naming and pairing; it does not certify physical collision quality or convexity. Verify collision behavior in the target engine. Unpaired helpers can block delivery when that option is enabled.
Settings reference
| Setting | Fresh default | Options and notes |
|---|---|---|
| Block Unpaired Colliders | On | Cancel export when a collision helper has no matching render object. |
10.10 Animation Clip Delivery
Export compatible action, NLA or scene-timeline animation through FBX or glTF.
How to use it
- Choose FBX, GLB or glTF and use Keep World for Temporary Export Pivot.
- Choose the supported Animation Mode: Active Actions, Action Library, NLA Tracks or Scene Timeline.
- For glTF, review Limit to Scene Range and Slide Clips to Frame 0 where available.
- Use Export Animation Library and verify names, timing and playback in the destination.
Limits and behavior
Available modes depend on the format. Export-time timing options do not retime the source actions. The current Blender state is restored. Native-format limitations still apply to constraints, materials and unsupported animation data.
Settings reference
| Setting | Fresh default | Options and notes |
|---|---|---|
| Animation Mode | Active Actions Merged | Options: Active Actions Merged — Export the actions currently assigned to target objects as one animation; Action Library — Export active and stashed Actions as separate animation clips; NLA Tracks — Export individual NLA tracks as animation clips; Scene Timeline — Bake the evaluated scene timeline as one animation. |
| Limit to Scene Range | Off | Clip glTF animation delivery to the current playback range. |
| Slide Clips to Frame 0 | Off | Shift exported glTF clips so they begin at frame zero. |
10.11 Incremental Collection Export
Export changed asset collections using a persistent comparison cache.
How to use it
- Choose direct asset collections and keep a stable Cache Name between runs.
- Choose Versioned output or Replace Stable and the manifest option.
- Use Force Reexport All when a complete refresh is required.
- Press Export Changed Collections and review the changed/skipped report.
Limits and behavior
Fingerprints include geometry, active UVs, transforms, modifiers, materials, animation, texture timestamps and export settings. Versioned output retains older files; Replace Stable can overwrite them after confirmation. Keep the cache with the project and re-export if a dependency changes outside the tracked state.
Settings reference
| Setting | Fresh default | Options and notes |
|---|---|---|
| Collections | Scene Top-Level | Options: Children of Active — Export each direct child of the active collection; Scene Top-Level — Export each direct child collection of the scene. |
| Changed Output | Create Versioned File | Options: Create Versioned File — Keep previous assets and add a collision suffix for changed collections; Replace Stable File — Replace the stable collection filename only after confirmation. |
| Force Re-export All | Off | Ignore retained fingerprints for this run. |
| Cache Name | SceneHelm_Incremental | Adjust this setting before running the action described above. |
| Write JSON Manifest | Off | Write objects, outputs and referenced texture status to JSON. |
Troubleshooting and frequently asked questions
Which Blender version is supported?
SceneHelm 1.0.0 targets Blender 5.2 LTS, starting with 5.2.0. Compatibility with other Blender lines is not claimed.
Where do I find SceneHelm?
In the 3D Viewport, press N and open the SceneHelm tab. The main buttons are Doctor, Model, Material, Animate, Render and Export. Scene organization tools are inside Doctor.
Do I need an account, activation or another add-on?
No. SceneHelm runs locally without an account, activation, telemetry or another add-on. Rendering and export use Blender native operators and their available components.
Does SCAN SCENE repair everything automatically?
No. Scans identify issues and provide reports and selection helpers. You decide which changes suit the project. Non-manifold boundaries or unapplied transforms may be intentional.
Can I use SceneHelm commercially?
Yes. The software is distributed under GPL-3.0-or-later. Using SceneHelm does not by itself place your renders, exports or original project assets under GPL.
Who maintains SceneHelm?
SceneHelm is maintained by Diego Contreras Martínez. Copyright (C) 2026 Diego Contreras Martínez. The software is licensed under GPL-3.0-or-later.
Is Python source included?
Yes. The installable ZIP contains readable Python files and the full GPL license. A separate source-code download is not required to obtain this source.
Can a team use the same SceneHelm edition?
Yes. SceneHelm is offered as one complete edition for creators and teams under GPL-3.0-or-later. There are no software seat, device or installation limits. Product support and update coverage follow the terms displayed at purchase.
Are demo models, textures or finished scenes included?
No. The photographed bottle and other demonstration assets shown in the gallery are presentation examples. The purchase contains the addon and its documentation, not those assets.
Is everything reversible with Undo?
No. Blender scene edits support Undo where the operator provides it, but files written to disk remain. Review overwrite options and use project checkpoints before significant changes.
What should I send with a support request?
Use the Superhive product support channel. Include exact Blender and SceneHelm versions, operating system, short reproduction steps and the complete error message. Run Extension Health and review the optional path-redacted Support ZIP before sharing it. The ZIP does not contain your .blend or external project assets.
What if the panel disappears after an update?
Disable SceneHelm, restart Blender, enable it again and rerun Extension Health. Keep a backup before updating. Direct migration from 0.95.0 to 1.0.0 preserves SceneHelm schema-1 records.
Why does an export look different in another application?
SceneHelm uses native FBX, glTF, OBJ and STL export. The destination application must support the chosen features. Check axes, units, materials, animation mode and compression using a representative sample.
What language is the documentation?
The interface and this online reference are in English. The download also includes the existing Spanish user manual, quick-start guide and technical support documents.
What is the refund policy?
Refund requests are handled under Superhive’s current refund policy and any applicable mandatory rights. Contact the creator through the product support channel with the issue and order information.
License and support
Copyright (C) 2026 Diego Contreras Martínez. SceneHelm is maintained by Diego Contreras Martínez. The installer contains readable Python source and GPL-3.0-or-later notices. Keep the license notices when redistributing. The full GPL text is included in the download. SceneHelm is offered as one complete edition for creators and teams. Product support and update coverage follow the terms displayed at purchase.
Have questions about this product?
Login to message
| Blender Extension Compatible | Yes |
| Published | about 2 months ago |
| Blender Version | 5.2 |
| Extension Type | Add-on |
| Render Engine Used | Cycles, Eevee |
| License | GPL |