 kleinARt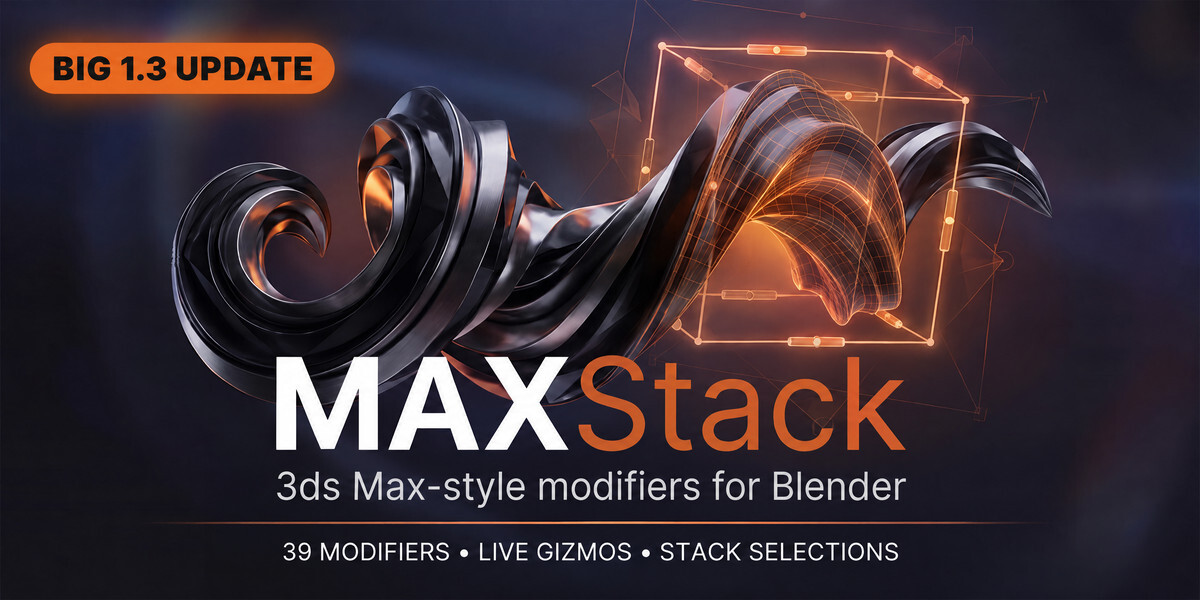






MAXStack 1.3 — FFD, Shell, a spline pack & a new stack UI
10 new modifiers, 39 in total — and a redesigned MAXStack panel that shows where every selection comes from and where it goes.
NEW
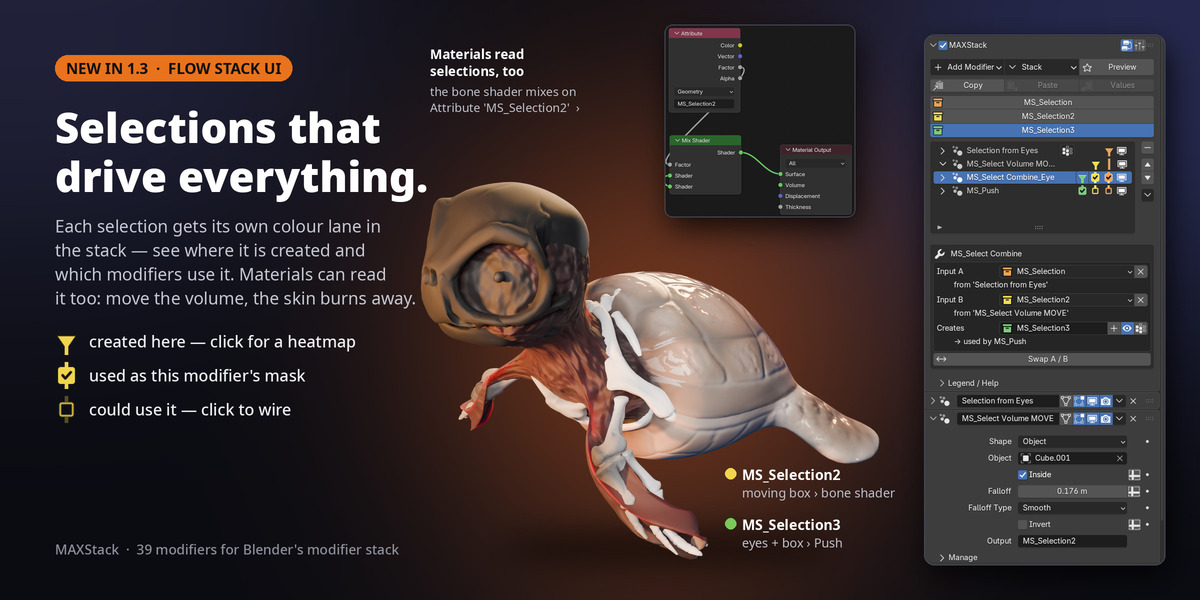
- Flow stack UI: the MAXStack panel now shows your selections like a subway map. Every selection gets its own colour and its own lane down the stack list: ▼ where it is created, ☑ on every modifier that uses it as its mask, ☐ where it could be used — one click wires or unwires it. A colour chip per selection sits above the list (click = viewport heatmap).
- Mask / Creates box: the active modifier says it in plain words — "Input: MS_Selection, from Select Volume", "Creates: MS_Selection 3, used by Taper". Pick a mask from a list of the selections created above it, a vertex group or the whole mesh. A mask that can't work (nothing creates it, or it is only created further down) is flagged in red instead of silently doing nothing.
- Selections number themselves: adding, pasting or duplicating a selection modifier gives it the next free name (MS_Selection 2, MS_Selection 3 …), so a new selection never silently replaces an existing one. Type into the name field to rename a selection — the modifiers using it follow along. The + button gives a modifier a fresh selection of its own.
- The stack list behaves like a native Blender list: click to activate, double-click to rename, filter by name, remove / move up / move down beside it. The toolbar is down to two rows; Apply All, Delete All and the other whole-stack actions now sit in a Stack menu, out of reach of a stray click.
- Prefer the old look? Switch back to the Classic stack UI any time (panel header, Stack menu or the add-on preferences). Three lane mark styles to choose from: Checkbox, Check Disc, Dots.
- FFD: the 3ds Max lattice deformer, right in the stack. The lattice fits itself to your mesh; press Tab to move the control points with Blender's own tools (grab, rotate, scale, proportional editing). 2 to 10 points per axis, Only In Volume, selection masking, gizmo box.
- Shell: give a surface thickness. Inner / outer amount, rim segments, even thickness, rim and inner material slots, part selections.
- Lathe: revolve a profile with degrees, segments, align min / center / max, weld core and caps. The revolve axis is drawn in the viewport.
- Sweep: ten built-in sections (angle, bar, channel, cylinder, half round, quarter round, pipe, tee, tube, wide flange) or your own section, with mitred corners, pivot alignment, mirror, offsets and caps.
- Renderable Spline: round or rectangular tubes from any spline or edge path, with auto smooth.
- Normalize Spline: even point spacing by length or count.
- Lattice: edges become struts, vertices become geodesic joints (tetra / octa / icosa), each part with its own material slot.
- Relax: smooth toward neighbours, with Keep Boundary and Keep Volume (no shrinking).
- Delete Mesh: delete the incoming selection, as faces or vertices.
- Material: set a material slot on the masked faces, fixed or random per element / per face.
IMPROVED
- Spline Resolution right on every spline modifier (Extrude, Bevel, Lathe, Sweep, Renderable Spline). Leave it at 0 to use the curve's own resolution, which the MAXStack panel now shows as an editable field.
- The spline modifiers work on curve objects and on edges drawn inside a mesh, and keep the object's materials.
- The MAXStack panel shows the material name behind every material slot setting.
- A selection that was applied into the mesh (or imported with it) can be picked as a mask directly.
FIXED
- The expand arrows in the stack list showed as dashed squares.
- Blender 5.2: the Invert toggle next to the mask dropdown was missing, and "Link Upstream Selection" never found a selection.
Your existing scenes upgrade automatically; placed modifiers keep their settings.
[1.2.0] — Edit Mesh (2026-10-01)
Added
-
MS_Edit Mesh — the 3ds Max Edit Poly idea: an editable level in the middle of the stack. Make it the active modifier and press Tab (or the Edit Mesh button): the result of the modifiers above is captured and you edit it with every normal Blender edit tool, while the modifiers below stay live on top. Leave edit mode as usual (Tab) to return. The base mesh is never touched; each Edit Mesh keeps its own hidden copy of the mesh.
- Mode: Delta (default) — your vertex moves ride on the live input, so changing a modifier above (Noise, Bend, …) still flows through. Stacked Edit Mesh modifiers work this way too.
- Mode: Replace — output the edited mesh as-is and ignore the input. Topology edits (extrude, delete, …) switch Delta to Replace automatically, since vertex moves can no longer be matched by index. UV, material and seam edits also only show in Replace.
- A stale snapshot (the input changed in a way the mode can't follow) turns the modifier red in the stack list and warns on the modifier. Recapture takes a fresh snapshot (discards the edits); Rebase (Replace) carries your vertex moves onto the current input when the topology still matches. Both are also in the row's ⋮ menu.
- Tab keeps its normal behaviour whenever the active modifier isn't an Edit Mesh; the binding can be changed in the add-on preferences.
-
build.sh --verifygained Edit Mesh node + runtime stages.
[1.1.0] — Bevel, Blender 5.2
Added
-
MS_Bevel — the 3ds Max Bevel modifier. Feed it a closed outline (a curve object, or a mesh's wire / boundary edges — e.g. a splat drawn as a spline) and it sweeps it through a Start Outline and up to three Height / Outline levels along Z (Level 2 / 3 toggles, like Max). Outline offsets are mitred so the rim stays an even width at corners, and every spline's winding is normalised automatically: + outline is always outward, holes shrink (a letter counter thickens with the letter) no matter how the spline was drawn. Rounding (−1..1) bows every level's side into a true quarter-round (
Segmentsper level): + = convex rounded edge / dome, − = concave fillet, 0 = straight (straight sides still getSegmentssubdivisions for later deforms). A water splat / puddle dome from an outline is Rounding 1 + a level with a negative Outline. Cap Start / Cap End (N-gon or Triangles), Smooth Across Levels (off = each level smoothed on its own, ring between levels crisp; sharp outline corners always crisp), and Select Start / End / Sides write the part into theOutputselection channel (only when one is ticked, so an idle Bevel creates no phantom channel). A closed mesh with no outline passes through untouched instead of vanishing.
Changed
- Extension maintainer / copyright now reads kleinART (was MediaProjekt). Contact address and website unchanged.
-
Build scripts run on Blender 5.2 LTS. 5.2 moved Geometry Nodes modifier inputs off the modifier's IDProperties onto
mod.properties.inputs.<Socket>.value(menus are real enums, set by item name) and only lists the active data type's sockets on Random Value.build/_util.pygainedset_input/get_input/set_menushims used byverify.pyandrender_previews.py;build.pylooks Random Value Min/Max up by type (rv_minmax). The add-on runtime (operators, gizmos, clipboard, migrate, flowlist) now reads/writes inputs through the newsrc/maxstack/sockets.pylayer, so Fit to Object, Set UV Map, gizmo drags, channel routing, Copy/Paste and auto-upgrade work on 5.2 as well as on 4.3–5.1 (fixesTypeError: bpy_struct[key] = val: id properties not supported for this type). -
build.sh --verifygained a Bevel stage (square-with-hole outline off the floor: welded rings, hole shrinks, walls outward, scratch attributes cleaned, Select End channel, closed-mesh pass-through).
MAXStack 1.3 — FFD, Shell, a spline pack & a new stack UI
10 new modifiers, 39 in total — and a redesigned MAXStack panel that shows where every selection comes from and where it goes.
NEW
- Flow stack UI: the MAXStack panel now shows your selections like a subway map. Every selection gets its own colour and its own lane down the stack list: ▼ where it is created, ☑ on every modifier that uses it as its mask, ☐ where it could be used — one click wires or unwires it. A colour chip per selection sits above the list (click = viewport heatmap).
- Mask / Creates box: the active modifier says it in plain words — "Input: MS_Selection, from Select Volume", "Creates: MS_Selection 3, used by Taper". Pick a mask from a list of the selections created above it, a vertex group or the whole mesh. A mask that can't work (nothing creates it, or it is only created further down) is flagged in red instead of silently doing nothing.
- Selections number themselves: adding, pasting or duplicating a selection modifier gives it the next free name (MS_Selection 2, MS_Selection 3 …), so a new selection never silently replaces an existing one. Type into the name field to rename a selection — the modifiers using it follow along. The + button gives a modifier a fresh selection of its own.
- The stack list behaves like a native Blender list: click to activate, double-click to rename, filter by name, remove / move up / move down beside it. The toolbar is down to two rows; Apply All, Delete All and the other whole-stack actions now sit in a Stack menu, out of reach of a stray click.
- Prefer the old look? Switch back to the Classic stack UI any time (panel header, Stack menu or the add-on preferences). Three lane mark styles to choose from: Checkbox, Check Disc, Dots.
- FFD: the 3ds Max lattice deformer, right in the stack. The lattice fits itself to your mesh; press Tab to move the control points with Blender's own tools (grab, rotate, scale, proportional editing). 2 to 10 points per axis, Only In Volume, selection masking, gizmo box.
- Shell: give a surface thickness. Inner / outer amount, rim segments, even thickness, rim and inner material slots, part selections.
- Lathe: revolve a profile with degrees, segments, align min / center / max, weld core and caps. The revolve axis is drawn in the viewport.
- Sweep: ten built-in sections (angle, bar, channel, cylinder, half round, quarter round, pipe, tee, tube, wide flange) or your own section, with mitred corners, pivot alignment, mirror, offsets and caps.
- Renderable Spline: round or rectangular tubes from any spline or edge path, with auto smooth.
- Normalize Spline: even point spacing by length or count.
- Lattice: edges become struts, vertices become geodesic joints (tetra / octa / icosa), each part with its own material slot.
- Relax: smooth toward neighbours, with Keep Boundary and Keep Volume (no shrinking).
- Delete Mesh: delete the incoming selection, as faces or vertices.
- Material: set a material slot on the masked faces, fixed or random per element / per face.
IMPROVED
- Spline Resolution right on every spline modifier (Extrude, Bevel, Lathe, Sweep, Renderable Spline). Leave it at 0 to use the curve's own resolution, which the MAXStack panel now shows as an editable field.
- The spline modifiers work on curve objects and on edges drawn inside a mesh, and keep the object's materials.
- The MAXStack panel shows the material name behind every material slot setting.
- A selection that was applied into the mesh (or imported with it) can be picked as a mask directly.
FIXED
- The expand arrows in the stack list showed as dashed squares.
- Blender 5.2: the Invert toggle next to the mask dropdown was missing, and "Link Upstream Selection" never found a selection.
Your existing scenes upgrade automatically; placed modifiers keep their settings.
[1.2.0] — Edit Mesh (2026-10-01)
Added
-
MS_Edit Mesh — the 3ds Max Edit Poly idea: an editable level in the middle of the stack. Make it the active modifier and press Tab (or the Edit Mesh button): the result of the modifiers above is captured and you edit it with every normal Blender edit tool, while the modifiers below stay live on top. Leave edit mode as usual (Tab) to return. The base mesh is never touched; each Edit Mesh keeps its own hidden copy of the mesh.
- Mode: Delta (default) — your vertex moves ride on the live input, so changing a modifier above (Noise, Bend, …) still flows through. Stacked Edit Mesh modifiers work this way too.
- Mode: Replace — output the edited mesh as-is and ignore the input. Topology edits (extrude, delete, …) switch Delta to Replace automatically, since vertex moves can no longer be matched by index. UV, material and seam edits also only show in Replace.
- A stale snapshot (the input changed in a way the mode can't follow) turns the modifier red in the stack list and warns on the modifier. Recapture takes a fresh snapshot (discards the edits); Rebase (Replace) carries your vertex moves onto the current input when the topology still matches. Both are also in the row's ⋮ menu.
- Tab keeps its normal behaviour whenever the active modifier isn't an Edit Mesh; the binding can be changed in the add-on preferences.
-
build.sh --verifygained Edit Mesh node + runtime stages.
[1.1.0] — Bevel, Blender 5.2
Added
-
MS_Bevel — the 3ds Max Bevel modifier. Feed it a closed outline (a curve object, or a mesh's wire / boundary edges — e.g. a splat drawn as a spline) and it sweeps it through a Start Outline and up to three Height / Outline levels along Z (Level 2 / 3 toggles, like Max). Outline offsets are mitred so the rim stays an even width at corners, and every spline's winding is normalised automatically: + outline is always outward, holes shrink (a letter counter thickens with the letter) no matter how the spline was drawn. Rounding (−1..1) bows every level's side into a true quarter-round (
Segmentsper level): + = convex rounded edge / dome, − = concave fillet, 0 = straight (straight sides still getSegmentssubdivisions for later deforms). A water splat / puddle dome from an outline is Rounding 1 + a level with a negative Outline. Cap Start / Cap End (N-gon or Triangles), Smooth Across Levels (off = each level smoothed on its own, ring between levels crisp; sharp outline corners always crisp), and Select Start / End / Sides write the part into theOutputselection channel (only when one is ticked, so an idle Bevel creates no phantom channel). A closed mesh with no outline passes through untouched instead of vanishing.
Changed
- Extension maintainer / copyright now reads kleinART (was MediaProjekt). Contact address and website unchanged.
-
Build scripts run on Blender 5.2 LTS. 5.2 moved Geometry Nodes modifier inputs off the modifier's IDProperties onto
mod.properties.inputs.<Socket>.value(menus are real enums, set by item name) and only lists the active data type's sockets on Random Value.build/_util.pygainedset_input/get_input/set_menushims used byverify.pyandrender_previews.py;build.pylooks Random Value Min/Max up by type (rv_minmax). The add-on runtime (operators, gizmos, clipboard, migrate, flowlist) now reads/writes inputs through the newsrc/maxstack/sockets.pylayer, so Fit to Object, Set UV Map, gizmo drags, channel routing, Copy/Paste and auto-upgrade work on 5.2 as well as on 4.3–5.1 (fixesTypeError: bpy_struct[key] = val: id properties not supported for this type). -
build.sh --verifygained a Bevel stage (square-with-hole outline off the floor: welded rings, hole shrinks, walls outward, scratch attributes cleaned, Select End channel, closed-mesh pass-through).
-
$20
personal licence
-
$90
5 artists team license - save 10%
 Included
Includes 12 months of
- Support from kleinARt
- Product updates
Extend this product’s Support Period +12 months: 50% of product price
Have questions before purchasing?
Login to message
| Blender Extension Compatible | Yes |
| Sales | 10 |
| Rating | 1 ratings |
| Dev Fund Contributor | |
| Published | 3 months ago |
| Blender Version | 4.2 - 5.2 |
| Extension Type | Add-on |
| Render Engine Used | Arnold, Blender-Internal, Blender-Game-Engine, Cycles, Eevee, Freestyle, Luxrender, Mental-Ray, Octane, Vray, Yafaray |
| License | GPL |
Discover more products like this
deformers 3ds max hard surface lathe ffd geometry nodes lattice deformer edit poly box mapping 3ds max to blender modifier stack bend modifier