User Manual

Batch Exporter Pro

Export multiple objects as individual files — FBX, GLTF, OBJ, STL and USD — in a single click.

v1.0 Blender 5.0+ Windows · macOS · Linux

01 Overview

Batch Exporter Pro solves one of the most repetitive tasks in any 3D workflow: exporting individual objects one by one. Whether you are preparing assets for a game engine, sending models to a client, or exporting geometry for 3D printing, this add-on lets you export any number of objects in a single click — each one as its own file, with the exact settings you need.

✨ What it does

Selects each object in your scene one by one, applies your chosen settings (pivot, transforms, modifiers), exports it to the format and folder you specified, and moves on to the next. Your original scene is never modified.

Key Features

Exports each object as a separate file automatically
Supports FBX, GLTF/GLB, OBJ, STL and USD
Four export sources: selected objects, active collection, all visible
Custom pivot / origin point per export (Object, Cursor, Bounding Box, World)
Apply Modifiers and Apply Transforms options
Copies texture files alongside FBX, OBJ and USD exports
Flexible file name templates: {name}, {collection}, {date}
Saves and loads your own presets
Four built-in presets: Unity FBX, Unreal FBX, Godot GLTF, USD Pipeline
Export log with per-object status and one-click Open Folder button

Compatibility

Blender version 5.0 and above
Operating system Windows, macOS, Linux
Python Bundled with Blender — no separate install needed

02 Installation

2.1 Install from ZIP file

If you downloaded the add-on as a .zip file:

1Open Blender and go to Edit → Preferences.
2Click the Add-ons tab in the left sidebar.
3Click the Install… button in the top-right area.
4Navigate to the downloaded .zip file and click Install Add-on.
5Search for "Batch Exporter Pro" in the search box.
6Enable the add-on by clicking the checkbox next to its name.

ℹ️ Tip

You only need to install once. Blender saves the add-on between sessions. If you receive an update, install the new .zip and Blender will replace the previous version automatically.

2.2 Verify installation

After enabling the add-on, open a 3D Viewport and press N to open the side panel. You should see a new tab labelled Batch Export. If the tab is not visible, try scrolling down in the N-panel tab list.

2.3 Uninstall

1Go to Edit → Preferences → Add-ons.
2Search for "Batch Exporter Pro".
3Click the arrow to expand the entry, then click Remove.

03 Panel Overview

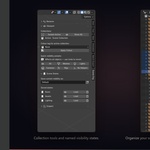
The add-on lives entirely in the N-panel (press N in any 3D Viewport). Look for the Batch Export tab. The panel is divided into five sections:

Section Purpose
Status banner Shows how many objects are ready to export. Turns red if nothing is selected.
1 · What to export Choose what to export (selection, collection, all visible) and the file format.
2 · Where to save Set the destination folder, file name template and texture options.
3 · Options Control pivot, modifiers, transforms, and FBX-specific settings.
Presets Save and load your settings. Four built-in presets included.
Export The main Export button and the export log from the last run.

04 Settings Reference

4.1 What to export

Option Default Description
Source Selected Objects What to export: the current selection, the active collection, or all visible objects in the scene.
Format FBX The output file format. Each object becomes one file in this format. See Section 5 for a format comparison.
GLTF Variant GLB (single file) Only shown when Format is GLTF. GLB packs everything into one binary file. GLTF+bin separates geometry and textures into multiple files.

4.2 Where to save

Option Default Description
Export Folder //exports/ Destination folder. The // prefix means relative to the .blend file. You can also use an absolute path such as C:\Users\you\exports.
File Name {name} Template for the filename. Use {name} for the object name, {collection} for its collection, {date} for today's date. Example: SM_{name} → SM_Chair.fbx.
One subfolder per collection Off Creates a subfolder named after each object's collection inside the export folder.
Copy Textures Off Copies texture image files into a textures/ subfolder next to each exported file. Only available for FBX, OBJ and USD.

⚠️ Relative paths require a saved file

If the Export Folder starts with //, your .blend file must be saved first. If not, the add-on will show an error and stop. Either save the file or use an absolute path.

4.3 Options

Option Default Description
Origin Point Object Origin Sets the pivot of each exported object. Object Origin keeps it as-is. Bounding Box Centre moves it to the mesh centre. World Origin places it at (0,0,0). 3D Cursor uses the cursor position.
Apply Modifiers On Applies all modifiers (Subdivision Surface, Mirror, Bevel, etc.) to the exported mesh. The original modifier stack is untouched.
Apply Transforms Off Bakes location, rotation and scale into mesh vertices and resets the origin to (0,0,0). Use only for Unreal Engine. Leave OFF for all other cases.

❗ Apply Transforms warning

With Apply Transforms ON, exported objects will not appear at their original world position when reimported. Their origin will be at (0,0,0) and their geometry offset. This is intentional for Unreal Engine workflows. For any other use case, leave this OFF.

4.4 FBX Settings

These options appear only when FBX is the selected format.

Option Default Description
Scale 1.0 Global scale multiplier. Keep at 1.0 for most engines. Use 100 if your engine expects centimetres instead of metres.
Forward Axis -Z Which axis points forward in the exported file. -Z matches Unity and Unreal conventions.
Up Axis Y Which axis points up in the exported file. Y matches Unity and Unreal conventions.

05 Format Guide

Choose the format based on where you intend to use the exported files.

FBX .fbx

Unity · Unreal · Maya · 3ds Max

Most widely supported format for game engines and DCC tools. Supports mesh, materials and animations.

💡 Use the Unity FBX or Unreal FBX preset for correct axis and scale settings.

GLTF / GLB .glb / .gltf

Godot · Web · Sketchfab · Modern

Modern open standard. GLB embeds geometry, materials and textures in one self-contained binary file.

💡 Choose GLB for sharing. Choose GLTF+bin if your pipeline needs separate texture files.

OBJ .obj + .mtl

Any 3D application · Legacy

Most universally compatible format. Simple and reliable, but no armatures or animations.

💡 Enable Copy Textures if the recipient needs textures alongside the .obj.

STL .stl

3D printing · Cura · PrusaSlicer

Geometry only — no materials, no textures. Exports in Blender native coordinates.

💡 Apply Modifiers ON is recommended to export the final solid mesh.

USD .usdc

Houdini · Maya · OpenUSD pipelines

Industry standard for complex scene interchange in VFX and animation pipelines. Supports materials and scene hierarchy.

💡 Use the USD Pipeline preset.


06 Presets

Presets save your entire panel configuration so you can switch between setups in one click.

6.1 Built-in presets

BUILT-IN

Unity FBX

FBX, axis -Z/Y, Apply Transforms ON, output //exports/unity/. Standard Unity import settings.

BUILT-IN

Unreal FBX

FBX, axis -Z/Y, Apply Transforms ON, name prefix SM_. Matches Unreal's Static Mesh import expectations.

BUILT-IN

Godot GLTF

GLTF as GLB, no Apply Transforms, subfolder per collection ON, output //exports/godot/.

BUILT-IN

USD Pipeline

USD format, subfolder per collection ON, output //exports/usd/.

6.2 Saving a custom preset

1Configure the panel with your desired settings.
2Scroll down to the Presets section.
3Type a name in the text field next to the save button.
4Click the save button (floppy disk icon).
5Your preset appears in the list and is available in all future sessions.

6.3 Loading and deleting presets

Click any preset name in the list to load it. All panel settings update immediately. Click the trash icon next to a preset to delete it permanently.


07 Step-by-Step Workflows

7.1 Basic batch export

1Select the objects you want to export (Shift+click or A to select all).
2Open the N-panel (N) and click the Batch Export tab.
3In section 1, confirm Source is set to Selected Objects and choose your Format.
4In section 2, set the Export Folder to an absolute path (e.g. C:\Users\you\Desktop\exports\).
5Leave the File Name as {name} to use each object's Blender name.
6Click EXPORT BATCH.
7Check the export log. Each object shows a green tick and filename if successful.
8Click Open Folder to see the exported files immediately.

7.2 Exporting for Unity

1In the Presets section, click Unity FBX to load the preset.
2Set the Export Folder to your Unity project's Assets folder.
3Select your objects and click EXPORT BATCH.
4In Unity, right-click the Models folder and select Reimport All.

7.3 Exporting for Unreal Engine

1Load the Unreal FBX preset. Note that Apply Transforms is ON and names are prefixed with SM_.
2Set the Export Folder to a staging folder on your desktop.
3Select your objects and click EXPORT BATCH.
4In Unreal, use File → Import Into Level or drag the FBX files into the Content Browser.

ℹ️ Unreal and Apply Transforms

The Unreal preset has Apply Transforms ON intentionally. Unreal expects all imported Static Meshes to have their transforms baked and their origin at world zero.

7.4 Exporting for 3D printing

1Set Format to STL.
2Enable Apply Modifiers to export the final mesh.
3Set the Export Folder to a folder your slicer can access.
4Select all objects to print and click EXPORT BATCH.
5Open your slicer and import the individual STL files.

08 Troubleshooting

The Batch Export tab does not appear Make sure the add-on is enabled in Edit → Preferences → Add-ons. If just enabled, press F3 and run Reload Scripts.
Error: file not saved The Export Folder starts with //. Either save your .blend file first, or replace // with an absolute path.
0 objects exported, no error Check that at least one object is selected and that Source matches your intent. Empty collections or deselected objects are silently skipped.
Objects appear at wrong positions when reimported into Blender Use GLTF/GLB for Blender-to-Blender round-trips. FBX applies axis conversion designed for game engines.
FBX opens in Unity/Unreal at wrong scale Check the Scale value in FBX Settings. Default is 1.0 (metres). Set to 100 if the engine expects centimetres.
Textures are missing after export Enable Copy Textures in section 2. For GLTF/GLB, textures are already embedded — no extra step needed.
The add-on crashes on enable Open Window → Toggle System Console, enable the add-on again, and copy the error text. Contact support with this output.

09 Changelog

v1.0.0 — Initial release

✓Batch export to FBX, GLTF/GLB, OBJ, STL and USD
✓Four export sources: selection, active collection, all visible
✓Four pivot modes: Object Origin, 3D Cursor, Bounding Box Centre, World Origin
✓Apply Modifiers and Apply Transforms (non-destructive, via temporary duplicate)
✓Copy Textures option for FBX, OBJ and USD
✓File name templates with {name}, {collection} and {date} variables
✓Save, load and delete custom presets
✓Four built-in presets: Unity FBX, Unreal FBX, Godot GLTF, USD Pipeline
✓Per-object export log with status icons
✓Open Folder button to reveal exported files after export
✓Relative path guard: clear error if .blend is unsaved

10 Support

If you encounter a bug or have a question, please write me a private message on Superhive. Include your Blender version, operating system and a description of what you were doing when the issue occurred.

For faster diagnosis, open Window → Toggle System Console before reproducing the issue and paste the console output in your message.

❤️ Enjoying the add-on?

Leaving a review on Superhive helps other artists find the tool and helps fund future development. Thank you!

$17

Support Period Included

Includes 12 months of

Extend this product’s Support Period +12 months: 50% of product price

Have questions before purchasing?
Login to message

Details
Blender Extension Compatible Yes
Dev Fund Contributor
Published 6 months ago
Blender Version 5.0 - 5.1
Extension Type Add-on
Render Engine Used Cycles, Eevee
License GPL