Octane HDRI Studio V2.5.4
 CreateVisions



Latest version tested and fully compatible with Octane Render 2026.4 (build 31.10.0) and Blender 5.2.
Octane HDRI Studio
Blender Extension for OctaneRender 2026
Overview
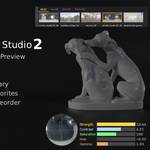
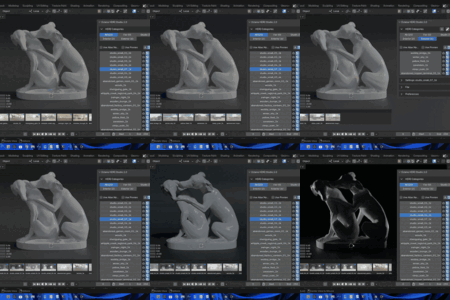
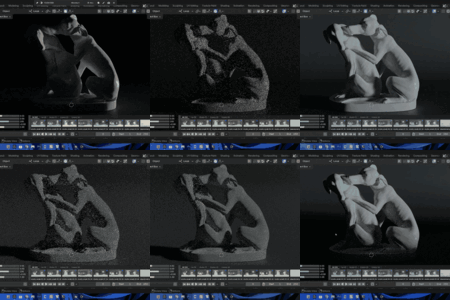
Octane HDRI Studio brings your full HDRI workflow into the Blender viewport. Browse, light, and tweak without ever opening a panel. A GPU-rendered preview sphere, live sliders, and a scrollable filmstrip give you instant visual feedback while you work.
What's New in Version 2.5.4
Your library now stays with you across updates. The global HDRI library and your layout preferences are stored in Blender's per-user config folder from now on. Every future update and every reinstall keeps your global HDRIs, favorites, snapshots, and viewport layout. An existing library is picked up automatically on the first start. The sidebar header shows the full version number.
Updating from 2.5.3 or earlier: please copy two files before you install, see Installation below. This is needed once, never again afterwards.
- Version 2.5.1: small fixes on top of 2.5. The world's nodes are tidied up automatically every time you pick an HDRI, an OCIO color space node is attached for clean, accurate colors, and the new Global Strength, Divide by tool gives the correct values.
- Version 2.5: works fully with the stable OctaneRender 2026 release, with correct HDRI brightness, correct color space, and a working power link. Plus much smoother viewport sliders, keyboard shortcuts for brightness and rotation, a scrollable HDRI list, and the new Global Strength tool to re-balance a whole library in one click.
- Version 2.2: the GPU Preview Sphere now shows up right at startup, no need to pick an HDRI first.
- Version 2.1: the HDRI Filmstrip and GPU Preview Sphere only show in the main Blender window now, not duplicated in every secondary window.
- Version 2 (Blender 5.0 and OctaneRender 2026.2.1): full feature set with GPU Preview Sphere, Viewport Sliders, HDRI Filmstrip, Categories, Global Library, and drag-and-drop.
- Version 1 (Blender 4.5 and OctaneRender 2025.1): basic HDRI management in the sidebar. The viewport tools are not in this version.
Viewport Tools
Available from Version 2.0.
HDRI Filmstrip
A bar of thumbnails right in your viewport. Scroll through your library, click to activate, drag thumbnails to reorder. The category tabs at the top let you switch between collections in one click. Resize it, move it, or collapse it with a double-click, it stays where you put it.
GPU Preview Sphere
A live HDRI preview rendered on the GPU. Two rotation rings, blue for horizontal and red for vertical, let you place the light source by dragging. The sphere updates the instant you change anything.
Viewport Sliders
Five sliders next to the preview sphere: Strength, Contrast, Saturation, Hue, and Gamma. Drag to adjust, hold Shift for finer control. Every change updates the sphere, the filmstrip, and the Octane shader at the same time.
From Version 2.5 the sliders use a smoother, relative-drag feel for much more precise control, and the viewport overlay uses the same value ranges as the sidebar sliders. You can also use the keyboard: Alt with Up and Down changes Strength, Alt with Left and Right rotates the HDRI.
Library Management
Available from Version 2.0.
Categories and Favorites
Sort HDRIs into your own categories. Use the All tab to see everything at once, or Favorites to filter down to your go-to HDRIs. Drag thumbnails between category tabs to move them. Create, rename, and delete categories from the sidebar or straight from the filmstrip tabs. With Favorites Always on Top turned on, your favorites stay pinned to the top of every category.
Global HDRI Library
Mark any HDRI as global and it will be there in every Blender session, with all settings, snapshots, and adjustments kept. Open a new file and your go-to HDRIs are already loaded. A small blue badge on the thumbnail shows which HDRIs are global. Since Version 2.5.4 the global library is stored in Blender's per-user config folder, so it survives every add-on update.
Drag-and-Drop Reorder
Rearrange HDRIs by dragging thumbnails inside the filmstrip. Drop one onto a category tab to move it between collections. A visual marker shows exactly where the HDRI will land.
Lighting Control
Automatic Settings Memory
Every change is saved per HDRI, automatically. Rotation, strength, color correction, all of it. Switch HDRIs, close Blender, open another project. Come back weeks later and your settings are exactly as you left them.
Snapshots
Save several lighting variations for one HDRI. Morning light, dramatic sunset, neutral studio, switch between them with one click. Turn on Auto Update to keep snapshots in sync as you tweak, or manage them by hand.
Dual-Axis Rotation
Rotate your HDRI on both the Z-axis for horizontal and the X-axis for vertical, giving you full control over the light direction. Use the rotation rings on the preview sphere or the sliders in the sidebar, they always stay in sync.
Full Color Correction
Controls for Strength, Contrast, Saturation, Hue, Gamma, and Background Color, each with its own reset button that greys out when the value is at its default. An Effect Strength slider lets you blend between the original and the corrected HDRI.
Global Strength
Re-balance the brightness of your whole HDRI library in one click. Set every HDRI to the same strength, or divide all values by a number you pick. Great for evening out a whole collection, or for fixing an older library after an upgrade. Introduced in Version 2.5.
Workflow
Proxy System
Create low-resolution copies of your HDRIs for a faster viewport. Build them one at a time or for a whole category at once, with live progress and ESC to cancel.
Octane Light Studio Integration
Switch between HDRI Studio and Octane Light Studio with one click. Turn HDRI lighting and OLS layers on or off from either panel, both add-ons stay in sync automatically.
Import and Export
Drag and drop .hdr and .exr files to import them. Export your full setup, HDRIs, categories, settings, snapshots, and proxies, with one click. Relative paths keep everything portable for sharing with your team or for backups. The Show in Explorer button reveals the source file of any HDRI on disk in one click.
Solo Mode
Isolate the HDRI lighting with one click. If Octane Light Studio is installed, Solo Mode controls the individual OLS layers. Without OLS it finds and turns off all Octane lights, which is perfect for checking your HDRI on its own.
Customization
Every viewport element is customizable:
- Filmstrip: resize from any edge, move it anywhere, double-click to collapse.
- Preview Sphere: drag to move, adjust the size in the preferences.
- Sliders: scalable, and they can be turned off.
- HDRI list: scrollable, with an adjustable number of visible rows, so even big libraries stay compact.
- Preferences: all settings are kept across sessions. Reset to defaults at any time.
Where Your Data Lives
Since Version 2.5.4, Octane HDRI Studio keeps your data outside the add-on folder, in Blender's per-user config folder:
-
Windows:
%APPDATA%\Blender Foundation\Blender\5.1\config\octane_hdri_studio\ - global_hdris.json: your global HDRI library with all settings and snapshots.
- preferences.json: the layout of filmstrip, preview sphere, and sliders.
Blender never touches this folder when you install or update an add-on. If you ever want to move your library to another machine, these two files are all you need to copy.
Installation
Version 2.5, Blender 5.0 and newer
- Open Blender with OctaneRender installed.
- Simply drag and drop the ZIP file into the Blender window and confirm. Alternatively go to
Edit > Preferences > Extensionsand useInstall from Disk. - The panel shows up under 3D View > Sidebar > OHS.
Updating from 2.5.3 or earlier
Your library now stays with you across updates. For this one update, please copy two files first. Blender replaces the add-on folder during installation, and in older versions your library lived inside it.
- Open
%APPDATA%\Blender Foundation\Blender\5.1\extensions\user_default\octane_hdri_studio\in the Explorer. - Copy
global_hdris.jsonandpreferences.jsonto a safe place, for example your desktop. - Install version 2.5.4 as described above.
- Copy the two files back into the same add-on folder.
- Start Blender. Version 2.5.4 picks them up on the first start and moves them to the new location.
If you skip this step, the add-on starts with an empty global library. Nothing else is affected, and you can still copy the files in afterwards as long as you kept them.
Version 1, Blender 4.5
- Open Blender 4.5 with OctaneRender installed.
- Go to
Edit > Preferences > Add-ons. - Click
Install, pick the ZIP file, and turn on Octane HDRI Studio. - The panel shows up under 3D View > Sidebar > OHS.
Requirements
Version 2.5, full feature set
- Blender 5.0 or newer
- OctaneRender 2026.2.1
Version 1, core features
- Blender 4.5
- OctaneRender 2025.1
Support
Andreas Fülscher
Discover more products like this
Environment Lighting octane Lighting gpu-preview octane render hdri manager Octane HDRI Studio hdri blender addon hdr blender viewport tools